
How to Go Viral on TikTok in 2026: A Data-Backed Strategy for Creators
How to Go Viral on TikTok in 2026: A Data-Backed Strategy for Creators
Estimated reading time: 14 minutes
Why Going Viral on TikTok Is Still Achievable in 2026
Here is something most creators get wrong about TikTok: they treat virality like a lottery ticket. Post enough content, hope the algorithm smiles on you, and maybe one video takes off. That mindset worked in 2020 when TikTok was still a novelty and the competition was thin. In 2026, with over 1.9 billion monthly active users globally, you need something more deliberate.
The good news is that TikTok remains one of the few platforms where a creator with zero followers can reach millions of people on their first video. That is not marketing rhetoric. The For You Page (FYP) is structurally designed to surface content based on engagement signals rather than follower count. That levels the playing field in a way that Instagram’s feed or YouTube’s subscriber model simply does not.
What has changed is the sophistication required. The creators consistently trending on TikTok in 2026 are not lucky. They understand the algorithm deeply, craft videos with intention, and treat their content like a product that needs to perform. This guide breaks down exactly how they do it, backed by data and grounded in what actually works right now.
Understanding the TikTok Algorithm in 2026
The TikTok algorithm has never been publicly documented in full detail, but TikTok’s own transparency resources and third-party research give us a reliable picture of how content gets distributed.
At its core, the algorithm serves each video to a small test audience first. Think of it as a staged rollout. If that initial group engages with the video strongly, the system pushes it to progressively larger audiences. This cycle repeats until engagement drops below a threshold or the content saturates its relevant audience pool.
The signals TikTok uses to measure content quality fall into several categories:
| Signal Category | Specific Metrics | Weight |
|---|---|---|
| Engagement Quality | Likes, comments, shares, saves | High |
| Watch Behavior | Completion rate, rewatch rate, average watch time | Very High |
| Interaction Depth | Profile visits, follows triggered by the video | Medium-High |
| Content Information | Captions, sounds, hashtags, on-screen text | Medium |
| Device and Account Settings | Language preference, location, device type | Low-Medium |
The most important shift in the 2026 algorithm is the elevated weight given to saves and shares over passive likes. TikTok’s internal systems now treat a save as a stronger quality signal than a like because it suggests the viewer found the content genuinely valuable, not just momentarily entertaining. Shares, particularly off-platform shares, indicate content worth distributing to people outside the existing TikTok ecosystem.
Understanding this hierarchy changes how you should think about content creation. You are not just trying to entertain. You are trying to create videos people want to bookmark and send to their friends.
The Anatomy of a Viral TikTok Video
Before diving into individual tactics, it helps to understand what the best-performing TikTok videos have structurally in common. After analyzing hundreds of viral TikToks across niches ranging from finance to fitness, a consistent pattern emerges.
The pattern looks like this:
- 0–3 seconds: A hook that creates immediate curiosity or emotional tension
- 3–15 seconds: The setup or context that makes the viewer feel they need to keep watching
- 15–40 seconds: The substance, payoff, or story development
- Final 5 seconds: A call to action, cliffhanger, or punchline that encourages rewatching or sharing
This structure is not rigid, but deviation from it should be intentional. Some of the most viral content breaks the formula deliberately to create pattern interrupts. A finance creator who opens with a shocking statistic, a recipe creator who shows the finished dish in the first two seconds, a travel creator who starts mid-sentence mid-adventure. These all work because they are intentional breaks, not lazy structure.
Hook Strategy: The First 3 Seconds Determine Everything
Every conversation about TikTok viral strategy comes back to the hook, and for good reason. In a scroll-based environment, attention is the scarcest resource. Your first three seconds need to stop the scroll before the viewer even consciously decides to watch.
There are five hook frameworks that consistently outperform everything else:
1. The Curiosity Gap Hook
Open with a statement or question that creates an information gap the viewer cannot resist closing.
Example: “The reason most creators never hit 100k followers has nothing to do with their content.”
2. The Bold Claim Hook
Make a specific, counterintuitive, or surprising claim in the first line.
Example: “I gained 200k followers in 11 days without using trending sounds.”
3. The Visual Hook
Lead with a visually striking image, movement, or scene change before any dialogue begins. This works particularly well in food, travel, and transformation content.
4. The Direct Address Hook
Speak directly to a specific person or problem. Hyper-specificity makes this work.
Example: “If you’re a freelance designer struggling to get clients from TikTok, this is for you.”
5. The Conflict or Problem Hook
Open in the middle of a conflict, mistake, or relatable failure.
Example: “I just lost $4,000 on a brand deal. Here is exactly what happened.”
What kills hooks faster than anything else is a slow build. Starting with “Hey guys, welcome back to my channel” in 2026 is the fastest way to get scrolled past. No preamble. No introductions. Start in the action.
Watch Time and Completion Rate: The Metrics That Actually Matter
If you had to pick two metrics to obsess over, make it watch time and completion rate. The TikTok algorithm treats these as primary quality indicators, and the reasoning is sound: if people are watching your video all the way through, and watching it more than once, the content is clearly doing something right.
Completion rate is the percentage of viewers who watch your video from start to finish. A completion rate above 60% is considered strong on most content types. For shorter videos under 15 seconds, you should be aiming even higher because the bar for finishing them is lower.
Average watch time matters more as your videos get longer. A two-minute video with a 45-second average watch time is significantly outperforming a two-minute video with a 20-second average, even if both have similar like counts.
Practical ways to increase completion rate:
- Keep the first version of any new video under 30 seconds until you understand your audience’s patience threshold
- Use open loops, questions left unanswered early in the video that get resolved at the end
- Add on-screen text that complements but does not duplicate what you are saying verbally, giving viewers two reasons to stay
- End videos in ways that reward full viewing, a surprising twist, a useful summary, a callback to the opening
One underrated tactic is the rewatch loop. Structuring your video so the ending naturally leads back to the beginning encourages replays, which TikTok counts as additional watch time and treats as a strong quality signal.
TikTok Content Strategy: What Types of Content Spread
Not all content categories perform equally on TikTok, and not all viral content looks the same across niches. What goes viral in personal finance looks nothing like what goes viral in comedy, but both share an underlying engine: emotional resonance + shareability.
Here is how content that consistently earns organic reach breaks down across categories:
| Content Type | Why It Spreads | Best Niche Applications |
|---|---|---|
| Educational / How-To | People save and share practical value | Finance, health, tech, marketing |
| Transformation / Before-After | Visual proof drives curiosity and aspiration | Fitness, home decor, beauty |
| Storytelling / Personal narrative | Emotional connection drives completion | Lifestyle, career, mental health |
| Trend-based / Reactive content | Timeliness amplifies reach temporarily | Entertainment, news commentary, pop culture |
| Opinion / Hot take | Controversy drives comments and shares | Business, politics, relationships |
| Behind-the-scenes | Authenticity builds trust and loyalty | Entrepreneurship, creative fields |
The smartest TikTok content strategy in 2026 does not pick one of these formats and stick to it exclusively. It identifies the two or three formats that match your brand and audience, and rotates through them systematically. This prevents the content fatigue that causes even strong accounts to plateau.
Trending Sounds, Hashtags, and the FYP Formula
Trending Sounds
TikTok’s audio-first nature is one of its defining characteristics. Using a trending sound does not guarantee virality, but it gives your video a distribution advantage because TikTok’s discovery features surface videos around sounds, not just hashtags.
The key is using trending sounds at the right stage of their trend cycle. A sound that has already peaked and saturated the platform offers diminishing returns. The window where a trending sound offers maximum leverage is typically within the first 48 to 72 hours of its rise. Tools like TikTok’s Creative Center and third-party platforms track sound momentum in real time.
One important nuance: if your content is educational or informational, forcing a trending sound onto it often reduces quality. A finance tip delivered over an audio trend that does not match the mood can feel dissonant. In those cases, original audio or a clean voiceover will outperform trend-chasing.
Hashtag Strategy
The role of hashtags on TikTok is more nuanced than on Instagram. They are primarily a classification signal for the algorithm, not a primary discovery mechanism for users. Using extremely broad hashtags like #fyp or #foryoupage has been widely debunked as a ranking tactic. They provide no targeting signal because they categorize content as everything and nothing simultaneously.
A more effective approach:
- Use one or two niche-specific hashtags that accurately describe your content category
- Add one mid-tier hashtag that represents the broader topic area
- Include a trending hashtag only if your content genuinely fits the trend
- Avoid using more than five hashtags total, as this can dilute your signal
The FYP Formula
Getting onto the For You Page consistently comes down to engineering your content to win TikTok’s early distribution test. Make it easy for the algorithm to categorize your content quickly (clear niche, consistent tone), give the first audience segment strong reasons to engage deeply, and post when your target audience is most active.
Best Posting Times and Frequency
The question of when to post on TikTok gets more nuanced with every algorithm update, but the underlying principle remains consistent: post when your specific audience is most likely to be actively scrolling.
General data from multiple creator analytics studies suggests these windows perform well across most audiences:
| Day | Recommended Windows (Local Time) |
|---|---|
| Monday – Friday | 6:00 AM – 9:00 AM, 12:00 PM – 2:00 PM, 7:00 PM – 9:00 PM |
| Saturday | 9:00 AM – 11:00 AM, 7:00 PM – 9:00 PM |
| Sunday | 8:00 AM – 10:00 AM, 4:00 PM – 6:00 PM |
These are starting points, not absolutes. Your TikTok analytics dashboard will show you exactly when your followers are online, and for accounts with a substantial following, that data should override any general benchmark.
Posting frequency is a persistent debate. The answer in 2026 is this: consistency beats volume. Posting once daily with intentional, well-crafted content outperforms posting five times per day with mixed quality. TikTok’s algorithm does not penalize lower post frequency the way early guidance suggested. What it does penalize, in a practical sense, is low engagement. If you post six videos a week and four of them underperform, you are training the algorithm to expect weak results from your account.
A sustainable cadence for most creators is three to five videos per week with at least one piece of content per week specifically designed to capture new audiences, what practitioners call a reach post versus a retention post.
Using Duet and Stitch to Amplify Reach
Duet and Stitch are two of TikTok’s most underutilized organic growth features. Both allow you to create response content attached to other videos, which means your content gets exposed to the original video’s audience in addition to your own.
Stitch lets you clip and respond to another video. This works exceptionally well for educational content, commentary, and debunking. When you Stitch a video from a creator with a large following and add genuine value to the conversation, their audience has a direct reason to visit your profile.
Duet places your video side-by-side with another. It performs well in entertainment, music reaction, and challenge formats. The tactical play is to Duet trending content early in its cycle when the original video is still actively circulating.
The underappreciated benefit of both features is SEO-adjacent: your response video inherits some of the contextual relevance of the original, helping the algorithm categorize your content accurately.
One caveat: always add something meaningful. A Stitch or Duet that simply agrees with the original without adding insight or entertainment value rarely earns traction. The format works when your response is the reason someone watches the whole video.
TikTok for Business: Turning Virality Into Revenue
Going viral is only valuable if it serves a larger goal. For businesses and creator-entrepreneurs, virality without conversion strategy is just vanity metrics.
The most effective TikTok for business approaches in 2026 treat the platform as a top-of-funnel awareness engine that feeds a deliberate customer journey. Viral content brings people in. Your profile bio, link in bio, and content ecosystem convert them into customers, email subscribers, or followers on owned platforms.
Three conversion structures that work:
1. The Content Funnel Model
Viral reach post draws new viewers. Niche-specific content builds trust. Direct offer or CTA converts.
2. The Product Demonstration Model
Show the product or service in action without explicitly selling. Let the result do the persuasion. This is particularly effective for physical products, software tools, and service-based businesses.
3. The Personal Authority Model
Build a recognizable face and point of view. Use virality to establish expertise, then monetize through consulting, courses, or high-ticket services where trust is the primary buying signal.
Brands running paid TikTok campaigns alongside organic content in 2026 consistently report lower cost-per-click than equivalent Instagram or YouTube campaigns, largely because TikTok’s native ad formats (particularly TopView and In-Feed ads) blend into the organic experience more naturally than competing platforms.
TikTok Creator Rewards: What You Need to Know
TikTok replaced its original Creator Fund with the Creator Rewards Program, which launched in 2023 and has continued to evolve through 2025 and into 2026. The new model pays creators based on a more sophisticated set of metrics than the original fund, specifically rewarding qualified views, originality scores, and content that holds attention.
To qualify for the Creator Rewards Program, creators generally need:
- A minimum of 10,000 followers
- At least 100,000 video views in the past 30 days
- An account in good standing, with content meeting community guidelines
- Videos longer than one minute tend to qualify for higher RPM rates
The payout rates under Creator Rewards are substantially higher than the original Creator Fund, with some creators reporting RPMs (revenue per 1,000 qualified views) ranging from $0.40 to $1.00 or more depending on niche, content quality, and audience geography. Finance, business, and health content typically earn higher rates due to advertiser demand in those categories.
Creator Rewards should be viewed as supplemental income rather than a primary revenue strategy for most creators. Brand partnerships, affiliate marketing, and owned product sales remain more lucrative per unit of effort for accounts with meaningful followings.
Common Mistakes That Kill TikTok Growth
Even strong creators make these errors. Recognizing them early saves months of stalled growth.
Inconsistency in niche. The algorithm needs to classify your account. If you post fitness content one week, cooking content the next, and travel content after that, TikTok cannot build an accurate audience profile for your account. Pick a lane and own it for at least 90 days before expanding.
Ignoring the first comment. Replying to the first comment quickly after posting boosts early engagement signals and keeps the algorithm’s distribution clock running in your favor.
Over-editing to the point of inauthenticity. Heavy transitions, fast-cut editing, and music overlays have their place, but overuse signals low-confidence content. Some of the highest-performing TikToks in 2026 are single-shot, minimal editing, high-substance videos.
Deleting underperforming videos. Many creators delete videos that do not perform immediately. This is almost always a mistake. Videos on TikTok do not follow a linear distribution curve. A video can sit dormant for weeks and then surface in a new audience segment. Deleting removes that possibility entirely.
Chasing trends at the expense of brand. Trend participation is useful. Trend dependence is a trap. If every piece of content you produce is reactive to what is already trending, you never build a distinctive voice that makes your account worth following specifically.
Key Takeaways
-
- The TikTok algorithm in 2026 prioritizes saves, shares, completion rate, and rewatch rate above all other engagement signals
- Your first three seconds determine whether anyone watches the rest. Build hooks with intention, not improvisation
- Watch time and completion rate are the two most important metrics for triggering wider distribution
- Hashtags serve as classification signals, not discovery mechanisms. Use three to five niche-relevant tags rather than chasing broad viral hashtags
- Trending sounds offer a distribution advantage but should only be used when they match the tone and content of your video
- Consistency in niche, posting frequency, and content quality matters more than volume
- Duet and Stitch features provide access to established audiences and should be part of every growth-oriented creator’s toolkit
- Virality without a conversion strategy creates noise, not business results
- TikTok Creator Rewards rewards originality and long-form attention retention more than it rewards short-form clip volume
FAQs
1. How long does it take to go viral on TikTok?
There is no fixed timeline. Some accounts go viral on their first video. Others build steadily for months before a single video breaks through to a large audience. What the data consistently shows is that accounts which post regularly with strong hooks and clear niche focus tend to have their first viral moment within the first 60 to 90 days. The creators who quit before that window closes are the ones who never find out how close they were.
2. Does posting every day help you go viral faster?
Frequency helps in the sense that more posts mean more opportunities for the algorithm to find a piece of content that resonates with a new audience segment. However, posting every day at the expense of quality consistently underperforms posting three to four times per week with genuinely strong content. Quality of individual videos matters more than raw posting volume for triggering the FYP distribution cycle.
3. How important are hashtags for getting on the For You Page?
Less important than most creators believe. Hashtags help TikTok’s system classify your content, which improves the accuracy of who your video gets shown to. But they do not directly boost distribution the way some creators assume. The algorithm’s primary trust signals come from watch behavior, not hashtag usage. Three to five accurate, niche-relevant hashtags are sufficient. Filling captions with dozens of hashtags is counterproductive.
4. Can small accounts go viral on TikTok in 2026?
Yes, and this is one of the platform’s genuine structural advantages over competitors. The FYP distributes content based on engagement quality, not follower count. A brand-new account with zero followers can reach hundreds of thousands of viewers if the first test audience engages strongly. Follower count matters for credibility and monetization thresholds, but it has minimal impact on how far any individual video can travel.
5. What is the best video length for going viral on TikTok?
It depends on the content type. For entertainment and trend-based content, videos between 7 and 30 seconds tend to achieve higher completion rates, which signals quality to the algorithm. For educational or storytelling content, videos between 60 and 180 seconds can outperform if the hook is strong enough to keep viewers watching. The Creator Rewards Program also incentivizes videos over 60 seconds with higher payout rates, which has nudged many creators toward longer formats in recent years. The honest answer is to test both formats within your niche and let your analytics show you where the engagement threshold lies.
6. Do TikTok lives help with video reach and virality?
Going live does not directly boost the reach of your pre-recorded videos. However, regular live sessions build audience loyalty, increase the time your followers spend engaging with your account, and can trigger the algorithm to classify your account as active and high-engagement. Creators who combine consistent video posting with weekly live sessions typically see faster follower retention and profile visit rates, which indirectly supports better video distribution.
7. Is TikTok worth investing in for business growth in 2026?
For most consumer-facing businesses and personal brands, yes. TikTok’s organic reach is still meaningfully higher than most social platforms at equivalent follower counts. The platform’s ad ecosystem has matured significantly, with targeting capabilities and creative formats that rival Meta’s advertising tools for certain demographics, particularly users between 18 and 35. The investment case is strongest for businesses that can tell a visual story, demonstrate a product in action, or build trust through a recognizable human presence. Purely transactional or B2B businesses with older target demographics may find better ROI elsewhere, but even in those cases, TikTok can serve a powerful brand awareness function.
Conclusion
Going viral on TikTok in 2026 is not about luck, and it is not about hacking the algorithm with trending sounds or aggressive posting schedules. It is about understanding how attention works in a scroll-first environment and building content that earns that attention at every stage of the viewing experience.
The creators who consistently trend on TikTok are students of their own analytics. They know which hooks made people stop, which video lengths kept people watching, which topics earned saves, and which calls to action drove profile visits. They treat every video as both a product and a data point.
Start with one niche. Build one hook formula that works. Master your first three seconds. Then layer in sounds, timing, and trend participation once the foundation is solid. Virality is a byproduct of that discipline, not a substitute for it.
The platform will keep evolving. The algorithm will keep shifting. But the fundamental principle, that the content people genuinely want to watch and share will always find its audience, is not going anywhere.
For additional insights into content strategy and platform algorithm behavior, explore resources from TikTok’s Newsroom and TikTok’s Creative Center for real-time trend data.
Video Editing for Marketing Agencies: How to Deliver More Without Burning Out Your Team
Video Editing for Marketing Agencies: How to Deliver More Without Burning Out Your Team
Estimated reading time: 14 minutes
The Real Problem Behind the Bottleneck
Most marketing agencies do not have a video problem. They have a capacity problem that looks like a video problem.
The requests pile up. A client needs three Instagram Reels, a YouTube explainer, a talking-head testimonial cut for LinkedIn, and two 15-second paid social clips — all by end of month. The account manager fields the requests. The creative director squeezes them into an already maxed-out schedule. The one video editor on staff works through lunch again.
Sound familiar?
This is the reality for hundreds of growing marketing agencies right now. Video editing for marketing agencies has become one of the most pressing operational challenges in the industry, not because agencies lack talent, but because video demand has grown faster than any internal team can realistically keep up with.
According to Wyzowl’s State of Video Marketing Report, 91% of businesses used video as a marketing tool in 2023 — and clients now expect their agency to handle it all. Seamlessly. Quickly. Consistently.
This article is for the agency owner, creative director, or operations lead who is tired of watching their team sprint toward burnout while deliverables still pile up. It breaks down exactly how to restructure your video workflow, what to look for in an external video production partner, and how to build a system that lets your agency deliver more without sacrificing quality or your team’s sanity.
Why Video Has Become Non-Negotiable for Agency Clients
A few years ago, video was a premium add-on. Clients treated it like a nice-to-have. Today, it is a baseline expectation, and the shift has been dramatic.
Platforms have restructured their algorithms to favor video content at every level. LinkedIn’s engagement data consistently shows that video posts outperform static content by significant margins. Meta’s internal guidance openly steers advertisers toward Reels and short-form video for organic reach and paid performance alike. YouTube remains the second-largest search engine in the world, with over 2.7 billion logged-in users monthly.
For marketing agencies, this creates a structural challenge. Clients are no longer asking whether video belongs in their content strategy — they are asking why last month’s video calendar was not full.
What has changed is not just volume. The type of video has multiplied. A single campaign might require:
- Short-form vertical videos for TikTok and Instagram Reels
- Horizontal cutdowns for YouTube pre-roll ads
- Captioned talking-head content for LinkedIn
- Product demonstration videos for landing pages
- Event recap or behind-the-scenes content for brand storytelling
- Testimonial compilations for sales enablement
Each format has different specs, pacing, caption styles, and platform requirements. Handling all of that in-house, for multiple clients, on rotating retainers, requires a level of operational infrastructure that most agencies have not yet built.
The Hidden Cost of Keeping Video In-House
There is a persistent belief among agency leaders that keeping video editing in-house is more cost-effective and better for quality control. In theory, that makes sense. In practice, the numbers usually tell a different story.
Consider what an in-house video editor actually costs:
| Cost Category | Estimated Annual Cost |
|---|---|
| Mid-level video editor salary (US average) | $55,000 – $75,000 |
| Benefits, taxes, and overhead (~30%) | $16,500 – $22,500 |
| Software licenses (Adobe Creative Cloud, etc.) | $2,400 – $4,800 |
| Hardware refresh cycle (every 2–3 years) | $3,000 – $5,000 |
| Training and professional development | $1,000 – $2,500 |
| Total annual investment | ~$78,000 – $110,000 |
That is before accounting for turnover costs — which, according to SHRM research, can run 50% to 200% of an employee’s salary when you factor in recruiting, onboarding, and productivity loss.
And here is the operational reality: even a strong in-house editor has a finite output ceiling. When demand spikes — around campaign launches, Q4 pushes, or when a client doubles their retainer scope — that ceiling becomes a wall.
The hidden cost is not just financial. It is the creative director’s time being pulled into revision cycles instead of strategy. It is the account manager managing client expectations about timelines that keep slipping. It is the editor who feels perpetually behind, which quietly erodes the quality of the work and their engagement with it.
Keeping all agency video content production internal only makes sense when volume is predictable and manageable. For most growing agencies, neither of those conditions holds.
Building a Scalable Marketing Agency Video Workflow
The agencies that handle video well do not necessarily have larger teams. They have better systems. Workflow is the difference between an agency that scrambles and one that delivers consistently.
Here is what a functional marketing agency video workflow looks like in practice.
Step 1: Scope Video at the Retainer Level
Video surprises are a capacity killer. If a client’s monthly retainer includes video content, that scope needs to be defined clearly — number of videos, formats, approximate lengths, revision rounds, and delivery deadlines. Vague language like “social content including video” is a recipe for scope creep.
Build a simple video content calendar into every retainer kickoff. Align it with the editorial pipeline for that client. When the team knows what is expected for the month on day one, the whole machine runs more smoothly.
Step 2: Standardize Your Brief and Asset Intake
Every video project should start with a completed brief. Not a Slack message. Not a verbal conversation. A written brief that covers:
- The platform and format
- The objective (awareness, conversion, engagement)
- The message or key talking points
- The tone and reference examples
- The deadline and review timeline
- Raw footage, brand assets, and music preferences
This brief becomes the single source of truth. It removes the guesswork that slows editors down and reduces revision cycles caused by misaligned expectations.
Step 3: Build in Buffer Time Structurally
The most common reason video timelines collapse is that they are built without buffer. Every stage takes longer than estimated, and those small delays compound. A realistic timeline for a client-facing video should include:
- Pre-production and brief alignment
- Editing (first cut)
- Internal review
- Client review round one
- Revisions
- Client approval
- Export and delivery
Rushing any stage to meet a deadline that was set without buffer does not save time. It creates rework.
Step 4: Separate Production Tracks by Complexity
Not every video is equal. A 30-second social clip has very different production requirements than a 3-minute brand story video. Treating them the same way in your workflow creates inefficiencies.
Create at least two production tracks: fast-turn social content and longer-form or campaign-level video. Assign different timelines, different resource allocations, and in some cases, different teams or partners to each.
The Case for a Video Production Partner for Agencies
One of the most operationally sound decisions a growing agency can make is bringing in an external video production partner rather than trying to build all capacity in-house.
This is not about outsourcing quality. It is about applying resources strategically.
A strong video production partner for agencies operates as an extension of your team, not a vendor you hand work off to and hope for the best. The best partnerships involve:
- Shared brand guidelines and client context
- A defined communication and revision process
- Output that is white-labeled and client-ready
- Predictable turnaround times that fit your delivery schedule
When evaluating potential video production partners, look for these signals:
Experience with agency clients specifically. A studio that primarily works with end brands has different rhythms than one that understands the pace and expectations of agency workflows.
Format range. Your partner should be comfortable across short-form vertical content, long-form YouTube video, motion graphics, and ad-spec formats. A narrow specialization becomes a bottleneck of its own.
Communication infrastructure. Do they use project management tools that integrate with your workflow? Do they have a clear revision process with documented turnaround times?
White-label capability. Your client relationship is primary. A production partner who understands that delivers work in a way that keeps your agency front and center.
The retainer model works particularly well here. Instead of quoting individual projects, many agencies establish a monthly video retainer with their production partner that covers a defined volume of deliverables. This creates predictability for both sides and allows the production partner to allocate the right resources proactively.
Content Batching: The Strategy That Changes Everything
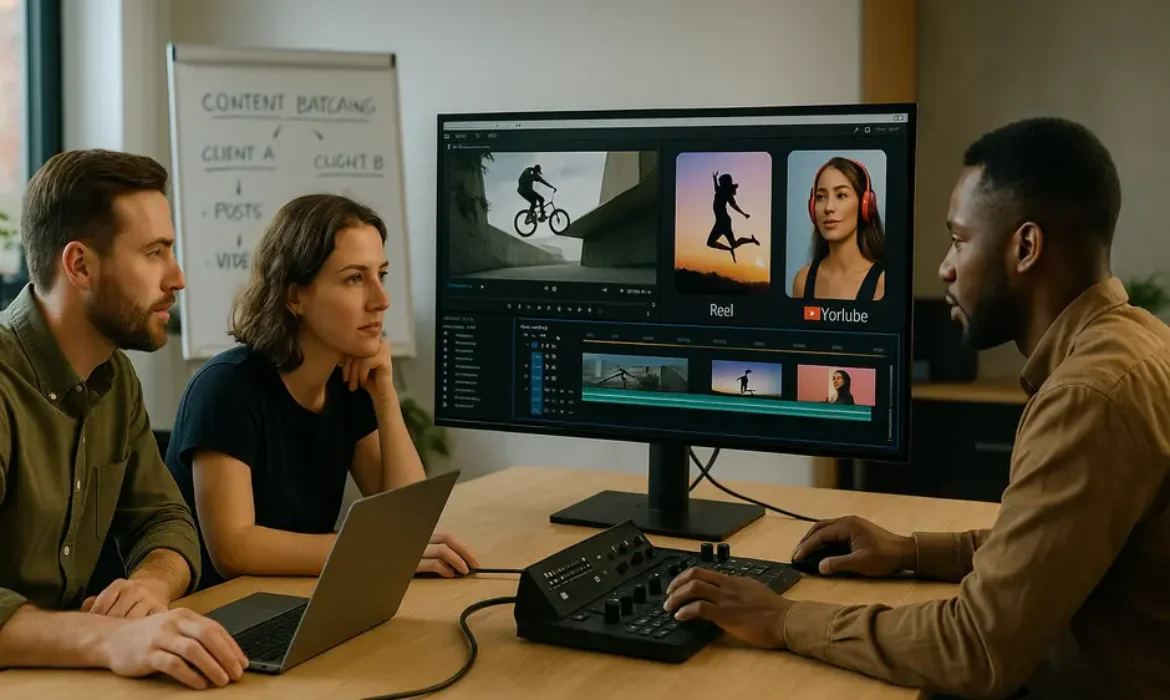
If there is one workflow adjustment that makes the single biggest difference in agency video content production, it is content batching.
Content batching means grouping the creation of multiple videos — often from a single filming session or asset set — into one efficient production block rather than treating each video as a standalone project.
Here is a practical example: a client has a monthly retainer that includes eight social videos. Rather than shooting and editing one video at a time throughout the month, a batch approach shoots all eight videos’ worth of raw footage in a single session, then edits all eight consecutively.
The advantages are significant:
- Efficiency: Editors maintain context and brand voice across all videos in the batch, reducing setup time and maintaining stylistic consistency
- Cost reduction: A single shoot covers multiple deliverables, reducing per-video production costs dramatically
- Calendar stability: When the month’s videos are batch-produced early, the rest of the month is available for strategy, client communication, and other deliverables
- Quality consistency: A batch produced in one session has a natural visual and tonal coherence that serial production rarely achieves
The video content calendar is the planning instrument that makes batching possible. Agencies that map out a full month’s (or quarter’s) social media video for agencies in advance can plan shoots, brief editors, and schedule delivery windows that keep everyone ahead of the curve instead of behind it.
Structuring Client Video Deliverables That Stick
Client video deliverables are where good workflows either pay off or fall apart. The structural decisions you make around how deliverables are packaged and presented have a direct impact on approval rates, revision volume, and overall client satisfaction.
A few principles worth building into your process.
Present in Context, Not in Isolation
Clients approve video more confidently when they see it in the context of how it will live. Embedding a Reel mockup in an Instagram preview frame, or showing a YouTube thumbnail alongside the video, dramatically reduces the kind of feedback that comes from a client imagining their asset differently than you built it.
Tools like Frame.io allow for time-stamped video feedback, which makes revision communication vastly more specific and actionable.
Set Clear Revision Parameters Upfront
Revision scope should be established in your retainer or project agreement, not improvised when a client asks for the fifth round of changes. Define what constitutes a revision (adjusting a caption, cutting a section, changing music) versus a scope change (reshooting content, changing the concept entirely).
Standardize Your Delivery Package
Every video deliverable should come with a standardized package that removes ambiguity:
| Deliverable Component | Description |
|---|---|
| Primary video file | Platform-optimized export (correct specs, aspect ratio, file format) |
| Caption file | Accurate SRT or VTT file for accessibility |
| Thumbnail image | Custom or best-frame option with dimensions |
| Revision history | Brief note on changes from previous version |
| Usage notes | Recommended caption copy, hashtags, and posting time if applicable |
This level of professionalism signals expertise and reduces the back-and-forth that eats into margins.
Tools, Systems, and the Editorial Pipeline That Keeps It All Moving
The operational backbone of a high-output agency video workflow is the combination of tools, documented processes, and editorial infrastructure that keeps everything connected.
Here is a practical breakdown of what that infrastructure looks like.
Project Management
Tools like Asana, Monday.com, or ClickUp serve as the operational hub for tracking video projects from brief to delivery. The key is not which tool you choose but that every video project lives inside it — with clear status, owner, and due date visible to the whole team.
Brief Templates
Every video project starts with a brief template. Standardized, non-negotiable, and short enough to complete in ten minutes. Invest time once in building the right template. Save hours every month thereafter.
Cloud Storage Architecture
A well-organized shared drive (Google Drive, Dropbox, or Frame.io) with a consistent folder structure for each client makes finding raw footage, previous cuts, and brand assets fast and painless. The time lost searching for files across a poorly organized system accumulates invisibly and wastes more hours than most team leads realize.
The Editorial Pipeline
Think of your agency content production process as a pipeline with defined stages. Every video moves through the same stages, in the same order, with the same owners at each gate:
- Brief submitted and approved
- Assets and footage collected
- First cut produced
- Internal review completed
- Client review sent
- Revisions applied
- Final approval received
- Files exported and delivered
- Project archived
When every team member knows which stage each project is in, communication improves, nothing falls through, and leadership can spot bottlenecks before they become crises.
Key Takeaways
-
- Video demand from agency clients has outpaced in-house capacity for most growing agencies, making workflow and operational structure more important than raw headcount
- Keeping video editing entirely in-house carries significant hidden costs — financial, operational, and human — that often go unexamined
- A scalable marketing agency video workflow depends on standardized briefs, clear retainer scopes, and structured editorial pipelines rather than heroic individual effort
- A well-chosen video production partner for agencies can dramatically increase output capacity without proportionally increasing overhead
- Content batching is the most efficient structural shift available to agencies managing recurring social media video for agencies — it reduces per-video cost, increases consistency, and stabilizes the editorial calendar
- Client video deliverables should be packaged professionally, presented in context, and governed by clear revision policies established upfront
- The right combination of project management tools, brief templates, and cloud storage architecture removes the operational friction that quietly kills agency margins
FAQs
1. How do marketing agencies typically price video editing services for their clients?
Most agencies price video editing through one of three models: per-video project pricing, a monthly retainer that includes a defined number of videos, or a bundled content retainer where video is one component of a broader content scope. The retainer model tends to work best for ongoing client relationships because it creates predictable revenue for the agency and predictable delivery for the client. When pricing, account for editing time, revision rounds, software costs, and any external production partner fees. Many agencies price their video work at a mark-up over their production partner’s rate, treating it as a managed service rather than a pass-through cost.
2. What is the most common reason marketing agencies miss video deadlines?
The most common cause is a combination of unclear scope and insufficient lead time. When a client requests video without a proper brief, editors have to interpret instructions, which usually means one or more revision rounds that were not planned for. The second most common cause is a workflow that treats every video as a unique, standalone project rather than running videos through a standardized production pipeline. Agencies that brief, produce, review, and deliver video through a consistent process almost universally report better on-time delivery rates.
3. When should a marketing agency consider bringing in an external video production partner?
There are several clear signals. If your in-house editor is consistently working at or above capacity, if video deadlines are regularly slipping, if your agency is turning down video work due to resource constraints, or if your current output quality is inconsistent — these all point to a need for additional production support. The right moment to bring in a partner is before the breaking point, not after. Establishing a production partnership when your team is under moderate pressure gives you time to build the relationship and test the workflow without the stress of a crisis driving the decisions.
4. How can agencies manage client expectations around video revisions effectively?
The most effective approach is to define revision parameters before a project begins, not after the first video is delivered. Your retainer agreement or project scope document should specify how many rounds of revisions are included, what qualifies as a revision versus a scope change, and what the turnaround time is for each revision round. Using a feedback tool like Frame.io, which allows clients to leave time-stamped comments directly on the video, dramatically improves the specificity of feedback and reduces the number of rounds required. Training account managers to guide clients through the feedback process also helps significantly.
5. What video formats should marketing agencies be producing for clients in 2024?
The short answer is: it depends on the platform and the objective. However, short-form vertical video (9:16, under 90 seconds) for Instagram Reels, TikTok, and YouTube Shorts continues to be the highest-demand format for organic social. Horizontal 16:9 video remains essential for YouTube, connected TV, and longer-form brand content. Square format (1:1) still performs well in Facebook and Instagram feed placements for paid social. Most agencies should be producing at least two to three format variations per video to cover platform requirements without commissioning entirely new content for each channel. A good production workflow builds multi-format export into the standard delivery package.
6. How does content batching work practically within an agency retainer structure?
In a retainer model, content batching typically involves planning a full month’s (or quarter’s) video output at the start of the period, organizing a single filming session or asset collection day that covers all planned videos, then moving those assets into editing in one consecutive block. For example, an agency managing a client whose monthly retainer includes eight social videos might schedule a two-hour filming session at the beginning of the month where all raw footage is captured, then batch-edit all eight videos across two to three editing days. This approach reduces per-video overhead, keeps brand and visual consistency high, and gives the rest of the month to the agency for review, revision, and other work.
7. What should agencies include in a standard video production brief?
A strong video brief does not need to be long, but it does need to be complete. At minimum, it should cover the platform and format specs, the campaign objective, the core message or script outline, the intended audience, the tone and visual references, the deadline and revision timeline, and a checklist of all raw assets available (footage, brand files, music direction). The brief should be completed by the account team or strategist — not the editor — and approved by the client or creative director before production begins. When editors receive a complete, approved brief, they can move directly into production without clarifying back-and-forth that delays the schedule.
Conclusion
The agencies thriving in a video-first content landscape are not the ones with the biggest teams or the most sophisticated software. They are the ones that have built systems capable of handling sustained volume without putting the weight of that volume entirely on their people.
Video editing for marketing agencies is ultimately an operational challenge as much as a creative one. The creative quality comes from talented editors and clear briefs. The operational sustainability comes from documented workflows, smart use of production partners, content batching strategies, and client communication processes that manage expectations before they become problems.
If your agency is feeling the pressure of rising video demand — if timelines are slipping, your editor is stretched thin, or you are losing sleep over a client video calendar that never quite gets done — the path forward is not to simply work harder. It is to work with better infrastructure.
Build the system. Define the workflow. Choose your production partners thoughtfully. Structure your deliverables professionally. Then let the machine do what machines do best, so your people can do what people do best: think strategically, build client relationships, and create work that actually moves the needle.
Looking to expand your agency’s video output without expanding your headcount? The strategies in this guide are a starting point — the implementation is where the real results happen.
Full-Time Video Editor vs Video Editing Service: What’s Right for Your Business?
Full-Time Video Editor vs Video Editing Service: What’s Right for Your Business?
Estimated reading time: 16 minutes
Why This Decision Matters More Than You Think
Video has become the dominant communication currency for modern businesses. From product launches and YouTube channels to internal training and social media campaigns, video content now touches virtually every part of a growth-focused business strategy. But as your video output scales, so does a pressing operational question: do you bring someone in-house, or do you hand that work to a dedicated editing service?
This is not a trivial question. Get it right, and you build a lean, efficient content machine. Get it wrong, and you are either overpaying for idle talent or suffering through inconsistent turnaround times and brand misalignment from a service that does not truly understand your voice.
The comparison between a full-time video editor and a video editing service is nuanced. It depends on your content volume, budget structure, long-term growth plans, and how deeply video is embedded in your day-to-day operations. This guide walks through every relevant dimension — salary, benefits, equipment cost, scalability, NDA protection, onboarding time, and more — so you can make an informed decision rather than a reactive one.
Breaking Down the True Cost of a Full-Time Video Editor
Most business owners anchor their thinking to the base salary when considering a full-time hire. That is a mistake. The fully loaded cost of an in-house video editor is significantly higher than the number on the offer letter.
Base Salary
According to the U.S. Bureau of Labor Statistics, the median annual salary for film and video editors in the United States is approximately $62,000. However, depending on your market and the editor’s experience level, that number can range from $45,000 for a junior hire to well over $100,000 for a senior editor in a competitive city like New York, Los Angeles, or San Francisco.
Benefits and Payroll Overhead
Once you add employer-side expenses, the picture changes considerably. A reasonable estimate for benefits and payroll costs adds 25–40% on top of base salary. This typically includes:
- Health insurance contributions
- Employer’s share of Social Security and Medicare taxes
- Paid time off, holidays, and sick leave
- Retirement plan contributions
- Workers’ compensation insurance
On a $65,000 salary, that adds roughly $16,000–$26,000 in additional annual cost, bringing your true spend to somewhere between $81,000 and $91,000 before you have touched a single piece of equipment.
Equipment and Software
A professional editing workstation is not cheap. A capable Mac Pro or high-end PC setup with sufficient RAM, storage, and a color-accurate monitor can cost anywhere from $3,000 to $8,000 upfront. Software subscriptions — Adobe Creative Cloud, DaVinci Resolve Studio, plugins, stock music libraries, and asset management platforms — add another $1,500–$3,000 per year.
If your editor works with high-resolution or RAW footage, you also need to factor in storage infrastructure, whether that is a NAS (network-attached storage) system or cloud storage, which can run hundreds to thousands of dollars annually depending on your volume.
Management Overhead
An in-house editor requires active management. Someone on your team will spend time briefing projects, reviewing cuts, giving feedback, coordinating revisions, and handling HR-related matters. This management overhead is rarely factored in at the decision stage, but it represents real hours — and real cost — especially in smaller organizations where leadership wears multiple hats.
Turnover Risk
The average employee tenure across creative roles hovers around two to three years. When a video editor leaves, you face recruiting costs (job boards, agency fees, or both), a hiring timeline that can stretch several months, and an onboarding period where productivity is reduced. Industry estimates suggest replacing an employee costs between 50% and 200% of their annual salary when you account for all related expenses. That is a substantial risk to absorb, particularly if video is a core part of your content engine.
What a Video Editing Service Actually Offers
A video editing service — whether it is a subscription-based platform, a managed service agency, or a dedicated freelance team — operates on a fundamentally different model. Instead of employment, you are purchasing a deliverable.
Subscription and Service Fee Structures
Editing services vary widely in pricing model. Some charge a flat monthly subscription fee that covers a defined volume of content — say, up to 20 edited videos per month. Others bill per project or per minute of finished video. A few operate on a retainer basis where you get a dedicated editor assigned to your account.
Monthly subscription fees for quality services typically range from $500 to $3,000 depending on the scope, turnaround time, and level of skill involved. Enterprise-level or highly specialized services can go higher.
The important distinction: you pay for what you use, or you pay for a defined capacity. Either way, you are not paying for downtime, sick leave, or slow months when your content calendar is light.
Scalability on Demand
One of the genuine advantages of an editing service is the ability to scale volume up or down without the HR complexity of hiring or laying off staff. If you have a product launch in Q4 that triples your normal output, a service can absorb that spike. If your content volume drops in Q1, you are not paying a full-time salary for someone to have limited work.
Turnaround and Process
Established editing services typically offer structured turnaround times — often 24 to 72 hours for standard edits, with expedited options for time-sensitive content. They usually have a defined revision policy, a style brief process, and project management workflows already in place.
Specialization and Bench Depth
A good editing service gives you access to more than one person’s skill set. If your project requires color grading, motion graphics, subtitling, or a different editing style, many services can route your work to the appropriate specialist rather than forcing a generalist to handle everything.
Head-to-Head Comparison: The Key Decision Factors
| Factor | Full-Time In-House Editor | Video Editing Service |
|---|---|---|
| Monthly Cost (Mid-Level) | $6,750–$7,600 (fully loaded) | $500–$3,000 |
| Onboarding Time | 30–90 days to full productivity | 3–10 business days |
| Scalability | Limited without new hires | High — scales with demand |
| Brand Familiarity | Develops over time, very deep | Built through briefs; varies by service |
| NDA / IP Protection | Standard employment contract | Requires explicit service agreement |
| Equipment Cost | Your responsibility | Included in service fee |
| Sick Leave / Downtime | You absorb it | Not your problem |
| Revision Process | Immediate, verbal communication | Structured, ticket or portal-based |
| Management Overhead | Significant | Minimal |
| Creative Consistency | High once trained | Depends on service quality |
| Trial Period Risk | High — costly to reverse if wrong hire | Low — most services offer trial projects |
| Turnover Risk | Real and costly | None |
When Hiring a Full-Time Editor Makes Strategic Sense
There are scenarios where building an in-house editing capability is genuinely the right move. It would be intellectually dishonest to argue otherwise.
Your Content Volume Is Consistently High
If your business is producing 40 or more edited videos per month on a regular, predictable basis — think media companies, large YouTube channels, SaaS businesses with extensive content marketing operations — a full-time editor can be more cost-effective per unit than a service at that scale.
Video Is Core to Your Brand Identity
For businesses where video is a primary brand expression — a streaming platform, a video-first news outlet, a company whose entire marketing strategy lives on YouTube — having someone deeply embedded in the brand, someone who knows your style guides, your founder’s speech patterns, and your audience preferences at an intuitive level, is genuinely valuable. That depth of familiarity is harder to replicate with an external service.
You Need Real-Time Collaboration
Live productions, same-day turnaround content, daily news-style formats, and similar workflows benefit from an editor who is physically present or deeply integrated into your communication channels. When you need to communicate rapidly and iterate in real time, an in-house editor removes a layer of friction.
You Have Budget Certainty and HR Infrastructure
If your business is large enough to have a functioning HR department, a reliable recruitment process, and the cash flow to absorb the full loaded cost of an employee without impacting operations, the infrastructure cost of employment is less daunting.
When a Video Editing Service Is the Smarter Move
For the vast majority of growing businesses — particularly those in the $500K to $10M revenue range — a video editing service delivers more value per dollar at this stage of the journey.
Your Content Volume Fluctuates
Seasonality is real. E-commerce brands produce more video during Q4. Event-driven businesses have peaks around conferences and product cycles. If your editing demand is uneven across the year, paying a full-time salary during slow periods represents significant waste.
You Are Building a Content Operation From Scratch
If video editing is relatively new to your business, committing to a full-time hire before you have established workflows, defined your content strategy, and tested what resonates with your audience is premature. A service lets you build competency and process before locking into overhead.
Speed to Capability Matters
Recruiting and onboarding a quality video editor takes time. A capable editing service can be operational within a week. For businesses in a growth phase where time to market matters, that speed difference is meaningful.
You Want Financial Predictability
A subscription-based editing service converts a variable, lumpy cost (recruiting, salary, benefits, turnover) into a predictable monthly line item. For businesses managing cash flow carefully, that predictability has real value.
You Need Specialized Skills Across Projects
Not every editor excels at every format. An editor who is brilliant at long-form documentary-style content may struggle with fast-paced social media reels or kinetic typography. Many editing services give you access to a range of specialists depending on the project type — a bench depth that would be impractical to maintain with a single full-time hire.
The Hidden Variables Most Businesses Overlook
Beyond the obvious cost and capability comparison, several under-discussed factors deserve serious consideration when making this decision.
Intellectual Property and NDA Protection
When a full-time employee creates content on your behalf, that content is owned by your company as a work-for-hire under standard employment law. With an external service, you need explicit contractual language covering IP ownership, confidentiality, and NDA provisions. This is not a reason to avoid services, but it is a detail that must be addressed in your service agreement. Any credible editing service will accommodate this without hesitation.
The Onboarding Time Reality
Hiring a full-time editor is not a quick fix. Even after you find the right candidate — which can take 30 to 60 days — you then enter an onboarding and ramp-up period. Most employees reach full productivity at a new role after 60 to 90 days, and creative roles can take longer due to the brand learning curve. A quality editing service, given a thorough style brief, can be turning around on-brand work within days.
Editor Burnout and Wellbeing
This is rarely discussed in operational comparisons, but it matters. Video editing is cognitively demanding and often repetitive. An in-house editor who is handling the same type of content daily without enough creative variation can burn out, and burnout affects quality before it affects tenure. Managing creative wellbeing is a real responsibility that an editing service absorbs on your behalf.
The “One Person as a Single Point of Failure” Problem
If your entire video production capability rests on a single employee and that person takes extended medical leave, resigns suddenly, or has a family emergency, your content operation can stall. Services have redundancy built in; a single hire does not.
Equipment Depreciation and Upgrades
Hardware ages. Software evolves. An in-house editing setup that was current two years ago may struggle with today’s higher-resolution formats, particularly as 4K and 8K workflows become standard. That upgrade cycle is your cost to manage with an in-house editor. A service keeps their own infrastructure current.
How to Evaluate Either Option Before Committing
Whether you are leaning toward a hire or a service, the decision should be tested before it is finalized.
For Evaluating a Video Editing Service
- Request a paid trial project A serious service will not hesitate to take on a real, representative project at the start of your relationship. This reveals their communication, turnaround, and output quality more accurately than any demo reel
- Audit their revision process How many rounds of revisions are included? How are feedback cycles managed? Is there a dedicated point of contact?
- Review their NDA and IP terms explicitly Do not assume — read the contract
- Assess their understanding of your niche A service that has worked with businesses in your industry will have a shorter learning curve
For Evaluating a Full-Time Hire
- Use a paid skills assessment Give shortlisted candidates a real editing task that reflects your typical content. Pay them for their time. The output quality and their process will tell you more than any portfolio review
- Define the role scope in advance An editor who will only edit may stagnate. Think about whether you want someone who can also handle motion graphics, color grading, or basic sound design — and be honest about whether the volume justifies full-time employment
- Check for cultural alignment In-house editors are part of your culture. They will attend meetings, interact with teams, and absorb your brand identity. Technical skill matters, but so does fit
- Calculate the full loaded cost before approving the hire Use the framework above — salary, benefits, equipment, management time, and turnover risk — and ensure your revenue model supports it comfortably
Key Takeaways
-
- The true cost of a full-time video editor is 25–40% higher than the base salary once benefits, equipment, and overhead are factored in
- Video editing services offer faster onboarding, built-in scalability, and lower financial risk — particularly for businesses with variable content volume
- Full-time hires make the most sense for high-volume, video-centric businesses with stable demand and the infrastructure to manage employment properly
- NDA and IP protection can be achieved with either option — it just requires explicit contractual language with a service
- Turnover is a meaningful risk with in-house hires; services eliminate it entirely
- Neither option is universally superior. The right answer depends on your volume, budget, and strategic relationship with video content
FAQs
1. What is the average salary for a full-time video editor in the United States?
The median annual salary for a video editor in the U.S. is approximately $62,000 according to the Bureau of Labor Statistics, though this varies significantly by experience level and location. Senior editors in major metros can earn $90,000 to $120,000 or more. When you add employer-side benefits and payroll taxes, the fully loaded cost typically lands between $80,000 and $95,000 annually for a mid-level hire. This is the figure you should be working from when comparing the in-house versus outsource decision.
2. Are video editing services reliable enough for professional-grade business content?
Quality varies across the market, but many established video editing services produce work that is fully competitive with in-house output. The key variables are the quality of your creative brief, the revision process, and the service’s familiarity with your brand and format requirements. High-performing services often assign a dedicated editor to your account, which builds the same kind of brand familiarity you would expect from an in-house hire — just without the employment relationship. Always start with a trial project before committing to a long-term contract.
3. How do I protect my intellectual property when using a video editing service?
This comes down to your service agreement. You should ensure the contract explicitly states that all edited content and derivative works are your property upon delivery. It should also include a confidentiality clause or a separate NDA covering raw footage, unreleased content, and any proprietary business information shared during the engagement. Any professional editing service will accommodate these requirements. If a service is resistant to signing an NDA, that is a serious red flag.
4. How long does it take to onboard a video editing service compared to hiring an employee?
A video editing service can typically be producing usable content within three to ten business days, given a clear style guide, brand brief, and sample content to reference. A full-time employee, by contrast, requires a recruitment period that often runs 30 to 60 days, followed by an onboarding and ramp-up period of another 60 to 90 days before reaching full productivity. For businesses that need to move quickly or simply cannot afford an extended ramp-up period, the speed advantage of a service is substantial.
5. What happens if my content volume increases significantly — can a service keep up?
Scalability is one of the clearest advantages editing services hold over in-house hires. Most subscription-based services offer tiered plans or add-on capacity to accommodate volume spikes. Some services allow you to add editing hours or video slots on a month-to-month basis. Contrast this with hiring, where scaling volume would require a new recruitment cycle. If your content output is growing rapidly or follows a seasonal pattern, a service’s elastic capacity model is far more operationally efficient.
6. Is there a hybrid approach — using both a part-time editor and a service?
Yes, and for some businesses it is the most pragmatic model. A part-time editor — whether a contractor or a reduced-hours employee — handles the high-priority, brand-sensitive content that benefits from deep institutional knowledge, while a service handles high-volume, more standardized formats like social clips, repurposed content, or product demos. This hybrid approach can give you the best of both worlds: brand depth where it matters most and cost efficiency where volume is high.
7. How do I calculate whether an editing service is cost-effective compared to a full-time hire?
Start by calculating your fully loaded in-house cost: base salary plus benefits (add 30% as a reasonable estimate), equipment amortization, and a rough estimate of management hours at your hourly rate. Divide that annual figure by your expected monthly video output to get a cost per video. Then price out an editing service against the same monthly volume. The comparison will usually favor the service at lower volumes and favor the employee at very high volumes. The breakeven point varies, but for most businesses producing fewer than 30 to 40 polished videos per month, the service is the more cost-efficient option.
Final Verdict
There is no universally correct answer in the full-time video editor versus editing service debate. What exists is a set of conditions that makes each option more or less appropriate for a given business at a given point in its development.
If you are a scaling business that produces video consistently but not at enterprise volume, values financial predictability, and wants to move fast without the risk exposure of a full-time hire, a well-chosen video editing service will almost certainly deliver more value per dollar than an employee at this stage. The speed, scalability, and absence of turnover risk make a compelling operational case.
If you are running a video-first business where content is the product, volume is high and consistent, and deep brand familiarity is a genuine competitive advantage, building an in-house editorial capability makes strategic sense — provided you have the infrastructure and cash flow to support it properly.
The middle ground — and where most growing businesses live — involves honest self-assessment about your actual volume, realistic budgeting for the true cost of employment, and a clear-eyed look at how central video is to your revenue strategy.
Start with a trial. Run the numbers properly. And make the decision based on operational reality rather than the assumption that having someone on payroll is inherently more professional than using a service. In the modern content economy, that assumption is simply no longer true.
For additional perspective on content marketing investment and team structure, resources from Content Marketing Institute and HubSpot’s marketing research library offer regularly updated benchmarks worth reviewing alongside your internal numbers.
How to Offer Video Editing as a Service: A Guide for Freelancers and Agencies
How to Offer Video Editing as a Service: A Guide for Freelancers and Agencies
Estimated reading time: 14 minutes
Why Video Editing Is One of the Smartest Services to Offer Right Now
If you have been on the fence about adding video editing to your freelance or agency service stack, the market data alone should move you off it. According to Statista, online video advertising revenue is projected to surpass $240 billion globally by 2028. Brands, creators, and small businesses are producing more video content than ever before, and the overwhelming majority of them cannot — or do not want to — edit it themselves.
That gap between content creation and professional post-production is precisely where the opportunity lives.
Video editing is no longer a niche technical skill reserved for Hollywood production houses. It has become a core marketing function. YouTube channels need consistent uploads. Brands need polished reels for Instagram and TikTok. SaaS companies need product walkthroughs. Coaches need course videos. Real estate agents need property tours. The demand is diverse, recurring, and growing.
For freelancers, offering video editing as a standalone service or as part of a broader content offer opens the door to consistent monthly income, premium positioning, and long-term client relationships. For agencies, adding a video editing arm either in-house or through a white label partner can significantly increase average contract value without a disproportionate increase in overhead.
This guide breaks down exactly how to build, package, price, sell, and protect a professional video editing service from the ground up.
Choosing Your Video Editing Service Business Model
Before you do anything else, you need to settle on how you want to structure the service itself. There are several viable models, and the right one depends on your skills, available time, client type, and growth ambitions.
Project-Based Model
You charge per project — a wedding video, a brand commercial, a YouTube series. This is the most straightforward approach and works well when you are starting out or working with high-ticket, one-time clients. The downside is income unpredictability. Every month, you are starting from zero.
Retainer Model
Clients pay a fixed monthly fee in exchange for a defined deliverable or number of editing hours. This is the backbone of a stable video editing service business. It suits brands, agencies, and creators who produce content on a schedule.
Productised Service Model
You package your editing service into clearly defined tiers — think “Basic,” “Standard,” and “Premium” — each with a fixed price, fixed scope, and fixed turnaround time. Clients buy a product rather than negotiating a custom quote. This model scales extremely well and dramatically reduces the sales conversation overhead.
White Label Model
You deliver video editing under another agency’s brand. The agency sells the service to their client, you handle production, and neither party discloses the arrangement without consent. This is an excellent growth channel for editors who prefer execution over client acquisition.
Most successful video editing businesses eventually combine two or more of these. A productised service for standard content creation clients, retainers for volume clients, and white label arrangements with one or two agencies can create a diversified, resilient revenue mix.
Defining Your Service Offering and Scope
One of the most common mistakes video editors make is trying to be everything to everyone. Vague positioning kills sales. The more specific you are about what you do, who you do it for, and what the output looks like, the easier it is to sell.
Start by answering these three questions:
What types of videos will you edit?
Social media content (Reels, TikToks, YouTube Shorts), long-form YouTube videos, corporate explainers, podcast video repurposing, training and course videos, event highlight reels, or real estate walkthroughs. These require different skill sets, software, and turnaround windows.
Who is your ideal client?
Content creators, marketing agencies, ecommerce brands, coaches, consultants, SaaS companies, or local businesses. Your positioning should speak directly to one or two of these, not all of them simultaneously.
What does your service include and exclude?
Colour grading? Motion graphics? Subtitles and captions? Background music sourcing? Thumbnail creation? The more clearly you define this, the less scope creep becomes a problem later.
A useful exercise is to build a simple service scope table before you ever send a proposal:
| Service Element | Included | Available as Add-On | Not Offered |
|---|---|---|---|
| Basic cuts and transitions | Yes | — | — |
| Colour grading | Yes | — | — |
| Motion graphics / Lower thirds | — | Yes | — |
| Custom animations | — | — | Yes |
| Subtitles / Captions | — | Yes | — |
| Background music licensing | Yes (royalty-free) | — | — |
| Thumbnail design | — | Yes | — |
| Script review | — | — | Yes |
| Rush delivery (under 24 hrs) | — | Yes | — |
This kind of transparent scope definition protects you legally, sets accurate client expectations, and makes upselling feel natural rather than pushy.
Packaging and Pricing Your Video Editing Service
Pricing video editing is where many talented editors consistently undercharge. The instinct to compete on price is understandable but almost always counterproductive. Clients who buy on price alone are the clients who push hardest on revisions, timelines, and scope.
Here is a practical framework for pricing based on deliverable type and complexity:
| Service Package | What It Includes | Typical Price Range |
|---|---|---|
| Short-Form Content (under 90 seconds) | 1-2 raw clips, basic cuts, music, captions | $75 – $200 per video |
| YouTube / Long-Form (8-20 minutes) | Full rough cut, colour grade, lower thirds, music | $200 – $600 per video |
| Corporate Explainer / Brand Video | Multi-camera, colour grade, motion graphics, sound mix | $500 – $2,000+ |
| Monthly Content Creator Retainer | 8-12 short-form videos per month | $800 – $2,500/month |
| Agency White Label Retainer | Custom scope, priority delivery, NDA | $1,500 – $5,000+/month |
These ranges reflect real-world market rates as of 2024 and will vary based on your location, experience level, and the industries you serve. It is worth benchmarking against platforms like Contra or Bonsai to understand what editors at your skill level are charging.
One important principle: price based on value delivered, not hours spent. A well-edited 90-second brand video might take you three hours to produce but generate thousands of dollars in revenue for your client. Price accordingly.
Building a Productised Video Editing Service
The productised service model deserves its own section because it is genuinely transformative for editors who want to scale without working unlimited hours.
The concept, popularised by practitioners like Paul Jarvis and companies like Design Pickle, is simple: instead of custom quoting every project, you define a fixed service with a fixed price, fixed scope, and fixed turnaround. Clients select a tier, pay, and submit their footage. You deliver. No lengthy discovery calls, no negotiation, no ambiguity.
Here is how to productise your video editing service in five practical steps:
Step 1: Identify your most repeatable work
What type of editing do you do most often? What can you deliver consistently and efficiently? That is your productised offer.
Step 2: Define the inputs you need
Document exactly what the client must provide — raw footage, a script or brief, music preferences, brand guidelines. Create a standardised intake form.
Step 3: Set a clear turnaround
Commit to a specific delivery window. Three business days is common for short-form content; five to seven for long-form.
Step 4: Limit revisions
Two rounds of revisions is the industry standard for most tiers. Additional revisions cost extra. This protects your time and trains clients to give better feedback upfront.
Step 5: Systematise your workflow
Use tools like Frame.io for client review and approvals, Notion or ClickUp for project management, and cloud storage solutions for footage transfer. Efficiency at the delivery stage is what makes the productised model profitable.
The productised service model also has a significant marketing advantage: it is easy to explain, easy to buy, and easy to share. Clients do not need to get on a call to understand what they are getting.
Client Onboarding: Setting the Right Foundation
A smooth onboarding process signals professionalism, builds trust, and prevents the most common friction points before they become problems.
Your onboarding process should include:
A Welcome Document or Client Guide
Introduce yourself, outline the workflow, explain how to submit footage, how feedback works, and what your communication channels are. This document alone will save you dozens of emails over the course of a client relationship.
A Signed Service Agreement
This is non-negotiable. Your agreement should cover payment terms, ownership and licensing of the final product, revision limits, confidentiality obligations, and what happens if either party needs to terminate the engagement. For agencies handling client work, an NDA should be standard procedure.
A Detailed Creative Brief
Even for repeat clients, a brief keeps every project anchored. It should capture the video’s purpose, target audience, tone, reference examples, technical specs (aspect ratio, platform), and any specific do’s and don’ts.
An Intake Form for Footage Submission
Create a structured form that collects all raw files, music preferences, script or talking points, and any platform-specific requirements. Tools like Typeform or JotForm work well for this.
A Clear Communication Cadence
Let clients know when they can expect updates, how long review feedback takes, and what your response time is for messages. This prevents the dreaded “just checking in” emails that fragment your workday.
Onboarding is also the right moment to introduce your upsell options naturally. If a client is signing up for basic YouTube editing, mention that caption generation and thumbnail design are available add-ons. Planting these early means they feel like helpful suggestions rather than sales pitches.
Revision Policy, NDAs, and Scope Creep Protection
Scope creep is the silent margin killer in any service business, and video editing is particularly vulnerable to it. “Can you just add one more thing?” is a phrase every editor has heard. Left unchecked, it erodes profitability, creates resentment, and attracts difficult clients.
Your revision policy needs to be crystal clear from the start. Here is a model that works well in practice:
- Round 1: Major structural changes — pacing, scene order, cut selections
- Round 2: Minor adjustments — colour tweaks, text corrections, audio balancing
- Additional Revisions: Charged at an hourly or flat-rate fee (document this clearly)
The key is framing. Do not present your revision policy as restrictive; present it as a structure that helps clients get better results faster. When clients know they have two rounds, they tend to consolidate their feedback more thoughtfully.
NDAs and Confidentiality
If you are working with agency clients on a white label basis, an NDA is essential. It protects the agency’s relationship with their end client and gives both parties legal recourse if the arrangement is disclosed inappropriately.
Even for direct clients, a confidentiality clause in your service agreement ensures that you do not share footage, brand strategy information, or project details without permission. This is especially relevant in industries like finance, healthcare, legal, and entertainment where sensitive content is common.
Change Order Procedures
For anything that falls outside the original scope, issue a change order before doing the work. A simple email or document that outlines the additional task and associated cost, confirmed in writing, is usually sufficient. This creates a paper trail and establishes that out-of-scope work comes at a price.
Video Editing Retainers and Recurring Revenue
If you want a video editing business with financial predictability, retainers are the answer. A monthly retainer is an agreement where a client pays a fixed fee for ongoing editing services, typically covering a defined volume of deliverables or hours each month.
Retainers work best for:
- YouTube creators publishing on a regular schedule
- Brands running ongoing social media content programmes
- Agencies with consistent video production for their clients
- Podcasters repurposing audio content into video clips
- E-learning platforms adding new course modules regularly
When structuring a video editing retainer, be precise about what is included:
| Retainer Component | Description |
|---|---|
| Monthly deliverable count | e.g., 10 short-form videos OR 4 YouTube videos |
| Included revision rounds | Typically 2 per deliverable |
| Turnaround time | 3-5 business days per video |
| Rollover policy | Unused edits may or may not carry forward |
| Priority access | Retainer clients get faster scheduling than one-off clients |
| Payment terms | Due on the 1st, invoiced in advance |
Retainers also create a natural relationship deepening dynamic. Clients who pay you every month start to see you as a partner, not a vendor. That shift in relationship increases loyalty, makes price discussions less fraught, and opens doors to expanded scope over time.
Offer a small discount for six or twelve-month commitments. Locking in revenue certainty is worth slightly lower per-unit pricing.
How Agencies Can Add Video Editing Without Hiring In-House
For agencies — whether they operate in social media, SEO, PR, branding, or content marketing — adding video editing to the service offering is a logical expansion move. Video is already part of almost every client’s marketing strategy, and if your agency is not delivering it, someone else is.
The challenge is that building an in-house video production team is expensive and slow. Hiring a skilled senior editor, investing in hardware and software, and building production workflows from scratch requires capital and time most agencies cannot afford to commit upfront.
The White Label Solution
Partnering with a specialist video editing provider or a freelance editor on a white label basis allows agencies to sell video services at full margin without the overhead. The client sees your agency’s brand; the editor works behind the scenes.
When evaluating a white label video editing partner, prioritise:
- Consistent quality across a range of video types — review their portfolio carefully
- Reliable turnaround times — missed deadlines in a white label arrangement reflect on you
- Clear NDA and confidentiality terms — the client relationship must be protected
- Scalability — can they handle three clients this month and twelve clients in six months?
- Communication standards — a white label partner who is difficult to reach creates real risk
Building a Video Editing Upsell Into Existing Retainers
Agencies already billing clients for content strategy, social media management, or paid advertising are in a natural position to add video editing as an upsell. A client paying $2,500 per month for social content management is an obvious candidate for a $1,000 per month video editing add-on if you can demonstrate the ROI of video on their existing channels.
Frame the upsell around their goals — more reach, better engagement, stronger conversion rates — rather than the service itself.
Selling and Marketing Your Video Editing Service
Great editing skills mean nothing if the right people do not know you exist. Here is how to build visibility and generate inbound leads for a video editing service.
Your Portfolio Is Your Primary Sales Asset
Showcase diverse, high-quality work. If you are targeting content creators, feature creator-style edits. If you are targeting corporate clients, lead with polished brand videos. Match your portfolio to the clients you want, not just the work you have done.
Leverage Social Proof
Testimonials, case studies, and measurable results (a client’s video reached 500,000 views after your edit) are disproportionately persuasive in the video space. Ask every satisfied client for a short written or video testimonial.
Be Present on Platforms Your Clients Use
LinkedIn is essential for B2B and agency sales. YouTube itself is underutilised as a portfolio and authority platform for editors. Show your process, offer editing tips, and demonstrate your taste. Creators often find their editors through organic social discovery.
Referral Partnerships
Build relationships with videographers, photographers, social media managers, and content strategists. These professionals regularly encounter clients who need editing help and can become a consistent referral source. Offer a referral fee or a reciprocal arrangement.
Content Marketing
Publishing genuinely useful content — guides, tutorials, breakdowns of editing techniques — positions you as an expert and attracts inbound leads through search. A well-structured blog post targeting terms like “how to find a video editor for YouTube” can drive qualified traffic month after month.
FAQs
1. How much should I charge when I am first starting out as a video editor?
Starting rates should reflect your actual skill level and the quality of your output, not simply match the lowest prices you find online. Most beginner editors charge between $25 and $75 per video for short-form content while building their portfolio. As you accumulate testimonials and refine your process, raise your rates accordingly. Undercharging consistently attracts difficult clients and creates a ceiling on your business growth.
2. Do I need a contract for every video editing project?
Yes, without exception. Even small projects can lead to disputes over ownership, usage rights, revision counts, and payment. A basic service agreement covering deliverables, timelines, payment terms, revision limits, and intellectual property rights protects both parties. Free contract templates from platforms like Bonsai provide a solid starting point, but consult a legal professional for large or complex engagements.
3. What is the difference between a productised service and a retainer?
A productised service is a defined package with a fixed price that clients purchase on demand — much like buying a product off a shelf. A retainer is an ongoing subscription where a client pays monthly for continued access to your services. The two can overlap: some editors offer a productised retainer where the monthly package has a fixed deliverable count and price.
4. How do I handle clients who constantly request revisions beyond the agreed limit?
Enforce your revision policy from the first instance it is exceeded. Issue a brief, professional note reminding the client of the policy and providing the cost for additional revisions. Clients rarely push back hard when the policy was clearly communicated upfront. If it becomes a pattern, address it directly in the next contract renewal conversation. Some clients simply need consistent boundaries set once.
5. Is white label video editing legal?
Yes, white label arrangements are entirely legal and common across the creative services industry. The key requirements are a clear contract between the agency and the editor, an NDA where appropriate, and transparency between the agency and editor about the nature of the arrangement. The agency’s end client does not need to be informed of third-party involvement unless their contract specifically requires disclosure.
6. What software do professional video editing service providers use?
Adobe Premiere Pro and DaVinci Resolve are the industry standards for professional editing. Final Cut Pro remains popular among Mac-based editors. For review and approval workflows, Frame.io integrates directly with Premiere Pro and is widely used by client-facing editors. For subtitle generation, tools like Descript and Kapwing offer time-saving automation. The specific software matters less to clients than the quality of the output.
7. How do I prevent scope creep in an ongoing video editing retainer?
Define deliverables in precise, measurable terms — not vague language like “social media videos.” Specify video length, number of edits per month, revision rounds, and any content types that fall outside the retainer. Review the scope at each renewal and adjust pricing if the client’s needs have grown beyond the original agreement. Treating scope creep as a structural problem to be solved at the contract level, rather than a client behaviour problem to be managed in real time, is the most durable approach.
Key Takeaways
-
- The demand for professional video editing is structural and growing. Entering this market now, with a clearly defined service, positions you ahead of generalist competition
- Choosing the right business model — project-based, retainer, productised, or white label — has a direct impact on your revenue stability and scalability
- Productised video editing services reduce sales friction, attract better clients, and scale more efficiently than custom-quoted work
- Clear scope definition, a written revision policy, and a signed service agreement are not optional extras; they are the foundation of a sustainable, profitable service
- Video editing retainers are the single most effective mechanism for building predictable recurring revenue as a freelancer or agency
- Agencies can add video editing to their offer without hiring in-house by partnering with a reliable white label editor under a proper NDA and service agreement
- Pricing should reflect the value delivered to the client, not the hours you spend producing the work
- Portfolio quality, social proof, and referral partnerships are the highest-leverage marketing investments for video editing service providers
Ready to take the next step? Start by defining your niche, building three pricing tiers, and creating a one-page service guide you can share with prospective clients. The structure you put in place now is what determines whether this becomes a scalable business or a time-consuming side project.
How Marketing Agencies Can Scale Video Production Without Hiring In-House
How Marketing Agencies Can Scale Video Production Without Hiring In-House
Estimated reading time: 13 minutes
Why Video Scaling Is the Agency Growth Problem Nobody Talks About
Every agency hits this wall eventually.
A client who started asking for two social videos a month suddenly wants ten. A new enterprise account lands with a brief that includes a full explainer series, platform-specific cuts, and weekly short-form content. Meanwhile, your existing team is already stretched across six other accounts.
You can win the work. The harder question is whether you can actually deliver it.
According to Wyzowl’s State of Video Marketing report, 91% of businesses used video as a marketing tool in 2023, and demand has only grown since. For marketing agencies, content marketing agencies, and social media agencies alike, video is no longer a niche deliverable. It is the expectation. Clients want it consistently, across multiple platforms, in multiple formats, at a cadence that makes traditional production models completely unsustainable.
The agencies that figure out how to scale video production without hiring in-house are the ones quietly outpacing their competition. They are taking on bigger accounts, offering broader service lines, and delivering more client video deliverables without proportionally increasing their overhead.
This guide breaks down exactly how they do it.
The Real Cost of Building an In-House Video Team
Before exploring the alternatives, it is worth understanding what you are actually trying to avoid.
Building a capable in-house video team from scratch requires more than hiring a videographer. A full-service internal setup typically includes a video producer or director, a camera operator, a motion graphics designer, a video editor, and someone to manage the content calendar coordination and file delivery. Depending on your market, that is a combined salary cost that can easily exceed $300,000 per year before benefits, equipment, software licenses, and studio space.
Then there is the specialization problem. A social media agency producing content for a fintech brand and a lifestyle e-commerce client simultaneously needs two completely different visual languages, editing styles, and platform strategies. One generalist in-house editor cannot do that effectively across twelve client accounts. You end up either compromising quality or over-hiring.
The overhead economics rarely work until your agency is sustaining a very high volume of dedicated video work with predictable revenue. Most agencies, even successful ones, do not have that level of predictability in video deliverables. Contracts change. Clients pause campaigns. Budgets shift.
That is precisely why outsourcing video production or building a hybrid model has become the smarter path for agencies focused on sustainable growth.
What “Scaling Video Production” Actually Means for Agencies
The term gets used loosely. Let us define it properly.
Scaling video production for an agency does not simply mean producing more videos. It means increasing your agency’s video output capacity in a way that is profitable, repeatable, and not dependent on adding a proportional amount of overhead. It means your production workflow can handle two clients or twenty without fundamentally breaking.
There are three dimensions to agency video production scaling worth thinking about separately:
Volume scaling refers to your ability to produce more videos per month across existing or new clients. This is the most obvious dimension, and the one most agencies focus on first.
Scope scaling refers to your ability to handle a wider variety of video formats. Short-form social cuts, long-form brand documentaries, animated explainers, product demo videos, event recaps, testimonial series — each format requires different skills, tools, and creative thinking. An agency that can only do one or two well is capped in how far it can grow.
Quality scaling is arguably the hardest one. It means your production quality does not degrade as volume increases. This is where most agencies run into trouble when they grow too fast without the right systems in place.
Addressing all three simultaneously requires deliberate capacity planning, the right partner relationships, and clear internal processes.
The Four Models Agencies Use to Scale Video Output
There is no single correct approach. The right model depends on your agency’s size, client mix, and growth stage. That said, most successful agencies settle into one of these four frameworks.
Model 1: The Specialist Freelance Network
Instead of hiring full-time video staff, the agency builds a curated roster of freelance specialists — editors, animators, motion designers, colorists, and sound designers — who work project by project.
This model works particularly well for agencies with variable video volume. You are not paying salaries during slow months, and you can staff up quickly when a large client project lands. The challenge is relationship management. Quality is only consistent when you work with the same trusted freelancers repeatedly and give them proper creative briefs.
Model 2: White-Label Video Production Partner
The agency partners with a dedicated video production company that operates entirely behind the scenes. All client deliverables are branded under the agency’s name. The partner handles everything from shoot logistics to final delivery.
This model works well for digital marketing agencies and content marketing agencies that want to offer video as a robust service line without building any internal production capability. The margins are lower than the freelance model, but the reliability and scalability are higher.
Model 3: Hybrid Internal-External Model
A small internal team handles creative strategy, client communication, and quality control. All execution is outsourced — either to a production partner, a freelance network, or both.
This is the model most mid-size agencies gravitate toward as they mature. It gives you creative oversight and a consistent client experience while keeping execution costs variable. Your internal team becomes a production direction function rather than a production execution function.
Model 4: Template-Driven Production System
For agencies producing high-volume, platform-specific social content, this model uses branded video templates and motion graphics frameworks that can be adapted quickly across clients and campaigns.
Tools like Adobe Premiere Pro, After Effects, or platforms built specifically for template-based video production allow editors — even less experienced ones — to produce consistent, on-brand videos at speed. This model works best when the creative brief is fairly standardized, such as weekly product promotion videos, social ads, or event countdown content.
Here is a comparison to help frame the decision:
| Model | Best For | Key Advantage | Key Risk |
|---|---|---|---|
| Freelance Network | Variable-volume agencies | Flexibility and cost control | Inconsistent quality without vetting |
| White-Label Partner | Agencies new to video | Full scalability, low overhead | Lower margins, less creative control |
| Hybrid Internal-External | Mid-size to growing agencies | Quality control + scalability | Requires strong internal project management |
| Template-Driven System | High-volume social content | Speed and consistency | Limited creative range |
Building a Production Workflow That Doesn’t Break Under Pressure
The most common reason agency video production falls apart at scale is not talent. It is process.
When everything is in someone’s inbox, production timelines slip. When creative briefs are verbal, revisions multiply. When approvals require back-and-forth email chains, deadlines become aspirational rather than real.
A production workflow that can support agency growth in video needs to be documented, systematized, and project-managed with the same rigor you would apply to a paid media campaign.
Here is a framework that holds up under pressure:
Stage 1: Creative Intake
Every video project starts with a structured brief. This should include the target platform, video purpose, audience profile, messaging hierarchy, brand guidelines reference, and any mandatory inclusions like legal disclaimers or product shots. Briefs should live in a shared project management system — not in an email thread.
Stage 2: Pre-Production Planning
Before a single frame is captured or animated, every asset, script, and logistical detail needs to be confirmed. For live-action shoots, this means location, talent, equipment, and shot list. For animation, this means script approval, storyboard sign-off, and style reference alignment. Skipping this stage is the single biggest cause of expensive revisions downstream.
Stage 3: Production Execution
Whether you are outsourcing video production to a partner or directing an internal freelance team, you need a clear handoff document at this stage. The brief, the pre-production materials, and the timeline all get packaged together. Ambiguity here costs money.
Stage 4: Internal Review
Before anything goes to the client, it passes through an internal review checkpoint. This is where the hybrid model shines — your internal team knows the client’s brand intimately and can catch misalignments before the client ever sees them.
Stage 5: Client Review and Revision
Set revision expectations in advance, ideally at the proposal stage. Two rounds of revisions should be standard. Additional rounds cost extra. Having this agreement documented prevents scope creep from eating your margins.
Stage 6: Final Delivery and Archiving
Every final deliverable gets stored in a shared asset library with consistent naming conventions. This sounds administrative, but it pays dividends when a client needs a re-cut six months later or when you are building a service expansion case with their historical content.
Capacity Planning: Matching Video Output to Client Demand
Capacity planning for video is something most agencies do reactively rather than proactively. They discover they are over-committed when a deadline is already at risk.
Proactive capacity planning means knowing, at any given time, how many video hours your current setup can produce per month, what each client account is likely to need, and where the gaps are before they become problems.
A simple capacity model looks like this:
| Resource | Available Hours/Month | Current Allocation | Available Capacity |
|---|---|---|---|
| Senior Editor (Freelance) | 80 hours | 65 hours | 15 hours |
| Motion Designer (Freelance) | 60 hours | 60 hours | 0 hours |
| White-Label Partner | 20 video units | 14 video units | 6 video units |
| Internal Creative Director | 40 hours | 35 hours | 5 hours |
When you map your editorial calendar across client accounts against this capacity table, overcommitment becomes visible before it becomes a crisis. You can either bring in additional freelance resource, push timelines with client agreement, or decline a project scope.
This kind of visibility is what separates agencies that scale video production sustainably from those that grow into chaos.
How to Maintain Quality While Increasing Volume
The tension between speed and quality in video production is real, but it is manageable with the right structure.
The agencies that do this best build what might be called a quality control layer that is distinct from the production execution layer. They have someone — typically a creative director or senior producer — whose job is not to make videos faster but to ensure every video that leaves the agency meets a defined standard.
That standard needs to be documented. Brand guidelines are a start, but video-specific quality benchmarks go further: pacing conventions for different platforms, acceptable compression settings, audio mixing standards, motion graphics style parameters, text hierarchy rules. These might seem like small details, but they are the difference between a video that feels polished and one that looks like it was produced in a hurry.
There is also a strong case for periodic quality audits. Every quarter, review a sample of video deliverables across clients and identify patterns in feedback and revision requests. These patterns reveal process gaps. If clients are consistently asking for music adjustments, the brief is not capturing audio preferences clearly enough. If cuts are regularly missing the brand feel, the creative handoff document needs stronger reference examples.
Nielsen research has long established that brand consistency across touchpoints directly impacts consumer trust. For agencies, that brand consistency is your job to protect — at scale.
Expanding Video as a Service Line Without Operational Chaos
Many agencies treat video production capacity as a reactive add-on rather than a proactive service line. A client asks for a video, the agency figures out how to deliver it, and the process starts over the next time. This is not a scalable approach.
Treating video as a structured service line means packaging it deliberately — with defined tiers, clear deliverables, documented timelines, and transparent pricing. It means your sales team can quote a video package with confidence because the production process behind it is understood and costed correctly.
Here is how that service line architecture might look for a mid-size social media agency or digital marketing agency:
Tier 1: Social Content Package
Monthly deliverables: 8–12 short-form social videos (15–60 seconds), platform-specific cuts for Instagram, TikTok, and LinkedIn. Template-driven production. Two-week turnaround per batch.
Tier 2: Brand Content Package
Quarterly deliverables: 2–4 mid-form brand or product videos (60–180 seconds), original creative execution, one revision round included. Four-week production cycle.
Tier 3: Full Campaign Production
Custom deliverables tied to campaign strategy. Includes concept development, scripting, production coordination, and full post-production. Scoped individually per project.
This kind of packaging does several things simultaneously. It makes pricing discussions easier. It sets client expectations clearly. It makes capacity planning more predictable. And it allows you to standardize enough of the production workflow that you can outsource execution reliably.
The key to service line expansion without chaos is that the client-facing packaging should always be simpler than the operational reality behind it. You are not simplifying the work. You are creating clear frameworks so the work can be executed consistently, regardless of which production resource handles it.
Key Takeaways
-
- Building an in-house video team is expensive and inflexible for most agencies. The fixed cost structure rarely aligns with the variable nature of client video demand
- There are four scalable models: freelance networks, white-label production partners, hybrid internal-external teams, and template-driven production systems. Most growing agencies use a combination
- A reliable production workflow is the foundation of everything. Without documented intake, pre-production, review, and delivery processes, quality degrades at volume regardless of how talented your team is
- Capacity planning should be proactive. Map available production hours against your editorial calendar every month so overcommitment becomes visible before it becomes a missed deadline
- Maintaining quality at scale requires a dedicated quality control layer that is separate from production execution
- Packaging video as a deliberate service line — with tiered offerings, defined deliverables, and transparent timelines — makes both sales and operations significantly more predictable
- The agencies that scale video production sustainably are not the ones with the biggest teams. They are the ones with the most disciplined processes
Frequently Asked Questions
1. What is the most cost-effective way to scale video production for a small agency?
For smaller agencies just beginning to scale video output, a curated freelance network combined with a template-driven production system offers the best balance of cost control and flexibility. Start by identifying two or three reliable freelance video editors and a motion designer who understand your typical client work. Build basic branded templates for your most common deliverables — social cuts, simple explainers, product videos. This setup allows you to take on significantly more video work without fixed salary overhead, and it gives you a foundation to build on as demand grows.
2. How do white-label video production partnerships work in practice?
A white-label video production partner operates as an invisible extension of your agency. You bring them a client brief, they produce the video, and all deliverables are supplied without their branding. Your agency presents the work as its own. In practice, the best white-label relationships involve a dedicated point of contact at the production company, clear contractual agreements on turnaround times and revision rounds, and an established quality review process on your end before anything goes to the client. The margins are lower than producing in-house or through freelancers, but the reliability and bandwidth are substantially higher.
3. How many videos can a typical agency realistically produce per month without in-house staff?
This depends entirely on the production model in place and the complexity of the deliverables. An agency with a well-structured freelance network and template system can realistically produce 30–60 short-form social videos per month. A hybrid model with a white-label partner on top of that can extend capacity further. The ceiling is not really about volume — it is about having the workflow infrastructure to brief, manage, review, and deliver at that volume without quality deteriorating. Agencies that hit a ceiling usually find the bottleneck in creative direction and quality review rather than production execution itself.
4. What should a video production brief include to ensure consistent quality from outsourced teams?
A strong video production brief should cover the target platform and aspect ratios required, the video’s primary objective and call to action, the target audience and their content context, key messages in priority order, brand guidelines with specific reference to color, typography, and tone, examples of videos in the right style direction, technical specifications for final delivery, and a clear revision policy. The brief is your single most powerful quality control tool when working with outsourced production resources. The more specific and visual the brief, the fewer revision rounds you will need.
5. How should agencies price video production when outsourcing execution?
Pricing video work when execution is outsourced should account for the direct cost of production (freelancer fees or partner charges), a creative direction and project management markup (typically 20–35% depending on your agency’s involvement), and your strategic value if the video work is tied to a broader campaign. Many agencies underprice video because they think of it as a pass-through cost rather than a strategic deliverable. If your agency is writing scripts, managing production timelines, ensuring brand alignment, and delivering on a client’s marketing objective through video, that is a significant service worth pricing accordingly. Industry benchmarks from resources like the Content Marketing Institute can provide useful market context.
6. What project management tools work best for managing outsourced video production at scale?
Tools like Asana, Monday.com, and ClickUp are widely used for managing multi-stakeholder video production workflows. Frame.io has become particularly popular for video-specific review and approval workflows, allowing clients and internal reviewers to leave time-coded feedback directly on the video file — which dramatically reduces the confusion that comes from written feedback on video projects. For agencies managing large volumes of assets, combining a project management tool with a digital asset management system creates a complete operational stack. The specific tools matter less than having a single source of truth for every project’s status, files, and communication.
7. At what stage of agency growth does it make sense to hire in-house video staff?
Hiring in-house video staff makes financial sense when your agency has sustained, predictable video revenue that consistently maxes out your outsourced production capacity. A rough benchmark: if video production is generating more than $40,000–$60,000 per month in recurring revenue and your current outsourced model is struggling to keep pace with quality and volume simultaneously, that is the inflection point where a full-time hire begins to make economic sense. Even then, most agencies benefit from hiring a creative director or producer role first — someone who manages the outsourced execution infrastructure rather than replaces it entirely.
Conclusion
Scaling video production as a marketing agency is not fundamentally a talent problem. It is a systems and strategy problem. The agencies growing their video output profitably are not necessarily the ones with the best editors on staff. They are the ones who built reliable models for sourcing production capacity, documented workflows that hold up under volume, and packaged video as a genuine service line rather than a reactive add-on.
Whether you are a boutique content marketing agency dipping into video for the first time or a mid-size digital marketing agency trying to meet growing demand from enterprise clients, the core principles are the same. Build the process before you build the team. Match capacity to demand proactively. Maintain quality control as an independent function from execution.
Done right, video is not just an add-on service — it is one of the most powerful ways to deepen client relationships, increase contract values, and differentiate your agency in an increasingly competitive market.
For further reading on video marketing trends and performance benchmarks, the Think with Google resource library offers regularly updated data on how video consumption patterns are shifting across platforms and verticals.
White Label Video Editing: The Complete Guide for Marketing Agencies
White Label Video Editing: The Complete Guide for Marketing Agencies
Estimated reading time: 15 minutes
Introduction
Every marketing agency hits the same wall eventually. A client asks for video content — a brand explainer, a social reel, a product demo — and the agency faces an uncomfortable fork in the road: hire an in-house editor, build an entirely new production capability from scratch, or turn the work away entirely.
None of those options are particularly good.
Hiring full-time video editors is expensive and operationally heavy. Turning away work leaves revenue on the table and sends clients toward competitors. And building a genuine in-house video department takes months of recruiting, equipment investment, and workflow development that most agencies simply cannot justify.
That is where white label video editing changes the equation entirely.
More agencies are quietly building profitable video service lines by partnering with specialized sub-contractors who do all the heavy lifting behind the scenes — editing, color grading, motion graphics, captioning — while the agency presents the finished product under its own brand. The client never knows, nor do they need to. What they see is polished, professional video delivered on time from their trusted agency partner.
This guide is built for agency owners, operations leads, and service directors who want a clear-eyed, practical look at how white label video production works, what it actually costs, how to structure client relationships properly, and how to build genuine scalability from a model that has already transformed hundreds of agencies worldwide.
What Is White Label Video Editing?
White label video editing is a business arrangement where a marketing or creative agency outsources video editing work to a third-party production partner, who delivers finished video assets without any branding or attribution. The agency then presents those deliverables to the end client under its own brand name as if it had produced the work internally.
The concept is not new. White labeling has been a cornerstone of the business world for decades — from supermarket-brand products to white label SaaS platforms. The logic is simple: you sell a service under your brand, and a specialist fulfills it behind the scenes.
In the context of video, this typically covers:
- Social media video editing (Reels, TikTok, YouTube Shorts)
- Long-form YouTube video editing and production
- Corporate explainer videos
- Product demo and e-commerce videos
- Client testimonial and case study videos
- Motion graphics and animated assets
- Event recaps and documentary-style brand films
- Podcast video editing with captions and chapter cuts
The key distinction between white label video editing and simple outsourcing is the branding layer. A white label partner operates as an invisible extension of your team. All files are delivered in your agency’s naming conventions, all communication flows through your project management systems, and the end client’s experience is seamless — they are working with you, full stop.
Why Agencies Are Outsourcing Video Production Now More Than Ever
The demand for video content has not plateaued — it has accelerated to a point where agencies that cannot deliver it competently are losing ground fast.
According to Wyzowl’s State of Video Marketing report, 91% of businesses used video as a marketing tool in 2024, and 88% of marketers reported a positive ROI from video. Those numbers represent a generational shift in how brands communicate, and clients now expect their agencies to own video as a core competency — not a nice-to-have add-on.
At the same time, building an in-house video editing team is genuinely difficult. Skilled editors command salaries between $55,000 and $90,000 annually depending on market and experience level. When you factor in software licenses, storage infrastructure, and the management overhead of running a production team, the economics rarely work for agencies under $3 million in annual revenue.
White label video production solves this tension by letting agencies:
- Offer video services immediately without infrastructure investment
- Scale production volume up or down based on actual client demand
- Access specialist skills — motion graphics, color science, audio mixing — that would require multiple hires
- Protect margins by marking up white label rates without carrying fixed costs
- Focus internal resources on strategy, client relationships, and growth
This is not a shortcut — it is an intelligent allocation of operational resources. The agencies growing fastest in the video space are often the ones who recognized early that their competitive advantage lies in client management and creative strategy, not in owning video rendering hardware.
How the White Label Video Editing Model Actually Works
Understanding the mechanics is essential before you commit to a partnership. The workflow varies slightly from partner to partner, but the broad structure looks like this:
Step 1: Agency Wins the Client Project
Your agency sells a video service package to the client — let’s say a ten-video social media content series per month. The client provides raw footage, brand guidelines, talking points, and approved scripts. All of this lives in your client-facing relationship.
Step 2: Agency Briefs the White Label Partner
You take the client’s brief and translate it into a production brief for your editing partner. This includes brand guidelines, tone references, revision protocols, file format requirements, and deadlines. Most established white label partners have standardized intake templates to make this fast.
Step 3: Production Happens Behind the Scenes
The white label editor or team works on the footage. Depending on the scope, this may involve rough cut assembly, color grading, audio normalization, motion graphics, subtitle generation, and final export. The client has no visibility into this stage.
Step 4: Review and Revision
The partner delivers a draft to your internal team. You review it against the client brief and either approve it or send revision notes back through your internal channel — never directly between the client and the sub-contractor.
Step 5: Agency Delivers to Client
You present the finished video under your agency’s branding. Files are named per your conventions, delivered through your preferred platform (Frame.io, Google Drive, a client portal), and accompanied by your agency’s communication.
Step 6: Client Feedback Loop
If the client requests revisions, those notes travel back through you to the partner. The partner revises and returns. From the client’s perspective, your agency is the only point of contact.
| Stage | Who Owns It | Client Visibility |
|---|---|---|
| Client briefing | Agency | Full |
| Production brief | Agency | None |
| Video editing and production | White label partner | None |
| Internal QA and review | Agency | None |
| Delivery and communication | Agency | Full |
| Revision management | Agency (relayed to partner) | Partial (brief notes only) |
What to Look for in a White Label Video Editing Partner
Not every video editing service that claims to offer white label capabilities is actually built for agency workflows. Choosing the wrong partner creates exactly the kind of chaos — missed deadlines, inconsistent quality, communication breakdowns — that white labeling is supposed to prevent.
Here is what genuinely matters during evaluation:
Dedicated Account Management
The best white label partners assign you a dedicated account manager, not a rotating support queue. When revisions come in at 5:00 PM before a client deadline, you need someone accountable on the other side of the phone.
Proven Agency Experience
Ask specifically whether the partner has worked with agencies before, not just direct-to-business clients. Agency workflows — with layered approval chains, multiple brand voices, and volume bursts — require a different operational mindset than handling single-client projects.
Clear NDA and Confidentiality Framework
Any credible partner should sign a comprehensive NDA before you share a single frame of client footage. More on this in the next section.
Defined Turnaround Times and SLAs
Vague promises like “we deliver fast” are meaningless. You want documented turnaround commitments — typically 24 to 72 hours for social cuts, 3 to 5 business days for longer-form edits — with clarity on what happens when those are missed.
Revision Policy Transparency
Know exactly how many revision rounds are included, what constitutes a revision versus a new scope request, and what additional revision fees look like.
Scalability Capacity
Can the partner handle five projects per month and fifty? Ask directly about team size, production capacity, and how they manage overflow during high-demand periods.
Portfolio Quality and Style Range
Request samples across multiple styles — corporate, social-first, documentary, promotional. A partner who only excels at one visual register will limit your ability to serve diverse clients.
Software and File Format Compatibility
Confirm they work in industry-standard tools (Adobe Premiere Pro, DaVinci Resolve, After Effects) and can deliver in every format your clients require — from 4K ProRes masters to platform-optimized H.264 exports.
Pricing, Markup, and Building a Profitable Service Line
This is where many agencies leave money on the table — or worse, under-price their video services out of uncertainty about what the work should cost.
White label video editing rates vary significantly based on complexity, turnaround, and the partner’s model. As a rough benchmark:
| Video Type | Typical White Label Cost | Suggested Agency Markup | Client-Facing Price Range |
|---|---|---|---|
| 60-second social cut (raw footage provided) | $75 – $150 | 100–150% | $175 – $375 |
| 5–10 minute YouTube video | $200 – $400 | 75–120% | $375 – $880 |
| Corporate explainer (with motion graphics) | $400 – $900 | 60–100% | $650 – $1,800 |
| Monthly retainer (10–15 social videos) | $800 – $1,800 | 80–120% | $1,500 – $4,000 |
| Brand film (2–5 minutes, full post-production) | $1,200 – $3,500 | 50–80% | $1,800 – $6,300 |
These ranges are directional, not absolute. Your market positioning, client industry, and service bundling all affect what you can charge.
A few principles that protect your margins:
- Bundle video into retainer packages rather than selling it à la carte Clients who pay a monthly retainer for social media management are far easier to upsell on video add-ons than new clients who come in specifically price-shopping video
- Charge for project management, not just production Your agency’s coordination, quality control, client communication, and strategic oversight represent real value. Build that into your pricing explicitly rather than treating it as a cost center
- Define deliverable ownership upfront Clients should understand what files they receive, in what formats, and under what terms. This protects both your revenue model and your relationship with the white label partner
- Do not race to the bottom on pricing Cheap video work attracts clients who micromanage, demand endless revisions, and devalue the relationship. Price confidently and attract clients who understand the value of professional production
NDAs, Branding Guidelines, and Client Confidentiality
Legal clarity is not optional in white label relationships — it is the foundation the entire model depends on.
Non-Disclosure Agreements
Before any footage, scripts, brand assets, or strategic information passes to a white label partner, an NDA must be in place. The agreement should cover:
- Confidentiality of client identity and all associated materials
- Prohibition on sub-contracting work to fourth parties without written consent
- Data handling and storage protocols for sensitive footage
- Duration of confidentiality obligations (perpetual or time-limited)
- Consequences of breach
Many agencies use a single master NDA for all white label relationships rather than negotiating bespoke agreements each time. If you need a starting framework, the SCORE Association provides useful contract templates for small business partnerships.
Branding Guidelines Management
Every client you serve has brand guidelines — some formal, some informal, but always present. Your job is to translate those guidelines clearly into your production brief so the white label partner can apply them accurately without ever speaking to the client directly.
A strong branding brief should include:
- Color palette (hex codes, not just color names)
- Typography specifications
- Logo usage rules and exclusion zones
- Tone-of-voice notes for any on-screen text or captions
- Music preferences and restrictions
- Competitor brands and styles to avoid
Deliverable Ownership
Be absolutely explicit in your contract with the white label partner about who owns the final deliverables. In most agency arrangements, the agency — and by extension the end client — owns all final output. The editing partner retains no rights to use, display, or distribute the work. Get this in writing.
Scaling Your Agency With White Label Video Production
The operational promise of white label video editing is scalability — the ability to grow your video service line without a proportional increase in fixed costs. But scalability does not happen automatically. It requires deliberate structure.
Build a Repeatable Intake System
The more standardized your briefing process, the faster you can onboard new projects without recreating the wheel. Build intake templates that capture everything your white label partner needs: footage links, brand assets, reference videos, format specs, and deadline requirements. When this process is airtight, you can handle volume surges without internal chaos.
Maintain a Vendor Roster, Not Just a Single Partner
Relying on a single white label partner creates a single point of failure. Build relationships with two or three partners who specialize in different areas — one strong in social-first content, another with motion graphics expertise, a third with documentary or corporate production experience. This gives you flexibility and redundancy.
Use Project Management Tools That Support Multi-Vendor Workflows
Platforms like Asana, Monday.com, or ClickUp allow you to manage internal and external production workflows in the same environment without exposing client-side information to your white label partners unnecessarily.
Create Quality Benchmarks Early
Document what “good” looks like for each client before you start delivering. Capture reference videos, approved styles, and specific quality notes in a shared library that both your internal team and your white label partner can reference. This dramatically reduces revision cycles as volume grows.
Review Partner Performance Quarterly
Scalability requires reliability. Build a formal quarterly review process for your white label partners that covers on-time delivery rate, revision frequency, communication responsiveness, and output quality. Use this data to allocate more work to high performers and address problems before they affect client relationships.
Common Mistakes Agencies Make When Outsourcing Video
Experience reveals patterns, and the agencies that struggle with white label video production tend to make the same handful of avoidable errors.
Choosing a Partner on Price Alone
The cheapest editing service is almost never the right answer. Low-cost partners frequently mean longer revision cycles, inconsistent quality, and inadequate account management — all of which cost you more in time and client satisfaction than the money you saved upfront.
Failing to Brief Thoroughly
Incomplete production briefs are the leading cause of revision spirals. If your partner does not understand the client’s brand voice, target platform, or visual references, they will make assumptions — and those assumptions will require corrections that eat into your margins.
Letting the Partner Communicate Directly With Clients
Even once, allowing a white label partner to email or call a client directly undermines the entire model and exposes the relationship. Enforce strict communication boundaries from day one.
Not Factoring QA Time Into Project Timelines
Every white label deliverable requires internal review before it reaches the client. Many agencies forget to build this time buffer into their project schedules, creating last-minute rushes that undermine quality.
Treating Video as a Standalone Service
The agencies that build the most profitable video lines integrate video strategically into broader content, SEO, or social media packages. Video delivered in isolation rarely generates the kind of client results that justify ongoing investment. Connect the video work to measurable outcomes — traffic, engagement, conversion — and you build far stickier client relationships.
Key Takeaways
-
- White label video editing allows agencies to deliver professional video services under their own brand without in-house production infrastructure
- The model works best when agencies invest in thorough briefing processes, strong vendor relationships, and clear legal frameworks including NDAs and deliverable ownership clauses
- Markup pricing between 60% and 150% is typical and sustainable when video is bundled into retainer-based service packages
- Scalability requires more than one white label partner — build a vendor roster with complementary specializations
- Quality control lives with your agency. Every deliverable should go through an internal review before it reaches the client
- Client confidentiality is non-negotiable. Enforce strict communication boundaries and ensure all white label partners are under NDA before any project materials are shared
- The agencies winning in video right now are those who position themselves as strategic partners, not production vendors — using video as a tool to drive measurable client outcomes
Frequently Asked Questions
1. Is white label video editing legal?
Yes, entirely. White labeling is a legally established and widely practiced business model across virtually every industry. The agency-client contract governs the service delivery, and the agency-partner contract governs the production relationship. As long as both agreements are properly structured — covering deliverable ownership, confidentiality, and scope — there are no legal issues with this model. What matters is that your client contract accurately reflects what services you are responsible for delivering, without misrepresenting how those services are produced.
2. How do I find reliable white label video editing partners?
Start with referrals from other agency owners in your network. Industry communities on Slack, LinkedIn groups for agency operators, and forums like the Agency Collective are good places to ask for direct recommendations. Beyond referrals, evaluate potential partners rigorously: request portfolios, ask for agency-specific references, test with a small paid trial project before committing to a volume agreement, and scrutinize their communication responsiveness before any contract is signed.
3. What should be included in a white label video editing contract?
A strong contract should cover: scope of services and deliverable specifications, pricing structure and payment terms, turnaround time commitments and SLA terms, revision policy (rounds included, process for additional revisions), NDA and confidentiality obligations, deliverable ownership (confirming all rights transfer to the agency on payment), prohibition on the partner communicating directly with end clients, sub-contracting restrictions, and termination clauses with adequate notice periods.
4. How do I price white label video services to clients without knowing exactly what a project will cost?
Build pricing buffers into your rates. When scoping a project, estimate the likely white label cost, add your markup, and then add a contingency of 10–15% to account for revision complexity or scope creep. For ongoing retainer clients, negotiate fixed monthly rates with the white label partner in advance so your cost base is predictable. Avoid per-minute pricing models with clients, as these create incentives for scope inflation — charge by deliverable type or package instead.
5. Will my clients find out I use a white label video partner?
Only if you tell them or if your operational boundaries break down. Most clients do not ask about the internal production mechanics of their agency’s work, just as they do not ask which developers built their agency’s website or which copywriting tools the team uses. Maintain strict communication protocols — all client contact goes through your agency — and ensure all deliverables are presented under your branding without any trace of the partner’s identity. This is standard professional practice.
6. How is white label video editing different from a freelance video editor?
Freelancers are individuals who typically work across multiple clients and may not have standardized agency workflow experience, volume capacity, or dedicated account management. A white label video editing partner is usually a structured service provider — often a team — specifically built to serve agencies at scale, with defined SLAs, account management, intake systems, and the operational capacity to handle multiple concurrent projects. The key difference is reliability and structure. A great freelancer can be a valuable resource, but they rarely offer the scalability and process consistency that a white label partner model provides.
7. Can I offer white label video editing as part of a broader content marketing package?
Absolutely — and this is the most effective way to deploy it. Video performs significantly better when it is integrated into a broader content strategy that includes SEO, social distribution, and conversion optimization. Agencies that bundle video into monthly content retainers typically see higher client lifetime value and lower churn, because the video is generating measurable results that justify continued investment. According to HubSpot’s Marketing Statistics, video content drives higher engagement rates across virtually every digital channel compared to static formats — making it a natural anchor for integrated marketing packages.
Final Thoughts
White label video editing is not a workaround — it is a strategic model that allows agencies to compete at the highest level without overextending their operational capacity. The brands winning in digital marketing right now are investing heavily in video, and the agencies serving them need to match that ambition.
The framework is not complicated, but it does require discipline: choose partners carefully, brief them thoroughly, protect your client relationships with proper legal structures, and build the kind of quality control process that lets you stand behind every deliverable with confidence.
When this model is executed well, your clients experience seamless, professional video production from an agency they trust. Your agency captures meaningful new revenue with healthy margins. And your white label partner gets steady, well-organized work from a client who respects the process.
That is what a well-run white label video operation looks like in practice — not a shortcut, but a smarter way to build.
This guide was written for agency owners and operations leaders navigating the practicalities of expanding into video services. For related reading on building scalable agency service lines, explore resources from the Content Marketing Institute and Agency Management Institute.
Batch Filming: How to Film a Month of YouTube Content in One Day
Batch Filming: How to Film a Month of YouTube Content in One Day
Estimated reading time: 15 minutes
Why Batch Filming Is the Strategy Serious Creators Swear By
Most YouTube creators share a familiar breaking point. They upload consistently for a few months, grow a little audience, feel the momentum building — and then life happens. A busy week at work, a family obligation, a bad cold, and suddenly the upload schedule falls apart. Subscribers notice. The algorithm notices. And climbing back from that inconsistency is harder than starting fresh.
The creators who never seem to miss an upload? They are almost never filming day-by-day. They are batching.
Batch filming YouTube content — meaning you plan, shoot, and organize multiple videos in a single dedicated session — is how solo creators compete with media teams. It is how creators with full-time jobs still post twice a week. It is how burnout gets replaced with breathing room.
This guide walks through the complete process: preparation, scripting, studio setup, the filming day itself, B-roll strategy, and what happens after the camera turns off. Whether you are a newer creator wanting to build good habits or an established one who has been grinding through one-video-at-a-time chaos, this is the system worth adopting.
What Is Batch Filming and Why It Works
Batch filming — sometimes called content batching or bulk filming — means consolidating your video production into concentrated sessions rather than spreading it across individual days. Instead of filming one video on Tuesday, another next Monday, and scrambling for a third the following weekend, you carve out one full day (or two half-days) and record everything you need for the next three to five weeks.
The logic behind this is simple and borrowed directly from manufacturing: setup costs time. Every time you prep your camera, arrange your lighting, adjust your backdrop, test your audio, and mentally switch into “on camera” mode, you are spending time and cognitive energy that does not contribute directly to your content. When you batch, you pay that setup cost once and then extract maximum output from it.
According to research on deep work and cognitive switching costs published in Harvard Business Review, switching between tasks — even mentally — reduces productivity by as much as 40%. Creators who film one video at a time are constantly switching contexts: back to normal life, then into creator mode, then back out again. Batching eliminates that waste.
The other reason batch recording YouTube videos works so well is psychological safety. When you have four finished videos sitting in your editing queue, you stop publishing from a place of panic. You can take a week off, travel, get sick, or just rest without threatening your channel’s momentum. That calm translates into better content decisions, more creative risk-taking, and a more sustainable creative career.
The Week Before: How to Prepare Like a Production Studio
The filming day is not where batch filming succeeds or fails. Preparation is. A chaotic, underprepared filming day produces chaotic content — blurry concepts, stilted delivery, and hours of unusable footage.
Professional video production companies spend far more time in pre-production than they do on set. Apply the same principle on a solo scale.
Roughly one week before your filming day:
Finalize your topic list. Decide which videos you are shooting. Do not leave this for the morning of. Your topics should already align with your content calendar and be validated through keyword research or audience feedback. Aim to have at least four to six topics ready so you have options if one is not working on the day.
Write or outline every script. More on script batching below, but no script should be written the morning before filming. Ideally, all scripting is done two to three days before the shoot.
Prepare your shot list. This is your blueprint for what gets filmed and in what order. The shot list should include your talking head segments, planned B-roll, any product demonstrations, and any graphics or text overlays you plan to add in post.
Order or gather any props, products, or visual aids. Nothing derails a filming day faster than realizing the thing you planned to demonstrate is still in your Amazon cart.
Check your gear. Charge every battery you own. Format your memory cards. Test your microphone. If you use a teleprompter app, make sure your scripts are loaded and the app is updated. Discover your dead battery on Thursday, not on Saturday morning.
Clean and arrange your set. Whether you film in a home office, a spare bedroom, or a dedicated studio corner, prepare the space in advance. This means your backdrop, your desk arrangement, your plants or shelves used for visual depth — everything should be camera-ready before your filming day begins.
Script Batching: Writing Multiple Scripts Without Burning Out
Script batching deserves its own spotlight because writing four to six scripts in a short window can feel overwhelming if approached incorrectly.
The key is to use the same mental state across all your scripts. Creative momentum is real. Once your brain is in “writing mode,” transitioning between topics costs far less energy than stopping, doing something else, and coming back. So just as you are batching your filming, batch your writing.
Set aside a dedicated two to three-hour writing session. Write your intro for all six videos before going deeper on any of them. Then write your main content sections. Then your outros. This way, you maintain a consistent voice and energy across all scripts rather than noticing that your Monday-morning draft sounds completely different from your Friday-afternoon draft.
For creators who prefer speaking naturally rather than following a word-for-word script, detailed outlines work just as well. Each outline should include:
- A strong hook (the first 15 to 30 seconds that determines watch time)
- Three to five main content beats with supporting points
- A specific call to action
- Any transition lines or key phrases you want to land precisely
If you use a teleprompter, batch-load all your scripts before filming day so you are not stopping to retype during your shoot. Apps like Teleprompter Premium or PromptSmart Pro let you organize multiple scripts into folders for exactly this reason.
One practical writing trick: group your scripts by topic category. If three of your six videos are tangentially related — say, they all cover YouTube monetization from different angles — write those three in sequence. The research you do for the first script carries into the second and third, cutting your total prep time significantly.
Building Your Shot List and Content Calendar
A shot list is not optional for batch filming. Without one, you will finish a filming day, sit down to edit, and discover you missed an essential segment for two different videos.
Your shot list should be organized by video, not by shot type — unless you are grouping B-roll shoots at the end of the day, which is a legitimate strategy covered later.
Here is a simple structure that works:
| Video Title | Talking Head Segments | B-Roll Needed | Props/Screen Recordings | Special Notes |
|---|---|---|---|---|
| Video 1: Topic A | Intro, 3 main sections, outro | Laptop typing, scrolling phone | Analytics screenshot | Change backdrop color |
| Video 2: Topic B | Intro, 4 main sections, CTA | Notebook writing, reading | Product on desk | Outfit change |
| Video 3: Topic C | Full script, no major segments | None required | Whiteboard walkthrough | No teleprompter |
| Video 4: Topic D | Hook only, rest is voiceover | Stock footage supplemented | PDF shown on screen | Film intro last |
Your content calendar works in tandem with your shot list. It answers a different question: not “what am I filming today?” but “when does each video go live?” Mapping your filming day against your publishing schedule helps you prioritize. If Video 3 is due to publish in six days and Video 6 is due in four weeks, you should film and prioritize editing Video 3 first, even if it is the most demanding shoot.
Tools like Notion, Airtable, or even a well-structured Google Sheet work well for content calendars. The specifics matter less than the habit. Buffer’s content planning research consistently shows that creators with documented content calendars publish 60% more consistently than those planning ad hoc.
Your Studio Setup for a Full Filming Day
Your environment on filming day is not just a background — it is a production tool. An optimized setup allows you to move faster, feel more professional, and maintain visual consistency across all your videos.
Lighting setup: Consistent lighting is critical when filming multiple videos in one session. Natural light is beautiful but unreliable — it changes over six to eight hours, so any footage filmed at 9 a.m. will look distinctly different from footage filmed at 3 p.m. For batch filming, controlled artificial lighting is your friend. A standard three-point lighting setup (key light, fill light, hair or rim light) gives you a polished, consistent look across every video. LED panel lights like those from Elgato or Godox are popular among YouTube creators because they allow easy color temperature and brightness adjustments between shots.
Camera settings: Lock in your camera settings before you start and do not touch them unless absolutely necessary. Fix your aperture, shutter speed, ISO, white balance, and frame rate at the beginning of the day. If your lighting setup is controlled, these should not need to change. Write your settings down or photograph your camera’s display so you can restore them quickly if something shifts.
Audio: Test your microphone at the start of the day and record a short test clip. Listen back through headphones. Do not trust your room acoustics have not changed — if you moved furniture to set up your backdrop, you may have inadvertently shifted your acoustic environment. A quick test saves you from discovering hours of bad audio during editing.
Teleprompter positioning: If you use a teleprompter, dial in the font size and scroll speed on a throwaway test clip first. A teleprompter that is slightly off-axis or scrolling too fast creates the glazed, unfocused eye look that instantly reads as scripted on camera.
Multiple backdrop options: If your videos have slightly different visual identities — a tutorial series versus a personal vlog-style video — consider having two backdrop arrangements ready. This might mean one half of the room has your standard bookshelf setup and the other side has a clean, minimalist look. Switching between them for different videos costs minutes, not hours.
The Day-Of Filming Workflow: Hour by Hour
Structure your filming day deliberately. Without a clear sequence, you will waste the middle hours deciding what to do next.
Here is a workflow template that scales well for a solo creator filming four to six videos:
| Time Block | Activity |
|---|---|
| 8:00 – 8:30 a.m. | Final gear check, test clip, audio test, teleprompter loaded |
| 8:30 – 9:00 a.m. | Quick script review for Videos 1 and 2 |
| 9:00 – 10:30 a.m. | Film Videos 1 and 2 talking head segments |
| 10:30 – 11:00 a.m. | Short break, review footage, outfit change if needed |
| 11:00 a.m. – 12:30 p.m. | Film Videos 3 and 4 talking head segments |
| 12:30 – 1:15 p.m. | Lunch break (genuine rest, step away from the space) |
| 1:15 – 2:00 p.m. | Film Videos 5 and 6 talking head segments |
| 2:00 – 3:30 p.m. | B-roll batching session (all videos) |
| 3:30 – 4:00 p.m. | Organize and label all footage, import to editing drive |
| 4:00 p.m. onward | Done. Do not edit today. |
The lunch break is not optional. Mental fatigue is real, and your on-camera energy in the afternoon should match your morning energy. Creators who push through lunch often notice their delivery in later videos becoming flat, rushed, or stiff — which means more retakes and less usable footage.
Film your talking head segments first while your energy is highest. B-roll is less mentally demanding and works well in the afternoon when your verbal delivery has started to tire.
Outfit Changes, B-Roll Batching, and Continuity Tricks
One of the most common anxieties about batch filming is visual continuity. If viewers watch four videos published across a month, will they notice you are wearing the same shirt in all of them?
Yes — and it matters more on some channels than others. Here is how to handle it cleanly.
Outfit changes: Plan two to three distinct outfits for your filming day and rotate them between videos. Keep each outfit consistent within a single video, obviously, but changing your top and maybe swapping your backdrop arrangement between videos creates enough visual variation that most viewers will never suspect they were filmed the same day. Document which outfit corresponds to which video in your shot list.
B-roll batching: Rather than interrupting each video shoot to capture B-roll, film all your talking head content first and then dedicate a separate block of time — usually late afternoon — to capturing all the B-roll for every video at once. Your shot list should clearly denote what B-roll each video requires. Common B-roll that applies across multiple videos — typing on a laptop, using your phone, writing in a notebook — can often be filmed once and reused across several edits with minor variations.
Continuity tricks:
- Keep your key light position and intensity consistent across all talking head segments so your face is lit identically across videos
- Use the same primary backdrop for at least half your videos to anchor your channel’s visual identity
- Avoid wearing a shirt with a prominent graphic or logo if you plan to use it across multiple videos — it becomes a continuity tell
Building Your Editing Queue After the Shoot
The work does not stop when the camera does. How you organize your footage immediately after filming determines how smoothly editing goes in the days that follow.
On filming day, before you dismantle anything:
Label every clip. Do not leave your camera’s default naming system in place. Rename files immediately: “Video1-Intro,” “Video1-Section2,” “Video3-Hook-Take3.” This takes fifteen minutes and saves hours of confused scrolling in your editing software.
Back up everything. Before you touch your memory card for anything else, copy all footage to your primary editing drive and a secondary backup. Memory cards fail. External drives fail. Cloud backup through a service like Backblaze adds another safety layer for large video files.
Build your editing queue. Create a simple list — it can live in Notion, a notes app, or a whiteboard — ranking your videos by publish date. The first video due goes to the top of the queue. You or your editor (if you have one) works through the list in order.
Separating filming and editing across different days is not laziness — it is strategy. Coming to your footage fresh, often 24 to 48 hours later, allows you to make sharper editorial decisions. You will more ruthlessly cut sections that do not work, spot audio issues more clearly, and generally produce a tighter final cut.
Common Mistakes That Derail Batch Filming Days
Even experienced creators run into problems. These are the most frequent ones worth avoiding:
Overloading the schedule. Six videos in one day is ambitious but manageable for most solo creators. Eight or ten is usually not. Overcommitting leads to rushing, which leads to lower quality footage across the board.
Skipping the script review. Reading through your scripts the morning of the shoot — even just a ten-minute skim — reactivates your familiarity with the material and reduces stumbles and retakes significantly.
Changing your lighting mid-day without documenting the change. If you adjust your key light for a specific video, write down the new settings. You will thank yourself when you try to match footage in editing.
Forgetting to capture thumbnail footage. Your thumbnail is often the most important visual asset for a video’s performance. Add a “thumbnail shot” line to your shot list for each video and capture it specifically — a clean, expressive still that works at small sizes.
Not reviewing any footage until editing day. Do a quick ten-second scrub of your first clip before filming your second video. Catching a focus issue or an audio problem early saves you from discovering it across six videos worth of footage.
Key Takeaways
-
- Batch filming YouTube content reduces the cognitive overhead of repeated setup, allowing you to produce more content with less total time investment
- The filming day is only as strong as the preparation that precedes it — scripts, shot lists, and gear checks all happen before the camera turns on
- Script batching works best when you write in a grouped, sequential flow rather than one complete script at a time
- A controlled artificial lighting setup is essential for visual consistency across a full day of filming
- Separating your talking head segments from your B-roll batching optimizes energy usage throughout the day
- An organized editing queue — footage labeled, backed up, and ranked by publish date — is what converts a productive filming day into a functional content pipeline
- Outfit changes and backdrop variation prevent viewers from noticing that multiple videos were filmed in the same session
FAQs
Q: How many videos can a solo creator realistically film in one day?
For most creators, four to six videos is the sweet spot. This assumes an average video length of seven to twelve minutes and a well-prepared script or outline for each. Shorter, more structured videos — tutorials, listicles, quick tips — can push that number toward eight. Longer-form, conversational content is harder to sustain across a full day. The guiding principle should be quality over volume: six great videos are far more valuable than ten rushed ones.
Q: Do I need a professional studio to batch film YouTube videos?
Not at all. A consistent, controlled home setup — even a spare corner of a room with a clean backdrop, a ring light or two LED panels, and a decent external microphone — is entirely sufficient. What matters more than equipment cost is setup consistency. The same camera position, the same lighting, the same focal length across all your talking head segments produces professional-looking results regardless of whether you are filming in a purpose-built studio or your bedroom.
Q: How do I stay energetic and natural on camera for six or more hours?
Pacing is everything. Build in genuine breaks — not scrolling your phone between takes, but actually stepping away from the filming space. Take a real lunch break. Hydrate consistently. Some creators find it helpful to do light physical movement before filming and between video blocks to maintain energy. Doing your most demanding or complex videos first, when your delivery is sharpest, and reserving simpler or more casual content for the afternoon also helps manage energy strategically throughout the day.
Q: Should I edit on the same day I film, or wait?
Wait. This is one of the most consistent recommendations across experienced creators and professional video editors. Coming to your footage fresh — ideally 24 to 48 hours later — dramatically improves the quality of your editorial decisions. You will spot problems you missed, cut more ruthlessly, and produce a tighter video. The only exception is if you have an extremely tight deadline on a specific video, in which case editing that one video that evening is acceptable, but it should be the exception, not the standard workflow.
Q: How do I plan my content calendar around batch filming days?
Work backward from your publishing schedule. If you publish twice a week, you need roughly eight videos per month. Plan one filming day every three to four weeks and target four to six videos per session. Schedule filming days during weeks when you have fewer competing commitments — not the week before a major deadline or during a travel period. Some creators prefer two lighter filming sessions per month (two to three videos each) over one intensive day, and both approaches are valid depending on your lifestyle and energy patterns.
Q: What is topic batching and how does it improve video quality?
Topic batching means grouping your videos by subject area for your scripting and research phase, not necessarily for filming order. For example, if three of your six planned videos are related to YouTube analytics and three are about equipment, write all three analytics scripts together before moving to the equipment scripts. This approach allows you to stay in a subject matter mindset longer, cross-reference ideas between related videos naturally, and often surface insights for one script while researching another. The result is more cohesive, better-researched content with less redundancy.
Q: What tools and apps are most useful for managing a batch filming workflow?
The following tools are widely used among creators who batch film regularly:
-
-
- Notion or Airtable — for content calendars, shot lists, and script organization
- Teleprompter Premium or PromptSmart Pro — for loading and scrolling multiple scripts during filming
- Google Drive or Dropbox — for script collaboration and pre-shoot organization
- Frame.io — for sharing footage with editors or collaborators after filming
- Backblaze — for automated cloud backup of large video files
- DaVinci Resolve or Adobe Premiere Pro — for editing, both of which support multi-project management useful for an editing queue
-
No single tool is mandatory. What matters is that your system is consistent, accessible, and does not create more friction than it removes.
Conclusion
Batch filming YouTube content is not a hack or a shortcut — it is a professional production methodology applied to the realities of solo content creation. The creators who build sustainable, growing channels are almost never the ones who scramble to film something whenever inspiration strikes. They are the ones with a content calendar mapped out, scripts written in advance, and a filming day that runs like a well-organized production.
The initial investment in building this system — writing the scripts, preparing the shot list, setting up a controlled environment — feels front-heavy. But that investment pays a return every single week when you are not stressed about what you are posting next, when you have creative space to actually improve your content, and when your audience receives the consistent, quality output that builds genuine trust over time.
Start small if the full system feels daunting. Plan a day to film just three videos. Build the habit before you scale the volume. The discipline of preparation is what separates creators who burn out in year one from those still growing in year five.
Have questions about your specific batch filming setup or content planning workflow? Drop them in the comments — practical questions often inspire the most useful content.
How Long Does Video Editing Take? Realistic Time Estimates for Every Video Type
How Long Does Video Editing Take? Realistic Time Estimates for Every Video Type
Estimated reading time: 12 minutes
Introduction
You just wrapped a shoot. The footage is sitting on your hard drive, your client or audience is waiting, and you are staring at a timeline wondering how long this is actually going to take.
It is one of the most common questions in video production — whether you are a solo content creator, a marketing manager hiring a freelancer, or a brand building an in-house team. The honest answer is: it depends. But that answer, on its own, is useless. What you actually need are realistic benchmarks.
This guide breaks down exactly how long video editing takes across every major video type, from quick social clips to full-length documentaries. You will find practical time estimates, an explanation of what drives those numbers up or down, and clear guidance on setting expectations that hold up in the real world.
Why Video Editing Takes Longer Than Most People Expect
Most people who have never edited video professionally assume editing is a linear, straightforward task. You watch the footage, cut the bad bits, add some music, and you are done. In reality, editing is layered, iterative, and deeply dependent on the type of content, the quality of the raw footage, and the level of finish expected.
There is also a significant psychological gap between watching a three-minute video and understanding what went into producing it. A polished three-minute corporate video might represent six to twelve hours of editing work. A ten-minute YouTube video could easily take eight to fifteen hours once you factor in colour correction, audio mixing, graphics, and feedback cycles.
According to production professionals interviewed across platforms like No Film School, a common rule of thumb is that every one minute of finished video requires roughly one to two hours of editing for standard projects — and significantly more for anything complex. That ratio shifts dramatically based on variables we will examine closely throughout this guide.
The Editing Ratio: Understanding Footage-to-Finished Video
Before you can estimate how long editing will take, you need to understand the editing ratio — the relationship between the amount of raw footage you shoot and the length of the final video.
A 10:1 shooting ratio means that for every one minute of finished content, the editor works through ten minutes of raw footage. That sounds manageable until you realize a typical corporate video shoot might generate four to six hours of footage for a two-minute final cut.
Common shooting ratios by production type:
| Production Type | Typical Shooting Ratio | Example |
|---|---|---|
| Talking head / interview | 5:1 to 10:1 | 30 min raw for 3–6 min final |
| Corporate event coverage | 15:1 to 30:1 | Hours of B-roll for a 3 min highlight reel |
| Documentary | 30:1 to 100:1 | Hundreds of hours for 60 min film |
| YouTube vlog | 3:1 to 8:1 | 40 min raw for a 10 min video |
| Social media short-form | 5:1 to 15:1 | 5 min raw for a 30–60 sec clip |
| Podcast video recording | 1:1 to 2:1 | Low ratio, mostly syncing and trimming |
The higher the ratio, the more ingestion, review, and selection time an editor spends before a single cut is made. This is often the most underestimated part of the entire process.
Time Estimates by Video Type
Here is where the data gets practical. These estimates reflect real-world editing timelines based on industry benchmarks and the experience of professional editors working across different niches.
Talking Head / Interview Videos
Typical editing time: 1–3 hours per finished minute
Interview-style content — common in corporate communication, thought leadership, and online education — involves selecting the best takes, cutting filler words and pauses, matching audio levels, and often adding lower-third text graphics. If the interview was well-shot and tightly conducted, an editor can move quickly. If the speaker repeatedly stumbled or the lighting shifted between takes, you are looking at considerably more time.
A ten-minute interview video with basic colour correction and a title sequence sits comfortably around ten to twenty hours of total editing work.
YouTube Vlogs and Lifestyle Content
Typical editing time: 1–3 hours per finished minute
Vlogs are deceptively time-consuming because they often involve handheld, run-and-gun footage shot across multiple locations with inconsistent audio. Editors have to stabilize footage, match audio across environments, and create a narrative arc from what is essentially a diary-format shoot.
A fifteen-minute lifestyle vlog, including music licensing, colour grading, and basic text overlays, often takes between twenty and thirty-five hours for a thorough edit — though experienced editors working with familiar footage and established templates can bring that down considerably.
Corporate and Brand Videos
Typical editing time: 2–5 hours per finished minute
Corporate videos carry higher production expectations and usually require more precise execution. A two-minute brand film might involve scripted narration, B-roll sequences, motion graphics, music bed, sound design, and multiple rounds of client review. These projects routinely take fifteen to forty hours depending on complexity.
The variance here is wide because “corporate video” covers everything from an internal staff update recorded on a laptop to a polished brand campaign with cinematic footage and animated logo sequences.
Social Media Short-Form Content (Reels, TikTok, Shorts)
Typical editing time: 1–4 hours per clip
Short does not mean fast. A sixty-second Instagram Reel that uses jump cuts, captions, trending audio, dynamic pacing, and product placement still requires significant attention to detail. Many editors report spending two to four hours on a single sixty-second clip when the brief calls for high engagement aesthetics.
However, if you are producing straightforward clip extractions from a longer video — repurposing a podcast highlight, for example — that turnaround can be under an hour per clip with a practiced workflow.
Podcast Video Recordings
Typical editing time: 0.5–1.5 hours per finished hour of content
Multi-camera podcast edits are among the faster projects because the shooting ratio is low and the editing decisions are primarily functional: sync the audio, cut between camera angles, remove obvious mistakes or dead air, add intro and outro graphics. A sixty-minute podcast episode typically takes one to three hours to edit at a competent level.
Where this extends is when the brief includes heavy audio cleanup, animated audiograms, chapter markers, social clips, and branded motion graphics — at which point you are essentially producing multiple deliverables from one recording session.
Event Highlight Reels
Typical editing time: 4–10 hours per finished minute
Events generate enormous amounts of footage from multiple cameras, and the editor’s job is to distill hours of content into a three-to-five minute emotional summary. This requires extensive ingestion time, careful music selection, precision timing to beats, and often some colour matching across cameras that may have been set up inconsistently during the live event.
A three-minute conference highlight reel from a full-day event with four cameras is realistically a twenty to forty hour project.
Mini-Documentaries and Long-Form Content
Typical editing time: 5–20 hours per finished minute
Documentary-style content sits at the most demanding end of the editing spectrum. Story structure, pacing, interview intercutting, archival footage, narration, music design, and colour work all contribute to projects that regularly run into the hundreds of hours for feature-length pieces.
Even a ten-minute brand documentary with three interview subjects and supporting B-roll can take sixty to one hundred hours from first cut to picture lock.
Breaking Down the Editing Workflow: What Actually Takes Time
Understanding the editing timeline means understanding what actually happens during each phase of post-production. Editors do not simply sit down and start cutting.
- Ingestion and organisation (10–20% of total time)
Footage must be imported, organised into folders or bins, labelled, and reviewed. On large projects, this phase alone can consume a full day of work. - Rough cut / assembly edit (25–35% of total time)
The editor builds the structural backbone of the video — selecting the best takes, establishing the narrative order, and creating a first pass that tells the story without polish. - Fine cut and pacing (20–30% of total time)
This is where the editing gets precise. Timing adjustments, transition refinements, music synchronisation, and rhythm work happen here. It is often the most creatively demanding phase. - Audio mixing and cleanup (10–20% of total time)
Audio is where amateur productions fail and professional ones succeed. Levelling, noise reduction, music balancing, and sound design can account for fifteen to twenty percent of total editing time on complex projects. - Visual effects, graphics, and text (10–25% of total time)
Animated lower thirds, title sequences, branded overlays, and any motion graphics layer are frequently where time balloons beyond expectations — particularly if the client requests multiple revisions on these elements. - Colour grading (10–20% of total time)
A proper colour grade — not just a quick filter — requires shot-by-shot attention and a calibrated monitor to execute accurately. - Export and delivery (2–5% of total time)
Final export, quality control review, and delivery in multiple formats for different platforms.
Colour Grading, Motion Graphics, and Sound: The Hidden Time Sinks
These three elements deserve special attention because they are consistently underestimated in initial project scoping.
Colour grading is not adjusting a brightness slider. Professional colourists use tools like DaVinci Resolve to apply primary and secondary corrections, create consistent looks across footage shot in different conditions, and deliver a visual mood that supports the brand or story. On a twenty-minute corporate video with twelve interview segments and supporting B-roll across three locations, colour grading alone can take six to ten hours.
Motion graphics is its own discipline. If your video requires animated infographics, kinetic typography, custom icon animations, or a branded intro sequence, you are looking at specialised software like Adobe After Effects and production timelines that reflect that specialisation. A thirty-second animated logo intro might take four to eight hours to design and render from scratch.
Audio mixing is frequently treated as an afterthought and almost always takes longer than planned. Dialogue recorded across different microphones needs to feel cohesive. Background music needs to breathe without competing with speech. Sound effects need to feel natural rather than tacked on. Professional audio mixing on a ten-minute video often takes three to five hours done properly.
How Revision Rounds Impact Your Timeline
No realistic discussion of video editing time is complete without addressing revision rounds — and yet they are almost always absent from initial project estimates.
Revisions are a structural part of the editing process, not an anomaly. Clients often do not know exactly what they want until they see what they do not want. Internal stakeholders add feedback. Brand guidelines evolve. Legal teams intervene. Every round of revisions adds time — sometimes a few hours, sometimes a full day.
Industry standard revision structure:
| Round | Typical Time Added | Common Focus |
|---|---|---|
| Round 1 (Rough cut feedback) | 3–8 hours | Structure, pacing, content selection |
| Round 2 (Fine cut feedback) | 2–5 hours | Tone, specific cuts, music |
| Round 3 (Final review) | 1–3 hours | Colour, graphics, minor tweaks |
| Additional rounds | 1–4 hours each | Any scope beyond agreed rounds |
Projects with poorly defined briefs or large approval committees can easily double or triple their original editing estimate through revision rounds alone. Experienced producers protect against this by defining the number of included revision rounds contractually from the outset, a practice endorsed broadly across the freelance production community.
Professional Editor Speed vs. DIY Editing
The difference in speed between a professional editor and someone learning their way through a timeline is dramatic — and it is not just about technical skill.
Professional editors have optimised workflows, keyboard shortcuts burned into muscle memory, template libraries, colour presets, organised asset systems, and years of pattern recognition that help them make decisions faster and with less second-guessing.
A professional editor might complete in four hours what takes a self-taught creator twelve. That is not an exaggeration — it reflects the compounding effect of efficient tooling, practised instinct, and reduced trial-and-error.
That said, software platforms have dramatically lowered the barrier to entry. Tools like CapCut, Adobe Premiere Pro, and DaVinci Resolve now offer auto-captioning, AI-assisted colour matching, and template-based editing that accelerate the process for less experienced editors considerably. Adobe’s own research regularly highlights how workflow integration across Premiere Pro and After Effects reduces production time on complex projects.
For content creators managing their own channels, the real speed advantage comes from establishing a consistent format. When your editing decisions become predictable — same structure, same colour preset, same intro sequence — the cognitive load drops sharply and your editing hours per video shrink.
How to Improve Your Video Editing Efficiency
Whether you are editing your own content or managing a team of editors, these strategies will meaningfully reduce turnaround time without sacrificing quality.
- Shoot better, edit faster. The single most effective way to reduce editing time is to reduce shooting ratio. Tighter scripts, better direction, and disciplined shooting create less footage to sort through and more footage worth using.
- Create a template library. Build reusable project files for your most common video types. A consistent starting point with pre-loaded colour grades, font styles, and intro sequences eliminates the setup phase on every new project.
- Use proxies for large files. Editing 4K or 6K footage in its native format on an underpowered machine creates lag and frustration that extends your timeline artificially. Proxy workflows in Premiere Pro and DaVinci Resolve allow you to cut smoothly and then relink to the original files at export.
- Define the brief clearly before editing begins. Vague briefs generate expensive revisions. A detailed brief that specifies tone, pacing, music style, graphic preferences, and deliverable formats reduces the back-and-forth that silently adds hours to every project.
- Batch similar tasks. Do all your rough cuts first, then all your audio work, then all your colour grading. Switching between different types of creative tasks is cognitively expensive and slower than batching by task type.
- Leverage keyboard shortcuts obsessively. Studies on productivity consistently show that keyboard-driven workflows reduce production time by fifteen to thirty percent compared to mouse-driven workflows. If you are editing in Premiere Pro, Resolve, or Final Cut Pro, investing a week in shortcut mastery pays dividends on every future project.
Key Takeaways
-
- Every one minute of finished video typically requires one to five hours of editing time, depending on the complexity and production quality expected.
- The editing ratio — how much raw footage you shoot relative to the finished length — is the single biggest driver of how long ingestion and rough cut phases take.
- Colour grading, motion graphics, and audio mixing are consistently underestimated and can each account for ten to twenty percent of total editing time.
- Revision rounds are not extras — they are structural. Account for at least two to three rounds in any client-facing project estimate.
- Professional editors work two to three times faster than beginners on equivalent projects, largely due to optimised workflows and practised decision-making.
- Shooting discipline, project templates, and proxy workflows are the three highest-leverage investments for improving editing efficiency.
FAQs
How long does it take to edit a 10-minute YouTube video?
For a standard YouTube video — talking head or vlog format with basic colour grading, music, and text overlays — expect between ten and twenty-five hours of editing work. That range compresses toward ten hours with well-shot footage and an experienced editor using established templates, and stretches toward thirty hours or beyond if the footage is complex, the style is highly polished, or the content requires significant story restructuring.
What is a realistic turnaround time for a professional video editor?
A professional editor working full-time typically delivers a first cut of a three-to-five minute corporate or brand video within three to five business days of receiving all assets. Turnaround extends with project complexity, revision rounds, and the editor’s current workload. Rush timelines are possible but generally carry premium pricing because they require the editor to prioritise your project above others in the queue.
Why does short-form content still take several hours to edit?
Short does not equal simple. A sixty-second social media clip often requires the same workflow stages as a longer video — footage review, cutting, colour grading, audio balancing, captions, music licensing, and export in multiple aspect ratios. The creative decisions are actually more compressed and precise, because every second matters in short-form content. Many editors find short-form more cognitively demanding per minute than long-form work.
How many hours should I budget for colour grading alone?
For a five-to-ten minute video with consistent lighting and footage from a single camera, budget two to four hours for a thorough colour grade. Multi-camera projects, footage shot across different days or locations, or projects requiring a cinematic look with secondary colour corrections can easily require six to twelve hours or more. If colour is being outsourced to a dedicated colourist rather than your primary editor, this phase often runs in parallel with other post-production work.
Does the type of editing software affect how long editing takes?
Yes, meaningfully. Editors working in software they know deeply move significantly faster than those using unfamiliar tools. Beyond familiarity, software architecture matters: DaVinci Resolve’s node-based colour tools are faster for experienced colourists than Premiere Pro’s Lumetri panel, while Final Cut Pro’s magnetic timeline is consistently reported to accelerate rough cut and fine cut phases due to its frictionless trimming. The right software depends on the type of content and the editor’s background, not a universal ranking.
How do I estimate editing time for a new project?
Start with your expected finished length, then multiply by the complexity factor for your video type (one to five hours per finished minute as a baseline range). Add time for each additional deliverable — social cuts, subtitles, alternate versions. Build in revision rounds at two to three hours each for at least two rounds. Add a ten to fifteen percent buffer for unexpected complications. This formula will not be perfect, but it produces estimates that hold up far better than gut-feel guesses.
At what point does it make financial sense to hire a professional editor rather than editing yourself?
This depends on your hourly rate and opportunity cost. If you bill at eighty to one hundred dollars per hour in your primary business and editing a single video takes you fifteen hours, you are spending twelve hundred to fifteen hundred dollars of your own time on a task a professional editor might complete in six to eight hours for three to five hundred dollars. Beyond pure economics, professional editors bring consistency, technical quality, and emotional detachment that often produces a better result than self-editing — particularly on projects where you are too close to the material to make objective cuts.
Conclusion
Video editing is one of those disciplines where the invisible labour is easy to dismiss until you are deep inside a timeline wondering where the last eight hours went. The time it takes to edit a video is not arbitrary — it is the product of footage volume, production complexity, quality standards, and the number of hands and minds that need to approve the result.
Whether you are scoping a client project, managing your content calendar, or deciding whether to edit in-house or outsource, having realistic benchmarks changes everything. You stop under-quoting, over-promising, and burning out on timelines that were never achievable.
The most consistent insight from editors who have worked across thousands of hours of footage is this: the projects that run smoothly are the ones where expectations were set accurately at the start. Clear briefs, defined revision rounds, and honest editing estimates are not administrative formalities — they are the foundation of every video that actually ships on time and at the quality level everyone agreed to.
Need help establishing realistic editing timelines for your production pipeline? Understanding the scope before the edit begins is always the smarter starting point.
Best Video Editing Software in 2026: Which One Is Right for Your Content?
Best Video Editing Software in 2026: Which One Is Right for Your Content?
Estimated reading time: 15 minutes
Why Choosing the Right Video Editor Still Matters in 2026
Video content is no longer just a marketing channel — it is the dominant language of the internet. According to Cisco’s Visual Networking Index, video traffic accounts for the overwhelming majority of all consumer internet traffic globally, and that number keeps climbing. Short-form, long-form, documentary, tutorial, cinematic — the format diversity has exploded. So has the software behind it.
But here’s the problem most creators run into: they pick a video editing program based on what someone else is using, not based on what their actual workflow demands. A documentary filmmaker and a YouTube vlogger do not share the same needs. Neither do a solo content creator and a three-person social media agency.
In 2026, the video editing software landscape has matured significantly. Several tools have introduced serious AI-assisted features, smarter timelines, and improved cross-platform capabilities. Prices have shifted. Hardware requirements have changed. And a few underdogs have grown into genuine competitors.
This guide cuts through the noise. Whether you are just starting out or looking to upgrade from a tool that no longer fits your workflow, you will find a clear, honest breakdown of every major option — what each does well, where it falls short, who it is built for, and what it costs.
How We Evaluated These Tools
Before diving into individual reviews, it is worth being transparent about the evaluation criteria used here. Picking the “best” video editing software is never a one-size-fits-all exercise. These are the factors that matter most:
- Performance on modern hardware — How well does the software handle 4K, 6K, and even 8K timelines without grinding your machine to a halt?
- Feature depth vs. learning curve — Some tools offer everything and are impossible to learn in a weekend. Others are streamlined but limiting
- Export options and format support — Can it handle H.265, ProRes, AV1, and platform-specific presets for YouTube, Instagram, and TikTok?
- Pricing transparency — Subscription fatigue is real. Lifetime license options, free tiers, and hidden costs all matter
- Community and support ecosystem — Tutorials, forums, templates, and plugin libraries are part of the overall value
- Cross-platform availability — Windows-only, Mac-only, and cross-platform tools each serve different user bases
These criteria form the backbone of every recommendation in this guide.
The Best Video Editing Software at a Glance
| Software | Best For | Platform | Starting Price | Free Version |
|---|---|---|---|---|
| Adobe Premiere Pro | Professional workflows, teams | Win / Mac | $55.99/month | No (trial only) |
| Final Cut Pro | Mac-based professionals | Mac only | $299.99 one-time | 90-day free trial |
| DaVinci Resolve | Color grading, filmmakers | Win / Mac / Linux | Free / $295 Studio | Yes |
| CapCut | Short-form, mobile creators | Win / Mac / Mobile | Free / Pro plans | Yes |
| Filmora | Beginners, vloggers | Win / Mac | $49.99/year | Yes (watermarked) |
| Vegas Pro | Windows power users | Win only | $12.99/month | 30-day trial |
| Kdenlive | Open-source users | Win / Mac / Linux | Free | Yes |
| iMovie | Mac/iOS beginners | Mac / iOS | Free | Yes |
Adobe Premiere Pro: The Industry Workhorse
If you have spent any time in professional video production — broadcast, film, branded content, or agency work — you have encountered Adobe Premiere Pro. It is the default choice in most professional environments for a simple reason: it integrates seamlessly with the rest of the Adobe Creative Cloud ecosystem.
The 2025–2026 versions of Premiere Pro introduced significant improvements to its AI-powered editing suite, now including automatic speech-to-text captions in over 100 languages, generative extend (which fills gap frames using content-aware generation), and enhanced color management for HDR workflows. These are not gimmicks — they genuinely reduce time spent on repetitive tasks.
Where it excels:
- Deep integration with After Effects, Audition, and Photoshop
- Industry-standard color correction tools via Lumetri Color
- Collaborative production workflows through Adobe’s cloud infrastructure
- Support for virtually every video format on the market
Where it falls short:
- The subscription cost is steep, especially for individual creators
- It can be CPU and GPU intensive, demanding a well-specced machine
- The learning curve is real for anyone coming from a consumer-grade app
Who should use it: Freelancers building a professional career, production companies, and anyone who already works within the Adobe ecosystem. If you are editing YouTube content as a hobby, this is probably more than you need. If you are building a client-facing production business, it is worth every dollar.
Pricing: $55.99/month for Premiere Pro alone or bundled within the full Creative Cloud All Apps plan at $59.99/month.
Final Cut Pro: Apple’s Professional Powerhouse
Final Cut Pro remains one of the most polarizing tools in the video editing conversation. Mac users swear by it. Windows users cannot touch it. But for those inside the Apple ecosystem — especially those running M1, M2, or M3 chips — the performance is genuinely impressive.
Apple’s Magnetic Timeline remains one of the most intuitive professional editing interfaces ever designed. It eliminates track lanes and lets you build complex sequences without collisions or sync nightmares. The software is also exceptionally well-optimized for Apple Silicon, making 4K and 8K playback smooth even on MacBook Pro hardware.
In 2026, Final Cut Pro added expanded AI scene removal tools, improved 360-degree video editing, and better integration with Apple’s spatial video format — a growing priority as Vision Pro usage expands.
Where it excels:
- Blazing performance on Apple Silicon Macs
- One-time payment with no subscription
- Clean, logical interface that professionals love
- Strong support for ProRes and ProRes RAW formats
Where it falls short:
- Mac-only — no Windows support, period
- Less compatible with multi-person collaborative workflows compared to Premiere Pro
- The one-time price is higher upfront, even if it saves money long-term
Who should use it: Mac-committed professionals, YouTube creators who want a premium editing experience, and anyone who prefers paying once rather than subscribing monthly. If you switch between Mac and Windows, look elsewhere.
Pricing: $299.99 one-time purchase. A 90-day free trial is available through Apple’s website.
DaVinci Resolve: The Color Grading Champion
Blackmagic Design’s DaVinci Resolve has pulled off one of the most remarkable comebacks in software history. What began as a color grading tool used exclusively in high-end Hollywood post-production has become one of the most capable all-in-one video editing platforms available — and much of it is completely free.
The free version of DaVinci Resolve is genuinely powerful. It includes the full editing suite, Fairlight audio tools, Fusion visual effects, and the legendary color grading workspace that set the standard for the industry. The Studio version, at a one-time $295, adds AI-powered noise reduction, stereoscopic 3D tools, advanced collaboration features, and more GPU-accelerated effects.
Recent updates have pushed DaVinci Resolve further into narrative film territory with improved cut-page workflows, updated audio normalization tools, and smarter keyframe automation.
Where it excels:
- Best-in-class color grading tools (used on major studio films)
- Completely free version with no watermark
- Covers editing, VFX, color, and audio in a single platform
- Cross-platform support including Linux — rare among professional tools
Where it falls short:
- Steeper learning curve than most consumer-facing software
- Performance can suffer on lower-end hardware without a dedicated GPU
- The interface, while powerful, can feel overwhelming to new users
Who should use it: Filmmakers, colorists, YouTube channels producing cinematic content, and anyone who wants professional results without a monthly subscription. Also a strong choice for those transitioning from film school into professional work.
Pricing: Free (core version) / $295 one-time for Studio.
CapCut: The Mobile-First Disruptor
CapCut has done something almost no app has managed in the video editing space: it made professional-looking edits accessible to people who had never touched a timeline before. Originally built as a companion app for TikTok by ByteDance, it has since expanded into desktop territory with a surprisingly capable web and desktop version.
In 2026, CapCut’s desktop application includes auto-captions, background removal, beat sync, AI-generated B-roll suggestions, and a growing template library that makes branded content creation remarkably fast.
Where it excels:
- Fastest route from raw footage to published short-form content
- Strong mobile experience — excellent for on-the-go creators
- AI-powered features that are actually useful, not just novelties
- Free tier is genuinely functional without a heavy watermark burden
Where it falls short:
- Not built for long-form or complex timelines
- Limited control over color grading compared to professional tools
- Privacy concerns exist given its ownership — worth researching independently before storing sensitive footage
Who should use it: TikTok creators, Instagram Reels producers, social media managers, and anyone who needs to turn around short-form content quickly without a steep learning curve.
Pricing: Free with optional Pro plans. Commercial licensing terms vary by region.
Filmora: Best for Beginners Who Want Results Fast
Wondershare Filmora occupies a smart middle ground. It is not trying to compete with Premiere Pro or DaVinci Resolve for professional credibility. Instead, it has built a genuinely solid product for creators who want results without investing months in learning software.
Filmora’s interface is clean, its effects library is extensive, and its preset-driven approach means you can produce polished videos within your first session. The 2025–2026 versions added AI smart cutout, audio stretch, and a compound clip feature that borrows from professional tools.
Where it excels:
- Accessible learning curve without sacrificing visual quality
- Wide variety of built-in effects, transitions, and music
- Works well on modest hardware
- Perpetual license option avoids subscription commitment
Where it falls short:
- Free version exports with a watermark
- Not suitable for professional-grade productions
- Effects library, while large, can feel template-heavy
Who should use it: YouTubers, social media creators, small business owners, and educators producing instructional video content.
Pricing: Free (watermarked) / $49.99 per year / $79.99 perpetual license.
Vegas Pro: Windows Loyalists, This One’s for You
Vegas Pro has been around since the late 1990s and has survived multiple ownership changes to remain a respected tool in Windows-centric production environments. It is particularly favored in music video production and broadcast journalism due to its long-standing audio capabilities and timeline flexibility.
Recent updates introduced GPU acceleration improvements and a cleaner interface, though the core editing paradigm — track-based with an emphasis on audio-visual alignment — has remained consistent.
Where it excels:
- Exceptionally strong audio editing tools built into the timeline
- Long timeline stability for multi-hour projects
- Windows-native performance without Mac envy
- Nested timelines and multi-camera editing at a professional level
Where it falls short:
- The subscription pivot has frustrated longtime users who preferred the perpetual license model
- Slower to adopt newer AI features compared to competitors
- Smaller plugin and template ecosystem
Who should use it: Windows-based professionals, music video producers, and broadcasters who need strong audio-video synchronization without switching to a Mac-centric workflow.
Pricing: $12.99/month for Vegas Pro 365 / $399 perpetual license.
Kdenlive: The Open-Source Contender
Kdenlive is the most capable free, open-source video editor available today for Linux, Windows, and Mac users. Built on the MLT Framework, it offers a genuine multi-track timeline, keyframe animation, and a solid suite of built-in effects — all without spending a dollar.
It is not flashy. It will not impress you with AI-generated effects or a polished onboarding experience. But for developers, Linux users, privacy-conscious creators, and those who genuinely want to understand their tools from the ground up, Kdenlive delivers real value.
Where it excels:
- Completely free and open source with no watermarks
- Strong community development and regular updates
- Cross-platform including Linux, where options are genuinely limited
- No data collection or subscription concerns
Where it falls short:
- Interface is less polished than commercial alternatives
- Performance on complex timelines can be inconsistent
- Limited customer support — community forums are the primary resource
Who should use it: Linux users, developers, privacy-focused creators, and anyone who wants a capable free editor without corporate strings attached.
Pricing: Free.
iMovie: Apple’s No-Cost Starting Point
iMovie is not trying to be Final Cut Pro. It is Apple’s on-ramp — a clean, capable, and completely free introduction to video editing for Mac and iOS users. For anyone recording family videos, school projects, or simple YouTube content, it gets the job done with almost no friction.
The iOS version, in particular, is one of the best mobile editing experiences available, with a streamlined interface that syncs with the Mac version via iCloud.
Where it excels:
- Free for all Mac and iOS users
- Extremely easy to learn — often mastered within an hour
- Decent output quality for personal and entry-level professional use
- Direct upgrade path to Final Cut Pro when you are ready
Where it falls short:
- Very limited compared to professional tools
- No multi-cam editing support
- Minimal control over color grading or audio mixing
Who should use it: First-time video editors, students, hobbyists, and iPhone users who want a fast mobile editing solution.
Pricing: Free.
Which Video Editor Should You Actually Choose?
Here is the honest decision framework:
- You are a professional filmmaker or work in a production company: DaVinci Resolve (free or Studio) or Adobe Premiere Pro, depending on your collaboration needs
- You are a Mac-based creator who wants professional output without a subscription: Final Cut Pro is the clearest choice. The one-time price pays off within six months compared to Premiere Pro’s subscription
- You create primarily for YouTube with long-form content: Adobe Premiere Pro, Final Cut Pro, or DaVinci Resolve — all three are strong. Choose based on your platform and budget preference
- You are a short-form social media creator: CapCut is purpose-built for your workflow. Filmora is a solid alternative if you want slightly more control
- You are a beginner on a budget: Start with iMovie (Mac) or CapCut (any platform). Move to Filmora when you want more features, and eventually migrate to a professional tool as your work demands grow
- You are a Windows user with audio-heavy projects: Vegas Pro has few genuine rivals in its specific niche
- You prefer open-source tools: Kdenlive is the most capable option available without spending anything
Key Takeaways
-
- DaVinci Resolve offers the highest professional ceiling at the lowest cost — its free version alone is better than most paid alternatives
- Final Cut Pro’s one-time pricing model makes it the most economical professional option for Mac users over a two-to-three year period
- Adobe Premiere Pro remains the safest choice for collaborative, client-facing professional production work
- CapCut and Filmora serve genuinely different audiences — social media speed vs. beginner-friendly long-form control
- Platform matters. Mac users have more premium options at the free or low-cost tier than Windows users
- No single tool is universally “best.” The right choice depends entirely on your content type, budget, hardware, and growth trajectory
- Before committing to any paid tool, use the available free trials. Most offer 30 to 90 days of genuine access
FAQs
1. What is the best free video editing software in 2026?
DaVinci Resolve is the best free video editing software available in 2026 — by a considerable margin. Its free version includes professional-grade color grading, a full editing timeline, Fusion visual effects, and Fairlight audio tools without any watermark. For short-form content creators, CapCut is a strong free alternative with an easier learning curve. iMovie and Kdenlive round out the best free options depending on your platform and needs.
2. Is Adobe Premiere Pro worth the monthly cost for individual creators?
That depends heavily on your revenue from video work. If you are earning from freelance video production or client work, Premiere Pro’s $55.99/month cost is easily justifiable given its professional output quality, industry recognition, and Creative Cloud integration. If you are producing YouTube content as a side project or hobby, the cost is harder to defend when tools like DaVinci Resolve or Final Cut Pro offer comparable — sometimes superior — results at a lower long-term cost.
3. Which video editing software is best for YouTube in 2026?
For long-form YouTube content, the top three are Adobe Premiere Pro, Final Cut Pro (Mac only), and DaVinci Resolve. Each handles 4K editing smoothly, integrates well with YouTube export specifications, and supports advanced color and audio work. DaVinci Resolve is particularly popular among YouTube creators who prioritize cinematic color grading. For Shorts and faster turnarounds, CapCut has become the go-to.
4. Can beginners use DaVinci Resolve, or is it too advanced?
DaVinci Resolve has a steeper learning curve than Filmora or iMovie, but it is absolutely accessible to beginners who are willing to invest time in learning it. Blackmagic Design offers an excellent free certification training program, and there is a vast community of tutorial creators on YouTube dedicated specifically to Resolve. Starting with the Cut page (a simplified editing interface within the software) makes the initial experience significantly less overwhelming.
5. What are the system requirements for running professional video editing software in 2026?
Requirements vary by software, but for smooth 4K editing, most professional tools recommend at minimum 16GB of RAM (32GB preferred), a dedicated GPU with at least 4GB VRAM, a modern multi-core processor (Intel Core i7 / AMD Ryzen 7 or Apple M-series equivalent), and fast NVMe SSD storage. DaVinci Resolve is the most GPU-dependent of the major options and benefits most significantly from a dedicated graphics card. Premiere Pro and Final Cut Pro handle hardware acceleration well but still require capable machines for complex timelines.
6. Is Final Cut Pro available on Windows?
No. Final Cut Pro is exclusively available on macOS and has no Windows version. Apple has never indicated plans to release a Windows-compatible version. Windows users seeking a comparable experience should look at Adobe Premiere Pro for subscription-based professional editing or Vegas Pro as a Windows-native alternative. DaVinci Resolve is also an excellent cross-platform option.
7. How does Filmora compare to Adobe Premiere Pro for serious content creators?
Filmora is excellent for beginners and casual creators but is not a substitute for Adobe Premiere Pro in professional environments. Premiere Pro offers significantly deeper control over color management, audio mixing, multi-camera editing, and complex visual effects workflows. Filmora’s strength lies in its accessibility and speed — it prioritizes getting a polished-looking video out quickly with minimal technical complexity. As your content quality demands grow, most creators using Filmora eventually migrate to a more capable tool. Many start with Filmora intentionally, treating it as a transitional step rather than a long-term platform.
Conclusion
The best video editing software in 2026 is not a single program — it is whichever tool actually matches how you work, what you create, and where you are in your creative development. DaVinci Resolve continues to astonish with what it offers for free. Final Cut Pro remains the gold standard for Mac professionals who are done with subscription models. Adobe Premiere Pro holds its ground as the industry default for team-based, client-facing production. And for the millions of creators producing social content every day, CapCut has quietly become indispensable.
Pick the tool that solves your current problems without forcing you to learn things you do not yet need. You can always upgrade. What you cannot recover is the time spent fighting software that was never built for your workflow in the first place.
Video Production Workflow for Content Creators: From Filming to Publishing
Video Production Workflow for Content Creators: From Filming to Publishing
Estimated reading time: 16 minutes
Why Your Video Production Workflow Is Either Your Biggest Asset or Biggest Bottleneck
Most content creators do not have a workflow problem. They have a consistency problem — and the root cause is almost always the same thing: no repeatable system.
Watch any creator who publishes reliably — weekly YouTube videos, multi-platform content, regular Shorts and Reels on the side — and you will find that beneath the creative output is a structured, well-documented video production workflow. Not because they are less creative. Because they understand that creativity thrives inside structure, not despite it.
According to HubSpot’s State of Marketing Report, video remains the most preferred content format among marketers and consumers alike, yet the majority of brands and independent creators cite “time and resources” as the primary barrier to consistent production. The process is not the problem. The lack of a process is.
This guide walks through every stage of the video production process — from the moment an idea surfaces to the second a video goes live — with practical frameworks, real tool recommendations, and the kind of hard-won insight that only comes from doing this work at scale.
Whether you are a solo YouTube creator, a small production team, or a brand managing a content calendar across multiple channels, this is the system you need.
Phase 1 — Pre-Production: Building the Foundation
Pre-production is where most creators lose time before a single frame is ever filmed. Ideas stay in someone’s head. Scripts get started and abandoned. Shot lists are skipped entirely because “we’ll figure it out on the day.” That approach works once, maybe twice, and then it collapses under volume.
A strong content creation workflow starts before you ever pick up a camera.
Ideation and Content Calendar
Your content calendar is not just a scheduling tool. It is a strategic document that tells you what you are making, why you are making it, and when it needs to be ready. Tools like Notion, Trello, and Asana each handle this differently — Notion being the most flexible for creators who want to combine research, scripting, and scheduling in one workspace; Trello being excellent for visual pipeline management; Asana for teams that need task assignment and deadline tracking.
The ideal setup includes:
- A rolling 4–6 week content calendar with publish dates
- A backlog of ideas with brief descriptions and target audience notes
- Status columns: Idea, In Script, Filming Scheduled, In Edit, Review, Published
This pipeline view means nothing falls through the cracks and you never arrive at filming day without knowing exactly what you are producing.
Scripting and Research
Full scripts versus bullet-point outlines is a debate that never fully resolves — and honestly, it depends on your delivery style. What matters more than format is completeness. Your script or outline should answer three questions before filming begins:
- What is the single point this video is making?
- What does the viewer need to know at each stage to follow that point?
- What is the call-to-action and where does it live in the structure?
Document your research sources, note any on-screen graphics or B-roll moments you want to capture, and flag any sections where specific footage will be needed.
The Shot List
Skipping the shot list is one of the most expensive habits in video production — not expensive in money, but in time. A shot list is a simple document that maps every piece of footage you need: A-roll (talking head or main presenter footage), B-roll (supporting visuals), cutaways, graphics references, and any specific product or location shots.
| Shot Type | Description | Location/Notes |
|---|---|---|
| A-Roll | Main talking head, intro to video | Studio/desk setup |
| B-Roll | Screen recording of software demo | Capture card or screen capture |
| Cutaway | Close-up of hands on keyboard | Natural light, clean desk |
| Graphic Card | Lower third for speaker name | Added in post |
| B-Roll | Stock footage: city timelapse | Source from Pexels or Artgrid |
Even a ten-item shot list removes the guesswork from a filming session and dramatically speeds up editing because you already know what footage exists.
Phase 2 — Filming: Executing With Precision
A well-prepared filming session is fast, focused, and low-stress. An unprepared one is where creators lose hours and end up with unusable footage that forces expensive reshoot days.
Equipment and Environment Checklist
Before rolling, run through a pre-shoot checklist:
- Camera battery charged, backup battery ready
- Memory cards formatted and cleared
- Audio levels tested (nothing kills a video faster than bad audio)
- Lighting consistent and controlled — no windows causing exposure shifts
- Background dressed, branded, or blurred to match your visual identity
- Camera settings confirmed: frame rate, ISO, white balance, resolution
For most YouTube and social media content, shooting in 4K at 24fps or 30fps gives you enough resolution to crop in post and maintain a cinematic quality without creating unnecessarily large file sizes.
A-Roll Efficiency
If you are the on-camera talent, get your A-roll done in focused blocks. Do not stop to review every take in real time. Record your sections, mark good takes with a verbal cue (“That one was good, moving on”), and keep the session moving. You will review everything in post.
If you are directing talent, call takes clearly, communicate adjustments concisely, and avoid reshooting sections you already have covered unless the performance genuinely failed.
B-Roll and Supplementary Footage
B-roll is what separates a good video from a great one. Plan for at least two to three times more B-roll than you think you will need. Editors work faster and produce better results when they have options. Screen recordings, product demos, location footage, close-ups, and stock footage all serve as visual support for your narration and keep viewers engaged through sections that might otherwise feel static.
Phase 3 — Post-Production Workflow: Editing, Colour, and Audio
This is where the video actually gets made. Filming captures raw material. Post-production shapes it into something worth watching. Your video editing pipeline should be consistent, structured, and efficient.
File Organisation
Before you open your editing software, organise your files. Seriously. Editors who skip this step spend fifteen minutes finding clips instead of cutting them.
A clean folder structure looks like this:
Project Name/
  01_Footage/
    A-Roll/
    B-Roll/
  02_Audio/
    Music/
    SFX/
    Voiceover/
  03_Graphics/
  04_Project Files/
  05_Exports/
This applies whether you are using Adobe Premiere Pro, DaVinci Resolve, or Final Cut Pro. The folder structure is editor-agnostic and makes collaboration far easier when another editor needs to step into your project.
The Editing Timeline
Build your edit in distinct passes rather than trying to perfect everything simultaneously:
Pass 1 — Assembly Edit: Drop all your A-roll into sequence. Cut out the obvious mistakes, long pauses, and anything clearly unusable. Do not worry about pacing yet.
Pass 2 — Rough Cut: Trim for pacing, flow, and storytelling logic. Add B-roll. Start to feel the rhythm of the video.
Pass 3 — Fine Cut: Micro-trim transitions, tighten the pacing, add lower thirds, graphics, and any motion elements. This is where the video starts to feel finished.
Pass 4 — Colour Grade: Colour grading is not just about aesthetics — it is about visual consistency across your entire content output. DaVinci Resolve has become the industry standard for colour work, even among creators who edit in Premiere Pro (using its Lumetri Color tools as a capable alternative). Establish a look and save it as a preset or LUT (Look Up Table) so every video sits in the same visual world.
Pass 5 — Audio Mix: Get your audio right before you export. This means levelling dialogue (typically around -12 to -6 dB), setting music beds to sit underneath voice without competing (usually -20 to -25 dB), and applying gentle noise reduction where needed. Tools like Adobe Audition, iZotope RX, or even the built-in audio tools in DaVinci Resolve handle this well.
Export Settings
Export settings depend entirely on your publishing destination, but a solid baseline for most platforms is:
| Platform | Resolution | Frame Rate | Format | Bitrate |
|---|---|---|---|---|
| YouTube | 3840×2160 (4K) | 24/30fps | H.264 or H.265 | 35–68 Mbps |
| Instagram Reels | 1080×1920 | 30fps | H.264 | 15–20 Mbps |
| LinkedIn Video | 1920×1080 | 30fps | H.264 | 10–15 Mbps |
| TikTok | 1080×1920 | 30fps | H.264 | 15–25 Mbps |
Always export a master file at the highest quality before generating platform-specific versions. This master becomes your archive copy and makes it trivially easy to repurpose content later.
Phase 4 — Review, Approval, and Collaboration
For solo creators, this phase is largely self-review — watching the video back on a different screen, ideally the next morning with fresh eyes. For teams or client work, a proper review and approval system prevents miscommunication and costly late-stage revisions.
Frame.io has become the go-to platform for video review and collaboration. It lets clients and collaborators leave time-coded comments directly on the video, eliminating the chaos of email-based feedback (“at around 2 minutes when you mention the pricing thing” is not useful feedback). Teams using Frame.io consistently report shorter revision cycles and fewer misunderstandings.
For lighter use cases, Vimeo Review and even shared Google Drive links with a comment sheet work reasonably well.
Managing Revisions Intelligently
Establish clear revision rounds upfront. Two rounds of revisions is the standard for most professional content work. Scope creep in video production almost always enters through unlimited, unstructured feedback cycles.
Use version naming conventions (v1, v2, v2.1) and keep all project files until the content is published. Deleting project files before a video is live is a risk not worth taking.
Phase 5 — Export, Metadata, and Publishing
Getting a video from your timeline to a live publish is the final phase — and the one most creators rush through, often leaving significant organic reach on the table.
Metadata: The SEO Layer of Video
YouTube, in particular, is a search engine with more than 500 hours of video uploaded every minute. Standing out requires treating your metadata with the same care as your content.
Your video metadata checklist:
- Title: Clear, keyword-forward, and specific to the video’s core value
- Description: Write at least 200 words. Include your primary keyword in the first two sentences. Link to related content, resources, and your social profiles
- Tags: Use a mix of broad category tags and specific topic tags — do not keyword-stuff, but do not leave them blank
- Thumbnail: Custom thumbnail with clear visual hierarchy — a viewer should understand the video’s promise in under a second
- Chapters: Add timestamps to your description. YouTube’s algorithm rewards structured content and viewers appreciate the navigation
- Cards and End Screens: Set these up before you schedule the video, not as an afterthought
Scheduling and Distribution
Your content calendar should include not just a publish date but a publishing time (based on when your specific audience is most active), a cross-posting plan (which clips will be cut for Shorts, Reels, or TikTok), and a note about any community posts or email newsletter mentions that will support the video’s launch.
The Best Tools for Managing Your Video Production Process
A great workflow needs the right infrastructure. Here is how the core tool categories break down:
| Category | Recommended Tools | Best For |
|---|---|---|
| Project Management | Notion, Trello, Asana | Content calendar, shot lists, task tracking |
| Cloud Storage | Google Drive, Dropbox | File sharing, backup, collaboration |
| Video Editing | Premiere Pro, DaVinci Resolve | Full editing pipeline |
| Colour Grading | DaVinci Resolve | Professional colour work |
| Review + Approval | Frame.io | Team and client feedback |
| Screen Recording | Loom, OBS, Camtasia | B-roll, tutorials, software demos |
| Audio Post | Adobe Audition, iZotope RX | Dialogue cleanup, audio mixing |
| Distribution | Hootsuite, Buffer, YouTube Studio | Scheduling, metadata, multi-platform |
The most important principle in tool selection is this: use fewer tools better, not more tools poorly. Every additional platform in your stack is a potential point of friction. Start with the minimum viable stack and add tools only when a genuine bottleneck requires it.
Batch Filming: The Strategy That Multiplies Your Output
If there is one tactical shift that transforms a creator’s output capacity, it is batch filming. The concept is simple: instead of filming one video at a time, you group multiple videos into a single production session.
The efficiency gains are significant. You set up your camera, lighting, and audio once. You are warmed up and in performance mode. You are wearing the same outfit, the background is dressed, the environment is controlled. What might take three separate afternoons as individual sessions often takes a single well-organised day of batch filming.
A practical batch filming structure:
- Week 1: Scripting and shot list creation for four videos
- Week 2, Day 1: Batch film all four A-roll sessions back to back
- Week 2, Day 2–3: Capture any needed B-roll and screen recordings
- Week 3: Edit all four videos across dedicated editing blocks
- Week 4: Review, export, and schedule for the next four weeks
This creates a four-week content buffer, which means you are publishing consistently even during weeks when life or other work makes production impossible.
The content calendar in Notion or Asana becomes the project management backbone that keeps this batch system running smoothly. Each video gets its own card or page, moving through status columns from Idea to Published with clear ownership and deadlines at every stage.
Scaling Your Content Creator System
At some point, a growing creator reaches the limit of what they can execute alone. The video production workflow you build as a solo creator should be documented with enough clarity that it can be handed off — partially or fully — to a team.
The creators and production teams that scale successfully share one habit: they write everything down. Not in complicated process documents no one reads, but in simple, visual SOPs (Standard Operating Procedures) that a new editor or producer can follow on day one.
Document the following specifically:
- Your preferred folder structure and file naming convention
- Your editing style guide (pacing notes, text animation preferences, colour preset)
- Your metadata template (description structure, standard tags, CTA language)
- Your review and approval process (who reviews, how feedback is shared, how many revision rounds)
When you bring on a video editor, a thumbnail designer, or a social media coordinator, these documents eliminate the back-and-forth that drains creative energy from the work that actually matters.
Notion handles SOP documentation particularly well for content teams, allowing you to embed video examples, link to asset folders, and keep everything updated in one place rather than scattered across Google Docs, emails, and Slack threads.
FAQs
Q1: What is a video production workflow and why does it matter for content creators?
A video production workflow is the end-to-end system that takes a video from initial idea to published content. It covers pre-production (scripting, shot lists, scheduling), production (filming), and post-production (editing, colour, audio, export). For content creators, having a documented workflow means consistent output quality, faster turnaround times, and far less decision fatigue. Without one, each video becomes its own improvised project, which is exhausting and inefficient at any scale.
Q2: How do professional creators use Notion for video production?
Notion works as an all-in-one production hub. Creators typically build a content database where each video is a page containing the script, shot list, production notes, edit feedback, and publishing checklist. The database view gives a bird’s-eye pipeline across all projects. Combined with linked databases for an editorial calendar, Notion can replace three or four separate tools that would otherwise not talk to each other.
Q3: What is the difference between a rough cut and a fine cut in video editing?
A rough cut is the first pass of an edit where all selected footage is assembled in narrative order, but timing and pacing are not yet optimised. A fine cut refines that assembly — tightening transitions, adding graphics and B-roll, correcting pacing, and preparing the video for colour and audio work. Think of the rough cut as the skeleton and the fine cut as the finished structure before the colour and sound layers are added.
Q4: Should I use Adobe Premiere Pro or DaVinci Resolve for my editing workflow?
Both are excellent professional tools, and the choice often comes down to workflow preference and budget. Premiere Pro integrates tightly with the Adobe Creative Cloud ecosystem (After Effects, Audition, Photoshop), which is valuable if you already use those tools. DaVinci Resolve offers superior colour grading tools in its free version and has become the preferred choice for creators who prioritise colour work. Many professional production teams use both — editing in Premiere, grading in Resolve.
Q5: What is batch filming and how do I start implementing it?
Batch filming means consolidating multiple video productions into a single shoot session rather than filming one video at a time. To start, script three to four videos that share a similar visual format. Block a full day for filming. Set up your environment once and move through all your A-roll scripts back to back, capturing B-roll and supplementary footage in the afternoon. Edit and publish on a staggered schedule over the following weeks. The initial investment of a full production day pays back weeks of consistent content.
Q6: How does Frame.io improve the post-production workflow for teams?
Frame.io allows editors and collaborators to leave time-coded comments directly on video files, eliminating the ambiguity of written feedback. Team members or clients can watch a cut and drop a comment at the exact timecode where a change is needed. This removes revision miscommunication, speeds up approval cycles, and creates a clear audit trail of changes requested and implemented. For any creator working with clients, managers, or a production team, it is a significant quality-of-life improvement over email or Slack-based feedback.
Q7: What export settings should I use when uploading videos to YouTube?
YouTube recommends H.264 encoding with a .mp4 container as the standard format for most creators. For 1080p, a bitrate between 8 and 12 Mbps is solid. For 4K, aim for 35–68 Mbps. Always export from your editing software at a higher quality than YouTube requires, since the platform re-encodes every upload. Exporting at a higher bitrate means YouTube’s compression algorithm has better source material to work with, resulting in a better final quality on the platform.
Key Takeaways
-
- A documented video production workflow is the single most impactful investment a content creator can make in their long-term output capacity
- Pre-production — scripting, shot lists, and content calendar planning — directly determines how efficiently filming and editing happen
- Your video editing pipeline should be built in structured passes: assembly, rough cut, fine cut, colour grade, audio mix, export. Each pass has a specific focus
- Batch filming allows creators to produce a month of content in a single well-organised production day, creating a consistent publishing buffer
- Tool selection matters, but tool discipline matters more. Use Notion, Trello, or Asana to manage the pipeline; Premiere Pro or DaVinci Resolve to edit; Frame.io for review; and Google Drive or Dropbox for cloud storage and backup
- Export and metadata are not afterthoughts. Treating video metadata with the same care as the content itself directly impacts discoverability and organic reach
- Document your workflow clearly enough that it can be partially or fully handed off to a team. Scalability starts with documentation, not hiring
The most consistent creators are not necessarily the most talented ones. They are the ones who have built systems that make showing up and producing inevitable rather than heroic. A strong video production workflow does not constrain creativity — it protects the time and mental space in which creativity can actually function.
Build the system once. Refine it over time. Let the work speak for itself.