
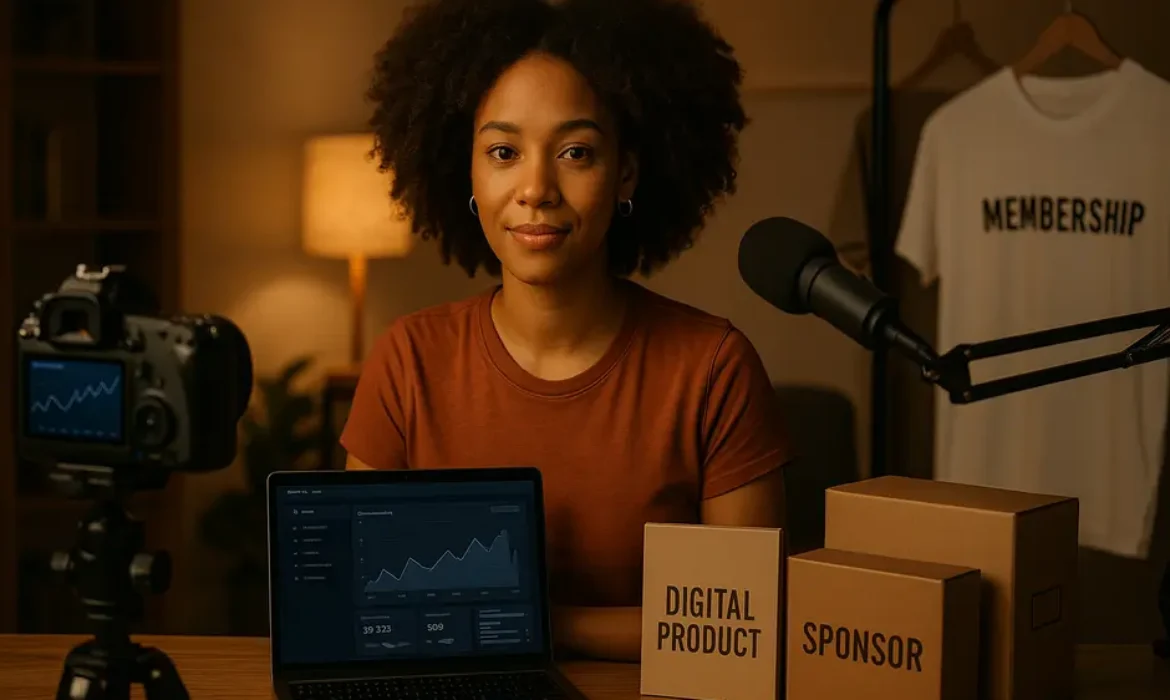
How to Make Money on YouTube Without Millions of Views
How to Make Money on YouTube Without Millions of Views
Estimated reading time: 16 minutes
1. The Myth That Views Equal Income
Most people assume that making money on YouTube is a numbers game. Get a million views, earn a few thousand dollars from ads, repeat. That logic made sense ten years ago when AdSense was the only real option on the table. Today, it is one of the least efficient ways to earn from a channel — especially when you are just starting out.
Here is a number that puts things in perspective: the average YouTube CPM (cost per thousand views) sits somewhere between $1 and $5 for most niches. That means a video with 50,000 views might generate $50 to $250 in ad revenue. Before the platform takes its 45% cut. Before taxes. Not exactly the income model dreams are made of.
But here is what changes everything. Creators who understand how to monetise a YouTube channel beyond AdSense are routinely earning $5,000, $10,000, or more per month with audiences in the low thousands. Not because they found a loophole, but because they stopped thinking like broadcasters and started thinking like business owners.
This guide is about exactly that shift — and every practical, proven method that makes it work.
2. Why Small Channels Are Actually Better Positioned Than You Think
There is a concept in marketing called audience specificity, and smaller YouTube channels tend to have it in abundance. When your channel has 2,000 highly engaged subscribers interested in personal finance for freelancers, or home fermentation, or drone photography, you have something that mass-appeal channels with a million subscribers often struggle to offer: trust and relevance.
Brands increasingly understand this. The influencer marketing industry was valued at over $21 billion in 2023 according to Statista, and a growing share of that spend is moving toward micro-creators (channels with 1,000 to 100,000 subscribers) because engagement rates are higher and conversion rates often outperform those from mega-influencers.
A viewer who has followed your 5,000-subscriber channel for six months trusts your opinion. They watch your videos in full. They read your pinned comments. They click your links. That relationship is genuinely valuable, and it is something you can build a real business around long before you hit any arbitrary view threshold.
3. YouTube Monetisation Without AdSense: The Full Picture
To be clear, the YouTube Partner Program (YPP) still has its place. Once you hit 1,000 subscribers and 4,000 watch hours (or 10 million Shorts views under the updated requirements), enabling AdSense is sensible. It requires no extra work and generates passive income in the background.
But relying on it as your primary revenue stream is a strategic mistake. The following table illustrates just how stark the contrast can be between passive ad income and intentional monetisation.
| Revenue Stream | Typical Earning Potential | Audience Size Required | Effort Level |
|---|---|---|---|
| AdSense/CPM Ads | $1–$5 per 1,000 views | Large (100K+) | Low |
| Affiliate Marketing | $50–$5,000+/month | Small to Medium | Medium |
| Digital Products | $500–$20,000+/month | Small (500+) | High (upfront) |
| Sponsorships | $200–$10,000+ per deal | Small to Medium | Medium |
| Online Courses | $1,000–$50,000+/month | Small (niche) | High (upfront) |
| Channel Memberships | $100–$3,000+/month | Engaged community | Medium |
| Coaching/Consulting | $1,000–$20,000+/month | Very Small (50+) | High (ongoing) |
| Merchandise | $200–$5,000+/month | Loyal community | Medium |
As you can see, the highest-earning strategies often require the smallest audience — they just require the right audience and the right offer.
4. Affiliate Marketing on YouTube: The Quiet Revenue Machine
Affiliate marketing is arguably the most accessible and scalable way to make money on YouTube without views in the millions. The mechanics are simple: you recommend a product or service, include a tracked affiliate link in your description, and earn a commission when viewers purchase through it.
What makes YouTube particularly powerful for affiliate marketing is the longevity of video content. A well-optimised video can surface in search results for years. That review you filmed about a project management tool in 2022 is still generating clicks — and commissions — in 2025. Written blog posts can do this too, but video builds the trust that converts.
Affiliate programs worth considering by niche:
- Software and SaaS: Programs like those offered through Impact or PartnerStack often pay 20–40% recurring commissions
- Amazon Associates: Lower commissions (typically 1–10%) but applicable to nearly any product category
- Financial products: Credit cards, investment platforms, and insurance products frequently offer $50–$200 per lead
- Online courses and education platforms: Teachable, Kajabi, and Coursera all run affiliate schemes with strong commission rates
How to integrate affiliate marketing without it feeling transactional:
The creators who earn the most from affiliate marketing do not lead with links. They build content around genuine recommendations. A video titled “The Exact Tools I Use to Edit YouTube Videos” outperforms a video titled “Best Video Editing Software” because it carries personal authority. Viewers trust that the creator has actually used what they are recommending.
Always disclose affiliate relationships clearly. Beyond being an ethical standard, it is required by the FTC guidelines on endorsements, and YouTube’s own policies. Transparency does not hurt conversions — in most cases, it strengthens them.
5. Selling Digital Products Directly From Your Channel
If affiliate marketing is the entry-level monetisation strategy, digital products are the graduate level. The margin is 100% (minus platform fees), the delivery is automated, and a single well-designed product can generate income indefinitely.
The types of digital products that sell consistently from YouTube channels include:
- Templates (Notion, Canva, Excel, Figma)
- Ebooks and guides
- Presets (Lightroom, video LUTs)
- Swipe files and resource libraries
- Audio samples, music packs, or sound design kits
- Printables and planners
Platforms like Gumroad make it remarkably easy to list and sell digital products without technical overhead. You can have a product live in under an hour, and link to it from every relevant video description.
What makes this work with a small audience:
Conversion is about relevance, not reach. A channel with 3,000 subscribers teaching UI/UX design can sell a $29 icon pack or $97 Figma component library and generate thousands of dollars in monthly revenue — because the audience came specifically for that type of content. They are already pre-qualified buyers.
The key is alignment. Your digital product should solve the exact problem your videos address. If you are making videos about meal prepping for busy professionals, a $15 downloadable meal planning system is a natural, frictionless purchase for your viewers. It extends the value of your content rather than interrupting it.
6. Sponsorships and Brand Deals for Micro-Creators
Brand deals for micro-creators have gone from a niche practice to a mainstream budget line for savvy marketing departments. Companies have realised that a well-placed mention in a tightly relevant video often outperforms a banner campaign reaching hundreds of thousands of disengaged people.
What brands are actually paying:
| Channel Size | Typical Sponsorship Rate (per video) |
|---|---|
| 1,000–5,000 subscribers | $100–$500 |
| 5,000–25,000 subscribers | $500–$2,000 |
| 25,000–100,000 subscribers | $2,000–$8,000 |
| 100,000–500,000 subscribers | $8,000–$30,000 |
These are estimates, not guarantees. Channels in high-value niches like finance, technology, or B2B software consistently command rates at the top of these ranges or well beyond them.
How to land your first brand deal without a booking agent:
Start by identifying brands that already sponsor channels in your niche. Study their talking points and campaign styles. Then reach out directly — not with a vague “collaboration inquiry,” but with a specific, data-backed pitch. Your media kit should include subscriber count, average views per video, audience demographics, engagement rate, and one or two examples of content that aligns with their product.
Platforms like Passionfroot, Grapevine, and Creator.co connect brands with smaller creators and can help you build your first sponsorship relationships while you are growing.
One important distinction: there is a difference between sponsored content and a genuine editorial partnership. The most successful brand deals happen when there is authentic alignment between the product and the creator’s values. Viewers can detect inauthenticity quickly, and a poorly matched sponsorship can damage the trust you have spent months building.
7. Channel Memberships, Patreon, and Community Revenue
Recurring revenue is the holy grail of any creator business, and YouTube’s channel membership feature — along with external platforms like Patreon — makes it achievable even with a modest subscriber base.
YouTube channel memberships allow subscribers to pay a monthly fee (starting from $0.99 in some regions, but most creators set tiers between $2.99 and $24.99) in exchange for perks like exclusive content, badges, custom emojis, and early access to videos.
Patreon operates on the same model but outside YouTube’s ecosystem, which gives you more flexibility and means you retain a greater portion of revenue (Patreon takes 5–12% depending on the plan, compared to YouTube taking 30% of membership revenue).
What actually makes memberships work:
The channels that build sustainable membership income do not just offer access — they offer community. Discord servers, monthly live Q&As, behind-the-scenes content, and the feeling of being part of an inner circle are what convert casual viewers into paying members.
A channel with 4,000 subscribers that converts 3% of its audience into $5/month Patreon supporters is earning $600 per month from memberships alone. Convert 5%, and you are approaching $1,000 before a single ad runs. These numbers are modest but consistent, and they compound over time as your audience grows.
8. Online Courses, Coaching, and Consulting
For creators with genuine expertise, selling online courses or offering coaching services represents one of the highest-leverage monetisation strategies available — and it does not require a large audience to be profitable.
Consider the math: a $297 online course sold to 50 people generates $14,850. A $500/month coaching package with 10 clients generates $5,000 per month. Neither of these outcomes requires anything close to viral reach. They require the right positioning and a compelling offer that solves a real problem.
YouTube serves as the perfect top-of-funnel for course and coaching businesses. Your videos demonstrate your knowledge, build trust over time, and naturally guide interested viewers toward a deeper paid engagement with your work.
Platforms like Teachable, Kajabi, and Podia handle the technical side of course delivery. For coaching, a simple booking tool like Calendly combined with a Stripe payment link is often all you need to get started.
The positioning principle that changes everything:
The most successful course creators on YouTube do not teach everything for free. They create content that solves specific surface-level problems while making it clear that deeper transformation — the kind that produces real, lasting results — comes from the course or programme. There is an art to this balance, and it takes practice, but the principle is straightforward: your free content builds trust, your paid content delivers transformation.
9. Merchandise Without a Massive Audience
Merchandise is often listed as a monetisation strategy best left until a creator has tens of thousands of loyal fans. And for generic branded merchandise — a t-shirt with your channel logo — that is probably true.
But merchandise tied directly to your community’s identity or inside references is a different proposition entirely. A channel built around a specific philosophy, aesthetic, or community vocabulary can sell merchandise profitably with a few hundred highly engaged fans.
Print-on-demand services like Printful, Printify, and Teespring (now Spring) eliminate upfront inventory risk. You design the product, connect it to your channel through YouTube’s merchandise shelf (available to channels with 10,000+ subscribers), and earn a margin on each sale without handling fulfilment.
The creators who succeed with merchandise at small scale tend to think of it less as a revenue stream and more as a community artefact — something their audience wants to own because it represents something they genuinely identify with.
10. Super Thanks, Super Chats, and Platform-Native Revenue
YouTube has expanded its suite of creator monetisation tools considerably in recent years. Super Thanks allows viewers to purchase an animated thank-you and have their comment highlighted on any video — not just live streams. Super Chats and Super Stickers serve a similar function during live broadcasts.
These features are available to channels enrolled in the YouTube Partner Program, and while they rarely become primary revenue drivers, they add a meaningful layer of direct financial support from your most engaged viewers.
Super Thanks in practice:
Channels that generate consistent Super Thanks tend to have strong viewer-to-creator relationships. Tutorial channels, educational content, and any video where someone credits your work with a real breakthrough in their life are natural candidates. Prompting viewers with something as simple as “If this video saved you time, Super Thanks is always appreciated” at the end of a video is enough to activate this behaviour.
It will not replace sponsorship income or product sales, but over the course of a year, a channel that receives $10 to $50 in Super Thanks per video across a catalogue of 50+ videos is generating several hundred to a few thousand dollars annually in pure tip revenue.
11. How to Stack These Revenue Streams Strategically
The creators earning consistent, significant income from small YouTube channels are almost never relying on a single stream. They are stacking complementary revenue sources in a way that makes the total greater than the sum of its parts.
A practical example of a stacked revenue model for a channel in the personal finance niche with 8,000 subscribers:
- Affiliate links to budgeting apps, investment platforms, and financial books: $800–$2,500/month
- One digital product (a budget spreadsheet template at $27): $400–$1,200/month
- One monthly sponsor at the micro-creator rate: $500–$1,500/month
- Patreon membership at $7/month with 80 patrons: $560/month
- AdSense: $150–$400/month
Total monthly estimate: $2,410–$6,160
From a channel with 8,000 subscribers. That is not a hypothetical — it is a realistic outcome for a creator who has built a genuinely useful channel, treats it like a business, and understands how to serve an audience well.
The key insight is sequencing. Do not try to launch everything simultaneously. Start with the revenue stream that requires the least overhead (typically affiliate marketing), prove the model, then layer in digital products, then pursue sponsorships once you have social proof. Memberships and courses make most sense once your audience knows, trusts, and actively engages with you.
Key Takeaways
-
- AdSense alone is an inefficient monetisation strategy, especially for channels under 100,000 subscribers
- Affiliate marketing offers the fastest route to meaningful low view YouTube income with minimal upfront investment
- Digital products, courses, and coaching consistently generate the highest revenue per subscriber of any monetisation method
- Brand deals and sponsorships are genuinely accessible to micro-creators in the right niches — engagement and relevance matter more than raw subscriber numbers
- Channel memberships and Patreon create the recurring revenue foundation that makes a creator business financially stable
- Stacking multiple revenue streams, introduced in a logical sequence, is what separates hobbyists from professional creators
- A highly engaged audience of 2,000 is commercially more valuable than a passive audience of 200,000
Frequently Asked Questions
Q1: How many subscribers do you need to start making money on YouTube?
Technically, you do not need any subscribers to start earning. Affiliate marketing and digital product sales can generate income from your first video if the content drives relevant traffic and includes well-placed links. The YouTube Partner Program requires 1,000 subscribers and 4,000 watch hours to unlock AdSense and channel memberships, but those are platform-specific thresholds, not prerequisites for earning. Plenty of creators generate meaningful income long before hitting those numbers.
Q2: Is affiliate marketing on YouTube still worth it in 2025?
Absolutely, and arguably more so than ever. As short-form content floods social platforms, long-form YouTube videos that provide genuine product guidance, tutorials, and comparison content occupy a valuable and less crowded space. Viewers who arrive on a detailed product review are in a high-intent mindset — they are actively researching a purchase. That context makes YouTube affiliate conversions consistently strong across niches.
Q3: What is the best digital product to sell on a YouTube channel?
The best digital product is one that directly extends the value of your video content. If you teach something in your videos, a template, worksheet, guide, or tool that helps viewers implement what they just learned tends to convert extremely well. Canva templates, Notion dashboards, Lightroom presets, and budget spreadsheets are all proven formats that combine perceived value with low production cost. The ideal price point for entry-level digital products sits between $9 and $49 to minimise purchase friction.
Q4: How do I get brand deals with a small channel?
Start by building a one-page media kit that clearly communicates your audience demographics, average engagement rate, niche, and the value you offer to brand partners. Then reach out proactively to brands whose products you already use and genuinely recommend. Specificity in your pitch matters enormously — explain exactly what you would create, how it serves their target customer, and why your audience is the right fit. Creator marketplaces like Passionfroot and Grapevine also connect smaller channels with brand campaigns actively seeking micro-creator partnerships.
Q5: Does YouTube take a cut of Patreon or digital product sales?
No. Revenue earned through external platforms like Patreon, Gumroad, Teachable, or direct affiliate links sits entirely outside YouTube’s monetisation ecosystem. YouTube takes 30% of revenue earned through its own native features — channel memberships, Super Thanks, and Super Chats. This is one reason many creators use YouTube as a traffic and trust-building channel while hosting their paid products and communities on independent platforms where they retain more control and a larger share of revenue.
Q6: Can you make a full-time income on YouTube with under 10,000 subscribers?
Yes, and it happens more often than most people assume. The creators who achieve this typically have highly specific, commercially relevant niches; strong audience relationships built over consistent content; and multiple revenue streams operating simultaneously. A creator in the B2B software space, legal education, or financial advisory niche with 5,000 engaged subscribers can comfortably earn $5,000 to $15,000 per month through a combination of affiliates, sponsorships, and their own products. Niche selection is arguably the single most important variable in this outcome.
Q7: What is the easiest way to start monetising a YouTube channel with no audience yet?
The most accessible starting point is affiliate marketing. Join a relevant affiliate programme, create content that naturally incorporates product recommendations, include your tracked links in video descriptions, and optimise your videos for YouTube search around terms your target viewer is already searching. There is no audience requirement, no product to build, and no sponsorship negotiation needed. As your catalogue grows and your channel gains authority, the affiliate revenue compounds — and you will have built an audience primed to purchase your own products when you are ready to create them.
Conclusion
The prevailing narrative around YouTube income — that you need millions of views to earn meaningful money — is not just outdated, it is actively misleading for the majority of creators trying to build something real.
The platform has evolved into a sophisticated ecosystem where the size of your audience is far less important than the depth of your relationship with it, the relevance of your niche, and your willingness to think commercially about what you create. Affiliate commissions, digital product sales, niche sponsorships, memberships, and coaching revenue are all available to creators who understand that YouTube is a distribution channel first and an ad network second.
The creators thriving right now are not waiting to go viral. They are building specific audiences, solving genuine problems, and monetising with intention. That approach is available to anyone willing to commit to it — and it starts long before the subscriber count hits any particular milestone.
All earning estimates referenced in this article reflect general market observations and creator-reported income ranges. Individual results vary based on niche, content quality, consistency, and business strategy.
YouTube Shorts Monetization in 2026: How Much Can You Realistically Earn?
YouTube Shorts Monetization in 2026: How Much Can You Realistically Earn?
Estimated reading time: 14 minutes
The State of YouTube Shorts in 2026
When YouTube Shorts launched its ad revenue sharing model in February 2023, it marked a fundamental shift in how short-form content creators could earn money on the platform. Before that point, the only option was the Shorts Creator Fund — a pool of money that paid pennies regardless of how well your content performed. The transition to a proper ad revenue sharing model changed the calculus entirely.
Fast forward to 2026, and YouTube Shorts has cemented itself as one of the dominant short-form video platforms globally, competing directly with TikTok and Instagram Reels for creator attention and advertiser spend. With over 70 billion daily Shorts views reported in recent years and that number continuing to climb, the monetization conversation has become far more nuanced than it was even two years ago.
The question most creators are asking — whether they have 500 subscribers or 500,000 — is simple: how much can you actually make from Shorts in 2026? Not theoretically. Not in the best-case scenario. Realistically, with normal growth, normal content, and a normal audience.
That is exactly what this breakdown covers.
How YouTube Shorts Monetization Actually Works
The mechanics behind YouTube Shorts earnings are genuinely different from standard YouTube monetization, and misunderstanding them leads to enormous frustration for creators who expected Shorts to pay like traditional videos.
Here is the core structure of how money flows through the Shorts ecosystem in 2026.
The Revenue Pool Model
Unlike long-form YouTube videos where ads are placed directly on your specific video and you earn a cut of those placements, Shorts uses a revenue pool model. Advertisers run ads between Shorts in the feed. That ad revenue goes into a collective monthly pool. YouTube takes its share, and then the remaining creator-eligible revenue is distributed based on how many views each eligible creator drove relative to total pool views.
Think of it like a shared tip jar at a coffee shop. Your earnings depend not just on how much you bring in, but how many other baristas are splitting the same pot.
This is why Shorts RPM figures often confuse creators who come from a long-form background. Your per-view earnings are not a direct reflection of ad rates on your specific videos.
Music Licensing Deductions
Here is a detail that significantly affects many creators: if your Shorts use licensed music from YouTube’s library, a portion of the revenue pool allocated to those views is paid to music rights holders. What remains is what gets shared among creators. A Short without licensed music keeps the full creator-eligible portion. A Short using a popular song will see a meaningful deduction before any creator payout occurs.
This is not a punishment — it is a licensing compliance mechanism — but it has a real-world impact on your earnings that many guides fail to mention clearly.
YouTube Shorts RPM: What the Numbers Really Look Like
RPM, or revenue per 1,000 views, is the standard metric creators use to benchmark their earnings. For long-form content, RPM can range anywhere from $2 to $20+ depending on niche, audience location, and advertiser competition. Personal finance, legal, and B2B tech content consistently commands the highest rates.
Shorts RPM tells a different story.
Typical Shorts RPM Ranges in 2026
| Channel Category | Estimated Shorts RPM Range |
|---|---|
| General Entertainment | $0.03 – $0.07 |
| Comedy / Viral Content | $0.04 – $0.09 |
| Education / How-To | $0.05 – $0.12 |
| Finance / Business | $0.06 – $0.15 |
| Tech Reviews | $0.05 – $0.13 |
| Lifestyle / Vlogging | $0.03 – $0.08 |
| Gaming | $0.03 – $0.07 |
These figures reflect what many mid-size and larger creators have publicly shared across creator forums, YouTube community posts, and interviews with publications like Creator IQ and Tubefilter. The reality is that Shorts RPM is substantially lower than long-form RPM — often by a factor of 20 to 50 times.
A long-form finance channel earning $8 RPM on regular videos might see $0.10 to $0.15 RPM on Shorts from the same audience. That is not a flaw in the system. It reflects the fundamental difference in ad placement. Ads run between Shorts, not within them, meaning viewer attention is less concentrated and completion of ad content is harder to guarantee.
What Does That Mean in Practical Earnings?
If your Shorts receive 500,000 views in a month:
- At $0.05 RPM: approximately $25
- At $0.10 RPM: approximately $50
- At $0.15 RPM: approximately $75
One million views might earn you $50 to $150. For most creators building solely on Shorts volume, ad revenue alone will not replace a salary. But that is not the right way to evaluate the platform’s value, as we will explore shortly.
The YouTube Partner Program and Shorts Eligibility
To earn from Shorts ad revenue at all, you need to be a member of the YouTube Partner Program. In 2026, YPP has two tiers with different eligibility thresholds.
YPP Eligibility Tiers
| Tier | Requirements | Shorts Monetization |
|---|---|---|
| Standard YPP | 500 subscribers + 3,000 watch hours OR 3 million Shorts views in 90 days | Limited (Channel Memberships, Super Thanks) |
| Full YPP | 1,000 subscribers + 4,000 watch hours OR 10 million Shorts views in 90 days | Full ad revenue sharing on Shorts |
The 1,000 subscribers threshold remains the gateway to full Shorts ad revenue sharing. Creators who meet the Shorts-specific view threshold — 10 million views in a 90-day window — can qualify for full YPP without meeting the watch hours requirement, which is a significant advantage for channels that are Shorts-first.
It is worth noting that YouTube modified these thresholds in late 2023 and they have remained relatively stable since, though the platform does reserve the right to adjust requirements. For the most current figures, checking YouTube’s official Help documentation directly is always advisable.
The Old Creator Fund: Why It No Longer Matters
The original YouTube Shorts Creator Fund, which predated the ad revenue sharing rollout, is no longer the mechanism through which creators earn. It has been superseded. Bringing it up is mostly a historical footnote at this point, but creators who built their understanding of Shorts earnings around the old fund structure need to recalibrate. The new model is proportional to your view contribution within the pool — an improvement, though still not generous by long-form standards.
Shorts vs Long-Form: Where Does the Money Actually Come From?
This comparison is one of the most searched questions among hybrid content creators, and it deserves a direct, honest answer rather than a diplomatic hedge.
Direct Ad Revenue Comparison
| Metric | Long-Form Video | YouTube Shorts |
|---|---|---|
| Ad Placement | Mid-roll, pre-roll on your video | Between videos in feed |
| Typical RPM | $2 – $20+ | $0.03 – $0.15 |
| Earnings per 1M views | $2,000 – $20,000 | $30 – $150 |
| Music Deduction Risk | Low | High (if using licensed tracks) |
| Watch Time Contribution | Yes | Partially |
Looking at that table, long-form wins the direct monetization comparison decisively. But that comparison misses a substantial part of what Shorts is actually useful for.
Shorts as a Discovery Engine
Many experienced creators in 2026 treat Shorts not primarily as a revenue source but as their top-of-funnel growth mechanism. A well-performing Short drives subscribers. Those subscribers then consume long-form content that earns at 10 to 50 times the RPM rate. The calculus shifts dramatically when you factor in the lifetime value of a subscriber acquired through a Short.
A creator in the personal finance space might earn $0.08 per 1,000 Shorts views directly. But if those Shorts drive 10,000 new subscribers who each watch two long-form videos per month at $8 RPM, the downstream value of those subscribers over a year easily eclipses what the Shorts themselves earned.
This is how creators with strategic approaches build sustainable businesses on YouTube in 2026. They are not chasing Shorts RPM — they are using Shorts to build an audience that monetises elsewhere.
Beyond Ad Revenue: Other Ways to Monetize YouTube Shorts
Ad revenue from the pool is just one layer of a Shorts monetization strategy. Creators who understand the full stack available to them earn considerably more than those focused solely on RPM figures.
Brand Sponsorships and Integrations
Sponsored Shorts are becoming an established category. Brands paying for 15- to 60-second product features in Shorts format are now standard in sectors like consumer tech, gaming peripherals, fitness supplements, and direct-to-consumer apps. A creator with 200,000 engaged subscribers in a relevant niche can command anywhere from $500 to $3,000 per sponsored Short depending on niche, engagement rate, and audience demographics.
Affiliate Marketing Through Shorts
Including affiliate links in Shorts descriptions works. It is not as friction-free as a clickable link in a TikTok bio or an Instagram Story swipe-up, but creators who direct viewers to their description or channel profile page see real conversion traffic. Amazon Associates, ShareASale, and software affiliate programs with high recurring commissions (such as those offered by SaaS tools popular in the creator economy) translate well to Shorts audiences that trust the creator’s recommendations.
Channel Memberships and Super Thanks
Once you reach YPP status, channel memberships allow your most loyal Shorts viewers to support you directly for a monthly fee. Super Thanks — the ability for viewers to tip during a video — also applies to Shorts, giving engaged fans a direct way to contribute.
Merchandise and Digital Products
Creators who have built personality-driven Shorts channels successfully sell merchandise through the YouTube Shopping integration, or direct audiences toward digital products — presets, templates, online courses, and e-books — listed in their channel profile.
YouTube Shorts Bonus Program
YouTube has periodically run bonus programs that pay creators additional incentives for meeting specific Shorts performance targets. These programs are not always publicly announced in advance and tend to be invitation-based, targeting creators who are growing quickly or performing above platform averages. While they should not be factored into baseline earnings projections, they do represent meaningful additional income when they occur.
What Affects Your Shorts Earnings?
Understanding why your RPM varies — sometimes dramatically month to month — requires looking at the right variables.
Audience Geography
Views from the United States, United Kingdom, Canada, and Australia generate significantly higher advertiser value than equivalent views from markets with lower advertising spend. A Short with 1 million views, predominantly from South or Southeast Asian audiences, will earn materially less than the same view count from a North American or Western European audience.
Niche and Advertiser Demand
Advertisers pay more to reach specific demographics. Finance, business, software, real estate, health, and education audiences attract higher CPMs because the commercial value of those viewers is demonstrably higher. A productivity tip Short will typically outperform a dance trend Short in raw RPM even if the latter gets far more views.
Viewer Completion Rate
Shorts that are watched fully, or watched multiple times, signal to YouTube that the content is high quality. This affects your distribution in the algorithm, which in turn affects the volume of monetisable views you receive.
Posting Consistency
The pool model rewards consistent volume. Creators who post daily or near-daily build a larger proportional share of monthly pool views compared to those who post sporadically.
Season and Advertiser Budget Cycles
Ad revenue across all digital platforms peaks in Q4, particularly October through December, due to holiday advertising spend. Shorts RPM in Q4 can be 30 to 60 percent higher than Q1. Factoring this seasonality into annual projections prevents misreading a January dip as a structural problem.
Realistic Earnings Scenarios by Channel Size
| Creator Profile | Monthly Shorts Views | Est. Ad Revenue | Other Revenue Potential |
|---|---|---|---|
| New Creator (under 1K subs) | 50,000 – 200,000 | $0 (not yet YPP) | Affiliate links only |
| Growing Creator (1K – 10K subs) | 200,000 – 1M | $10 – $100 | Affiliate + occasional sponsorship |
| Established Creator (10K – 100K subs) | 1M – 10M | $100 – $1,000 | Sponsorships, affiliate, memberships |
| Large Creator (100K – 500K subs) | 10M – 50M | $1,000 – $5,000 | Brand deals, merchandise, digital products |
| Major Creator (500K+ subs) | 50M+ | $5,000 – $15,000+ | Full multi-stream revenue |
These figures deliberately include a wide range because individual results vary significantly. A creator in finance with 50,000 subscribers who posts consistently and has a US-heavy audience will outperform a general entertainment creator with 200,000 subscribers and globally distributed viewership.
The clearest pattern: ad revenue alone from Shorts rarely constitutes a full income at any tier below 500K subscribers. It becomes meaningful as a supplementary income stream much earlier, particularly when combined with the other revenue channels outlined above.
How to Maximise Your YouTube Shorts Revenue
Tactical execution matters as much as understanding the theory. Here are evidence-based approaches that impact both your Shorts analytics and your earnings.
Optimise for Hook Strength
The first one to three seconds of a Short determine whether a viewer watches through or scrolls away. Higher completion rates feed better algorithmic distribution, which feeds more views, which feeds more pool revenue. Study your Shorts analytics for average percentage viewed and refine your hooks based on what actually retains people.
Post Without Licensed Music When Possible
Where original audio, voiceover, or royalty-free music serves the content equally well, the absence of licensed music deductions means you retain the full creator-eligible portion of pool revenue. Over thousands of views, this is not negligible.
Use Shorts to Build Toward Long-Form
For creators building a long-term business, each Short should ideally convert a percentage of viewers to subscribers who will engage with higher-RPM content. Include clear but natural calls to subscribe when it fits the content.
Target Niche Topics With Advertiser Demand
General entertainment Shorts can accumulate massive views but thin revenue. Niche content in high-value categories — finance tips, software tutorials, career advice, health guidance — earns at higher RPM even at lower absolute view counts.
Post During Peak Engagement Windows
Shorts analytics show when your audience is most active. Consistent posting during those windows improves early engagement velocity, which YouTube’s algorithm interprets as a quality signal for broader distribution.
Leverage Shorts Analytics Actively
YouTube’s built-in analytics dashboard for Shorts now provides per-video RPM, traffic source data, audience retention curves, and demographic breakdowns. Using this data to iterate rather than guessing is what separates systematic creators from those who post and hope.
Key Takeaways
-
- YouTube Shorts monetization operates on a revenue pool model, not direct per-video ad placement, which explains the fundamentally lower RPM compared to long-form content
- Typical Shorts RPM in 2026 ranges from $0.03 to $0.15 per 1,000 views depending on niche, audience geography, and music licensing deductions
- Full ad revenue sharing requires full YouTube Partner Program membership: 1,000 subscribers plus 4,000 watch hours, or 10 million Shorts views in 90 days
- At realistic view volumes, direct ad revenue from Shorts alone is unlikely to constitute a primary income below the 500K subscriber tier
- Brand sponsorships, affiliate marketing, digital products, and channel memberships dramatically expand the practical earning potential of a Shorts-first or Shorts-supplemented strategy
- Shorts RPM peaks in Q4 and drops in Q1, meaning annual income should be modelled across the full calendar cycle
- The smartest use of Shorts in 2026 is as a combined growth and monetization vehicle — top-of-funnel audience acquisition that feeds more lucrative long-form content and direct brand relationships
FAQs
Q1: How much does YouTube Shorts pay per 1,000 views in 2026?
The honest answer is that it varies considerably. In 2026, most creators see Shorts RPM in the range of $0.03 to $0.15 per 1,000 views. Finance and education content tends toward the higher end of that range, while general entertainment and gaming content typically sits at the lower end. Licensed music tracks further reduce your earnings since a portion of the creator-eligible revenue is redirected to rights holders. A reasonable middle-ground estimate for planning purposes is around $0.05 to $0.08 per 1,000 views for a general content creator with a geographically mixed audience.
Q2: Can you make a full-time income from YouTube Shorts alone?
It is possible, but at the view volumes required, it is genuinely difficult to achieve through Shorts ad revenue alone. A creator earning $0.06 RPM would need roughly 167 million monthly views to generate $10,000 per month purely from ad revenue. Few creators outside the top percentile achieve that volume consistently. The more sustainable path to full-time income is using Shorts ad revenue as one layer of a broader monetization stack that includes sponsorships, affiliate income, and product sales. Creators who build that diversified model typically reach full-time income levels significantly faster than those targeting ad revenue thresholds alone.
Q3: Do YouTube Shorts count toward your watch time for monetization?
Shorts views count toward the Shorts-specific 10 million view threshold for YPP qualification, but they do not contribute to the 4,000 watch hours requirement that traditional long-form videos fulfil. If your channel strategy is Shorts-first, you either need to reach 10 million Shorts views in 90 days or supplement with enough long-form content to accumulate watch hours. YouTube confirmed this distinction in their Partner Program documentation, and it has remained a point of confusion for creators building Shorts-heavy channels.
Q4: Is YouTube Shorts monetization better or worse than TikTok’s Creator Rewards Program?
This comparison is context-dependent. TikTok’s Creator Rewards Program introduced in 2023 and refined since has improved creator payouts relative to the original TikTok Creator Fund, but YouTube Shorts generally offers more diversified monetization options — including memberships, Super Thanks, merchandise integration, and a broader affiliate ecosystem through YouTube Shopping. For raw per-view earnings, the two platforms are competitive in certain niches. For total creator income potential when all revenue streams are considered, YouTube’s ecosystem typically offers greater upside for creators building long-term audiences, primarily because of the long-form content opportunity sitting alongside Shorts.
Q5: Why did my Shorts RPM drop suddenly?
Several factors cause Shorts RPM fluctuation. The most common are: seasonal shifts in advertiser spending (Q1 and Q3 tend to see lower ad budgets), a change in your audience demographics (a viral Short that attracts viewers outside your typical niche can dilute your niche RPM), increased music licensing on recent content, or broader shifts in how YouTube weights the pool distribution in a given month. Short-term RPM drops of 20 to 40 percent are normal between months. Looking at rolling three-month averages in your Shorts analytics gives a more accurate picture of your actual earnings trend than month-to-month comparisons.
Q6: Do I need a separate channel for Shorts, or can I mix them with long-form content?
A dedicated Shorts channel is not necessary, and for most creators, it is not advisable. YouTube’s algorithm has become significantly better at understanding and distributing mixed channels where both formats co-exist. The main strategic consideration is audience alignment — if your Shorts attract a fundamentally different viewer than your long-form content, conversion to subscribers who engage across both formats will be lower. The most successful hybrid channels in 2026 use Shorts to provide quick, accessible value in the same broad niche as their long-form content, creating a natural pathway from discovery to deeper engagement.
Q7: What is the fastest way to qualify for YouTube Shorts monetization?
The fastest route to full Shorts ad revenue sharing is either reaching 1,000 subscribers with 4,000 watch hours, or hitting 10 million Shorts views within any 90-day window. For channels with strong Shorts traction, the 10 million view path is often faster than accumulating watch hours organically. Tactically: post consistently (daily or near-daily where content quality allows), optimise hooks aggressively in the first two seconds, focus on content formats with proven replay and sharing behaviour in your niche, and cross-promote Shorts through your other social channels to seed initial momentum. Some creators in trend-responsive niches have hit 10 million views in a 90-day window within their first few months — it is not guaranteed, but it is achievable with the right content approach.
Conclusion
YouTube Shorts monetization in 2026 is neither the goldmine some early adopters hoped for nor the dead end cynics claimed it was after the original Creator Fund disappointed so many. It sits somewhere more nuanced and more interesting than either extreme: a genuinely useful, if modest, direct revenue stream that becomes substantially more valuable when positioned as part of a broader content and business strategy.
The creators thriving on Shorts in 2026 are not the ones chasing RPM figures. They are the ones who understood early that Shorts is best evaluated as a growth and engagement tool that happens to pay you while it works. The ad revenue is real. The ceiling on ad revenue alone is low. But the ceiling on what a Shorts-built audience can generate across sponsorships, products, and long-form content is a completely different conversation.
Build the audience first. Understand what it wants. Monetise intelligently across multiple channels. The RPM will matter less and less as the rest of your business matures around it.
For the most current YouTube Partner Program requirements and Shorts-specific policies, refer to YouTube’s official Help Center and the YouTube Creator Academy, both of which are updated as platform policies evolve.
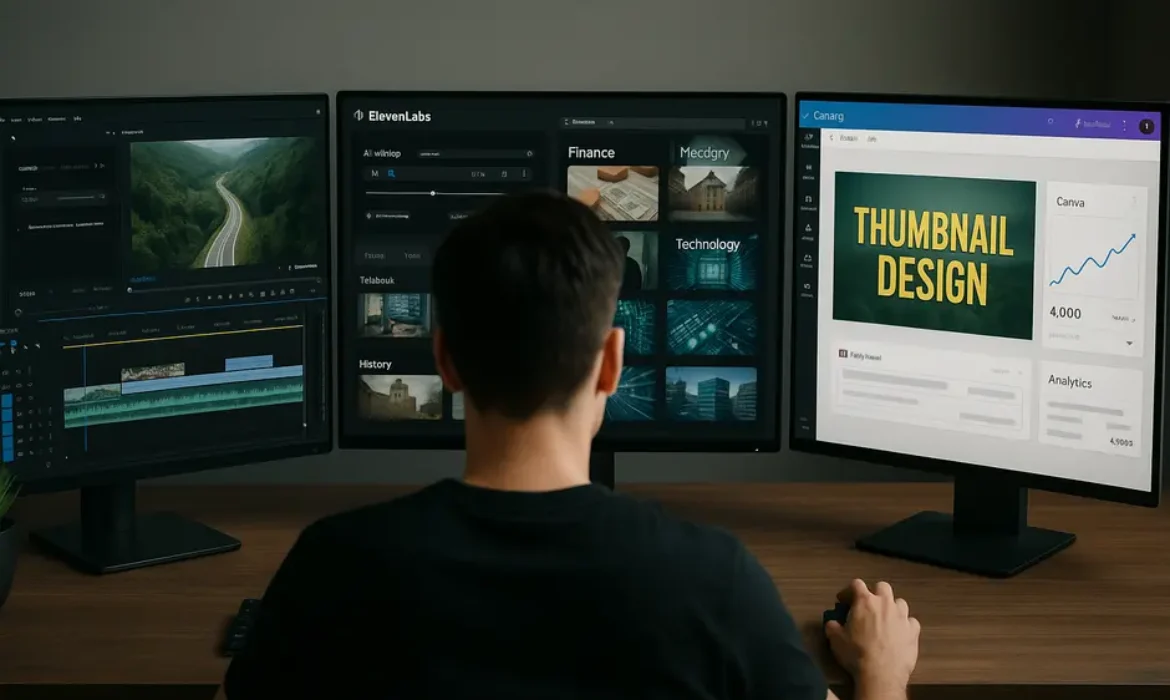
How to Start a Faceless YouTube Channel in 2026 (Step-by-Step)
How to Start a Faceless YouTube Channel in 2026 (Step-by-Step)
Estimated reading time: 14 minutes
Key Takeaways
-
- Faceless YouTube channels let you build scalable content businesses without ever appearing on camera
- Niche selection is the single most important decision you will make, and it determines both your growth speed and monetization ceiling
- Tools like ElevenLabs, Canva, and royalty-free stock footage platforms have made production quality accessible to solo creators
- YouTube automation does not mean zero effort — it means systematizing your workflow so each video requires less of your personal time
- Channels in finance, history, true crime, and self-improvement consistently outperform in terms of CPM and audience loyalty
- Your first 10 videos teach you more than any course will — publish early, optimize often
Why Faceless YouTube Channels Are Booming in 2026
There is a quiet revolution happening on YouTube, and it has nothing to do with viral personalities or influencer drama. It is being driven by creators who have never shown their face on camera — not once — and are building audiences in the hundreds of thousands while generating serious income.
The numbers support this. YouTube reported over 2.7 billion logged-in monthly users heading into the mid-2020s, and content consumption has only accelerated. Meanwhile, a growing segment of that audience craves information-rich, calm, and focused content — exactly what faceless channels tend to deliver.
The appeal from the creator side is equally compelling. You can build and run a profitable YouTube channel without the anxiety of being on camera, without expensive camera gear, and increasingly, without recording your own voice. With advances in realistic AI voiceover technology and an abundance of high-quality stock footage, the barrier to entry has dropped dramatically.
But here is what most guides will not tell you: faceless channels are not easier to grow. They require a different set of skills — tighter scripting, stronger hooks, smarter niche positioning. The face-based creators rely on personality to carry momentum. Faceless creators rely almost entirely on content quality and structure. That is both the challenge and the opportunity.
What Exactly Is a Faceless YouTube Channel?
A faceless YouTube channel is any channel where the creator never appears on camera. Instead of on-screen presence, these channels typically use one or more of the following formats:
-
-
- Voiceover with stock footage or video clips — narrated explainers, documentary-style content, news commentary
- Screen recordings — tutorials, software walkthroughs, financial analysis
- Animated or motion graphics — whiteboard videos, text animations, explainer videos
- Text-on-screen with background music — popular in niche content like stoicism quotes, motivational content
- Slide-based presentations — common in educational and business content
-
Some creators record their own voice. Others use AI voiceover tools to generate narration entirely without human recording. Both approaches work — the right choice depends on your comfort level, production goals, and how much you want to systematize the operation.
The term “YouTube automation” often gets attached to faceless channels, which creates some confusion. Automation really refers to outsourcing or systematizing various parts of production — scriptwriting, voiceover, editing, thumbnails — so the channel can publish consistently without you doing everything manually. Plenty of faceless channels are not automated at all; one person handles everything. Others are essentially content businesses with a team of freelancers.
Choosing the Right Niche (The Decision That Changes Everything)
Niche selection is where most beginners either set themselves up for success or quietly doom themselves before publishing a single video. The niche determines your audience size, your CPM rate (how much advertisers pay per thousand views), your content difficulty, and your long-term monetization options.
Here is a practical framework for evaluating a niche:
The Four-Filter Niche Test
| Filter | Question to Ask | Why It Matters |
|---|---|---|
| Audience Demand | Are people actively searching for this content? | No demand means no organic discovery |
| CPM Potential | Do advertisers spend heavily in this category? | Higher CPM = more revenue per 1,000 views |
| Content Longevity | Will videos stay relevant for months or years? | Evergreen content compounds over time |
| Production Feasibility | Can you produce this without showing your face? | Some niches are harder to execute faceless |
High-Performing Niches for Faceless Channels in 2026
Personal Finance and Investing — CPMs in this niche frequently range between $15 and $40. Topics like index fund investing, budgeting strategies, and passive income ideas attract an educated, financially active audience that advertisers are willing to pay handsomely to reach.
History and True Crime — Narrative-driven content that works beautifully with stock footage and voiceover. Audiences in these categories binge heavily, which drives strong watch time metrics.
Health and Wellness — Sleep, nutrition, mental health, and longevity topics perform exceptionally well. CPMs are solid, and the audience is enormous.
Technology and AI Explainers — In a period of rapid technological change, there is insatiable demand for clear explanations of complex topics. This niche rewards well-researched, clearly produced content.
Self-Improvement and Psychology — Stoicism, productivity, habit building, and behavioral psychology channels have cultivated enormous subscriber bases with nothing but voiceover, text on screen, and ambient music.
Business and Entrepreneurship — Case studies, startup stories, and business strategy content attract a high-value audience with strong CPMs.
Avoid choosing a niche purely based on what is trending. Trends fade. Choose a niche where you have genuine curiosity or existing knowledge — that translates into better scripts, more accurate information, and content that does not feel generic.
Tools You Actually Need to Get Started
The tools available to faceless creators in 2026 are genuinely impressive. Here is a practical breakdown of what you need at different production stages.
Scripting
Good scripts are the backbone of any successful faceless channel. No tool replaces original research and clear thinking, but tools like Notion or Google Docs work fine for drafting. Some creators use Claude or similar writing assistants to accelerate research and outlining, but the final voice and angle should always be yours.
Voiceover
ElevenLabs has become the benchmark for AI voice generation. The platform produces voices with natural cadence, emotional range, and minimal robotic quality. For creators who do not want to record their own voice — or who want to maintain complete anonymity — ElevenLabs is currently the most production-ready option available. You can explore their voice library and pricing at elevenlabs.io.
If you do want to record your own voice, a USB condenser microphone like the Blue Yeti or Audio-Technica AT2020 will give you clean audio for under $100. Decent audio quality matters far more than video quality on faceless channels.
Visuals
Stock Footage: Platforms like Pexels, Pixabay, and Storyblocks give you access to royalty-free footage. Storyblocks operates on a subscription model that is well worth it if you are publishing regularly, since the library is substantially larger.
Canva: An essential tool for thumbnail creation and basic motion graphics. Canva Pro unlocks a range of features that meaningfully speed up the design process, particularly if you are handling everything yourself.
CapCut and DaVinci Resolve: Both are strong video editing options. CapCut is faster to learn and works well for straightforward stock footage videos. DaVinci Resolve is more powerful and completely free, making it the go-to for creators who want professional-grade editing without the software cost.
Thumbnail and SEO Research
vidIQ and TubeBuddy are the two dominant YouTube research and optimization platforms. Both offer keyword research, competitor analysis, and performance tracking. vidIQ has a slight edge for trend data; TubeBuddy is excellent for A/B testing thumbnails once your channel has enough traffic to make that data meaningful.
For broader keyword research that informs your content calendar, Google Trends and Ahrefs remain the most reliable tools available.
Step-by-Step: Building Your Faceless Channel From Scratch
Step 1: Define Your Channel Identity
Before you open YouTube Studio, spend genuine time on positioning. What is your channel about? Who is the specific person you are serving? What makes your take on this topic different or better than what already exists?
You do not need a radically original concept. You need a clearly defined angle. A finance channel for people in their 20s and 30s who grew up without financial education is more compelling than a generic “money tips” channel.
Create a simple channel brief: niche, target audience, content format, publishing frequency, and the one-line reason someone should subscribe.
Step 2: Set Up Your Channel Properly
Channel setup affects your first impression and your searchability. Use your primary keyword in the channel description. Write a compelling channel description that speaks directly to your target viewer — this is often where you earn the subscribe from someone who has just finished their first video.
Add channel art and a profile image. For a faceless channel, a clean logo or icon works well. Canva has channel art templates that take minutes to customize.
Step 3: Research and Script Your First Videos
Start with 5 to 10 video topics based on search demand, not just personal interest. Use vidIQ or TubeBuddy to find keywords with reasonable search volume and lower competition. Your goal early on is not to rank for the most competitive terms — it is to build a track record and learn what resonates.
Each script should follow a clear structure:
-
-
- Hook (first 30 seconds): State the core value of the video immediately. Answer the question: why should someone keep watching?
- Body: Deliver on the promise of the title and thumbnail in a logical, well-paced sequence
- Call to Action: One clear ask — subscribe, watch the next video, or leave a comment
-
Scripts for a 10-minute video typically run between 1,400 and 1,600 words when read at a natural pace.
Step 4: Produce Your Videos
Your production workflow should become a repeatable system. Here is a straightforward workflow that works for solo creators:
-
-
- Finalize the script
- Generate or record voiceover
- Source relevant stock footage or screen record your content
- Edit video in CapCut or DaVinci Resolve — sync footage to voiceover, add captions, background music at low volume
- Export and create thumbnail in Canva
-
For your first few videos, expect this to take 6 to 10 hours per video. With practice and a refined workflow, this drops significantly.
Step 5: Optimize for YouTube Search
YouTube is the world’s second-largest search engine. Every video upload is an SEO opportunity.
-
-
- Title: Lead with your target keyword, keep it under 60 characters, make it compelling
- Description: Write a real description — at least 200 words — that naturally includes your target keyword and related terms in the first two paragraphs
- Tags: Use 5 to 10 relevant tags that reflect the specific topic and broader category
- Chapters: Add timestamps for every section — this improves watch time and appears in Google search results
- Captions: Upload an accurate transcript. Auto-generated captions have improved but manual transcripts are indexed more reliably
-
Step 6: Build a Consistent Publishing Schedule
Consistency signals to the YouTube algorithm that your channel is active and reliable. It also trains your audience to expect new content.
For a solo faceless channel, publishing once per week is a strong starting cadence. Two videos per week accelerates growth but requires a tight workflow. Publish on the same day each week — not because the algorithm rewards it directly, but because consistency in your own habits prevents the channel from stalling.
Step 7: Analyze and Iterate
Your analytics are your feedback system. After your first 10 videos, spend an hour studying your YouTube Studio data. Look for:
-
-
- Click-through rate (CTR): Are people clicking your thumbnails? A CTR below 2% suggests your thumbnails or titles need work
- Average view duration: Are people watching to the end? Low retention in the first 30 seconds means your hooks need strengthening
- Impressions vs. views: How widely is YouTube distributing your content? Low impressions relative to view count suggests your content is being discovered mostly through search rather than recommendations — not bad, but worth understanding
-
Monetization Strategies Beyond AdSense
The YouTube Partner Program requires 1,000 subscribers and 4,000 watch hours (or 10 million Shorts views). Reaching that threshold takes most new channels three to twelve months, depending on publishing frequency and niche.
Once monetized through AdSense, many creators treat ad revenue as their primary income source. The smarter approach is treating AdSense as just one layer in a diversified strategy.
| Monetization Method | When to Pursue | Revenue Potential |
|---|---|---|
| YouTube AdSense | After hitting YPP threshold | Medium — depends heavily on CPM |
| Affiliate Marketing | From day one | High — especially in finance, tech, health |
| Digital Products | Once audience is established | Very high — courses, templates, guides |
| Sponsorships | After ~10K subscribers | Medium to very high — varies by niche |
| Channel Memberships | After YPP approval | Recurring, predictable income |
Affiliate marketing deserves particular attention for faceless channels. A finance channel can embed affiliate links to brokerage platforms, budgeting apps, or financial tools in video descriptions. A technology channel can recommend software with strong affiliate programs. This revenue often exceeds AdSense in the early stages when ad revenue is still modest.
Scaling and Automating Your Channel
Once your channel is producing consistent revenue and you understand what content works, automation becomes a viable strategy for scaling output without sacrificing quality.
The components of a YouTube channel you can systematically delegate or automate include:
Scriptwriting: Hire a researcher or writer through platforms like Contra or Upwork. A well-briefed writer with subject matter knowledge can produce strong scripts for $50 to $150 per video depending on length and complexity.
Voiceover: Either use AI voiceover tools or hire voice talent from ACX, Voices.com, or Fiverr.
Editing: Video editing is typically the most time-intensive task. A skilled editor who understands your style can handle this entirely once they have worked through your first few videos together.
Thumbnails: A graphic designer who understands your brand can deliver consistent, high-CTR thumbnails quickly.
The goal of systematization is not to remove yourself entirely — it is to focus your attention on the highest-leverage activities: niche strategy, content calendar decisions, quality control, and audience relationship building.
Common Mistakes That Kill Faceless Channels Early
-
-
- Picking a niche that has no search demand. Passion is not enough. There needs to be an audience actively looking for what you are creating.
- Underestimating the importance of audio quality. Viewers will tolerate imperfect video. Poor audio sends them away immediately.
- Treating every video like it exists in isolation. The strongest channels build interconnected content ecosystems where each video naturally leads viewers to others. Use end screens, cards, and playlists deliberately.
- Giving up before the algorithm picks up momentum. Most channels experience a long quiet period before growth accelerates. The creators who win are the ones who kept publishing at month four when nothing seemed to be working.
- Copying successful channels too closely. It is fine to study what works in your niche. It is not fine to replicate someone else’s scripts, format, and style so closely that you become a lower-quality version of them. Find your specific angle and lean into it.
- Neglecting thumbnails. A strong video with a weak thumbnail will underperform. A decent video with a compelling thumbnail will often outperform better content. This is not ideal, but it is reality on YouTube.
-
FAQs
1. How long does it take to grow a faceless YouTube channel?
Most faceless channels take between 6 and 18 months to reach the YouTube Partner Program threshold, assuming consistent weekly publishing. Growth is rarely linear — many channels see slow progress for the first few months before an algorithm shift or a video gaining traction suddenly accelerates subscriber growth. Channels in high-demand niches with strong SEO optimization tend to reach monetization faster than channels in crowded or ambiguous spaces.
2. Can I use AI voiceover for my YouTube channel without any issues?
Yes. AI-generated voiceover is permitted on YouTube, and channels using it are eligible for monetization. The key consideration is that YouTube’s spam and deceptive practices policy requires transparency when content is significantly altered or synthetic. For most informational faceless channels, AI voiceover falls well within acceptable use. ElevenLabs and similar platforms provide commercially licensed voices specifically designed for content creation.
3. Do faceless YouTube channels make real money?
Absolutely, and some generate substantial income. The range is enormous — many channels earn a few hundred dollars per month from AdSense while others in high-CPM niches earn several thousand dollars monthly from ad revenue alone, supplemented by affiliate income and sponsorships. A well-positioned finance channel with 100,000 subscribers and strong affiliate partnerships can realistically generate $5,000 to $15,000 per month in total revenue. Results depend on niche, publishing consistency, content quality, and how aggressively you pursue monetization beyond ads.
4. What is the best niche for a faceless YouTube channel in 2026?
Personal finance, investing, self-improvement, health and wellness, history, and technology explainers consistently perform well for faceless formats. The “best” niche is the intersection of high advertiser demand, your genuine interest or knowledge, and an audience with specific, searchable problems. A niche you find genuinely interesting will sustain you through the difficult early months when growth is slow.
5. Do I need to invest a lot of money to start a faceless channel?
No. You can start with free tools — Canva free plan, DaVinci Resolve, Pexels for footage, and OBS for screen recording — and keep your initial investment to essentially nothing. As the channel grows and generates income, reinvesting in tools like ElevenLabs, Storyblocks, or vidIQ makes the operation more efficient. Many successful faceless channels were started on budgets under $50.
6. Is YouTube automation ethical?
Yes, when done with integrity. “YouTube automation” as a concept simply means running a channel more like a content business than a solo hobby — using freelancers, tools, and systems to produce content efficiently. The ethical line is content quality and accuracy. Outsourcing production while maintaining editorial oversight and factual standards is entirely legitimate. Pumping out low-quality, misleading, or plagiarized content to game the algorithm is both unethical and, increasingly, ineffective.
7. How many videos should I have before I start promoting my channel?
There is no perfect number, but having 6 to 10 videos live before actively promoting your channel gives new viewers enough content to explore, which increases the chance they subscribe. It also prevents a situation where someone discovers your channel through promotion and finds only one or two videos. That said, do not use “not having enough content” as a reason to delay indefinitely. Publish your first video, then build from there.
Conclusion
Starting a faceless YouTube channel in 2026 is one of the more accessible and scalable content businesses available to independent creators. The tools are sophisticated, the audience is massive, and the monetization pathways are more varied than ever.
But none of that matters without a clear niche, consistent publishing, and a genuine commitment to producing content that actually serves your audience. The faceless format removes one barrier — on-camera comfort — but it does not remove the fundamental requirements of any successful content strategy: relevance, quality, and consistency over time.
Pick your niche with care. Build your workflow until it becomes second nature. Publish before you feel fully ready. Study your data honestly and adjust. The creators who build durable, income-generating faceless channels are not the most technically gifted — they are the most persistent.
Start with one video this week. The compounding effect does the rest.
External resources referenced in this article: Statista, ElevenLabs, Pexels, Google Trends, Ahrefs

Most Profitable YouTube Channel Niches in 2026: Where the Real Money Is
Most Profitable YouTube Channel Niches in 2026: Where the Real Money Is
Estimated reading time: 15 minutes
Why Niche Selection Is the Most Important Business Decision You’ll Make on YouTube
Most people who start a YouTube channel get the fundamentals backwards. They think about production quality, thumbnails, video length, and upload frequency before they spend serious time thinking about niche. That is a costly mistake.
Your niche determines everything downstream — the advertisers who bid on your content, the RPM you earn per thousand views, the affiliate programs available to you, the audience loyalty you build, and ultimately how much money you actually take home.
Two channels can both have 100,000 subscribers and one million monthly views. One earns $2,000 a month. The other earns $22,000. The difference is almost entirely about niche.
This is not a theoretical scenario. It reflects the reality of how YouTube monetization actually works. Advertisers in financial services, legal industries, and enterprise software pay dramatically more per impression than advertisers selling T-shirts or mobile games. Understanding this dynamic is what separates creators who build sustainable businesses from those who chase views and wonder why the money never follows.
In 2026, YouTube’s monetization landscape is more mature, more competitive, and — for creators who approach it strategically — more lucrative than ever. The platform now serves over 2.5 billion logged-in users monthly, and ad spend on the platform continues to climb. Brands are getting smarter about where they place their budgets, which means the gap between high-value and low-value niches is only widening.
This guide walks through the most profitable YouTube niches heading into 2026, explains the mechanics behind the money, and gives you a framework for choosing the right category based on your own skills, interests, and financial goals.
Understanding RPM, CPM, and Why They Matter More Than Views
Before diving into specific niches, you need a firm grasp of two metrics that determine your actual earnings.
CPM (Cost Per Mille) is what advertisers pay for every 1,000 ad impressions on your content. This is set by the advertiser, influenced by their industry, their target audience, and the competition for ad placements in a given category.
RPM (Revenue Per Mille) is what you as a creator actually receive per 1,000 views. RPM is always lower than CPM because YouTube takes its cut (approximately 45% of ad revenue), and not every view results in a served ad.
Here is a simplified way to think about it: CPM tells you what brands are willing to spend. RPM tells you what lands in your pocket.
A channel in the finance niche might see CPMs ranging from $20 to $50 in the United States, while a gaming channel might see CPMs of $2 to $5 for the same audience size. Same platform, same algorithm, dramatically different economics.
| Niche | Average CPM (US Audience) | Typical RPM Range |
|---|---|---|
| Finance and Investing | $20–$50 | $10–$25 |
| Legal | $25–$45 | $12–$22 |
| Insurance | $30–$55 | $15–$28 |
| Real Estate | $18–$40 | $9–$20 |
| Business/Entrepreneurship | $15–$35 | $8–$18 |
| Tech/Software (B2B) | $12–$30 | $6–$15 |
| Health and Wellness | $10–$25 | $5–$13 |
| Digital Marketing | $14–$28 | $7–$14 |
| Gaming | $2–$6 | $1–$3 |
| Entertainment/Vlogging | $1–$4 | $0.50–$2 |
Note: These figures represent approximate ranges based on aggregated creator reports and industry benchmarks. Actual figures vary based on audience demographics, seasonality, and video content.
The difference between a $1 RPM and a $15 RPM is not marginal — it is the difference between a side hobby and a full-time business. Keep this table in mind as you evaluate the niches below.
The 10 Most Profitable YouTube Niches in 2026
1. Finance and Investing: The Undisputed King
The finance niche has held its position at the top of the YouTube monetization hierarchy for years, and 2026 is no different. If anything, the category has deepened as more everyday people seek financial literacy, retirement planning guidance, and investment strategies in an increasingly uncertain economic environment.
What makes finance so valuable to advertisers? The audience. Someone watching a video about index fund investing or Roth IRA conversions is, by definition, someone who has money to manage and is actively making financial decisions. Fidelity, Vanguard, Charles Schwab, and hundreds of fintech companies compete aggressively to reach this audience, and that competition drives CPMs sky-high.
Profitable sub-niches within finance include:
- Stock market investing for beginners
- Dividend investing and passive income strategies
- Cryptocurrency and blockchain analysis
- Retirement planning and tax optimization
- Personal budgeting and debt elimination
- Options trading education
Channels like Andrei Jikh and Graham Stephan have built audiences in the millions by delivering genuinely educational content in this space. But the market is far from saturated — there is perpetual demand because financial situations change, markets evolve, and a new generation of investors enters the market every year.
Beyond AdSense, finance channels have access to some of the most lucrative affiliate programs on the planet. Brokerage referrals, credit card partnerships, and financial software affiliates can easily add $5,000 to $50,000+ per month in secondary income for established channels.
2. Legal Content: High Stakes, Higher RPMs
Legal content is one of the most underutilized high-RPM niches on YouTube. Law firms, legal software companies, and legal services providers pay among the highest CPMs in all of digital advertising because a single converted customer can be worth thousands of dollars.
The challenge with this niche is that it requires genuine expertise or close collaboration with licensed legal professionals. But for attorneys, law students, or creators who partner with legal experts, the monetization ceiling is exceptional.
Popular formats that work well:
- “What to do if..” scenario-based legal advice
- Contract breakdowns and legal document explanations
- Constitutional and Supreme Court case analysis
- Criminal defense and civil rights content
- Immigration law guidance
Channels that operate in this space tend to see RPMs that rival or occasionally exceed finance channels, particularly when the content attracts audiences actively seeking legal representation — a demographic that legal advertisers bid heavily to reach.
3. Real Estate: Evergreen Demand, Premium Advertisers
Real estate content has demonstrated remarkable staying power as a YouTube niche because the core subject matter — buying, selling, investing in, and managing property — never goes out of style. Economic cycles change the specific questions people ask, but the demand for real estate information remains constant.
The advertiser pool here is deep: mortgage lenders, real estate platforms like Zillow and Redfin, title companies, property management software, and individual real estate agents all compete for visibility in front of an audience that is actively transacting or seriously considering major financial decisions.
Effective sub-niches within real estate:
- First-time home buyer guides
- Real estate investing (BRRRR, house hacking, REITs)
- Commercial real estate education
- Short-term rental (Airbnb) strategy
- Market analysis and housing trend commentary
The educational angle is particularly powerful here. Someone confused about the mortgage process or trying to understand cap rates represents an extremely high-intent viewer — exactly the type of person advertisers pay premium rates to reach.
4. Technology and Software Reviews
The tech niche encompasses a wide spectrum, and the profitability varies considerably depending on which segment you occupy. Consumer tech (smartphone reviews, gadget unboxings) sits at the lower end of the RPM scale. Enterprise software, SaaS tools, cybersecurity, and developer-focused content sit considerably higher.
In 2026, B2B software reviews and tutorials represent one of the most strategically sound positions in the tech niche. Companies like HubSpot, Salesforce, Monday.com, and hundreds of SaaS providers maintain aggressive YouTube advertising campaigns and affiliate programs. A single referral commission for enterprise software can range from $100 to several thousand dollars.
The tech niche also benefits from strong affiliate marketing opportunities through platforms like Amazon Associates, Best Buy, and direct manufacturer programs, though the real money in this niche tends to come from software and service referrals rather than hardware.
5. Health, Wellness, and Longevity
Health content has evolved significantly. The niche is no longer dominated by workout tutorials and recipe videos (though those still perform well). In 2026, the highest-value segments within health and wellness are:
- Longevity science and biohacking
- Mental health and anxiety management
- Chronic disease management and prevention
- Medical education and anatomy
- Supplement and nutrition research
The RPMs in health content vary considerably based on how commercially oriented the content is. A channel focused on fitness motivation earns far less per view than a channel reviewing health supplements or explaining prescription medication options — the latter attracting pharmaceutical and healthcare advertisers who pay premium rates.
One important consideration: health content falls under YouTube’s YMYL (Your Money or Your Life) category, which means the platform and its advertisers scrutinize content more carefully. Creators in this space benefit significantly from established credentials or close collaboration with verified healthcare professionals.
6. Business Education and Entrepreneurship
The entrepreneurship niche sits at a fascinating intersection of aspiration and practical education, and the advertiser interest reflects that dual appeal. Business software companies, online course platforms, payment processors, and e-commerce tools all compete heavily to reach the audience that gravitates toward this content.
What works particularly well in 2026:
- Bootstrapped business case studies
- E-commerce and dropshipping education
- Agency building and B2B service businesses
- Business model breakdowns and analysis
- Founder interviews and entrepreneurship stories
The audience attracted to business content tends to skew older (25–45), has disposable income, and makes active purchasing decisions related to business tools and services. This demographic is enormously valuable to advertisers, which keeps CPMs elevated even as the creator space in this niche has grown more competitive.
7. Digital Marketing and SEO
Digital marketing content attracts an audience of professionals and small business owners who are actively spending money on tools, courses, and services. SEO, paid advertising, email marketing, and content strategy are all sub-niches with dedicated, high-intent audiences.
The affiliate and sponsorship opportunities in this niche are exceptional. SEO tools like Ahrefs and Semrush run substantial affiliate programs, email marketing platforms pay recurring commissions, and landing page builders, CRM systems, and ad management tools all have creator partnership programs.
For faceless channel creators specifically, digital marketing is one of the most accessible high-RPM niches because the content format — screen recordings, tutorial walkthroughs, data analysis — does not require on-camera presence.
8. Artificial Intelligence and Emerging Technology
The AI content category has exploded in the past two years and shows no signs of plateauing heading into 2026. The audience for this content spans from casual technologists to senior business executives evaluating AI implementation, which creates an unusually diverse and valuable advertiser base.
Profitable angles within this niche:
- AI tool tutorials and comparisons
- Automation workflows for businesses
- AI applications in specific industries (healthcare AI, legal AI, finance AI)
- Machine learning education for non-engineers
- AI ethics and regulatory analysis
The crossover potential here is significant. A channel covering AI in finance, for example, captures the RPM benefits of both the technology category and the finance category simultaneously.
9. Personal Finance and Credit
Distinct from the broader investing niche, personal finance content focused on credit scores, debt management, budgeting, and building financial foundations from scratch serves a different — but equally valuable — audience segment.
This sub-niche is particularly well-suited for creators who want to build a loyal community around financial transformation. The credit repair industry, debt consolidation services, and consumer banking advertisers all bid aggressively on this content.
Evergreen topics like “how to build credit from zero,” “understanding your credit score,” and “how to get out of debt fast” generate consistent search traffic year after year with minimal content freshness requirements — a significant operational advantage.
10. Insurance and Financial Planning
Insurance content consistently produces some of the highest CPMs on YouTube because insurance leads are extraordinarily valuable. A single converted customer for a life insurance policy, for example, represents a lifetime value of tens of thousands of dollars to the insurer. This economics drives insurers to bid aggressively on relevant content.
The niche is less competitive than finance or business channels for a simple reason: it is harder to make interesting. Creators who crack the code on making insurance genuinely understandable and engaging have a significant opportunity with far fewer competitors than comparable high-CPM categories.
Niche vs. Broad Channel: What Actually Works in 2026
The debate between running a tightly focused niche channel versus a broader general interest channel is worth addressing directly because the conventional wisdom has evolved.
The algorithmic reality in 2026 is that YouTube’s recommendation engine rewards topical depth. A channel that comprehensively covers one subject area — say, rental property investing — gets served to qualified audiences more consistently than a channel that covers investing, travel, cooking, and personal development in rotation. The algorithm needs to understand who your channel is for before it knows who to show it to.
More practically, advertisers buying placements across YouTube advertising categories often target at the channel or content category level. A channel that is unambiguously categorized as “finance” captures those premium finance-category bids on virtually every video. A generalist channel’s videos get categorized individually, and many will fall into lower-value categories.
That said, adjacent niche expansion makes strategic sense once a channel has established authority. A personal finance channel that has built trust around budgeting content can expand into credit, investing, and tax strategy without sacrificing its core identity — and in doing so, significantly expands its total addressable audience.
Faceless YouTube Channels: A Separate Opportunity
The rise of faceless YouTube channels has opened the most profitable niches to creators who are not comfortable on camera or who want to build scalable media businesses rather than personal brands.
For faceless formats, the highest-performing niches align closely with content types that do not require personal presence:
- Finance explainers using motion graphics and data visualization
- Tech tutorials using screen recordings
- Real estate market analysis with charts and property footage
- Business case studies narrated over relevant footage
- AI and automation tutorials with screen capture
The operational advantage of a faceless channel is scalability — content can be produced by a team without the bottleneck of a single on-camera personality. Many of the most profitable YouTube channels you have never heard of (because they lack a recognizable face) are in these exact categories.
How to Choose the Right Niche for You
The highest-RPM niche in the world will not make you money if you cannot produce consistent, credible content in it. Niche selection needs to balance three factors:
1. Monetization ceiling — What is the maximum RPM, affiliate potential, and sponsorship rate achievable in this niche? Use the table above as a starting reference.
2. Your existing knowledge and credibility — Finance content from someone with no financial background tends to be superficial, and audiences notice. Your fastest path to building a genuinely authoritative channel is starting from existing expertise.
3. Sustainable content volume — Can you produce 50, 100, or 200 videos in this niche without running out of things to say? A niche that feels exhausted at 30 videos is a strategic problem.
The sweet spot is a niche where your knowledge, genuine interest, and commercial potential intersect. That intersection exists for most people — it just takes honest self-assessment to find it.
Key Takeaways
-
- RPM, not view count, is the number that actually determines your YouTube income. A 100,000-view video in finance can earn 10 to 20 times more than the same view count in entertainment
- Finance, legal, insurance, and real estate content consistently command the highest CPMs because the audience has high purchase intent and advertisers pay premium rates to reach them
- Faceless YouTube channels are a fully viable business model in 2026, especially in tutorial, analysis, and educational formats within high-RPM niches
- Niche channels outperform generalist channels both algorithmically and commercially. Depth of topical authority drives recommendations and premium ad categorization
- Secondary revenue streams — affiliate commissions, sponsorships, digital products — often exceed AdSense income in the highest-value niches. Build your channel strategy with these streams in mind from day one
- The AI content category represents a relatively new, rapidly growing, and currently less competitive opportunity that merges well with finance, health, legal, and business niches
- YouTube niche selection is a business decision, not just a creative one. Treat it with the same analytical rigor you would apply to choosing any investment
FAQs
Q1: What is the single most profitable YouTube niche in 2026?
Finance and investing consistently ranks as the highest-RPM niche on YouTube, with US-based audiences generating CPMs between $20 and $50 and creator RPMs typically ranging from $10 to $25 per thousand views. When you factor in affiliate commissions from brokerage platforms and financial tools, the total revenue potential exceeds any other content category. That said, the legal and insurance niches occasionally produce higher raw CPMs — it depends on the specific content and the audience’s commercial intent at the moment of viewing.
Q2: Can you make good money on YouTube without showing your face?
Absolutely, and many of the highest-earning YouTube channels operate without an on-camera personality. Faceless channels in finance, tech tutorials, real estate analysis, and business education perform exceptionally well because the content value is informational rather than personality-driven. The key is that the narration, script quality, and production value need to compensate for the absence of personal connection that on-camera creators naturally establish.
Q3: How many views do you need to make $10,000 per month on YouTube?
This depends almost entirely on your niche. In a gaming or entertainment niche with an RPM of $1 to $2, you would need 5 to 10 million views per month to reach $10,000 from AdSense alone. In a finance channel with an RPM of $15, that same $10,000 requires roughly 667,000 views per month. This is why niche selection is a financial decision as much as a creative one.
Q4: How long does it take for a YouTube channel to become profitable?
Most channels in competitive high-RPM niches require six to eighteen months of consistent output before reaching meaningful monetization thresholds. YouTube requires 1,000 subscribers and 4,000 watch hours in the past twelve months to qualify for the YouTube Partner Program. After that, revenue scales with audience growth, content volume, and niche RPM. Channels in high-value niches tend to generate meaningful affiliate income before they even qualify for AdSense, which is another reason strategic niche selection accelerates the timeline to profitability.
Q5: Is it too late to start a YouTube channel in a competitive niche like finance?
The finance niche is competitive, but competition is not the primary barrier — trust and consistency are. New finance channels break through every year because they bring a specific angle, demographic focus, or communication style that existing channels do not serve. A channel focused on financial planning for freelancers, or investing specifically for Gen Z, or personal finance in a non-English speaking market can find substantial audience while benefiting from the same premium RPMs as established channels.
Q6: What is the difference between RPM and CPM, and which should I optimize for?
CPM (Cost Per Mille) is the advertiser-side metric — what brands pay for 1,000 ad impressions. RPM (Revenue Per Mille) is the creator-side metric — what you receive per 1,000 video views after YouTube’s cut and accounting for views that do not serve ads. You cannot directly control CPM — it is determined by your niche and audience demographics. What you can influence is your RPM by attracting audiences in high-CPM niches, optimizing video length (longer videos can serve multiple ads), and building geographically valuable audiences (US, UK, Canada, and Australia consistently produce the highest RPMs globally).
Q7: Should I choose a niche I am passionate about or one that is most profitable?
The honest answer is that passion without commercial viability produces a hobby, and commercial strategy without genuine interest produces mediocre content that does not survive long-term competition. The most durable channels exist at the intersection of the two. If you have a genuine interest in how money works, the finance niche aligns passion with profit. If you are deeply interested in health and longevity, the health niche offers both personal meaning and significant monetization potential. Spend time honestly mapping your existing knowledge, interests, and the commercial landscape before committing — it is a decision worth taking seriously.
Conclusion
YouTube in 2026 rewards creators who think strategically about where they play before they think about how they play. The most successful channels in the highest-earning niches were not lucky — they understood that the finance, legal, real estate, and tech spaces attract premium advertisers, built credible content for those audiences, and monetized not just through AdSense but through the full ecosystem of affiliate partnerships, sponsorships, and direct products.
The opportunity is genuinely significant. But the creators who capture it will be the ones who treat niche selection as a foundational business decision rather than an afterthought. Pick your lane carefully, build depth before breadth, and let the economics of high-intent content work in your favor over time.
For further reading on YouTube’s monetization policies and advertising ecosystem, YouTube’s official Help Center documentation provides authoritative guidance on Partner Program requirements and ad revenue mechanics.
Video Editing on iPad: Can You Actually Edit Professionally on a Tablet?
Video Editing on iPad: Can You Actually Edit Professionally on a Tablet?
Estimated reading time: 16 minutes
1. The Question Every Creator Is Asking
There is a moment most video creators recognize immediately. You are on a flight, at a coffee shop, or between shoots with three hours to kill and raw footage sitting on a drive. You glance at your iPad and wonder, seriously this time, whether you could actually finish a proper edit right there.
Not a rough cut. Not a quick social clip. A real, polished, color-graded, audio-mixed video that you would put your name on without hesitation.
It is a fair question, and the answer has changed dramatically over the last two years. The combination of Apple Silicon chips pushing desktop-class performance into tablet form, ProRes recording becoming standard on iPhone and iPad Pro, and editing applications maturing into genuinely professional tools means the conversation around video editing on iPad has shifted from “interesting experiment” to “viable workflow” for many creators.
But “viable” does not mean “perfect,” and this guide is not going to pretend otherwise. What you will find here is an honest, experience-backed examination of what iPad video editing can and cannot do, which apps are worth your time and money, and how to decide whether a tablet-first or tablet-supplemental workflow makes sense for your specific situation.
2. How Capable Is the iPad for Serious Video Work?
The hardware story is genuinely impressive. The M4 chip inside the 2024 iPad Pro delivers a 10-core CPU and a 10-core GPU, paired with up to 16GB of unified memory. To put that in practical terms, the M4 iPad Pro outperforms many MacBook Pro configurations from just three years ago on raw processing benchmarks.
Apple’s M-series chips use a unified memory architecture, meaning the CPU, GPU, and neural engine share the same memory pool rather than transferring data across separate banks. For video editing, this translates into noticeably faster render times, smoother real-time playback of high-resolution footage, and better handling of effects that would choke older hardware.
ProRes recording, available on iPhone 15 Pro and iPad Pro models with the right storage configuration, means you are no longer forced to work with compressed, heavily processed footage. ProRes retains far more color and tonal information than H.264 or even H.265, giving color grading work significantly more latitude. Editing ProRes 4K footage natively on an iPad Pro without proxy media is now a realistic expectation, not a marketing claim.
The display on the iPad Pro with Liquid Retina XDR technology covers the P3 wide color gamut and reaches 1,000 nits of sustained brightness with 1,600 nits peak. For color work, that is a meaningful advantage over many laptop screens in the same price range.
So from a pure hardware standpoint, the iPad Pro is not pretending to be a professional editing device. The silicon underneath genuinely qualifies.
3. The Best Video Editing Apps for iPad in 2025
The software landscape has matured considerably. Where iPad editors once had to choose between consumer-grade clip assemblers or watered-down ports of desktop apps, there are now three serious options that each deserve examination.
| App | Developer | Price | Best For | ProRes Support | Color Grading Tools |
|---|---|---|---|---|---|
| LumaFusion | LumaTouch | $29.99 one-time | Run-and-gun editors, freelancers | Yes | Good |
| DaVinci Resolve | Blackmagic Design | Free (Pro: subscription) | Color-focused professionals | Yes | Excellent |
| Final Cut Pro | Apple | $4.99/month | Apple ecosystem users | Yes | Very Good |
Each of these has a distinct philosophy, a distinct set of strengths, and a distinct type of user who will get the most from it.
4. LumaFusion: The Professional’s Go-To Mobile Editor
LumaFusion has held a special place in the mobile editing world since its launch, and for good reason. It was designed specifically for touch-based editing rather than ported from a desktop application, which means the interface actually makes sense on a screen you are tapping and swiping rather than clicking.
The timeline accommodates up to six video and audio tracks, supports keyframing for nearly every parameter, includes a multicam editing mode, and handles ProRes, H.264, H.265, and various other formats without complaint. The color grading tools include curves, color wheels, and HSL controls that are not toys. They are functional, accurate, and responsive.
For documentary makers, event videographers, news journalists, and content creators working across social platforms, LumaFusion handles the full job. You can import from external drives, work directly from connected storage, add custom LUTs, mix audio with precision, and export in broadcast-ready formats.
The Apple Pencil integration is particularly useful for precision keyframe work on the timeline, fine-tuning color adjustments, and making frame-accurate edits that would be frustrating with a fingertip alone. If you are serious about iPad editing, an Apple Pencil is not optional.
LumaTouch has extensive documentation and tutorials on their official site that are genuinely useful for understanding the full depth of the application.
The one honest limitation: LumaFusion does not have the advanced node-based color grading, audio mixing depth, or VFX capabilities of DaVinci Resolve. For certain professional deliverables, that gap is meaningful.
5. DaVinci Resolve for iPad: Hollywood Power in Your Hands?
Blackmagic Design releasing DaVinci Resolve for iPad was not just a software launch. It was a statement. DaVinci Resolve is the industry-standard color grading tool used on major film and television productions, and bringing that to a tablet was either bold ambition or reckless overreach, depending on your perspective.
Having used it extensively, the truth sits closer to bold ambition.
The color page on DaVinci Resolve for iPad is remarkable. The node-based grading workflow, primary wheels, log controls, curves, qualifier tools, and scopes are all present and functional. Using a color correction workflow that you would recognize on a $50,000 grading suite, on a device you are holding in one hand, is a genuinely strange and impressive experience.
The cut and edit pages are both available, though the edit page’s full feature set is still more limited on iPad than on the desktop version. The Fairlight audio page offers multi-track mixing capability that surpasses anything else available on a tablet.
The free version of DaVinci Resolve for iPad covers most professional needs. The paid DaVinci Resolve Studio tier unlocks noise reduction, certain AI-assisted tools, and collaborative features.
There are friction points worth knowing. The interface, while adapted for touch, was designed for mouse and keyboard workflows at its core. Complex node trees become slightly unwieldy on even an iPad Pro’s large screen. Rendering times for effects-heavy timelines are longer than on a high-end Mac. And project management across multiple connected drives requires more intentional workflow planning than it does on a desktop.
That said, for any editor or colorist who does significant color work, DaVinci Resolve for iPad represents something genuinely unprecedented: a full professional color toolset that fits in a bag.
6. Final Cut Pro for iPad: Apple’s Own Answer
Apple launching Final Cut Pro for iPad on a subscription model was controversial. Five dollars per month for software you do not own outright bothered a segment of professional users accustomed to one-time purchases. Set that aside for a moment and look at what the application actually delivers.
Final Cut Pro for iPad carries features from its desktop sibling, including Magnetic Timeline, multicam editing, roles-based audio mixing, and excellent ProRes playback. The interface adaptation for touch is clean and intuitive, and it integrates seamlessly with iCloud for project sync between iPad and Mac.
The Apple Pencil support within Final Cut Pro for iPad enables a drawing tool called the Jog Wheel, which gives tactile control over scrubbing and trimming in a way that feels purposeful rather than gimmicky.
Where Final Cut Pro for iPad earns genuine praise is in the overall experience of working within the Apple ecosystem. If you shoot on iPhone, edit a first cut on iPad in Final Cut Pro, and then hand the project off to Final Cut Pro on a Mac for finishing, the workflow is seamless. No export, no conversion, no headaches.
For creators already embedded in the Apple ecosystem, that kind of continuity has real value. The monthly cost becomes easier to justify when you factor in both the iPad and Mac usage.
Apple’s Final Cut Pro overview page provides a complete breakdown of the feature set across platforms.
7. iPad Pro vs. Laptop for Video Editing: An Honest Comparison
This is where the conversation gets genuinely nuanced, and where a lot of content either over-promises for the iPad or dismisses it unfairly. Here is a direct comparison across the criteria that matter most.
| Criteria | iPad Pro (M4) | MacBook Pro (M3 Pro) |
|---|---|---|
| Raw Processing Power | Excellent | Excellent to Superior |
| Storage Flexibility | Limited (requires external) | Excellent (internal NVMe) |
| Display Quality | Outstanding (XDR) | Outstanding (Liquid Retina XDR) |
| Portability | Superior | Very Good |
| Battery Life During Editing | Very Good (8–10 hours) | Good (6–8 hours editing) |
| App Feature Depth | Good to Very Good | Excellent |
| External Monitor Support | Single display only | Dual external display |
| File Management | Improving but restricted | Fully flexible |
| Keyboard/Mouse Input | Optional add-on | Native |
| Starting Price | $999 (iPad Pro 11″) | $1,999 (MacBook Pro 14″) |
The honest summary: an iPad Pro is a legitimate editing device for most professional workflows, but a MacBook Pro still has meaningful advantages when a project requires complex multi-layer compositing, extensive plugin ecosystems, precise file system management, or output to multiple external displays simultaneously.
The price gap matters too. A capable iPad Pro editing setup, including the Magic Keyboard, Apple Pencil, and a USB-C hub, approaches MacBook Pro pricing. At that point, the comparison becomes genuinely close on cost while the laptop retains some workflow advantages.
8. The Real Limitations You Need to Know About
Honest content does not hide the friction points. Here are the areas where iPad video editing still has meaningful gaps compared to a desktop or laptop workflow.
File management remains constrained. iPadOS handles the file system differently from macOS, and while this has improved substantially, working across multiple external drives with complex folder structures requires workarounds that desktop editors simply do not face.
Plugin ecosystems are thin. Desktop editing applications benefit from decades of third-party plugin development. Motion graphics plugins, audio VSTs, color toolkits, and output plugins are broadly available on Mac and PC. On iPad, you are largely limited to what each application ships with natively.
External display support is still a single-screen situation. The iPad Pro currently supports one external display output via USB-C or Thunderbolt. For editors accustomed to a timeline on one screen and a program monitor on another, this is a real adjustment.
Export and delivery options are narrower. Custom export presets, network delivery pipelines, and integration with broadcast delivery services are significantly more mature on desktop applications.
Thunderbolt storage is available but requires planning. The iPad Pro’s Thunderbolt port supports external NVMe drives and hubs, enabling fast external storage workflows. But you need to build that setup intentionally. Editing directly from a USB-C hub connected to a Thunderbolt SSD is smooth; assuming you can edit off a slow USB-A drive is a recipe for dropped frames and frustration.
These are not reasons to dismiss iPad editing. They are reasons to understand what you are working with and plan accordingly.
9. How to Build a Professional iPad Editing Setup
If you are serious about making iPad your primary or secondary editing device, the hardware configuration matters as much as the software choice.
The Core Device
Start with an iPad Pro. The M4 chip, ProMotion display, and Thunderbolt connectivity are not luxuries for professional video work. The 11-inch model is more portable; the 13-inch model offers more comfortable timeline real estate. Both are legitimately capable.
Apple Pencil Pro
For precise keyframe control, color adjustments, and timeline navigation, the Apple Pencil Pro’s pressure sensitivity and tilt detection are worth the investment.
External Storage
Connect a high-quality Thunderbolt or USB-C NVMe drive for project storage. Editing 4K ProRes footage from iPad’s internal storage is possible, but for large projects, external fast storage extends both your storage capacity and preserves internal storage health. Brands like Samsung T9 or WD Black offer reliable performance at reasonable prices.
USB-C Hub
A quality USB-C hub expands your connectivity to include card readers, additional storage, HDMI output, and audio interfaces simultaneously. The Thunderbolt 4 compatibility on iPad Pro means you are not limited to basic USB speeds.
Magic Keyboard for iPad Pro
For longer editing sessions, the Magic Keyboard transforms the iPad into a more traditional laptop-like workflow, with a full-travel keyboard, trackpad, and an additional USB-C charging port.
Color Reference Display (Optional)
For professional color grading deliverables, connecting the iPad Pro to a calibrated external monitor via USB-C to HDMI ensures your work translates accurately to other screens.
10. Who Should Actually Edit on an iPad?
The most useful question is not whether iPad video editing is “professional enough” in the abstract. It is whether it fits your specific workflow, project requirements, and working style.
iPad editing makes strong sense if you:
- Shoot run-and-gun documentary, travel, or event content and need to edit in the field
- Work primarily on social media content, short-form video, or digital delivery projects
- Already own an iPad Pro and want to maximize its utility before investing in a laptop
- Supplement a desktop editing setup with a portable option for rough cuts and travel
- Shoot on iPhone Pro or iPad Pro and want a seamless ProRes-native workflow
- Value portability and battery life as genuine professional requirements
You will likely need a laptop or desktop if you:
- Regularly deliver projects requiring complex multi-layer motion graphics or compositing
- Work with plugin-dependent workflows, particularly audio-heavy post-production
- Need to manage extremely large project archives with complex folder hierarchies
- Require dual-monitor editorial setups as part of your daily workflow
- Collaborate on projects that demand specific desktop application compatibility
Neither list is absolute. Plenty of working professionals use both an iPad and a Mac, assigning the right tool to the right phase of the job.
Key Takeaways
-
- The M4 iPad Pro has desktop-class processing power that makes 4K ProRes editing genuinely smooth without proxy workflows
- LumaFusion, DaVinci Resolve for iPad, and Final Cut Pro for iPad represent mature, professional-grade editing options, each suited to different workflows
- iPad Pro hardware limitations, specifically single external display support, restricted file management, and a limited plugin ecosystem, mean it is not a complete replacement for a desktop editing station for all use cases
- A well-configured iPad Pro editing setup with Apple Pencil, external NVMe storage, and a USB-C hub can cost roughly as much as an entry-level MacBook Pro, making the choice a genuine decision rather than an obvious one
- For field-based creators, social content producers, documentary shooters, and editors who value mobility, iPad video editing is not a compromise. It is a legitimate professional workflow
FAQs
Q1: Can you edit 4K footage on an iPad without using proxy files?
Yes, and this is one of the most significant practical improvements in recent years. The M3 and M4 chips in current iPad Pro models handle 4K ProRes and 4K H.265 footage in real time without requiring proxy transcoding in most editing applications. LumaFusion, DaVinci Resolve for iPad, and Final Cut Pro for iPad all support native 4K editing. For footage shot in ProRes on an iPhone 15 Pro or iPad Pro, the playback performance on a current iPad Pro is genuinely smooth even with basic color grading applied. Editing from fast external storage rather than slower USB drives makes a meaningful difference in sustained performance.
Q2: Is LumaFusion or DaVinci Resolve better for iPad video editing?
The answer depends entirely on your workflow priorities. LumaFusion is purpose-built for touch-based mobile editing, has a more intuitive timeline-centric interface, and covers most professional editing needs at a one-time price of $29.99. DaVinci Resolve for iPad is free, offers the most advanced color grading tools available on any tablet platform, and has deeper audio capabilities through its Fairlight integration. If color grading is a central part of your work, DaVinci Resolve for iPad is the more powerful choice despite a steeper learning curve. If you need a fast, capable, well-organized editorial tool for cutting and delivering projects, LumaFusion is hard to beat.
Q3: Can the iPad Pro handle professional audio mixing for video?
Reasonably well, within limitations. DaVinci Resolve for iPad’s Fairlight page offers multi-track audio editing, EQ, compression, and routing that goes significantly beyond basic audio tools. LumaFusion includes per-clip audio controls, keyframeable volume and pan, and basic equalization. What iPad editing lacks compared to desktop audio post is depth in the plugin ecosystem. Desktop tools like Logic Pro, Pro Tools, or even Adobe Audition benefit from decades of third-party audio plugin development. For dialogue editing, basic music mixing, and sound design with built-in tools, iPad handles professional audio work reasonably. For complex broadcast or cinematic audio post, you will want to finish in a dedicated desktop audio application.
Q4: Does the Apple Pencil actually improve video editing on iPad?
Significantly, yes. The Apple Pencil Pro brings precision to tasks that are genuinely difficult with finger input alone. Fine keyframe adjustments on a compressed timeline, precise masking and selection work in color tools, and frame-accurate trimming operations all benefit from pencil input. The pressure sensitivity in applications that support it enables variable adjustments that feel closer to a mouse or tablet workflow. If you are editing casually or cutting simple social content, the Apple Pencil is optional. If you are doing serious color work, complex motion graphics, or frame-precise editing, it is nearly essential.
Q5: What external storage should I use for iPad video editing?
The iPad Pro’s Thunderbolt port supports high-speed external NVMe drives. For professional 4K ProRes editing, you want read and write speeds above 500 MB/s to avoid frame drops and slow render times. Thunderbolt-compatible SSDs from reputable manufacturers deliver read speeds above 2,000 MB/s on compatible hardware. Standard USB-C SSDs without Thunderbolt certification work but at reduced speeds. For larger project archives, a USB-C hub connected simultaneously to the iPad and multiple drives gives you flexible workflow options. Avoid editing from mechanical hard drives or slower USB flash storage; the performance bottleneck will negate the iPad Pro’s powerful processor.
Q6: Is Final Cut Pro for iPad worth the subscription cost?
If you already use Final Cut Pro on a Mac, yes, without much debate. The ability to start a project on iPad and continue on Mac seamlessly, using the same project files and media, is a workflow advantage that is difficult to quantify but easy to appreciate once experienced. The $4.99 monthly cost covers both Mac and iPad use. If you do not use Final Cut Pro on Mac and are evaluating iPad editing apps purely on their own merits, LumaFusion at a one-time cost and DaVinci Resolve at free are more cost-effective options unless you are specifically committed to Apple’s ecosystem.
Q7: Can you color grade professionally on an iPad?
Yes, and DaVinci Resolve for iPad makes this more achievable than many professionals expected. The full node-based color grading workflow, primary and secondary tools, color warper, qualifier-based selective grading, and HDR monitoring controls are all functional on iPad. The iPad Pro’s XDR display with P3 wide gamut and high brightness provides a capable reference screen for grading work, though most colorists working on client deliverables requiring broadcast color accuracy will want to validate their work on a calibrated external reference monitor. For documentary, social, and digital delivery content, the iPad Pro display and DaVinci Resolve combination is a serious color grading setup.
Final Verdict
Video editing on iPad has moved past the question of whether it is theoretically possible and arrived at the more practical question of whether it fits your specific professional context. For many creators, it does, and does so without meaningful compromise.
The M4 iPad Pro is not trying to imitate professional editing hardware. In raw processing capability, display quality, and battery life, it has become professional editing hardware. The apps have matured to match. LumaFusion handles complete editorial workflows with intelligence. DaVinci Resolve for iPad brings genuine Hollywood-grade color tools to a device you carry in a tote bag. Final Cut Pro for iPad offers seamless continuity with the Mac ecosystem that Apple has always been best at delivering.
The remaining friction, limited external display support, constrained file management compared to macOS, and a thinner plugin ecosystem, is real and worth acknowledging honestly. For complex finishing work, plugin-heavy audio post, or multi-display editorial suites, a MacBook Pro or Mac Studio remains the more capable choice.
But for the creator who shoots in the field, edits between locations, delivers to digital platforms, and values a setup that fits in a single bag without sacrificing serious capability, iPad video editing is not a workaround anymore. It is a workflow.
This article reflects hands-on experience with current iPad Pro hardware and leading iPad editing applications. Hardware specifications and software features may be updated by manufacturers over time.
Best AI Video Editing Tools in 2026: What’s Actually Useful vs Hype
Best AI Video Editing Tools in 2026: What’s Actually Useful vs Hype
Estimated reading time: 15 minutes
Why This Conversation Matters Right Now
Not everything marketed as “AI-powered” makes your editing faster. Some tools genuinely save hours. Others add friction while wearing the costume of innovation.
The video content landscape in 2026 looks substantially different from even two years ago. Short-form content has become the primary discovery engine across platforms — YouTube Shorts, Instagram Reels, and TikTok dominate attention spans in ways that make long-form alone an incomplete strategy. At the same time, video production volume has exploded. According to Cisco’s Visual Networking Index, video traffic accounts for more than 82% of all internet traffic, and that percentage continues to climb.
Creators, marketing teams, and media companies are under pressure to produce more content, faster, without sacrificing quality. That’s the specific gap that AI video editing tools are designed to fill — and where many of them either genuinely deliver or quietly disappoint.
This guide cuts through the marketing language. You’ll find honest assessments of each major tool, practical guidance on when to use them, and a clear-eyed view of where automation actually earns its place in a professional workflow versus where human judgment still wins.
How to Actually Evaluate an AI Video Tool
Before diving into the tools themselves, it helps to establish a consistent framework. The most common mistake is evaluating tools by their feature list rather than their output quality and workflow compatibility.
Here are the criteria that matter most:
Output quality: Does the automated result require significant manual cleanup, or is it genuinely close to publish-ready? A tool that cuts your editing time by 80% but produces B-grade output creates a different kind of problem.
Learning curve versus time saved: Some tools have a steep ramp-up period. That’s fine if the long-term payoff is substantial, but worth knowing upfront.
Integration with existing workflows: A tool that doesn’t talk to Premiere Pro, Final Cut, or your existing asset management system can become an island. The best tools reduce hand-off friction.
Pricing transparency: Many tools use seat-based pricing that scales poorly for small teams. Others charge per export minute, which can get expensive at volume.
Reliability at scale: Processing a single 10-minute video as a demo is very different from running 50 client videos through a tool monthly. Stability and support quality matter enormously at scale.
With that framework in hand, let’s look at the tools that have genuinely earned their reputation in 2026.
The Best AI Video Editing Tools in 2026
1. Opus Clip — Best for Automated Clip Repurposing
Opus Clip remains one of the most practically useful tools for creators managing long-form content. Its core functionality — scanning a long video, identifying the highest-engagement moments, and auto-generating short clips with captions — sounds simple, but the execution has matured considerably.
The tool uses what Opus calls a “Virality Score” that analyzes hooks, pacing, and emotional arcs to predict which clips are most likely to perform well on short-form platforms. In practice, this scoring is directionally accurate but not infallible. Clips scored highly by the algorithm still benefit from a human review pass before publishing.
Where it genuinely excels:
- Podcast-to-clips pipeline is among the fastest available
- Auto-reframe for vertical video is solid, tracking speakers reliably even in multi-person conversations
- Caption styling and animation quality is above average
Where it falls short:
- Limited control over clip structure when you want a specific narrative arc
- The virality scoring can over-index on emotional spikes and miss contextually important moments
Best suited for: Podcasters, course creators, YouTubers converting long content to short-form.
Pricing (2026): Starts at approximately $19/month for 150 minutes of processed video. Business tiers available with team collaboration features.
2. Descript — Best for Transcript-Based Editing
Descript occupies a unique position in this space. Rather than traditional timeline-based editing, it lets you edit video by editing the text transcript — delete a sentence from the transcript and that footage disappears from the video. It sounds gimmicky until you actually try it, at which point it becomes hard to go back.
The AI transcript editing capability is what makes Descript genuinely powerful. The transcription accuracy hovers around 95–98% for clear audio, which means the manual correction burden is low. The Overdub feature — which lets you correct audio mistakes by typing replacement text in your own cloned voice — was already impressive in earlier iterations and has improved substantially.
Where it genuinely excels:
- Script-based editing workflow dramatically accelerates talk-heavy content
- Filler word removal is the best in class — one click removes every “um,” “uh,” and “you know” with precise cuts
- Screen recording integration makes it a strong choice for tutorial and SaaS content
Where it falls short:
- Not ideal for heavily visual content where the narrative exists in action rather than speech
- The timeline editor, while functional, doesn’t match the depth of Premiere Pro or Final Cut
- Overdub voice cloning requires a sample recording and has a setup cost
Best suited for: Marketers, educators, podcast producers, anyone whose content is primarily talk-driven.
Pricing (2026): Free tier with export watermark; Creator plan at approximately $24/month.
3. Runway ML — Best for Generative Visual Effects
Runway has evolved from a creative experiment into a serious production tool. Its Gen-3 Alpha model (and subsequent iterations) can generate video from text prompts, extend clips, remove backgrounds without a green screen, and apply cinematic style transfers that would have required a full post-production team two years ago.
For commercial video production, the inpainting and object removal tools are particularly useful. Removing a mic stand from a corporate shoot, replacing a background without a green screen, or extending a clip by a few frames to hit a timing mark — all of these are genuinely fast in Runway.
Where it genuinely excels:
- Generative AI capabilities for visual effects are industry-leading
- Background removal quality outperforms most browser-based alternatives
- Motion brush and camera control features give unusual precision for an AI tool
Where it falls short:
- Generative video still struggles with coherent motion over longer clips
- Output can have an “AI look” that’s immediately recognizable to trained eyes
- Pricing climbs quickly at production volume
Best suited for: Creative directors, social media producers, indie filmmakers, and marketing teams producing high-visual-impact content.
Pricing (2026): Starts at $15/month for 625 credits. Pro and Unlimited tiers available.
4. Adobe Firefly Video — Best for Enterprise Integration
Adobe’s Firefly Video integration within Premiere Pro represents the most seamless AI-into-professional-workflow experience currently available. Because it lives natively inside Premiere, there’s no export/import cycle — the AI tools operate directly on your timeline.
The Generative Extend feature, which uses AI to extend footage at the beginning or end of a clip to ease editorial timing, is practically useful in ways that standalone tools can’t match. The text-to-video capabilities within Firefly are still maturing, but the generative B-roll suggestions, object removal, and color-aware masking tools are already workhorses.
One significant differentiator is that Firefly models are trained on licensed content, which matters considerably for commercial work. Legal clearance concerns that complicate the use of other generative tools are largely addressed here.
Where it genuinely excels:
- Native Premiere Pro integration eliminates workflow friction
- Commercially safe generative content due to licensed training data
- Generative Extend is genuinely useful in daily editing scenarios
- Enterprise-grade reliability and support
Where it falls short:
- Requires an Adobe Creative Cloud subscription — not accessible to non-Adobe users
- Generative video output still trails Runway in raw visual quality
- Some features are gated behind higher-tier subscriptions
Best suited for: Professional editors, in-house creative teams, agencies already working in the Adobe ecosystem.
Pricing (2026): Included in Creative Cloud All Apps plans starting at approximately $60/month.
5. CapCut AI — Best Free Option for Short-Form Creators
CapCut’s AI features have grown substantially, and the free tier remains genuinely competitive. For creators who primarily produce content for TikTok, Instagram Reels, and YouTube Shorts, the platform offers auto-captions, AI-suggested cuts, script-to-video generation, and a library of templates that accelerate production considerably.
The auto-caption generator is notably accurate and produces stylized captions that match platform aesthetics. The smart cut tool analyzes footage rhythm and music BPM to suggest edit points that feel more natural than manual frame-by-frame cutting.
Where it genuinely excels:
- Free tier is genuinely useful, not just a teaser
- Auto-caption quality is among the best for consumer-grade tools
- Template ecosystem reduces design decision fatigue
- Mobile and desktop versions work well together
Where it falls short:
- Output resolution and quality on the free tier is capped
- Watermarks on some export formats
- Less suitable for long-form or broadcast-grade content
Best suited for: Independent creators, social media managers, small business owners managing their own content.
Pricing (2026): Free with limitations; CapCut Pro at approximately $10/month.
6. Pictory — Best for Text-to-Video Content Marketing
Pictory sits at the intersection of content repurposing and AI video production. Its core use case is converting written content — blog posts, scripts, articles — into video assets with matched stock footage, auto-narration, and branded captions.
For content marketing teams, the workflow is genuinely efficient. Paste a URL or script, select a visual style, and Pictory assembles a draft video with relevant footage pulled from a licensed library. The output won’t replace a custom video shoot, but for explainer content, social promos, and educational snippets, it significantly reduces production time.
Where it genuinely excels:
- Blog-to-video pipeline is faster than any comparable tool
- Brand kit integration keeps visual consistency across batches
- Auto-narration voices have improved — still not indistinguishable from a voiceover artist, but functional
- Batch processing for teams managing high content volume
Where it falls short:
- Stock footage matching is imprecise — often requires manual selection of visuals
- Output has a “template” aesthetic that experienced viewers recognize
- Not suitable for narrative or documentary content
Best suited for: Content marketing teams, B2B companies, e-learning producers.
Pricing (2026): Starter plan at approximately $25/month; Team plans for higher volumes.
7. AutoPod — Best for Podcast and Multi-Camera Video Editing
AutoPod is built specifically for podcast and multi-camera show editors working inside Adobe Premiere Pro. It automates the most time-consuming part of multi-cam editing — cutting between camera angles based on who’s speaking.
For anyone regularly editing video podcasts with two or more participants, AutoPod is one of the highest ROI tools on this list. What previously took two to four hours of manual cutting can be reduced to a 10-minute review-and-approve workflow.
Where it genuinely excels:
- Multi-camera sync and auto-switching is highly accurate
- Social clip creation from long-form episodes is streamlined
- Seamless Premiere Pro integration
- Episode-level automation at scale is reliable
Where it falls short:
- Requires Adobe Premiere Pro — no standalone version
- Doesn’t work well with overlapping speech or group discussions
- Limited aesthetic control over the auto-cut style
Best suited for: Video podcast editors, YouTube show producers, media companies.
Pricing (2026): Approximately $29/month for full access.
8. Topaz Video AI — Best for Video Enhancement and Upscaling
Topaz Video AI stands apart from the other tools on this list because it doesn’t edit narrative content — it enhances and restores existing footage. If you’re working with archival material, low-resolution assets, or footage shot under suboptimal conditions, Topaz can produce genuinely remarkable results.
The upscaling capability — converting 1080p content to 4K with AI-reconstructed detail — is the best available outside professional broadcast facilities. The motion deblur and noise reduction models are similarly impressive.
Where it genuinely excels:
- Upscaling quality is industry-leading for prosumer software
- Noise reduction preserves detail rather than blurring it
- Frame interpolation for smooth slow-motion is excellent
- One-time purchase option available (rare in this category)
Where it falls short:
- Processing is computationally intensive — requires a capable GPU
- Not useful for content creation from scratch
- Slow processing times on standard hardware
Best suited for: Archivists, documentary filmmakers, videographers enhancing client footage.
Pricing (2026): One-time purchase at approximately $299, or subscription at $99/year.
Head-to-Head: Which Tool Is Right for You
| Tool | Best Use Case | Skill Level | Price Range | Standalone or Plugin |
|---|---|---|---|---|
| Opus Clip | Long-to-short repurposing | Beginner | $19+/month | Standalone |
| Descript | Transcript-based editing | Beginner–Intermediate | $24+/month | Standalone |
| Runway ML | Generative visual effects | Intermediate–Advanced | $15+/month | Standalone |
| Adobe Firefly | Enterprise professional editing | Advanced | $60+/month (CC) | Plugin (Premiere) |
| CapCut AI | Short-form social content | Beginner | Free–$10/month | Standalone |
| Pictory | Blog/text to video | Beginner | $25+/month | Standalone |
| AutoPod | Podcast multi-cam editing | Intermediate | $29/month | Plugin (Premiere) |
| Topaz Video AI | Enhancement/upscaling | Intermediate | $99/year or $299 one-time | Standalone |
What the Hype Gets Wrong
The narrative around AI video editing tools tends toward two extremes: either these tools will replace human editors entirely, or they’re overpriced toys that don’t deliver on their promises. Neither is accurate.
The honest picture is more nuanced. Automated video editing tools excel at repetitive, pattern-based tasks — finding speakers, removing filler words, generating captions, matching cuts to music beats. These are tasks that consume a disproportionate share of an editor’s time without requiring much creative judgment. Automating them isn’t replacing editors; it’s giving them their time back.
What AI genuinely cannot do well yet is narrative judgment. Deciding which moment in an interview changes the story, knowing when to hold on a reaction shot for two extra seconds to build tension, understanding that the audience needs a breath before the emotional turn — this is craft that develops over years. The best results come from workflows that combine AI efficiency with human editorial judgment.
The other thing the hype consistently undersells is the importance of source material quality. AI video editing tools are multipliers, not rescuers. Good footage gets meaningfully better. Poor audio, shaky handheld work, and confusing source structure will produce poor AI output at faster-than-usual speed.
Workflow Integration: Getting the Most Out of AI Editing
The most effective approach to video editing automation isn’t replacing your workflow — it’s inserting AI tools at the highest-friction points within it.
For a typical creator workflow, this might look like:
Pre-edit: Use Descript or Otter.ai to generate a transcript before touching the timeline. This gives you a searchable record of your footage and identifies the strongest moments in text before you spend time scrubbing through video.
Rough cut: Use AutoPod (for multi-cam) or Opus Clip’s smart cut tool to produce an initial assembly. This is not your final cut — treat it as a first draft that needs editorial review.
Post-production: Use Topaz Video AI to enhance specific clips, Runway for any effects work, and Adobe Firefly’s generative tools for timeline problem-solving.
Distribution: Use Opus Clip or CapCut AI to generate platform-specific short-form versions from your finished long-form video.
This layered approach extracts real efficiency without abdicating creative control. The goal is to spend your time on decisions that require judgment, not on tasks that can be reliably systematized.
Key Takeaways
-
- The best AI video editing tools in 2026 are genuinely useful, but their value depends entirely on matching the right tool to the right task
- Opus Clip and Descript offer the highest practical ROI for creators working with spoken-word content
- Runway ML leads in generative visual capabilities; Adobe Firefly leads in professional workflow integration
- CapCut AI remains the strongest free option for short-form social content
- AI tools excel at repetitive, pattern-based editing tasks. Narrative judgment still requires human expertise
- Source material quality determines output quality. AI amplifies what’s already there
- Building a layered workflow — using different tools at different stages — produces better results than relying on any single platform
- Legal clearance for generative content remains an important consideration; Adobe Firefly’s licensed training data is a meaningful differentiator for commercial work
FAQs
Q1: Can AI video editing tools completely replace a professional video editor?
Not in any meaningful sense, and this question tends to confuse the category. What AI tools replace is the grunt work — the hours spent scrubbing timelines for the best take, removing filler words one by one, or manually syncing captions to audio. What they don’t replace is editorial judgment: the ability to understand story structure, pacing, emotional resonance, and audience expectations. The professionals seeing the greatest benefit from these tools aren’t being replaced by them — they’re using them to double or triple their output capacity while focusing their attention on the craft decisions that actually matter.
Q2: Which AI video tool is best for someone just starting out with no editing experience?
CapCut AI is the most accessible starting point. The learning curve is minimal, the free tier is genuinely functional, and the template-driven workflow makes it possible to produce presentable content quickly. For anyone specifically looking to repurpose existing long-form content into short clips, Opus Clip is a close second recommendation — the interface is intuitive and the output quality is consistently usable with minimal cleanup.
Q3: How accurate are AI-generated captions, and should I trust them for published content?
The accuracy range for modern AI caption generators sits between 93% and 98% for clear, well-recorded audio. Descript and Otter.ai tend to score at the high end. However, “mostly accurate” is not the same as “publish-ready.” Proper nouns, technical terminology, industry jargon, and anything spoken quickly or with a strong accent will produce errors that need manual correction. The workflow recommendation is to always do a fast review pass on generated captions before publishing — it takes significantly less time than creating captions from scratch, which is the point.
Q4: Is it worth paying for premium tiers, or do the free versions of these tools cover most use cases?
It depends on volume and output requirements. For individual creators producing content occasionally, the free tiers of CapCut AI and the entry-level tiers of Descript cover a surprising amount of ground. The value proposition for premium tiers typically comes down to three things: higher processing volume, removal of export restrictions or watermarks, and access to more advanced features. For anyone producing content professionally or at commercial scale, the time savings of higher-tier tools generally justify their cost within the first month of use.
Q5: What’s the best AI tool for video upscaling and enhancing old footage?
Topaz Video AI is the clear leader in this category. The quality of its upscaling models — particularly its Proteus and Artemis models for different types of source material — consistently outperforms browser-based alternatives and general-purpose tools. For archival footage, documentary work, or any situation where you’re working with degraded source material, it’s worth the investment. The main caveat is hardware — to process files in reasonable time, you’ll want a dedicated GPU with at least 8GB of VRAM.
Q6: How do I know if an AI video tool is commercially safe to use for client work?
This is a legitimate concern and one that’s often overlooked in the excitement around generative features. The key question is how the tool’s models were trained. Tools trained on licensed or proprietary datasets — Adobe Firefly being the clearest example — carry lower legal risk for commercial use. Tools trained on scraped internet content introduce ambiguity around copyright that some clients and legal teams will flag. When working with clients, it’s worth explicitly checking the terms of service for any generative features you plan to use and, where significant budget is involved, getting a legal review of the specific use case.
Q7: Are there AI video editing tools built specifically for enterprise or agency use?
Yes, and the market has matured considerably in this area. Adobe Firefly’s enterprise tier, Descript’s Business plan, and Pictory’s Team plan all include collaboration features, brand kit management, and centralized asset libraries designed for team workflows. For larger agencies or media companies, platforms like Brightcove and Vidyard also integrate AI editing features within broader video hosting and analytics ecosystems. The enterprise-specific differentiators to evaluate are SSO support, role-based access controls, API availability for custom integrations, and dedicated account support — none of which matter to an individual creator but become critical at organizational scale.
Final Thoughts
The phrase “AI-powered” has been applied to enough mediocre software that it’s almost become meaningless. What this guide has tried to do is separate the tools where the automation genuinely delivers — measurably faster workflows, usable output, meaningful time savings — from those that mostly deliver an impressive demo.
The tools that stand out in 2026 share a common characteristic: they’re built around specific, well-defined problems rather than trying to replace the entire editing process. Opus Clip solves clip repurposing. Descript solves transcript-based editing. AutoPod solves multi-cam switching. Topaz solves footage enhancement. Each one does its specific job exceptionally well.
The creators and teams seeing the most value from AI video editing tools aren’t looking for a replacement for good judgment. They’re systematically identifying the parts of their workflow that consume time without requiring creativity, and they’re automating those parts precisely. That’s not a trick — it’s just a smart way to work.
The technology will continue improving. Generative video will get better. Narrative understanding will get more sophisticated. But the fundamental principle — use tools for what they’re genuinely good at, and bring human judgment to everything else — will remain the right approach regardless of what the next generation of tools looks like.
For further reading on the evolving role of AI in creative workflows, the MIT Technology Review and Wired consistently publish substantive coverage that goes beyond the press release layer.
DaVinci Resolve for YouTube: Is It Worth Learning for Content Creators?
DaVinci Resolve for YouTube: Is It Worth Learning for Content Creators?
Estimated reading time: 15 minutes
Why This Question Matters More Than Ever
There is a point in almost every content creator‘s journey where the editing software question becomes impossible to ignore. Maybe your current tool is slowing you down, or the subscription fees are adding up, or you have watched enough cinematic YouTube videos to know your colour work needs serious improvement. Whatever the trigger, “Should I learn DaVinci Resolve?” is one of the most searched questions among creators right now — and it deserves a properly honest answer.
DaVinci Resolve for YouTube has become a genuine topic of conversation in creative communities, and not just because it is free. The conversation has matured. Creators are asking sharper questions: Will it slow my workflow down? Is the colour page actually practical for YouTube, or is it overkill? What about audio? Can I handle everything in one application without losing my mind?
This guide covers all of that — without the fanboy enthusiasm and without the unfair dismissal. Just a clear-eyed look at what Resolve offers, where it falls short, and whether the learning investment makes sense for the kind of content you make.
What Is DaVinci Resolve and Who Makes It?
DaVinci Resolve is a professional video editing, colour grading, audio mixing, and visual effects application developed by Blackmagic Design, an Australian company that has been building professional broadcast and cinema equipment since 2001. The software itself has a deeper history — it began life as a dedicated colour grading system used on Hollywood films before Blackmagic acquired it in 2009 and eventually released it as a free, standalone application.
That origin story matters. Unlike most editing software that started as a cut-and-trim tool and bolted colour correction on as an afterthought, Resolve was built from the colour suite outward. This lineage shows in the quality of its tools, even at the free tier.
The latest major release, DaVinci Resolve 19, introduced enhanced AI-powered audio tools, improvements to the Cut page, new colour science features, and performance upgrades across the board. It continues to be updated at a rate that would embarrass many subscription-based competitors.
For YouTube creators, the relevant picture is this: you are getting access to the same colour science used on major film productions, a professional non-linear editor, a full audio workstation, and a node-based compositing environment — all without spending a single dollar on software.
The Free Version vs. Studio Version: What Do You Actually Get?
One of the most common points of confusion among beginners is exactly where the line falls between the free version and DaVinci Resolve Studio. The short answer is that the free version handles the vast majority of what YouTube content creators need. The Studio version, which costs a one-time fee of $295 USD, adds capabilities that matter in specific professional or high-volume scenarios.
Here is a direct comparison of the most relevant differences:
| Feature | Free Version | Studio Version |
|---|---|---|
| 4K timeline and export | Yes (up to Ultra HD) | Yes (up to 32K) |
| Colour grading tools | Full access | Full access + extra noise reduction |
| Fusion VFX | Core tools included | Full ResolveFX and third-party plugins |
| Fairlight audio | Full access | Full access |
| Noise reduction (temporal/spatial) | Limited | Full Magic Mask and advanced tools |
| Collaborative multi-user editing | No | Yes |
| GPU processing | Single GPU | Multiple GPU support |
| AI-powered tools (DaVinci Neural Engine) | Partial | Full access |
| Watermark on export | None | None |
| Price | Free | One-time $295 USD |
For a solo YouTube creator producing weekly vlogs, tutorials, short films, or even podcast-style video content, the free version is entirely capable. You will only start running into meaningful limitations when you need advanced noise reduction on poorly lit footage, high-end motion graphics, or collaborative editing with a team.
The one-time pricing model for Studio is also worth emphasising. In an industry dominated by monthly subscriptions, paying once and owning it permanently is a meaningful financial advantage, especially for creators who are just starting to monetise.
Navigating the Interface: Pages, Panels, and the Learning Curve
Let us be straightforward: DaVinci Resolve has a steeper initial learning curve than iMovie or CapCut, and even steeper than Adobe Premiere Pro for someone coming in completely cold. But the reasons are worth understanding, because the difficulty is architectural rather than arbitrary.
Resolve is structured around dedicated pages, each designed for a specific part of the post-production workflow:
- Media Page — Import and organise your footage before you begin editing
- Cut Page — A streamlined, fast-editing environment designed for quick assembly. It features a dual-timeline system that makes rough cuts significantly faster than the traditional approach
- Edit Page — The traditional non-linear editor with a familiar timeline structure, multicam editing, and advanced trimming tools
- Fusion Page — A node-based compositing environment for motion graphics, titles, and visual effects
- Colour Page — The centrepiece. This is where DaVinci Resolve’s cinema heritage lives, offering nodes, scopes, power windows, curves, and more
- Fairlight Page — A complete digital audio workstation with mixing, effects, and dialogue tools
- Deliver Page — Render and export your finished project
For a beginner learning DaVinci Resolve, the honest recommendation is to start with the Cut page and Edit page exclusively. Master those before touching Fusion or Colour in depth. Many creators make the mistake of attempting to learn everything simultaneously, then feel overwhelmed and abandon the software. The pages are designed to be modular — you do not have to use all of them at once.
The Cut page in particular is genuinely underrated. It was designed with speed in mind, and for creators who publish frequently, it can dramatically reduce the time spent on basic assembly edits.
Colour Grading YouTube Videos: Where Resolve Truly Shines
If there is one capability that justifies learning Resolve above all else for YouTube, it is colour grading. The Colour page is not just a good colour grading tool — it is the industry standard for professional colourists working on film and television.
For YouTube specifically, this matters more than many creators realise. Colour affects how professional your content appears, how it competes in thumbnails and autoplay previews, and how it translates across different viewing devices. A well-graded video simply looks more intentional, more cinematic, and more trustworthy.
What sets Resolve’s Colour page apart for YouTube work:
- Node-Based Workflow — Rather than stacking adjustment layers linearly, Resolve uses nodes. Each node is a self-contained colour operation. This sounds complicated but becomes incredibly powerful once you understand it — you can build reusable looks, isolate specific colour ranges, and create complex grades without the performance overhead of stacked layers
- Scopes and Monitoring — The waveform, parade, histogram, and vectorscope tools help you grade to broadcast standards rather than guessing by eye. This matters especially when your audience watches on phones, tablets, TVs, and monitors — all of which display colour differently
- Colour Warper and Curves — These tools allow surgical adjustments that go well beyond the typical saturation and contrast sliders found in consumer editors
- LUT Support — You can apply Look Up Tables from third-party creators, which is a common workflow for creators shooting in log profiles on mirrorless cameras
Even if you shoot on a smartphone or basic mirrorless camera without shooting in log, the Colour page will elevate your footage. Understanding basic primary and secondary corrections alone will separate your videos from the majority of content on the platform.
Fairlight Audio: A Hidden Gem for Solo Creators
Audio quality is the single most underinvested area in most YouTube content, and it is also the one viewers notice most immediately. Poor audio causes viewers to click away faster than almost any other technical issue, according to audience research consistently cited by platform creators and podcasting experts.
Fairlight is DaVinci Resolve’s built-in digital audio workstation, and it is far more capable than most creators discover. For YouTube, the most practically valuable features include:
- Voice Isolation (Studio) — The AI-powered voice isolation tool can separate dialogue from background noise with impressive accuracy. It is one of the stronger arguments for upgrading to Studio if you record in imperfect acoustic environments
- Dialogue Processing Chain — You can build a signal chain including noise reduction, EQ, compression, and limiting directly within Fairlight without needing external plugins. This is the same fundamental chain used by professional audio engineers
- FairlightFX — Built-in audio plugins including reverb, chorus, delay, and the essential de-esser and noise reduction tools
- Multi-Track Mixing — If you incorporate music, sound effects, and voice-over into your content, Fairlight’s mixer gives you proper channel control with automation support
For creators who currently drop their footage into editing software, slap a music track on, and call it done — spending even two or three hours learning Fairlight basics will produce a noticeable and immediate improvement in content quality.
Fusion VFX: Motion Graphics Without the Monthly Bill
Fusion is DaVinci Resolve’s node-based visual effects and motion graphics compositor. If you have used After Effects, Fusion operates on similar principles but with a node graph rather than a layer stack.
For YouTube content creators, Fusion is primarily useful for:
- Creating animated lower thirds and title sequences
- Building custom intro animations
- Adding text animations that go beyond basic templates
- Compositing green screen footage
- Creating subtle visual enhancements like light leaks or particle effects
The learning curve on Fusion is steeper than the rest of Resolve. However, the DaVinci Resolve tutorial ecosystem on YouTube is substantial, and Blackmagic Design provides extensive official documentation and training materials through their Blackmagic Design training certification programme.
For creators who currently pay for a separate motion graphics tool or use template packs that do not quite match their brand, learning even basic Fusion skills opens significant creative doors without any additional software cost.
DaVinci Resolve vs. Premiere Pro for YouTube Creators
This comparison comes up constantly, and the answer is genuinely nuanced. Neither tool is objectively superior for every creator — the right choice depends on your workflow, ecosystem, and priorities.
| Factor | DaVinci Resolve | Adobe Premiere Pro |
|---|---|---|
| Cost | Free (Studio: one-time $295) | $55.99/month or Creative Cloud bundle |
| Colour grading | Industry-leading | Competent but less powerful |
| Audio tools | Fairlight (professional-grade) | Essential Sound panel (functional, basic) |
| Motion graphics | Fusion (node-based, steep curve) | After Effects integration (familiar, powerful) |
| Integration with other tools | Blackmagic ecosystem | Full Adobe Creative Cloud suite |
| Performance on lower-end hardware | Can be demanding | Similar demands, slightly more optimised |
| Community and tutorials | Growing rapidly | Larger established library |
| Collaboration features | Studio version only | Built into Creative Cloud |
| Export presets for YouTube | Excellent | Excellent |
| Update frequency | Frequent free updates | Frequent, tied to subscription |
If you are already embedded in the Adobe ecosystem — using Photoshop for thumbnails, After Effects for motion work, Audition for audio — staying with Premiere makes legitimate sense. The integration is genuinely useful and the workflow continuity matters.
If you are starting from scratch, or if you primarily use non-Adobe tools for the rest of your creative work, DaVinci Resolve is the stronger choice for most YouTube-focused workflows. The colour grading capabilities alone justify the investment in learning time, and the elimination of a monthly software subscription is a real financial benefit, particularly in the early stages of building a channel.
GPU Requirements and Performance Considerations
DaVinci Resolve is a GPU-accelerated application, and this is one of the areas where creators run into genuine frustration if they are underprepared.
The software relies heavily on the GPU for colour processing, Fusion effects, and playback. On underpowered machines, particularly older laptops with integrated graphics, performance can be genuinely challenging.
Minimum recommended for comfortable use:
| Component | Recommended for YouTube Editing |
|---|---|
| GPU | NVIDIA GTX 1060 / AMD RX 580 (8GB VRAM minimum for comfortable use) |
| RAM | 16GB minimum, 32GB recommended for longer timelines |
| Storage | NVMe SSD for project media and cache |
| CPU | Modern quad-core at minimum; eight-core or higher preferred |
| Operating System | macOS 12.5+, Windows 10 (64-bit), or Linux |
Apple Silicon Macs (M1, M2, M3, M4 series) run DaVinci Resolve exceptionally well due to the unified memory architecture. If you edit on a MacBook Pro or Mac Studio, performance is often outstanding even on the free version without proxy media.
For Windows users on mid-range hardware, the proxy workflow becomes an important tool — covered in the next section.
Proxy Media Workflow: How to Edit Smoothly on Any Machine
Proxy media is one of the most valuable concepts for any creator editing high-resolution footage on a machine that struggles with native playback. The concept is straightforward: you create lower-resolution copies of your original footage for use during editing, then switch back to the full-resolution originals for final export.
In DaVinci Resolve, proxies can be generated directly within the Media page using the optimised media or proxy media settings. The workflow looks like this:
- Import your footage into the Media Pool
- Right-click and generate optimised media (or proxy media) in a compressed format like DNxHR LB or H.264
- Edit using the proxy files — playback becomes smooth and responsive
- Before delivery, switch back to original media in the Project Settings
- Export at full quality using your original high-resolution footage
This workflow is particularly relevant for creators shooting in 4K on Sony, Canon, or Panasonic cameras that produce XAVC-S or H.265 footage, both of which are computationally demanding to decode in real time.
Exporting to YouTube: Settings That Actually Work
Exporting correctly matters more than most creators realise. YouTube re-compresses uploaded video, and uploading with the wrong settings can result in excessive quality loss or long processing times.
Blackmagic Design recommends the following export settings for YouTube on the Deliver page:
| Setting | Recommended Value |
|---|---|
| Format | MP4 or MKV |
| Codec | H.264 or H.265 |
| Resolution | Match timeline (1080p, 4K UHD) |
| Frame Rate | Match source footage |
| Bitrate | 30–50 Mbps for 1080p; 50–80 Mbps for 4K |
| Audio Codec | AAC |
| Audio Sample Rate | 48 kHz |
| Audio Bitrate | 320 kbps |
Resolve also includes a built-in “YouTube” preset in the Deliver page that handles most of these settings automatically. Using it as a starting point and adjusting bitrate upward is a sensible approach for most creators.
One important note: YouTube recommends uploading in its preferred formats as documented in their upload encoding guidelines, and Resolve’s H.264 output aligns well with those specifications.
Is DaVinci Resolve Worth Learning in 2026?
The question has a clear answer, but it comes with important context.
DaVinci Resolve is worth learning if you are committed to improving the production quality of your content, plan to create videos consistently for at least a year, and are willing to invest time upfront to build a workflow that will serve you for years. The software is not ideal for creators who need the fastest possible path to publishing simple, ungraded content.
For creators who are serious about their craft — who care about how their videos look and sound, who want professional tools without perpetual subscription costs, and who are willing to move past the initial learning curve — DaVinci Resolve is one of the most compelling options available at any price point.
The colour grading capabilities alone give your content a visual polish that is genuinely difficult to achieve in other editors without significant effort. The Fairlight audio tools address the most common technical weakness in creator content. And the fact that the software is deeply used in professional film and television means the skills you build are transferable well beyond YouTube.
The learning curve is real but finite. Most creators who commit to using Resolve for 30 days of consistent editing report that it begins to feel natural, and many find the Cut page faster than any editor they have previously used.
Key Takeaways
-
- DaVinci Resolve’s free version covers the full needs of the majority of YouTube content creators, including colour grading, audio mixing, and visual effects
- The Colour page is the software’s defining strength — no other free or similarly priced tool comes close for professional-grade colour work
- The Cut page is optimised for fast editing and is an underrated tool for high-volume creators
- Fairlight provides a professional audio workstation that addresses the most common technical weakness in YouTube content
- Fusion enables motion graphics and VFX without additional software costs, though it carries the steepest learning curve in the suite
- For creators on lower-end hardware, the proxy media workflow resolves most performance issues with high-resolution footage
- DaVinci Resolve 19 continues to expand its AI-powered tools, with the most powerful features available in the Studio version
- The one-time $295 Studio pricing compares extremely favourably with subscription-based alternatives over any period longer than six months
- Export settings matter — using high-bitrate H.264 or H.265 with a 48 kHz audio track aligns with YouTube’s preferred specifications and minimises quality loss during platform re-compression
FAQs
Q1: Can a complete beginner learn DaVinci Resolve for YouTube with no prior editing experience?
Yes, but approach it strategically. Start with the Cut page and Edit page, and spend your first month focused exclusively on assembly editing, basic colour corrections, and simple title additions. Blackmagic Design offers free official training courses through their certification programme that are well-structured for beginners. Many creators find that dedicating a few hours each week to intentional practice produces a comfortable working proficiency within four to eight weeks.
Q2: Does DaVinci Resolve free version add a watermark to exported videos?
No. This is one of the most common misconceptions about the software. The free version of DaVinci Resolve exports without any watermark whatsoever. Watermarks on export are associated with tools like DaVinci Resolve’s much simpler older product, and that is not the case here. You get clean, professional exports at no cost.
Q3: What are the biggest differences between DaVinci Resolve 19 and earlier versions?
DaVinci Resolve 19 introduced several meaningful upgrades including enhanced AI audio tools within Fairlight, new IntelliTrack motion tracking for the Colour page, improvements to the Cut page interface, updated Fusion tools, and performance refinements for Apple Silicon and modern NVIDIA GPU architectures. For most YouTube creators, the audio AI improvements and Cut page updates are the most immediately relevant changes in day-to-day use.
Q4: Is DaVinci Resolve better than Premiere Pro for YouTube specifically?
For creators focused primarily on video quality and who are not already invested in the Adobe ecosystem, Resolve is arguably the stronger choice for YouTube work. Its colour grading capabilities are objectively more powerful, Fairlight competes well with Premiere’s audio tools, and the absence of a subscription cost is a genuine advantage. Premiere Pro has the edge in integration with After Effects and the broader Creative Cloud suite, which matters significantly if you use those tools regularly.
Q5: How much VRAM does DaVinci Resolve need for comfortable 4K editing?
For 4K editing without proxy media, 8GB of VRAM is a practical minimum and 12–16GB provides noticeably smoother performance, particularly when working with multiple streams, colour-graded timelines, or Fusion effects. Apple Silicon Macs handle this differently due to unified memory, and an M2 MacBook Pro with 16GB unified memory typically outperforms Windows machines with dedicated 8GB VRAM cards in Resolve. For creators on tighter hardware budgets, the proxy workflow makes 4K editing manageable even on machines that would otherwise struggle.
Q6: Can I use DaVinci Resolve to edit YouTube Shorts and vertical video?
Yes. Resolve handles vertical timelines well — set your project to a 1080×1920 or 2160×3840 resolution in Project Settings and it operates just as smoothly as standard horizontal formats. The Cut page and Edit page both support vertical framing without issues. The Colour and Fairlight pages work identically regardless of aspect ratio, so your entire workflow transfers directly to short-form content.
Q7: Is the DaVinci Resolve tutorial ecosystem good enough to learn from for free?
The tutorial ecosystem for DaVinci Resolve has grown dramatically over the past few years and is now genuinely comprehensive. Channels dedicated to Resolve education on YouTube cover everything from beginner orientation to advanced colour science and Fusion workflows. Beyond YouTube, Blackmagic Design’s own official training materials are detailed and free. Forums like the Blackmagic Design forum and communities on Reddit provide active support for troubleshooting specific issues. For self-directed learners, the resources available today are more than sufficient to reach professional proficiency without spending money on third-party courses.
Conclusion
DaVinci Resolve occupies a genuinely unusual position in the creative software landscape — it is professional-grade software that costs nothing to use at a level that exceeds the needs of most working content creators. The learning curve is real, and the interface can feel overwhelming at first encounter, but the payoff for creators who work through that initial period is substantial.
The colour grading tools will visually differentiate your content in ways that matter to how viewers perceive and respond to it. The audio workstation in Fairlight addresses what is consistently the most damaging technical weakness in independent YouTube content. And the overall architecture of the software, with its dedicated pages for specific tasks, ultimately produces a more organised and intentional post-production workflow than the cluttered, everything-in-one-panel approach of many alternatives.
Whether you are publishing weekly travel videos, educational content, documentary work, or cinematic short films, the tools are there. The question is simply whether you are ready to invest the time to use them properly. For creators who are serious about the long game, that investment pays for itself many times over.
CapCut vs Premiere Pro: Which Editing App Is Right for Social Media Creators?
CapCut vs Premiere Pro: Which Editing App Is Right for Social Media Creators?
Estimated reading time: 14 minutes
Why This Comparison Actually Matters in 2025
Short-form video now dominates social media consumption. According to Statista, short-form video content consistently generates the highest return on investment among all social media content types, with platforms like TikTok, Instagram Reels, and YouTube Shorts driving massive engagement volumes.
That shift has changed the tools conversation. For years, the editing software discussion in professional circles was limited to Premiere Pro, Final Cut Pro, and DaVinci Resolve. Then ByteDance launched CapCut globally in 2020, and within two years, it had been downloaded over 500 million times. It became the editing engine behind a significant portion of viral content on TikTok, partly because of its deep native integration with the platform.
Suddenly, creators who had never touched a professional editing timeline were producing content that looked polished, trended, and converted. That success forced a real question: does professional editing software still have a place in social-first content creation, or has the game fundamentally changed?
The honest answer is more nuanced than most comparisons admit.
CapCut at a Glance: What It Does Well
CapCut, developed by ByteDance, started as a mobile editing app and has since expanded into a web-based and desktop application. It is free to use at its core, with a Pro subscription unlocking additional templates, assets, and AI-powered features.
The app is built around speed and accessibility. Its entire design philosophy assumes that users want to go from raw footage to a finished, share-ready video as quickly as possible, with as little friction as possible. That is not a criticism. For a large segment of creators, that is exactly what they need.
Core strengths include:
- A vast and regularly updated library of trending templates tied directly to TikTok audio trends
- Auto-captions powered by speech recognition that work surprisingly well across multiple languages
- One-tap background removal and smart AI cutout tools
- Built-in effects, transitions, and filters updated to mirror current platform trends
- Direct export optimization for TikTok, Instagram Reels, and YouTube Shorts
- Collaborative features that allow team members to work on the same project from different devices
- A relatively flat learning curve, with most basic features accessible within the first session
For creators who need to post consistently and cannot afford to spend three hours on a single video, CapCut delivers a genuinely strong value proposition.
Adobe Premiere Pro at a Glance: The Industry Standard
Adobe Premiere Pro has been the dominant professional video editing software in broadcast, film, and digital media production for over two decades. It is a desktop-first application available on Windows and macOS through the Adobe Creative Cloud subscription, which starts at around $54.99 per month or is included in the full Creative Cloud suite.
Premiere Pro operates on a non-linear editing timeline, giving editors complete control over every frame, audio track, color grade, and effects layer. It integrates natively with After Effects, Audition, Photoshop, and Illustrator, making it the center of a powerful creative ecosystem.
Core strengths include:
- Precise, frame-accurate editing with multi-track audio and video support
- Professional color grading through Lumetri Color, comparable in depth to dedicated color tools
- Advanced motion graphics and title work via the Essential Graphics panel and After Effects integration
- Robust export options through Adobe Media Encoder supporting virtually every format and codec
- Dynamic Link with After Effects for complex visual effects without rendering
- Collaborative workflow tools through Adobe Productions for team-based projects
- Auto Reframe, a genuinely useful AI-powered feature that automatically resizes footage for different aspect ratios
The learning curve is steep. Getting comfortable with Premiere Pro typically takes weeks of deliberate practice, and mastering its deeper features takes considerably longer. But what you get in return is a level of precision and flexibility that no mobile or template-based tool can replicate.
Head-to-Head Comparison: Feature Breakdown
| Feature | CapCut | Adobe Premiere Pro |
|---|---|---|
| Platform | Mobile, Web, Desktop | Desktop (Windows/macOS) |
| Cost | Free (Pro from ~$7.99/month) | From $54.99/month |
| Learning Curve | Low | High |
| Trending Templates | Extensive, regularly updated | None natively |
| Auto-Captions | Yes, built-in | Yes, via transcription panel |
| Color Grading | Basic to moderate | Professional-grade (Lumetri) |
| Multi-track Editing | Limited | Full multi-track support |
| Export Quality | Up to 4K (limited codec options) | Up to 8K, full codec library |
| AI Features | Auto-captions, background removal, smart templates | Auto Reframe, Speech to Text, AI-powered editing tools |
| Integration | TikTok, social platforms | Adobe CC (After Effects, Audition, Photoshop) |
| Collaboration | Real-time cloud collaboration | Adobe Productions, Team Projects |
| Mobile Editing | Full-featured mobile app | Companion app only (limited) |
| Best For | Short-form social content, quick turnaround | Professional, long-form, and complex projects |
CapCut for Social Media: Strengths and Real Limitations
There is a reason CapCut has become the default tool for a generation of short-form creators. Its integration with TikTok culture is not incidental. ByteDance built the app to feed directly into how content spreads on that platform. Templates are tied to sounds that are actively trending. Effects mirror what is performing well in the algorithm. The workflow bends toward vertical video by default.
For creators whose primary goal is posting consistently and staying culturally relevant, that alignment is a genuine competitive advantage.
Where CapCut genuinely excels:
The auto-caption feature alone justifies the app for many creators. Captions are no longer optional on social platforms, and CapCut generates accurate, stylized captions in a fraction of the time it takes to manually subtitle a video in Premiere Pro.
The background removal and AI segmentation tools are also better than you might expect from a free app. They handle hair and complex edges reasonably well for social-quality footage, which removes the need for expensive green screen setups in casual shooting environments.
The template library is a legitimate creative resource when used thoughtfully. Rather than simply dragging your clips into a pre-made structure, skilled creators use templates as a starting point and customize the pacing, text, and transitions to produce something that feels original while benefiting from proven visual frameworks.
Where CapCut shows its limitations:
Export quality and codec flexibility are real constraints. While CapCut supports up to 4K resolution, its codec options are limited, and the compression applied during export is often noticeable when footage is viewed on high-resolution screens or when it needs further post-processing.
Audio mixing in CapCut is functional but shallow. For creators who care about multi-track audio, dialogue editing, or sound design beyond basic level adjustments and built-in effects, it quickly becomes inadequate.
The timeline itself lacks the precision that complex editing demands. Trimming to exact frames, managing multiple synchronized audio and video tracks, and applying nuanced transitions requires workflows that CapCut was not designed to handle.
Privacy and data handling are also legitimate concerns worth noting. Given CapCut’s ownership by ByteDance, which also owns TikTok, some organizations and professional environments have placed restrictions on its use. For individual creators, this may be a non-issue, but for agencies, brands, and enterprise teams, it warrants consideration.
Premiere Pro for Social Media: Power With a Price
Premiere Pro is not a natural fit for short-form social content creation. That is worth saying clearly. Its interface was designed for projects measured in minutes and hours, not seconds. Opening Premiere Pro to cut a 30-second Reel feels like using a professional kitchen to make a sandwich.
That said, when social media content demands a higher production standard, Premiere Pro’s advantages become apparent.
Branded content, commercial campaigns, documentary-style long-form content for YouTube, narrative short films for social distribution — these all benefit from Premiere Pro’s precision and depth. When a brand needs to deliver a video that will run as a paid Instagram ad or a product launch film, the quality floor is higher, and the tools need to match.
Adobe has also made genuine progress on features that matter for social-first workflows. The Auto Reframe feature, powered by Adobe Sensei, intelligently detects subjects in a widescreen video and automatically reframes for square, vertical, or other aspect ratios. For creators repurposing long-form content across multiple platforms, this saves considerable time.
The Speech to Text transcription feature in Premiere Pro has also improved significantly, offering caption generation that integrates cleanly with the timeline for manual refinement.
The honest cost consideration:
At $54.99 per month for the standalone app, Premiere Pro is a significant investment for an individual creator. When weighed against CapCut’s free tier, the cost difference is substantial. That investment only makes sense if the depth of features you access genuinely improves the quality and marketability of your work.
Mobile vs Desktop Editing: The Workflow Question
The mobile vs desktop editing debate goes deeper than device preference. It reflects fundamentally different content creation realities.
Mobile editing, which CapCut excels at, fits naturally into the creation workflow for social media. You shoot on your phone, edit on your phone, and post from your phone. The friction is minimal, the feedback loop is fast, and the proximity between capture and creation keeps the energy of the original footage intact.
Desktop editing introduces distance from that process, but also introduces power. Keyboard shortcuts, multi-monitor setups, professional audio hardware, and the processing capacity of a full workstation allow for a level of craft that simply is not possible on a phone screen.
The reality for most modern social creators is that a hybrid approach makes the most sense. Quick, reactive content — a trending audio response, a day-in-the-life story, a behind-the-scenes clip — belongs in a mobile editing workflow. Planned, produced content with scripting, multiple cameras, or branded requirements belongs on the desktop.
Choosing one tool to handle both scenarios inevitably means compromising somewhere.
Template Editing vs Manual Editing: Different Philosophies
This distinction is worth exploring because it shapes the creative output in ways that go beyond technical capability.
Template editing, as CapCut enables it, is fundamentally a process of curation and customization. You select a framework that already has visual rhythm, timing, and aesthetic baked in, then fill it with your specific content. The upside is speed and a guaranteed baseline quality. The downside is that highly popular templates produce content with a recognizable aesthetic that can make your work feel interchangeable with thousands of others using the same structure.
Manual editing in Premiere Pro requires you to build every visual decision from scratch. The rhythm is yours. The pacing comes from your instincts and your understanding of your audience. The color grade reflects deliberate choices about mood and brand. This level of intentionality takes longer, demands more skill, and produces results that are genuinely difficult to replicate.
Neither approach is categorically superior. Some of the most effective social content ever created was built on a CapCut template. Some of the least engaging content imaginable has come out of Premiere Pro timelines that technically tick every production quality box.
The differentiator is always the creator’s judgment, not the tool.
Who Should Use CapCut?
-
- Daily content creators on TikTok, Instagram Reels, or YouTube Shorts who need to maintain consistent posting schedules without spending hours on editing
- Small business owners managing their own social media who need professional-looking output without a steep learning curve
- Beginner creators who are still developing their editing instincts and want a forgiving environment to learn pacing, transitions, and text placement
- Creators who shoot on mobile and want a seamless, end-to-end mobile production workflow
- Social media managers working across multiple accounts who need quick turnaround times and template-driven consistency
Who Should Use Premiere Pro?
-
-
- Professional video editors and production companies producing client work at broadcast or commercial quality
- YouTube creators producing long-form content that requires precise editing, professional audio mixing, and detailed color work
- Brands and agencies managing high-stakes video campaigns where quality control and codec flexibility are non-negotiable
- Creators building a professional portfolio who need to demonstrate mastery of industry-standard tools
- Filmmakers and documentarians using social platforms as a distribution channel but holding high production standards for their work
-
Can You Use Both?
Absolutely, and many professional creators do exactly this.
A common workflow for high-output creators looks something like this: produce planned, polished content in Premiere Pro for YouTube and branded campaigns, then repurpose key moments using CapCut for quick short-form content across TikTok and Instagram. The desktop workflow handles depth and quality. The mobile workflow handles speed and volume.
This dual-tool approach removes the false binary of the CapCut vs Premiere Pro debate entirely. They are not competing products in any meaningful sense. They serve different needs, and recognizing where each one belongs in your workflow is a mark of mature content strategy.
Some creators also use Premiere Pro’s Auto Reframe to generate vertical edits from horizontal long-form content, then do final trim and text work in CapCut before posting. That combination is faster than rebuilding the entire edit and maintains production quality on the core footage.
Key Takeaways
-
-
- CapCut is purpose-built for fast, social-first content creation with a low barrier to entry and strong platform integration, particularly with TikTok
- Premiere Pro is the professional standard for complex, high-quality video production with unmatched creative control and ecosystem depth
- The learning curve, cost, and workflow context differ significantly between the two tools, and the right choice depends entirely on your specific creation goals
- CapCut’s limitations in audio mixing, export codec options, and editing precision become relevant as production complexity increases
- Premiere Pro’s advantages in color grading, multi-track editing, and professional output are genuine but come at a significant time and financial investment
- Mobile editing and desktop editing serve different creative moments, and a hybrid workflow often produces better overall results than committing exclusively to one platform
- Template-based editing and manual editing are different creative philosophies, each with appropriate contexts
- Both tools can coexist productively in a single creator’s workflow, with each serving distinct content types and timelines
-
FAQs
1. Is CapCut good enough for professional social media marketing?
For most social media marketing applications, CapCut is entirely capable. Brands creating organic social content, short-form ads, and educational videos for platforms like TikTok, Instagram, and YouTube Shorts will find that CapCut meets their technical requirements. Where it falls short is in projects that require precise branding controls, complex motion graphics, professional-grade audio, or formats that go beyond social distribution. For agency work with high-stakes deliverables or content requiring broadcast-quality specifications, Premiere Pro remains the more appropriate tool.
2. Does CapCut reduce video quality when exporting?
CapCut exports up to 4K resolution, but its compression and codec options are limited compared to professional tools. The quality is generally more than sufficient for social media platforms, which apply their own compression algorithms during upload regardless of the source quality. However, if you are exporting footage that needs to be re-edited or used in a higher-production-value project downstream, CapCut’s export quality may present limitations.
3. Can Premiere Pro be used for short-form social media content?
Yes, and features like Auto Reframe, Speech to Text, and preset export profiles for social platforms make it more viable than it used to be. That said, Premiere Pro is not optimized for the speed that short-form content creation demands. Creators producing primarily short-form content at high volume will find the workflow slower and more complex than CapCut without a proportional benefit in output quality for those formats.
4. Is CapCut owned by the same company as TikTok?
Yes. CapCut is developed by ByteDance, the same company behind TikTok. This has led some organizations and government entities to restrict or ban its use on official devices, citing the same data privacy concerns that have surrounded TikTok. For individual creators, this is generally not an issue, but professional environments, agencies working with sensitive client content, and enterprise teams should verify their organization’s policies before using CapCut in a work context.
5. What is the learning curve difference between CapCut and Premiere Pro?
CapCut has a genuinely accessible learning curve. Most users can produce a polished short-form video within their first session. The core tools are intuitive, the interface is clean, and the template library provides a guided starting point. Premiere Pro is significantly more complex. Getting comfortable with the basic workflow typically takes several weeks of deliberate practice, and features like color grading, audio mixing, and motion graphics integration represent additional skill trees that can take months or years to develop properly. Adobe offers structured learning resources through Adobe Learn that help accelerate the process.
6. Which tool is better for caption and subtitle creation?
For speed and simplicity, CapCut’s auto-caption feature is genuinely impressive. It generates styled captions quickly with reasonable accuracy across multiple languages and lets you customize the look with minimal effort. Premiere Pro’s transcription and caption tools have improved significantly, offering a more precise workflow with better control over subtitle format and placement, which is valuable for content that requires compliance with accessibility standards or specific caption styling guidelines. For creators who prioritize caption quality at scale, both tools are now functional, with CapCut winning on speed and Premiere Pro winning on control.
7. How does pricing compare when you factor in long-term use?
CapCut’s free tier is genuinely useful and covers the needs of most individual social media creators. The Pro tier, at approximately $7.99 per month, unlocks additional templates, AI tools, and asset libraries. Premiere Pro starts at $54.99 per month as a standalone app, or it is included in the full Adobe Creative Cloud plan. Over a year, CapCut costs nothing to around $96, while Premiere Pro costs approximately $660 or more. That cost difference is significant and only justified if the quality, depth, and professional applications of Premiere Pro directly support your income or creative output.
Final Verdict
CapCut and Premiere Pro are not in direct competition because they are not trying to do the same thing. CapCut is a content velocity tool. Premiere Pro is a craft tool. Framing the comparison as a winner-take-all decision misunderstands how professional and semi-professional creators actually work.
If you are building a content strategy around consistent, platform-native short-form video and you need to produce at volume without a large production budget or team, CapCut is the smarter starting point. It will get you further, faster, with less friction than any desktop editing tool.
If your work requires production quality that reflects a professional standard, if you are producing content for clients, or if your creative vision regularly exceeds what templates and limited timelines can deliver, Premiere Pro is worth the investment and the learning curve.
And if you are operating at the level where both are relevant to your work, use both. Let each tool do what it was designed for, and stop looking for a single solution to every content challenge you face.
The best editing software is always the one that disappears into your workflow and lets your ideas take center stage.
Want to go deeper on video editing workflows for social media? Explore Adobe’s official guide to Premiere Pro for content creators or check out CapCut’s feature documentation at capcut.com for the latest updates to their toolset.
Adobe Premiere Pro vs DaVinci Resolve vs Final Cut Pro: Which Should Your Editor Use?
Adobe Premiere Pro vs DaVinci Resolve vs Final Cut Pro: Which Should Your Editor Use?
Estimated reading time: 15 minutes
Why This Comparison Still Matters in 2026
The conversation around professional NLE software has never been more relevant. Production pipelines have evolved dramatically over the past five years — remote teams are now the norm, camera formats have grown more demanding, and clients expect faster turnarounds without any compromise in quality. Choosing the wrong editing platform does not just slow your workflow down; it can genuinely limit what your team can deliver.
The three names that dominate the professional video editing landscape — Adobe Premiere Pro, DaVinci Resolve, and Final Cut Pro — each represent a genuinely different philosophy about how editing should work. One is built on ecosystem integration, another on post-production depth, and the third on raw speed within a closed hardware environment. None of them is universally superior. But one of them is almost certainly the right choice for your specific situation.
This guide breaks down exactly what each platform offers, where each one falls short, and which type of editor or production team benefits most from each. Whether you are a solo documentary filmmaker, a commercial post house, or a content creator scaling up to broadcast quality, this comparison will help you make a well-informed decision.
A Quick Overview of Each Platform
Before diving deep, it helps to understand the foundational identity of each tool.
Adobe Premiere Pro has been a staple of professional editing since it launched in its modern iteration in 2003. It sits inside the broader Adobe Creative Cloud ecosystem, which means seamless integration with After Effects, Audition, Photoshop, and Illustrator. For editors already working in that ecosystem, the integration is genuinely powerful rather than just a marketing talking point.
DaVinci Resolve, developed by Blackmagic Design, started life as a colour grading suite used exclusively in high-end Hollywood facilities. Blackmagic eventually rebuilt it into a full non-linear editing system. Today, DaVinci Resolve is the only platform that handles editing, colour grading, visual effects (through Fusion), audio post-production (through Fairlight), and collaborative media management — all within a single application.
Final Cut Pro is Apple’s professional editing platform, and it takes a distinctly different approach to NLE architecture. Rather than traditional track-based timelines, Final Cut Pro uses a magnetic timeline with a primary storyline model. It is macOS-exclusive, deeply optimised for Apple Silicon, and known for its extraordinary rendering and export speed on compatible hardware.
Each of these tools is used by working professionals at the highest levels of the industry. The question is which one fits your workflow.
Interface and Learning Curve
Interface design reflects the philosophy behind each tool, and understanding those philosophies helps you anticipate how long it will take for an editor to become productive.
Premiere Pro uses a familiar track-based timeline that anyone who has worked with traditional NLE software — including AVID Media Composer — will recognise immediately. Tracks stack vertically, clips sit on those tracks, and the paradigm is intuitive for editors coming from broadcast or news backgrounds. The interface is dense and customisable, which is both its strength and its occasional weakness. New users can feel overwhelmed by the sheer number of panels and options.
DaVinci Resolve organises itself around distinct pages — Cut, Edit, Fusion, Colour, Fairlight, and Deliver. This modular approach is elegant once you understand it, but it initially confuses editors who expect a single unified workspace. The Edit page behaves like a traditional NLE, while the Cut page offers a streamlined, faster-paced alternative for rough assembly. The Colour page is its own world entirely — one that professional colourists spend years mastering.
Final Cut Pro is arguably the most approachable for newcomers, but it challenges experienced editors with its non-standard magnetic timeline. Editors trained in track-based systems sometimes find the initial adjustment frustrating. However, those who invest the time almost universally report that it becomes faster for certain types of editing — particularly narrative and documentary work — once the muscle memory takes hold.
In practice, a skilled editor can become genuinely productive in Premiere Pro within days, DaVinci Resolve’s Edit page within a week or two, and Final Cut Pro within two to three weeks if they are coming from a track-based background.
Editing Performance and Proxy Workflows
Performance in real-world editing is not just about spec sheet benchmarks. It is about how smoothly a platform handles your specific camera formats, your hardware configuration, and your delivery requirements.
Final Cut Pro consistently sets the benchmark for raw performance on Apple hardware. Its optimised use of Apple Silicon, combined with native support for ProRes and ProRes RAW, means editors on M-series MacBook Pros can cut 4K and even 8K footage in real time with minimal dropped frames. Apple’s ProRes codec documentation illustrates why ProRes has become the industry’s preferred intermediate format — and Final Cut Pro treats it as a first-class citizen. The magnetic timeline also contributes to speed, reducing the friction of basic cuts and trims.
DaVinci Resolve has made significant strides in performance, particularly with GPU acceleration. It leverages CUDA (NVIDIA) and Metal (Apple) to offload processing, and Blackmagic’s proxy workflow — using optimised media generated in the Media Pool — is straightforward and well-integrated. For editors working with heavy visual effects or intensive colour work, Resolve’s GPU utilisation is genuinely impressive. The challenge arises on lower-end hardware; Resolve can feel sluggish without a capable GPU and sufficient RAM (Blackmagic recommends at least 16GB, though 32GB is the practical minimum for professional work).
Premiere Pro supports a wide range of camera formats natively and has improved its GPU acceleration through the Mercury Playback Engine. Its proxy workflow is functional, though some editors find it slightly more convoluted to set up compared to Resolve or Final Cut Pro. Premiere Pro also has a history of RAM usage concerns — though recent updates have addressed many of these issues — and performance can vary considerably depending on system configuration, codec choice, and the number of third-party plugins installed.
For editors primarily on Windows machines working with RED, ARRI, or Sony Venice footage, Premiere Pro and DaVinci Resolve are the practical options since Final Cut Pro simply does not exist on that platform.
Colour Grading Capabilities
This is where the comparison becomes genuinely unequal.
DaVinci Resolve’s Colour page is the industry standard for professional colour grading, and calling it merely “robust” would be underselling it. The node-based colour pipeline, the precision of its scopes, the depth of its HDR tools, and its implementation of colour science — including its own DaVinci Wide Gamut colour space — represent decades of refinement from a company whose tools were grading Hollywood features long before they built an NLE. Films graded in Resolve include everything from major studio releases to award-winning independent productions. For any production where colour is a primary deliverable, Resolve is in a category by itself.
Final Cut Pro offers capable colour tools, including colour wheels, curves, and a dedicated Colour Inspector. Apple’s Colour Finale plugin (a third-party addition) significantly extends what is possible. However, for professional colourists, Final Cut Pro’s colour environment feels constrained compared to Resolve’s. It handles basic primary and secondary corrections well and produces excellent results when working within its ProRes ecosystem, but it is not a tool professional colourists tend to choose for complex, client-facing colour work.
Premiere Pro’s Lumetri Colour panel is accessible and functional, offering scopes, curves, HSL secondary corrections, and Creative LUT support. For editors who need to do their own colour work as part of a finishing pipeline, Lumetri gets the job done. For dedicated colourists, it lacks the precision and depth of Resolve’s toolset. That said, Premiere’s tight integration with After Effects allows for complex compositing workflows that colourists sometimes leverage on heavily effects-driven projects.
In many professional pipelines, the practical answer to colour grading is to edit in Premiere Pro or Final Cut Pro and then round-trip to DaVinci Resolve for colour — a workflow that is well-documented and widely used in the industry.
Collaborative Editing and Team Workflows
As productions grow, the ability for multiple team members to work on the same project simultaneously becomes critical.
DaVinci Resolve offers the most sophisticated collaborative editing solution in the comparison through DaVinci Resolve’s collaborative workflow feature, available in both the free and Studio versions. Multiple editors can work on the same timeline simultaneously using a PostgreSQL database, with bin locking, timeline locking, and real-time updates. For larger post houses, this is a genuine differentiator. The Blackmagic Cloud feature also enables remote collaboration without requiring a local server infrastructure.
Adobe Premiere Pro supports collaborative work through Productions — a feature introduced for managing large-scale projects with multiple editors. Productions allows editors to work in separate but linked project files that share bins and assets. It is a well-designed system for broadcast and film productions, though it requires careful setup and some discipline from the team to avoid conflicts. Adobe also offers integration with Frame.io (which Adobe acquired in 2021) for client review and approval workflows.
Final Cut Pro handles collaboration through libraries stored on shared storage, and while multiple editors can work on separate projects within the same library, true simultaneous multi-editor collaboration on the same timeline is not natively supported in the way Resolve handles it. For smaller teams working in a structured handoff workflow, this is manageable. For larger post houses requiring real-time collaboration, it is a limitation worth acknowledging.
Export Formats and Delivery
| Platform | Broadcast Formats | ProRes Support | H.264/H.265 | HDR Export | DCP Output |
|---|---|---|---|---|---|
| Premiere Pro | Excellent | Yes (via Media Encoder) | Yes | Yes | Via third-party |
| DaVinci Resolve | Excellent | Yes | Yes | Yes (native) | Yes (Studio) |
| Final Cut Pro | Excellent | Native, first-class | Yes | Yes | Via third-party |
DaVinci Resolve Studio (the paid version) includes the most comprehensive delivery options, including native DCP output for theatrical delivery — a significant advantage for cinema-focused productions. The Deliver page is thoughtfully designed and offers custom presets that make multi-format delivery efficient.
Premiere Pro, through Adobe Media Encoder, handles virtually every delivery format a professional is likely to encounter. Media Encoder runs as a background application, allowing editors to continue working while exports render — a practical time-saver in deadline-heavy environments.
Final Cut Pro excels at fast ProRes export and has exceptional direct export speeds on Apple Silicon. Its Share destinations system simplifies delivery for common targets, though complex custom delivery workflows sometimes require Compressor (Apple’s companion encoding application).
Pricing: Real Cost vs Perceived Value
| Platform | Pricing Model | Cost |
|---|---|---|
| Adobe Premiere Pro | Subscription (Creative Cloud) | Approximately $55/month (single app) or $60/month (All Apps) |
| DaVinci Resolve | Free version available; Studio is a one-time purchase | Free / $295 USD (Studio, perpetual licence) |
| Final Cut Pro | One-time purchase | $299.99 USD (Mac App Store) |
DaVinci Resolve offers an extraordinary free tier. The free version includes virtually everything a professional editor or colourist needs for standard deliverables. The Studio version adds collaborative tools, noise reduction, certain AI-powered features, and DCP output — and it is a one-time purchase rather than a recurring subscription. For freelancers or small studios managing software costs carefully, this makes Resolve an almost irresistible value proposition.
Final Cut Pro at $299.99 is a one-time cost that covers all future updates within the current major version. Given the pace at which Apple updates the software, this has historically been excellent value, particularly for Mac-committed workflows.
Premiere Pro is the most expensive option on an ongoing basis. For organisations already paying for Adobe Creative Cloud All Apps — which many agencies and design firms do — the incremental cost is less significant. But for a video-focused operation with no other Creative Cloud dependency, paying over $600 annually for a subscription is a real consideration.
Which Editor Should Use Which Tool?
The honest answer is that tool selection should follow workflow requirements rather than personal loyalty or convention. Here is a practical breakdown:
Choose Premiere Pro if:
- Your team is already embedded in the Adobe Creative Cloud ecosystem
- You frequently work alongside motion graphics artists using After Effects
- You edit on Windows machines or cross-platform teams
- Your projects involve complex audio workflows that benefit from Audition integration
Choose DaVinci Resolve if:
- Colour grading is a primary or significant deliverable
- You want professional-grade tools without a subscription commitment
- Your production requires true simultaneous multi-editor collaboration
- You handle theatrical or broadcast delivery requiring precise colour science
- You are building or scaling a post-production studio from the ground up
Choose Final Cut Pro if:
- Your team is entirely on Mac hardware, particularly Apple Silicon
- Editing speed and performance are the highest priorities
- You are a solo editor or part of a small team without complex collaboration needs
- You primarily work in ProRes-based workflows
- You edit high-volume content where turnaround speed is commercially significant
Head-to-Head Comparison Table
| Feature | Premiere Pro | DaVinci Resolve | Final Cut Pro |
|---|---|---|---|
| Platform | Mac, Windows | Mac, Windows, Linux | Mac only |
| Pricing | $55/month | Free / $295 (Studio) | $299.99 (one-time) |
| Learning Curve | Moderate | Moderate–Steep | Moderate |
| Colour Grading | Good (Lumetri) | Industry-leading | Capable |
| Multi-editor Collaboration | Yes (Productions) | Yes (native, robust) | Limited |
| Performance (Apple Silicon) | Good | Good | Exceptional |
| Ecosystem Integration | Adobe CC | Blackmagic | Apple |
| VFX Integration | After Effects | Fusion (built-in) | Motion (separate) |
| Audio Post | Audition integration | Fairlight (built-in) | Logic Pro / third-party |
| Free Version | No | Yes | No (30-day trial) |
| DCP Output | Third-party | Studio version | Third-party |
| Best For | Agency / broadcast teams | Colour-critical / cinema | Fast Mac-based workflows |
Key Takeaways
-
- DaVinci Resolve is the most complete post-production platform available today, and its free tier makes it accessible to anyone without financial barriers. For colour-critical work, it is in a league of its own
- Final Cut Pro is unmatched for raw editing performance on Apple Silicon and represents exceptional long-term value for Mac-based operations. Its speed advantages are real and measurable, not marketing language
- Premiere Pro’s primary competitive advantage is its deep integration with the Adobe Creative Cloud ecosystem and its cross-platform availability. For teams already invested in Adobe tools, it remains the most logical choice
- Colour grading and NLE choice can be separated. Many professional pipelines edit in Premiere or Final Cut and grade in Resolve — a round-trip workflow that combines the strengths of multiple tools
- There is no universally correct answer. The right platform is the one that best fits your specific hardware, team structure, delivery requirements, and existing software investments
FAQs
Q1: Is DaVinci Resolve really free, or is the free version too limited for professional work?
The free version of DaVinci Resolve is genuinely professional-grade. It includes the full Edit, Cut, Fusion, Colour, and Fairlight pages with no watermarks and no time limits on projects. The Studio version ($295, one-time) adds specific features including multi-user collaboration without a server, certain AI-powered audio and video tools, noise reduction powered by neural engine processing, and native DCP output for cinema delivery. For the vast majority of professional video editors, colourists, and filmmakers, the free version covers everything they need. The Studio version is worth the investment only if you specifically require those additional capabilities.
Q2: Can Premiere Pro and DaVinci Resolve work together in the same pipeline?
Absolutely, and this is a common professional workflow. Editors will cut a project in Premiere Pro, then export an XML or AAF file that DaVinci Resolve can import. Resolve reconforms the project against the original camera files, allows the colourist to grade the footage, and then the finished master is exported. This round-trip workflow is well-documented and widely used in commercial and narrative film production. It allows teams to use the tool that each specialist knows best rather than forcing a single platform on everyone.
Q3: Is Final Cut Pro worth learning if you already know Premiere Pro?
For editors committed to Mac hardware, particularly those working on M-series chips, the performance gains from Final Cut Pro are significant enough to justify the learning investment. The magnetic timeline takes adjustment, but most editors report that after four to six weeks, their editing speed exceeds what they achieved in Premiere Pro. If you occasionally need to hand off projects to Windows-based teams or post houses, the lack of cross-platform support is a real constraint. If your world is entirely Mac-based and speed is commercially important, the transition is worth serious consideration.
Q4: How does AVID Media Composer fit into this comparison?
AVID Media Composer is the fourth major player in professional NLE software and remains dominant in broadcast television and major film post-production, particularly in the United States. Networks like HBO, NBC, and many film studios standardise on AVID because of its mature bin-based media management, its decades of integration with broadcast infrastructure, and its robust collaborative workflows. If you are targeting a career in broadcast TV or major studio features, knowing AVID is still commercially valuable. For most other applications — commercial work, documentary, digital content, independent film — Premiere Pro, Resolve, or Final Cut Pro will serve you better and cost considerably less.
Q5: Which platform handles HDR colour workflows best?
DaVinci Resolve handles HDR workflows with greater depth and precision than any competing NLE. Its native support for HDR10, Dolby Vision, and HLG, combined with its colour science tools and accurate scopes for HDR monitoring, make it the platform of choice for productions delivering HDR masters for streaming platforms. Apple’s HDR pipeline within Final Cut Pro is also strong, particularly for HDR ProRes workflows targeted at Apple TV+. Premiere Pro supports HDR export through Lumetri and Media Encoder but lacks the grading depth of Resolve for complex HDR finishing.
Q6: Which editing software do most professional editors use in 2026?
Usage varies significantly by market segment. According to industry surveys and production data, Adobe Premiere Pro maintains the largest installed base among commercial agencies, marketing teams, and content creators. DaVinci Resolve has seen rapid adoption growth, particularly among independent filmmakers and post-production facilities, driven largely by its pricing model and colour capabilities. Final Cut Pro retains a strong professional user base among Mac-centric editorial departments and independent editors in markets like Australia, Canada, and the UK. AVID continues to dominate broadcast television workflows. There is genuinely no single dominant platform across all professional contexts — which is itself an important data point when making your own decision.
Q7: How important is GPU specification when choosing between these platforms?
GPU specification matters most for DaVinci Resolve and, to a lesser extent, Premiere Pro. Resolve’s colour engine, Fusion compositor, and noise reduction tools are GPU-accelerated, and the difference between working on a mid-range GPU versus a high-end workstation GPU is tangible in real time. Blackmagic recommends at least 8GB of VRAM for Resolve, and 16GB or more for intensive colour grading with HDR or visual effects work. Final Cut Pro benefits most from Apple’s unified memory architecture in M-series chips rather than discrete GPU VRAM. Premiere Pro’s Mercury Playback Engine uses GPU acceleration but is generally less GPU-demanding than Resolve for equivalent tasks.
Conclusion
The debate between Premiere Pro, DaVinci Resolve, and Final Cut Pro is not one that resolves with a single winner — and any comparison that tells you otherwise is oversimplifying the reality of professional post-production. These are three mature, powerful, and genuinely distinct tools that reflect different priorities, different hardware environments, and different workflows.
If there is one overarching truth in this comparison, it is that the best platform is the one that removes friction from your specific workflow. An editor working on a high-volume commercial pipeline embedded in Adobe Creative Cloud will be more productive in Premiere Pro than they would be if forced to switch to Resolve, regardless of what the feature matrix suggests. A colourist finishing a streaming drama needs Resolve’s colour page — full stop. A solo Mac editor cutting documentary features for fast turnaround will find Final Cut Pro gives them a genuine competitive advantage in delivery speed.
What is increasingly common — and increasingly sensible — is the use of multiple platforms within a single pipeline, leveraging each for what it does best rather than treating the choice as a binary commitment. The tools interoperate well enough to support this, and the best post-production teams tend to be the ones who care more about the quality of the work than loyalty to any particular piece of software.
Invest the time to understand what your workflow actually demands, evaluate the hardware your team works on, and consider your long-term cost structure. Then make the decision based on evidence rather than convention.
For official documentation and release notes, visit Adobe Premiere Pro’s official page, Blackmagic Design’s DaVinci Resolve page, and Apple’s Final Cut Pro page.
Corporate Video Production on a Budget: How to Look Professional Without a Film Crew
Corporate Video Production on a Budget: How to Look Professional Without a Film Crew
Estimated reading time: 14 minutes
Why Budget-Conscious Video Is No Longer a Compromise
There was a time when producing a corporate video meant booking a production company, hiring a director of photography, renting a studio, and spending somewhere between $5,000 and $50,000 before a single frame was edited. That era is not entirely gone, but for most businesses, it is no longer the only path to credible, compelling video content.
The landscape has shifted dramatically. Smartphones now shoot in 4K. Lighting setups that once required a gaffer can be replicated with a $60 ring light. Remote recording platforms like Riverside.fm have made it possible to capture broadcast-quality audio and video from opposite sides of the world. And audiences, having spent years watching YouTube tutorials, podcast recordings, and behind-the-scenes reels, no longer equate “low budget” with “low credibility.”
What they do equate with low credibility, however, is poor audio, distracting backgrounds, and shaky footage. Those are entirely avoidable problems, regardless of your corporate video production budget.
This guide is written for marketing managers, founders, in-house content teams, and anyone tasked with producing professional business video without the luxury of a full production crew. You will find specific tools, practical techniques, and a clear framework for building a video operation that consistently delivers quality output at a fraction of traditional costs.
Understanding What “Professional” Actually Means on Camera
Before purchasing any equipment or booking any recording session, it is worth pausing on what “professional” actually signals to a viewer. Most people assume it means expensive cameras and cinematic color grading. In reality, it means something far more achievable.
Professional video communicates:
- Clarity — the viewer can see and hear everything without effort
- Intentionality — the framing, background, and lighting appear considered rather than accidental
- Confidence — the speaker or presenter comes across as credible and at ease
- Consistency — the visual and audio quality holds up across multiple videos
Notice that none of those qualities require a film crew. They require preparation, good judgment, and a handful of well-chosen tools. That distinction is what separates businesses that successfully produce affordable corporate video production from those that invest in gear but still look amateur.
A study by Wyzowl found that 91% of businesses now use video as a marketing tool, and yet the businesses that see the strongest returns are often not the ones with the largest production budgets. They are the ones with the clearest message and the most consistent output.
The Essential Gear Setup That Won’t Break the Bank
Building a capable low budget corporate video setup does not require buying everything at once. Start with the elements that most visibly affect quality, then build from there.
Camera
Your smartphone is almost certainly capable enough to start. The iPhone 15 Pro and Samsung Galaxy S24 Ultra both shoot in cinematic 4K with excellent dynamic range. If you want a dedicated camera, the Sony ZV-E10 or Canon EOS M50 Mark II offer interchangeable lenses, clean HDMI output for live streaming, and strong autofocus — all under $700.
Lighting
This is the single highest-impact investment you can make on a limited corporate video budget. A good key light transforms an average setup into something that looks genuinely polished.
| Lighting Option | Best For | Approximate Cost |
|---|---|---|
| Ring Light (18-inch) | Talking head videos, solo presenter setups | $40–$80 |
| Elgato Key Light | Desk or seated setups, soft diffused look | $150–$200 |
| Godox SL60W (softbox) | More cinematic two-point lighting | $90–$130 |
| Window light + reflector | No-cost option when natural light is available | Free–$20 |
Position your key light at roughly 45 degrees from your face, slightly above eye level. Avoid placing it directly behind your camera — that produces flat, unflattering light and is the most common mistake in self-produced business video content creation.
Audio
This is non-negotiable. Bad audio will destroy an otherwise excellent video faster than any visual imperfection. A viewer will forgive soft focus before they forgive muffled or echo-heavy sound.
Recommended microphones for a corporate video without a studio setup:
- Rode Wireless GO II — clip-on wireless system, clean broadcast quality (~$300)
- Blue Yeti — USB condenser, excellent for desk setups (~$130)
- DJI Mic — compact, wireless, surprisingly good for the price (~$280)
- Rode VideoMicro — attaches to camera, solid directional capture (~$80)
If budget is extremely tight, recording in a small carpeted room with soft furnishings around you will do more for audio quality than most cheap microphone upgrades.
Background and Environment
Your background communicates brand values instantly. A cluttered background suggests disorganization. A stark white wall can feel sterile. The best approach is a thoughtful, real environment: a bookshelf with curated titles, a clean corner of your office with soft natural light, or a simple branded backdrop.
Avoid virtual backgrounds unless your green screen setup is genuinely clean. Poorly rendered virtual backgrounds are one of the fastest ways to lose viewer confidence.
Choosing the Right Video Format for Your Goals
Not all corporate video formats require the same resources. Matching your video type to your actual goals — rather than defaulting to the most elaborate option — is a core principle of sensible corporate video production budget management.
Talking Head Video
The most versatile and scalable format for businesses working without a crew. A single presenter, well lit, speaking directly to camera, can carry enormous credibility. Thought leadership content, product explanations, team introductions, and opinion pieces all work exceptionally well in this format.
The key to a great talking head video is scripting that doesn’t sound scripted. More on that in the next section.
Testimonial Video
Customer testimonials filmed on a smartphone or recorded remotely via Riverside.fm carry genuine persuasive power. According to Nielsen, 92% of consumers trust earned media — including peer recommendations and testimonials — over any form of brand-produced advertising.
For remote testimonial recording, a simple guide sent to the customer in advance (lighting tips, background suggestions, audio recommendations) will significantly improve the quality of what you receive back.
Explainer Video
Animated or screen-recorded explainer videos can be produced entirely without a camera. Tools like Loom, Descript, or even Canva’s video editor allow you to produce clean, visually coherent explainer content. For software products or service walkthroughs, a well-narrated screen recording often outperforms a traditional filmed video.
Company Culture Video
This format benefits from being less polished. A company culture video that looks slightly raw, with genuine laughs and candid team moments, lands far better than an over-produced corporate brand video where everyone appears to be reading from a script. Shoot it on a smartphone, edit loosely, and let personality come through.
Corporate Brand Video
This is typically where businesses consider spending more. A flagship brand video that communicates your mission, values, and offer in two to three minutes is worth investing in relative to the others. Even so, a $2,000 to $4,000 brand video produced with the right approach will consistently outperform a $20,000 version that lacks a clear message.
Recording Tools and Software Worth Knowing
The right software stack makes the difference between a professional workflow and a frustrating one.
Riverside.fm
One of the strongest tools available for remote video production. Riverside.fm records locally on each participant’s device rather than streaming compressed video over the internet, which means you capture broadcast-quality footage regardless of connection speed. The platform is widely used by podcast and video teams who need clean multi-track recordings without a studio environment.
SquadCast
Similar to Riverside.fm in its local recording approach, SquadCast is particularly popular with audio-first teams who also produce video. It integrates cleanly with Descript for editing workflows and is a credible option for remote interviews and panel-style corporate content.
Teleprompter App
For anyone nervous about speaking to camera or needing to stay on-message, a teleprompter app is genuinely transformative. Tools like Teleprompter Premium or Parrot Teleprompter allow you to scroll a script at a readable pace directly over the camera lens. The result is a speaker who maintains eye contact, stays on message, and appears far more confident than they might naturally feel.
The critical technique here: write your script the way you speak, not the way you write. Short sentences. Conversational rhythm. Pauses built in. Read it aloud several times before recording.
Descript
Descript is a video and audio editor that allows you to edit footage by editing a transcript. It significantly reduces post-production time for talking head content and includes features like filler word removal, studio-quality audio enhancement, and screen recording. For in-house teams with limited editing experience, it is one of the most practical tools available.
CapCut (Professional Version)
For social-first video content — short clips, branded reels, repurposed longer content — CapCut’s desktop version offers strong auto-captioning, template-based editing, and solid color correction tools. Not a replacement for full video editing software, but highly capable for fast-turnaround content.
How to Direct Yourself (or Your Team) Without a Director
One of the most common failure points in low budget corporate video is performance. Gear and software can be figured out. But getting a CFO, CEO, or subject matter expert to speak naturally and confidently on camera without a director is a different challenge entirely.
Here are the approaches that consistently work:
Pre-record a practice run. Before the actual take, record a full run-through and play it back. People are often shocked to discover their own habits — looking away at key moments, rushing through important lines, crossing their arms — and they self-correct naturally once they see it.
Use bullet points, not full scripts (most of the time). Unless the content is highly technical or compliance-sensitive, speaking to bullet points produces more natural delivery than reading a full script. Prepare your key messages, practice them conversationally, and allow slight variation between takes.
Record in short segments. Rather than attempting a continuous five-minute take, record section by section. This reduces pressure, makes editing easier, and allows each segment to be its best version independently.
Give specific direction. Instead of “be more natural,” say “imagine you’re explaining this to a colleague over lunch” or “pretend you’ve had this conversation a hundred times before.” Concrete framing produces better results than abstract instruction.
Conduct an interview instead of a monologue. For executives or subject matter experts who struggle with solo recording, have someone off-camera ask them questions and edit out the questions in post. The answers will sound far more authentic than a prepared statement.
Post-Production on a Budget: Editing Without an Agency
Editing is where a good video becomes a great one — and where many in-house teams feel most out of their depth. The good news is that modern editing tools have lowered the barrier significantly, and for most corporate video formats, you do not need complex post-production.
Video Editors Worth Considering
| Tool | Best For | Cost |
|---|---|---|
| Descript | Transcript-based editing, talking head video | Free / $24 per month |
| DaVinci Resolve | Full-featured professional editing | Free (advanced paid version) |
| Adobe Premiere Pro | Industry-standard, integrates with entire Adobe suite | ~$55/month |
| Final Cut Pro | Mac users, fast rendering, intuitive timeline | $299 one-time |
| CapCut Desktop | Social-first short content, auto-captioning | Free / subscription |
The Elements That Elevate Edited Video
Captions. A significant portion of viewers watch video without sound, particularly on LinkedIn and Facebook. Auto-captioning tools within Descript, CapCut, and Adobe Premiere have improved dramatically, but always review for accuracy before publishing.
B-roll. Cutaway footage — whether it is your product in use, your team at work, or relevant environmental shots — makes a talking head video far more watchable. Even 15-30 seconds of relevant B-roll cuts between main footage can significantly reduce perceived production cost.
Music. A carefully chosen background track at low volume (around -18 to -22 dB below dialogue) adds emotional texture and professional polish. Use only licensed music. Epidemic Sound and Artlist both offer flat-rate subscriptions for unlimited commercial use.
Color correction. You do not need a colorist. Most editing software includes basic color presets or LUTs (Look Up Tables). Matching the color temperature across cuts and ensuring faces look natural are the two priorities.
Intro and outro. A simple branded opener (logo, brand colors, consistent typography) and a clear call to action at the end of every video builds recognition and gives each video a sense of completion. Canva makes these straightforward to produce even without design experience.
Distribution Strategy: Making Sure Your Video Gets Seen
Producing excellent corporate video content without a clear distribution plan is one of the most common mistakes businesses make, regardless of budget. A $300 video that reaches the right 10,000 people delivers more value than a $15,000 video that lives on a Vimeo page no one visits.
YouTube remains the second largest search engine in the world. Optimizing your video title, description, and tags for search intent gives your content long-term discoverability. A corporate explainer video with a well-optimized YouTube page can continue generating views and leads for years.
LinkedIn is the primary channel for B2B video distribution. Native video (uploaded directly rather than shared as a YouTube link) consistently outperforms linked content in reach. Keep LinkedIn videos concise — 60 to 90 seconds tends to perform best — and include captions.
Your website. Embedding video on key landing pages, especially product pages and about pages, has a measurable impact on time on page and conversion. According to HubSpot, landing pages with video can increase conversions by up to 80%.
Email. The word “video” in an email subject line has been shown to increase open rates. Even a thumbnail image linked to a hosted video (rather than embedded video, which most email clients do not support) can significantly improve click-through rates in email campaigns.
Repurposing. Every long-form corporate video should be broken into shorter clips for social distribution. A three-minute brand film becomes three or four 30-to-60-second clips, each tailored to a specific platform or audience segment. This multiplies your return on any single production session.
Key Takeaways
-
- A professional-looking corporate video is far more about intentional preparation than expensive equipment. Audio quality, lighting, and a considered background are the three factors that most visibly separate amateur from professional output
- Matching your video format (talking head, testimonial, explainer, company culture, brand video) to your specific goals is more important than spending more on production
- Tools like Riverside.fm, SquadCast, Descript, and teleprompter apps give small teams broadcast-capable infrastructure without agency-level costs
- Performance is often the hardest element to control without a director. Using interview formats, practice runs, and conversational scripting techniques consistently produces better results than scripted monologue
- Post-production essentials — captions, B-roll, licensed music, and basic color correction — are achievable with free or low-cost tools and dramatically elevate perceived production quality
- Distribution strategy should be planned before production begins, not after. The same video, properly repurposed and distributed across YouTube, LinkedIn, your website, and email, can reach significantly more of your target audience with no additional production spend
FAQs
Q1: What is a realistic corporate video production budget for a small business?
For most small businesses, a functional and genuinely professional video setup can be built for between $500 and $1,500 in one-time equipment costs (camera or smartphone mount, lighting, microphone), with ongoing software costs of $25 to $55 per month depending on which editing tools you use. For occasional outsourced editing or a one-off brand film, budgeting $1,500 to $4,000 for a freelance videographer or editor is reasonable without compromising quality. The key is understanding that ongoing content — weekly or monthly business video content creation — should be handled in-house wherever possible to reduce per-video costs over time.
Q2: Can I really produce a professional business video without a studio?
Absolutely. Most of the corporate video content that performs well online today is shot in real environments rather than studios. A well-lit corner of an office, a home workspace with soft natural light, or a clean outdoor location with controlled audio can all produce results that are indistinguishable from a studio setup to most viewers. What matters is that the background feels intentional, the light is flattering, and the audio is clean. Those three things are achievable anywhere.
Q3: How do I make a talking head video that doesn’t look boring?
The most common reason talking head videos feel flat is that nothing changes visually for the entire duration. Introduce B-roll footage at relevant moments, vary your shot framing (a wider shot for context, a tighter shot for emphasis), use light on-screen text to reinforce key points, and keep the video shorter than you think it needs to be. The other factor is energy — a speaker who is genuinely engaged with the topic will hold attention regardless of the production setup around them.
Q4: Is Riverside.fm better than Zoom for recording corporate video remotely?
For production purposes, yes, significantly. Zoom compresses both video and audio during the call, which means the recording reflects the quality of everyone’s internet connection. Riverside.fm records locally on each participant’s device in high resolution and then uploads the uncompressed files, meaning the quality of the final recording is not affected by connection speed or bandwidth drops during the call. For any content intended for public distribution — interviews, testimonials, panel discussions — Riverside.fm or SquadCast are the professional choices.
Q5: What type of corporate video generates the best ROI for B2B companies?
Testimonial videos and explainer videos consistently deliver measurable ROI for B2B companies, largely because they address objections and build trust at key decision points in the buyer journey. A well-produced customer testimonial that speaks directly to a specific pain point and outcome is often more persuasive than any amount of ad spend. Explainer videos that clarify complex products or services also tend to perform well on landing pages, reducing bounce rates and increasing qualified lead conversion.
Q6: How long should a corporate video be?
It depends entirely on where the video will live and what it needs to accomplish. For LinkedIn and social media, 60 to 90 seconds is the current performance sweet spot. For YouTube, between two and five minutes works well for educational or explainer content, provided the pacing is tight. For a homepage brand video, 90 seconds to two and a half minutes is generally optimal. The underlying principle is the same for every format: end before the viewer loses interest, not after. It is always better to leave a viewer wanting slightly more than to push through padding to hit an arbitrary length target.
Q7: Do I need to hire a professional video editor, or can I learn to do it in-house?
For most corporate video formats, in-house editing is entirely viable — especially with tools like Descript, which makes the process intuitive even for non-editors. The time investment to reach a competent editing standard for talking head content, testimonials, and social clips is much smaller than most people assume. Where professional editing becomes genuinely worth the cost is in flagship brand video production, complex multi-camera work, or high-stakes launches where every visual detail needs to be precisely calibrated. For routine content cadences, building in-house capability almost always produces a better long-term return on investment.
Producing high-quality corporate video without a film crew is no longer an exercise in compromise. The tools are accessible, the knowledge is available, and the audience has shifted its expectations in your favor. What separates the businesses that consistently produce credible, effective video content from those that don’t is almost never budget. It is a commitment to getting the fundamentals right — sound, light, message, and distribution — and then repeating that process consistently over time.
Start with one format. Master the workflow. Build from there.