Video Editing for Online Course Creators: How to Make Your Lessons Look Professional
Estimated reading time: 15 minutes
Why Video Quality Directly Affects Course Sales and Completion Rates
There is a moment every online course creator experiences — you have spent weeks building a curriculum, the knowledge is solid, the structure makes sense, and then someone leaves a review that says: “Great content, but the video quality made it hard to stay engaged.”
That stings, but it is also one of the most honest pieces of feedback you can receive. Video editing for online courses is not about being a cinematographer. It is about respecting your learner’s time, holding their attention, and communicating expertise through a polished, professional presentation.
According to research from Kaltura’s State of Video report, video has become the dominant medium for education, with over 91% of organizations using it for learning and development. But here is what the data does not always surface: production quality plays a direct role in whether students complete a course or abandon it mid-way.
Course completion rates are notoriously low across platforms like Udemy, Teachable, and Kajabi — often sitting between 10% and 30% for most creators. While content quality is a significant factor, poorly edited video that includes awkward pauses, inconsistent audio, jumpy cuts, or missing visual context drives students to disengage faster than a dense lecture ever would.
The good news? You do not need a production studio or a $10,000 camera setup. What you need is a working understanding of course video editing principles, the right tools, and a repeatable workflow.
Setting the Right Foundation Before You Edit
Professional video editing starts long before you open your editing software. The quality of your edit is almost entirely determined by the quality of your raw footage. Garbage in, garbage out — it is a cliché because it is true.
Shoot with editing in mind. When recording your lessons, give yourself clean start and end points. Pause for two to three seconds before you begin speaking and after you finish a section. These silent handles give you clean cut points and make the editing process significantly faster.
Use consistent lighting and framing. Learners notice inconsistency even when they cannot name it. If your camera angle shifts between lessons, or your lighting changes from warm to cool, your course will feel disjointed. Pick a setup and stick with it for the entire course.
Record in a quiet environment. A condenser microphone in a room with soft furnishings will almost always outperform an expensive camera in a reflective, noisy space. Audio quality is arguably more critical than visual quality for educational content — students will watch a low-resolution lecture but will abandon a crisp 4K video with poor audio.
Organize your files before importing anything. Create a folder structure that separates raw footage, audio files, screen recordings, graphics, and exports. Label your clips with consistent naming conventions — something like Module_01_Lesson_03_Take2.mp4. This prevents the chaos of searching through hundreds of unnamed files mid-project.
Choosing the Right Editing Software for Online Course Videos
One of the most common questions course creators ask is which editing software to use. The honest answer is that the right tool depends on your technical comfort level, budget, and the complexity of your content.
Here is a practical breakdown:
| Software | Best For | Platform | Price Point | Learning Curve |
|---|---|---|---|---|
| Camtasia | Screen recording + lecture editing | Windows/Mac | ~$299 one-time | Low–Medium |
| Adobe Premiere Pro | Professional multi-track editing | Windows/Mac | ~$55/month | Medium–High |
| Final Cut Pro | Mac users wanting speed and power | Mac only | $299 one-time | Medium |
| DaVinci Resolve | Free professional-grade editing | Windows/Mac/Linux | Free (Studio: $295) | Medium–High |
| iMovie | Beginners on Mac | Mac/iPhone | Free | Very Low |
| Descript | Transcript-based editing, great for talking heads | Windows/Mac | Free–$24/month | Low |
| ScreenFlow | Mac-based screen recording and editing | Mac only | $149 one-time | Low–Medium |
For most course creators building content for platforms like Teachable, Udemy, Thinkific, or Kajabi, Camtasia and Descript represent the most practical starting points. Camtasia is purpose-built for educational video production, with templates for callouts, zoom effects, and chapter titles built directly into the timeline. Descript takes a different approach — it generates a text transcript of your video and lets you edit by deleting words from the transcript, which dramatically lowers the barrier for non-technical creators.
If you are producing higher-volume content or want maximum control over color grading, transitions, and multi-camera editing, Adobe Premiere Pro or DaVinci Resolve give you that depth. DaVinci Resolve in particular is remarkable for a free tool — it rivals Premiere on most editing tasks and has a professional color correction suite that most course creators will never fully exhaust.
The Core Editing Techniques Every Course Creator Needs
Knowing what to cut matters more than knowing every button in your software. Here are the editing principles that separate forgettable course videos from ones that get five-star reviews.
Cut the hesitations, not the humanity. Remove the “umms,” false starts, and long pauses — but do not sand your delivery down to a robotic monotone. Learners connect with instructors who sound like real people. Keep the occasional pause for emphasis. Cut the noise, preserve the personality.
Use jump cuts strategically. A jump cut is when you cut between two shots of the same subject from slightly different angles or timings. On YouTube, this is an accepted visual shorthand for “I edited for clarity.” On a structured course, it can feel jarring. Use B-roll footage, screen recordings, or graphics overlays to mask cuts and maintain visual continuity.
Pace your edits to match cognitive load. Conceptually dense sections need slower pacing. Give learners time to absorb complex ideas — do not rush through foundational material. Simpler, procedural content can move faster. Adjusting your edit rhythm to the complexity of the content is one of the most underrated techniques in eLearning video editing.
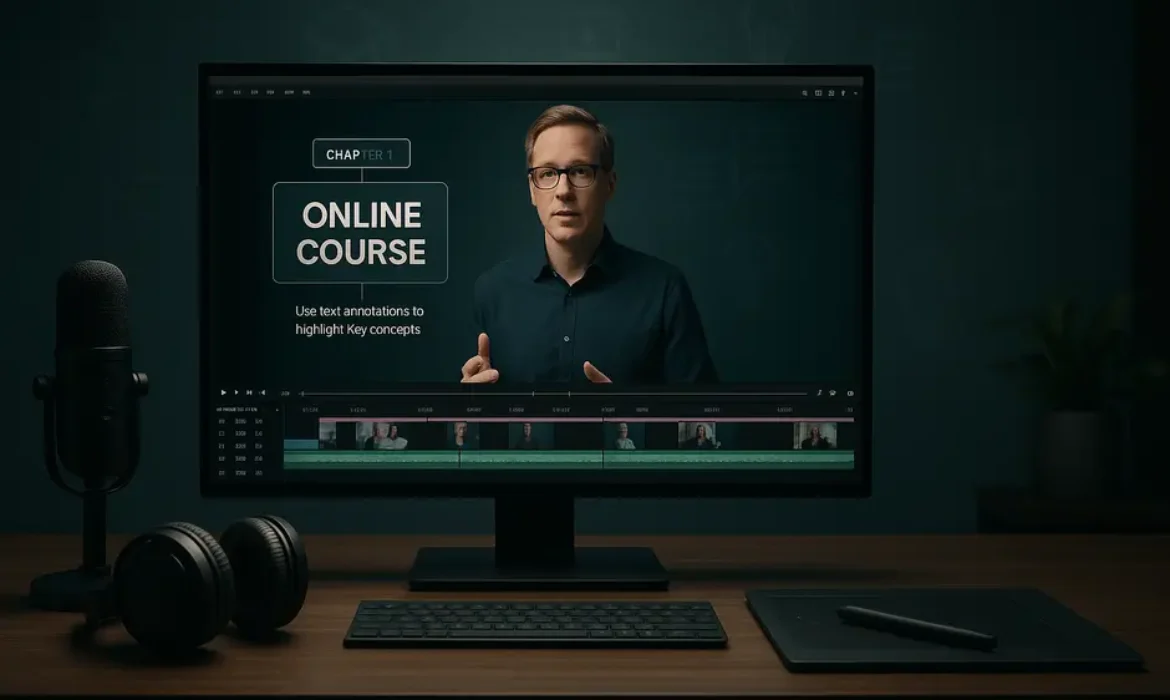
Create visual structure within lessons. Each lesson should have a clear visual beginning, middle, and end. An opening title card, a brief “what you will learn” screen, the core content, and a closing summary slide create a predictable rhythm that reduces cognitive fatigue and makes course completion feel achievable.
Maintain consistent color grading. Even subtle inconsistency in color temperature between clips creates subconscious friction. Apply a simple color correction LUT (look-up table) across all your footage, or at minimum, match the white balance between clips shot in the same environment.
Screen Recording Editing: A Skill Set on Its Own
A significant portion of online course content involves screen recordings — software tutorials, coding walkthroughs, presentation slides, or live demonstrations. Editing screen recordings presents its own challenges that are distinct from camera footage.
Tools like Loom, Camtasia, and ScreenFlow all capture screen activity effectively, but the editing work that follows is where quality diverges.
Speed up the mundane, slow down the critical. When recording a software walkthrough, you will inevitably navigate menus, wait for applications to load, or scroll through long files. Speed these moments up to 150–200% in your editor. When you reach a step that requires precision — a specific setting, a configuration field, a formula — slow down and use a zoom callout to focus attention on exactly what learners need to see.
Add cursor highlights or spotlight effects. A plain cursor on a busy screen is easy to lose. Both Camtasia and ScreenFlow offer cursor highlight features that draw a colored ring around the cursor, making it immediately visible. This is a small addition that dramatically improves the clarity of technical tutorials.
Use zoom and pan animations deliberately. Zooming into a specific area of a screen helps learners follow along without squinting. But overusing zoom effects creates visual chaos. As a rule: zoom into areas that require close inspection, return to full view when showing context or navigation.
Callout boxes and annotations add instructional value. A callout pointing to a specific button, combined with a short text label, removes ambiguity. Learners do not have to wonder “which button is that?” because you have highlighted it directly. This is particularly valuable for software that looks different across operating systems or version updates.
Using Lower Thirds, Chapter Titles, and On-Screen Graphics
Visual text elements are one of the fastest ways to elevate the professionalism of your course videos. Used correctly, they serve a genuine instructional purpose. Used carelessly, they clutter the screen and distract.
Lower thirds are the text overlays that appear at the bottom of the screen — typically used to display the instructor’s name or a topic label. In course videos, lower thirds work well as topic identifiers at the start of a new section, helping learners orient themselves within the lesson structure.
Chapter titles function as visual anchors. Opening each new module or major concept with a clean title card — even a simple slide with the lesson title on a solid background — creates a sense of structure. Learners who re-visit a course to review specific content can navigate more easily when sections are visually labeled.
On-screen text and key points reinforce auditory information visually. When you make a critical statement — a statistic, a definition, a process step — displaying that text on screen doubles the retention impact. This is supported by dual-coding theory, which demonstrates that combining verbal and visual information improves comprehension and recall.
A practical design principle: keep your graphics consistent in font, color, and placement. Pick two typefaces — one for titles, one for body text — and stick with them throughout the course. Use your brand colors. Consistency does not just look professional; it reduces cognitive load because learners stop noticing the graphics and focus on the content instead.
Audio Editing for eLearning: The Often-Overlooked Factor
If video quality is what gets students to enroll, audio quality is what keeps them watching. Poor audio — background noise, inconsistent volume, room reverb, sudden level spikes — is the fastest way to break immersion in an educational video.
Noise reduction comes first. Most editing software includes a basic noise reduction filter. In Adobe Premiere Pro, the Essential Sound panel handles this cleanly. Audacity (free) and Adobe Audition offer more granular control. The principle is the same: capture a sample of your room noise, then subtract that frequency profile from the entire audio track.
Normalize or compress your audio levels. Aim for an average loudness level around -14 to -16 LUFS for online video, which aligns with the loudness normalization standards used by most streaming platforms. Inconsistent volume between clips — where one section is quiet and another is loud — forces learners to constantly adjust their devices, which is a friction point that breaks engagement.
Remove mouth sounds and breath noise surgically. Tools like iZotope RX are industry-standard for audio cleanup. Many creators underestimate how much these small sounds accumulate across a 15-minute lesson and how much cleaner the audio sounds when they are removed.
Consider music and sound design carefully. Background music in eLearning is a double-edged sword. A subtle, low-energy track can add warmth during intro and outro sequences. Music behind lecture content, however, competes with the instructor’s voice and increases cognitive load. If you use music, keep it at -25 to -30 dB below the vocal track — audible but never dominant.
Optimizing Videos for Specific LMS Platforms
Different platforms have different technical requirements and viewing contexts. Understanding these nuances prevents the frustrating discovery that your beautifully edited video looks compressed and blurry after upload.
| Platform | Recommended Format | Max Resolution | Max File Size | Notes |
|---|---|---|---|---|
| Teachable | MP4 (H.264) | 1080p | 4GB per file | Supports HD streaming via Wistia |
| Kajabi | MP4 (H.264) | 1080p | 2GB per file | Uses Wistia for hosting |
| Udemy | MP4 (H.264) | 1080p minimum | No stated max | Minimum 720p required; 1080p preferred |
| Thinkific | MP4 (H.264) | 1080p | 2GB per file | Vimeo-powered hosting |
| Loom | Recorded directly | Up to 4K | N/A | Direct recording tool; limited editing |
Beyond format specifications, consider how your video will be consumed. Many learners watch courses on mobile devices, which means small text, fine details in screen recordings, and text-heavy slides may be difficult to read. Test your exports on a phone screen before publishing — it is a quick check that catches a surprising number of readability issues.
Export settings that hold up across platforms:
- Format: MP4
- Codec: H.264
- Resolution: 1920×1080 (1080p)
- Frame Rate: 30fps (sufficient for talking head and screen content)
- Bitrate: 8–12 Mbps for 1080p (variable bitrate preferred)
- Audio: AAC, 48kHz, 192–320kbps stereo
Workflow Tips to Edit Faster Without Cutting Corners
Sustainable course creation depends on an efficient editing workflow. Here is how experienced course creators reduce editing time without sacrificing output quality.
Create a sequence template. Build your standard intro sequence, lower thirds, chapter title style, and outro once. Save it as a sequence template in your editor. Every new lesson starts from that template — you only need to update the text and drop in new footage.
Edit in passes, not in one sitting. First pass: cut the obvious mistakes, long pauses, and false starts. Second pass: add graphics, callouts, and text overlays. Third pass: audio cleanup and level matching. Final pass: color correction. This approach prevents decision fatigue and keeps each session focused.
Use keyboard shortcuts obsessively. The time savings from keyboard shortcuts in Premiere Pro, Final Cut Pro, or DaVinci Resolve are substantial. The blade tool, ripple delete, and in/out markers become muscle memory quickly. Invest a day learning shortcuts and you will recover that time within the first week.
Batch record and batch edit. Record multiple lessons in a single session when your energy and setup conditions are consistent. Then edit that batch together rather than switching between recording and editing modes daily. Batching keeps you in a single mode longer and reduces context switching.
Use Descript for talking-head heavy content. If the majority of your course is you speaking to camera, Descript’s transcript-based editing cuts editing time by 40–60% compared to traditional timeline editing. You read the transcript, delete the filler words and mistakes, and the video updates automatically.
Key Takeaways
-
- Video quality directly influences course completion rates and student reviews — treat it as a core part of your product, not an afterthought
- Audio quality matters more than visual quality for educational content. Fix your audio before anything else
- Choose your editing software based on your content type: Camtasia or Descript for most course creators; Premiere Pro or DaVinci Resolve for higher-complexity production
- Screen recording editing requires its own techniques — cursor highlights, strategic zoom, speed adjustments, and callout boxes all improve clarity
- Lower thirds, chapter titles, and consistent graphic design reduce cognitive load and increase perceived production value
- Always export in H.264 MP4 at 1080p and test playback on a mobile device before publishing to your LMS
- Build template sequences to dramatically reduce per-lesson editing time and maintain visual consistency
FAQs
Q1: What is the best video editing software for online course creators who are just starting out?
For most beginners, Camtasia or Descript are the strongest starting points. Camtasia is purpose-built for educational video production with built-in callouts, screen recording integration, and pre-designed templates. Descript is ideal if you are uncomfortable with timeline editing — it lets you edit video by editing a text transcript, which removes much of the technical barrier. Both tools produce professional results without requiring you to learn the complexities of a full non-linear editing suite.
Q2: How long should individual course videos be?
Research from platforms like Udemy and data published by MIT’s educational technology research consistently points to 6–9 minutes as the sweet spot for lecture video length. Attention begins to drop significantly after the 9–12 minute mark for non-interactive video. For complex procedural content — such as software tutorials — slightly longer videos (12–15 minutes) are acceptable if they walk through a complete task from start to finish. Splitting content into clearly titled segments that each address a single concept outperforms long, multi-topic lessons on engagement metrics.
Q3: How do I reduce background noise in my course videos without expensive software?
Most professional-level noise reduction can be achieved with free or low-cost tools. Audacity (free) has a built-in noise reduction filter that works well for consistent background noise like HVAC systems or computer fans. Adobe Premiere Pro’s Essential Sound panel includes noise reduction in the standard subscription. For more advanced noise removal — keyboard sounds, mouth clicks, room reverb — iZotope RX Elements (approximately $99) is the industry standard and available at a fraction of the cost of the full suite.
Q4: Do I need to create a new editing setup for each LMS platform I publish to?
Not necessarily. If you export a 1080p H.264 MP4 at approximately 8–12 Mbps, that file will meet the technical requirements of Teachable, Kajabi, Udemy, and Thinkific without modification. The main variables to watch are file size limits — some platforms cap uploads at 2GB per file, which only becomes relevant for very long, high-bitrate videos. Keep a master export at maximum quality and create compressed versions only if a specific platform requires it.
Q5: Should I use lower thirds and on-screen text in all my course videos?
Lower thirds work best as subtle orientation aids — displaying the current topic or module section at the beginning of a segment. They should not remain on screen throughout a lesson. On-screen text that reinforces key points, statistics, or step labels adds genuine instructional value and is worth including consistently. The principle is that every graphic element should earn its place — if it adds clarity or aids retention, include it. If it decorates without function, remove it.
Q6: How do I make screen recording videos look less boring?
The most effective techniques are: strategic zoom and pan to direct attention, cursor highlight effects to make navigation legible, callout boxes to label important interface elements, speed ramping to fast-forward through mundane actions, and occasionally cutting back to a picture-in-picture camera shot of yourself to maintain a human connection. Varying the visual pace and using a combination of screen and camera footage — even occasionally — dramatically increases engagement compared to a static screen recording with only a voiceover.
Q7: Does video production quality affect how much I can charge for my online course?
Production quality signals professionalism, which directly influences pricing perception and conversion rates. Learners comparing two courses on the same topic will generally associate higher production quality with higher expertise, even if the content depth is comparable. That said, content substance and instructor credibility remain primary conversion factors. The realistic goal is to produce video that is clean, well-lit, clearly audible, and visually organized — not cinematic. Most learners are more forgiving of modest production values than of poor audio or disorganized visual presentation. Investing in a quality microphone, consistent lighting, and a competent editing workflow will return more on course pricing and enrollment than a camera upgrade.
Conclusion
Video editing for online courses is one of those skills that feels intimidating at first and becomes surprisingly systematic once you establish a workflow. The gap between a course that looks hobbyist and one that looks professionally produced is rarely about expensive equipment. It is almost always about intentionality — taking the time to clean up your audio, structure your visuals, standardize your graphics, and optimize your exports for the platform your students are watching on.
Your learners enrolled because they trust your expertise. Your video production should reinforce that trust at every touchpoint — from the first frame of your intro sequence to the final frame of your concluding lesson. When your editing is clean, your pacing is thoughtful, and your visuals support rather than compete with your content, students stay longer, complete more, and return for your next course.
The tools exist at every price point. The knowledge is here. The only remaining variable is consistency — building a workflow you can repeat across every lesson you create.
Sources referenced in this article include Kaltura’s State of Video Report, the American Psychological Association’s research on dual-coding theory, iZotope product documentation, and open learning research from MIT. Platform-specific technical specifications are sourced from official documentation for Teachable, Kajabi, Udemy, and Thinkific.