
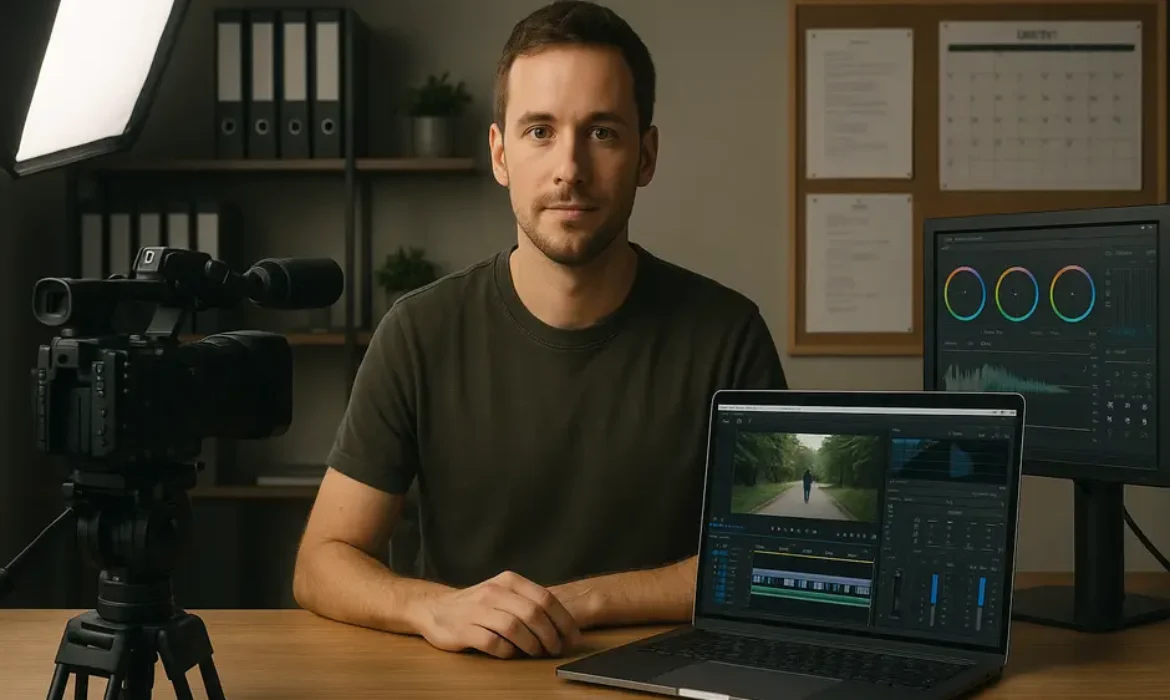
Video Production Workflow for Content Creators: From Filming to Publishing
Estimated reading time: 16 minutes
Why Your Video Production Workflow Is Either Your Biggest Asset or Biggest Bottleneck
Most content creators do not have a workflow problem. They have a consistency problem — and the root cause is almost always the same thing: no repeatable system.
Watch any creator who publishes reliably — weekly YouTube videos, multi-platform content, regular Shorts and Reels on the side — and you will find that beneath the creative output is a structured, well-documented video production workflow. Not because they are less creative. Because they understand that creativity thrives inside structure, not despite it.
According to HubSpot’s State of Marketing Report, video remains the most preferred content format among marketers and consumers alike, yet the majority of brands and independent creators cite “time and resources” as the primary barrier to consistent production. The process is not the problem. The lack of a process is.
This guide walks through every stage of the video production process — from the moment an idea surfaces to the second a video goes live — with practical frameworks, real tool recommendations, and the kind of hard-won insight that only comes from doing this work at scale.
Whether you are a solo YouTube creator, a small production team, or a brand managing a content calendar across multiple channels, this is the system you need.
Phase 1 — Pre-Production: Building the Foundation
Pre-production is where most creators lose time before a single frame is ever filmed. Ideas stay in someone’s head. Scripts get started and abandoned. Shot lists are skipped entirely because “we’ll figure it out on the day.” That approach works once, maybe twice, and then it collapses under volume.
A strong content creation workflow starts before you ever pick up a camera.
Ideation and Content Calendar
Your content calendar is not just a scheduling tool. It is a strategic document that tells you what you are making, why you are making it, and when it needs to be ready. Tools like Notion, Trello, and Asana each handle this differently — Notion being the most flexible for creators who want to combine research, scripting, and scheduling in one workspace; Trello being excellent for visual pipeline management; Asana for teams that need task assignment and deadline tracking.
The ideal setup includes:
- A rolling 4–6 week content calendar with publish dates
- A backlog of ideas with brief descriptions and target audience notes
- Status columns: Idea, In Script, Filming Scheduled, In Edit, Review, Published
This pipeline view means nothing falls through the cracks and you never arrive at filming day without knowing exactly what you are producing.
Scripting and Research
Full scripts versus bullet-point outlines is a debate that never fully resolves — and honestly, it depends on your delivery style. What matters more than format is completeness. Your script or outline should answer three questions before filming begins:
- What is the single point this video is making?
- What does the viewer need to know at each stage to follow that point?
- What is the call-to-action and where does it live in the structure?
Document your research sources, note any on-screen graphics or B-roll moments you want to capture, and flag any sections where specific footage will be needed.
The Shot List
Skipping the shot list is one of the most expensive habits in video production — not expensive in money, but in time. A shot list is a simple document that maps every piece of footage you need: A-roll (talking head or main presenter footage), B-roll (supporting visuals), cutaways, graphics references, and any specific product or location shots.
| Shot Type | Description | Location/Notes |
|---|---|---|
| A-Roll | Main talking head, intro to video | Studio/desk setup |
| B-Roll | Screen recording of software demo | Capture card or screen capture |
| Cutaway | Close-up of hands on keyboard | Natural light, clean desk |
| Graphic Card | Lower third for speaker name | Added in post |
| B-Roll | Stock footage: city timelapse | Source from Pexels or Artgrid |
Even a ten-item shot list removes the guesswork from a filming session and dramatically speeds up editing because you already know what footage exists.
Phase 2 — Filming: Executing With Precision
A well-prepared filming session is fast, focused, and low-stress. An unprepared one is where creators lose hours and end up with unusable footage that forces expensive reshoot days.
Equipment and Environment Checklist
Before rolling, run through a pre-shoot checklist:
- Camera battery charged, backup battery ready
- Memory cards formatted and cleared
- Audio levels tested (nothing kills a video faster than bad audio)
- Lighting consistent and controlled — no windows causing exposure shifts
- Background dressed, branded, or blurred to match your visual identity
- Camera settings confirmed: frame rate, ISO, white balance, resolution
For most YouTube and social media content, shooting in 4K at 24fps or 30fps gives you enough resolution to crop in post and maintain a cinematic quality without creating unnecessarily large file sizes.
A-Roll Efficiency
If you are the on-camera talent, get your A-roll done in focused blocks. Do not stop to review every take in real time. Record your sections, mark good takes with a verbal cue (“That one was good, moving on”), and keep the session moving. You will review everything in post.
If you are directing talent, call takes clearly, communicate adjustments concisely, and avoid reshooting sections you already have covered unless the performance genuinely failed.
B-Roll and Supplementary Footage
B-roll is what separates a good video from a great one. Plan for at least two to three times more B-roll than you think you will need. Editors work faster and produce better results when they have options. Screen recordings, product demos, location footage, close-ups, and stock footage all serve as visual support for your narration and keep viewers engaged through sections that might otherwise feel static.
Phase 3 — Post-Production Workflow: Editing, Colour, and Audio
This is where the video actually gets made. Filming captures raw material. Post-production shapes it into something worth watching. Your video editing pipeline should be consistent, structured, and efficient.
File Organisation
Before you open your editing software, organise your files. Seriously. Editors who skip this step spend fifteen minutes finding clips instead of cutting them.
A clean folder structure looks like this:
Project Name/
  01_Footage/
    A-Roll/
    B-Roll/
  02_Audio/
    Music/
    SFX/
    Voiceover/
  03_Graphics/
  04_Project Files/
  05_Exports/
This applies whether you are using Adobe Premiere Pro, DaVinci Resolve, or Final Cut Pro. The folder structure is editor-agnostic and makes collaboration far easier when another editor needs to step into your project.
The Editing Timeline
Build your edit in distinct passes rather than trying to perfect everything simultaneously:
Pass 1 — Assembly Edit: Drop all your A-roll into sequence. Cut out the obvious mistakes, long pauses, and anything clearly unusable. Do not worry about pacing yet.
Pass 2 — Rough Cut: Trim for pacing, flow, and storytelling logic. Add B-roll. Start to feel the rhythm of the video.
Pass 3 — Fine Cut: Micro-trim transitions, tighten the pacing, add lower thirds, graphics, and any motion elements. This is where the video starts to feel finished.
Pass 4 — Colour Grade: Colour grading is not just about aesthetics — it is about visual consistency across your entire content output. DaVinci Resolve has become the industry standard for colour work, even among creators who edit in Premiere Pro (using its Lumetri Color tools as a capable alternative). Establish a look and save it as a preset or LUT (Look Up Table) so every video sits in the same visual world.
Pass 5 — Audio Mix: Get your audio right before you export. This means levelling dialogue (typically around -12 to -6 dB), setting music beds to sit underneath voice without competing (usually -20 to -25 dB), and applying gentle noise reduction where needed. Tools like Adobe Audition, iZotope RX, or even the built-in audio tools in DaVinci Resolve handle this well.
Export Settings
Export settings depend entirely on your publishing destination, but a solid baseline for most platforms is:
| Platform | Resolution | Frame Rate | Format | Bitrate |
|---|---|---|---|---|
| YouTube | 3840×2160 (4K) | 24/30fps | H.264 or H.265 | 35–68 Mbps |
| Instagram Reels | 1080×1920 | 30fps | H.264 | 15–20 Mbps |
| LinkedIn Video | 1920×1080 | 30fps | H.264 | 10–15 Mbps |
| TikTok | 1080×1920 | 30fps | H.264 | 15–25 Mbps |
Always export a master file at the highest quality before generating platform-specific versions. This master becomes your archive copy and makes it trivially easy to repurpose content later.
Phase 4 — Review, Approval, and Collaboration
For solo creators, this phase is largely self-review — watching the video back on a different screen, ideally the next morning with fresh eyes. For teams or client work, a proper review and approval system prevents miscommunication and costly late-stage revisions.
Frame.io has become the go-to platform for video review and collaboration. It lets clients and collaborators leave time-coded comments directly on the video, eliminating the chaos of email-based feedback (“at around 2 minutes when you mention the pricing thing” is not useful feedback). Teams using Frame.io consistently report shorter revision cycles and fewer misunderstandings.
For lighter use cases, Vimeo Review and even shared Google Drive links with a comment sheet work reasonably well.
Managing Revisions Intelligently
Establish clear revision rounds upfront. Two rounds of revisions is the standard for most professional content work. Scope creep in video production almost always enters through unlimited, unstructured feedback cycles.
Use version naming conventions (v1, v2, v2.1) and keep all project files until the content is published. Deleting project files before a video is live is a risk not worth taking.
Phase 5 — Export, Metadata, and Publishing
Getting a video from your timeline to a live publish is the final phase — and the one most creators rush through, often leaving significant organic reach on the table.
Metadata: The SEO Layer of Video
YouTube, in particular, is a search engine with more than 500 hours of video uploaded every minute. Standing out requires treating your metadata with the same care as your content.
Your video metadata checklist:
- Title: Clear, keyword-forward, and specific to the video’s core value
- Description: Write at least 200 words. Include your primary keyword in the first two sentences. Link to related content, resources, and your social profiles
- Tags: Use a mix of broad category tags and specific topic tags — do not keyword-stuff, but do not leave them blank
- Thumbnail: Custom thumbnail with clear visual hierarchy — a viewer should understand the video’s promise in under a second
- Chapters: Add timestamps to your description. YouTube’s algorithm rewards structured content and viewers appreciate the navigation
- Cards and End Screens: Set these up before you schedule the video, not as an afterthought
Scheduling and Distribution
Your content calendar should include not just a publish date but a publishing time (based on when your specific audience is most active), a cross-posting plan (which clips will be cut for Shorts, Reels, or TikTok), and a note about any community posts or email newsletter mentions that will support the video’s launch.
The Best Tools for Managing Your Video Production Process
A great workflow needs the right infrastructure. Here is how the core tool categories break down:
| Category | Recommended Tools | Best For |
|---|---|---|
| Project Management | Notion, Trello, Asana | Content calendar, shot lists, task tracking |
| Cloud Storage | Google Drive, Dropbox | File sharing, backup, collaboration |
| Video Editing | Premiere Pro, DaVinci Resolve | Full editing pipeline |
| Colour Grading | DaVinci Resolve | Professional colour work |
| Review + Approval | Frame.io | Team and client feedback |
| Screen Recording | Loom, OBS, Camtasia | B-roll, tutorials, software demos |
| Audio Post | Adobe Audition, iZotope RX | Dialogue cleanup, audio mixing |
| Distribution | Hootsuite, Buffer, YouTube Studio | Scheduling, metadata, multi-platform |
The most important principle in tool selection is this: use fewer tools better, not more tools poorly. Every additional platform in your stack is a potential point of friction. Start with the minimum viable stack and add tools only when a genuine bottleneck requires it.
Batch Filming: The Strategy That Multiplies Your Output
If there is one tactical shift that transforms a creator’s output capacity, it is batch filming. The concept is simple: instead of filming one video at a time, you group multiple videos into a single production session.
The efficiency gains are significant. You set up your camera, lighting, and audio once. You are warmed up and in performance mode. You are wearing the same outfit, the background is dressed, the environment is controlled. What might take three separate afternoons as individual sessions often takes a single well-organised day of batch filming.
A practical batch filming structure:
- Week 1: Scripting and shot list creation for four videos
- Week 2, Day 1: Batch film all four A-roll sessions back to back
- Week 2, Day 2–3: Capture any needed B-roll and screen recordings
- Week 3: Edit all four videos across dedicated editing blocks
- Week 4: Review, export, and schedule for the next four weeks
This creates a four-week content buffer, which means you are publishing consistently even during weeks when life or other work makes production impossible.
The content calendar in Notion or Asana becomes the project management backbone that keeps this batch system running smoothly. Each video gets its own card or page, moving through status columns from Idea to Published with clear ownership and deadlines at every stage.
Scaling Your Content Creator System
At some point, a growing creator reaches the limit of what they can execute alone. The video production workflow you build as a solo creator should be documented with enough clarity that it can be handed off — partially or fully — to a team.
The creators and production teams that scale successfully share one habit: they write everything down. Not in complicated process documents no one reads, but in simple, visual SOPs (Standard Operating Procedures) that a new editor or producer can follow on day one.
Document the following specifically:
- Your preferred folder structure and file naming convention
- Your editing style guide (pacing notes, text animation preferences, colour preset)
- Your metadata template (description structure, standard tags, CTA language)
- Your review and approval process (who reviews, how feedback is shared, how many revision rounds)
When you bring on a video editor, a thumbnail designer, or a social media coordinator, these documents eliminate the back-and-forth that drains creative energy from the work that actually matters.
Notion handles SOP documentation particularly well for content teams, allowing you to embed video examples, link to asset folders, and keep everything updated in one place rather than scattered across Google Docs, emails, and Slack threads.
FAQs
Q1: What is a video production workflow and why does it matter for content creators?
A video production workflow is the end-to-end system that takes a video from initial idea to published content. It covers pre-production (scripting, shot lists, scheduling), production (filming), and post-production (editing, colour, audio, export). For content creators, having a documented workflow means consistent output quality, faster turnaround times, and far less decision fatigue. Without one, each video becomes its own improvised project, which is exhausting and inefficient at any scale.
Q2: How do professional creators use Notion for video production?
Notion works as an all-in-one production hub. Creators typically build a content database where each video is a page containing the script, shot list, production notes, edit feedback, and publishing checklist. The database view gives a bird’s-eye pipeline across all projects. Combined with linked databases for an editorial calendar, Notion can replace three or four separate tools that would otherwise not talk to each other.
Q3: What is the difference between a rough cut and a fine cut in video editing?
A rough cut is the first pass of an edit where all selected footage is assembled in narrative order, but timing and pacing are not yet optimised. A fine cut refines that assembly — tightening transitions, adding graphics and B-roll, correcting pacing, and preparing the video for colour and audio work. Think of the rough cut as the skeleton and the fine cut as the finished structure before the colour and sound layers are added.
Q4: Should I use Adobe Premiere Pro or DaVinci Resolve for my editing workflow?
Both are excellent professional tools, and the choice often comes down to workflow preference and budget. Premiere Pro integrates tightly with the Adobe Creative Cloud ecosystem (After Effects, Audition, Photoshop), which is valuable if you already use those tools. DaVinci Resolve offers superior colour grading tools in its free version and has become the preferred choice for creators who prioritise colour work. Many professional production teams use both — editing in Premiere, grading in Resolve.
Q5: What is batch filming and how do I start implementing it?
Batch filming means consolidating multiple video productions into a single shoot session rather than filming one video at a time. To start, script three to four videos that share a similar visual format. Block a full day for filming. Set up your environment once and move through all your A-roll scripts back to back, capturing B-roll and supplementary footage in the afternoon. Edit and publish on a staggered schedule over the following weeks. The initial investment of a full production day pays back weeks of consistent content.
Q6: How does Frame.io improve the post-production workflow for teams?
Frame.io allows editors and collaborators to leave time-coded comments directly on video files, eliminating the ambiguity of written feedback. Team members or clients can watch a cut and drop a comment at the exact timecode where a change is needed. This removes revision miscommunication, speeds up approval cycles, and creates a clear audit trail of changes requested and implemented. For any creator working with clients, managers, or a production team, it is a significant quality-of-life improvement over email or Slack-based feedback.
Q7: What export settings should I use when uploading videos to YouTube?
YouTube recommends H.264 encoding with a .mp4 container as the standard format for most creators. For 1080p, a bitrate between 8 and 12 Mbps is solid. For 4K, aim for 35–68 Mbps. Always export from your editing software at a higher quality than YouTube requires, since the platform re-encodes every upload. Exporting at a higher bitrate means YouTube’s compression algorithm has better source material to work with, resulting in a better final quality on the platform.
Key Takeaways
-
- A documented video production workflow is the single most impactful investment a content creator can make in their long-term output capacity
- Pre-production — scripting, shot lists, and content calendar planning — directly determines how efficiently filming and editing happen
- Your video editing pipeline should be built in structured passes: assembly, rough cut, fine cut, colour grade, audio mix, export. Each pass has a specific focus
- Batch filming allows creators to produce a month of content in a single well-organised production day, creating a consistent publishing buffer
- Tool selection matters, but tool discipline matters more. Use Notion, Trello, or Asana to manage the pipeline; Premiere Pro or DaVinci Resolve to edit; Frame.io for review; and Google Drive or Dropbox for cloud storage and backup
- Export and metadata are not afterthoughts. Treating video metadata with the same care as the content itself directly impacts discoverability and organic reach
- Document your workflow clearly enough that it can be partially or fully handed off to a team. Scalability starts with documentation, not hiring
The most consistent creators are not necessarily the most talented ones. They are the ones who have built systems that make showing up and producing inevitable rather than heroic. A strong video production workflow does not constrain creativity — it protects the time and mental space in which creativity can actually function.
Build the system once. Refine it over time. Let the work speak for itself.