
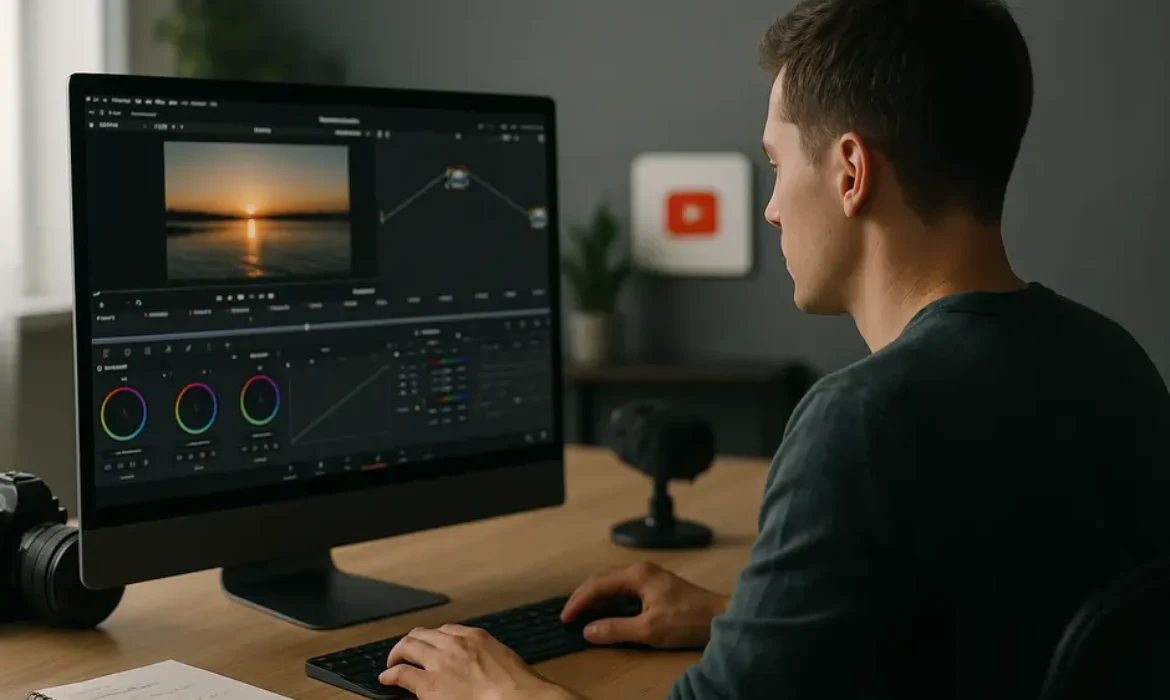
DaVinci Resolve for YouTube: Is It Worth Learning for Content Creators?
Estimated reading time: 15 minutes
Why This Question Matters More Than Ever
There is a point in almost every content creator‘s journey where the editing software question becomes impossible to ignore. Maybe your current tool is slowing you down, or the subscription fees are adding up, or you have watched enough cinematic YouTube videos to know your colour work needs serious improvement. Whatever the trigger, “Should I learn DaVinci Resolve?” is one of the most searched questions among creators right now — and it deserves a properly honest answer.
DaVinci Resolve for YouTube has become a genuine topic of conversation in creative communities, and not just because it is free. The conversation has matured. Creators are asking sharper questions: Will it slow my workflow down? Is the colour page actually practical for YouTube, or is it overkill? What about audio? Can I handle everything in one application without losing my mind?
This guide covers all of that — without the fanboy enthusiasm and without the unfair dismissal. Just a clear-eyed look at what Resolve offers, where it falls short, and whether the learning investment makes sense for the kind of content you make.
What Is DaVinci Resolve and Who Makes It?
DaVinci Resolve is a professional video editing, colour grading, audio mixing, and visual effects application developed by Blackmagic Design, an Australian company that has been building professional broadcast and cinema equipment since 2001. The software itself has a deeper history — it began life as a dedicated colour grading system used on Hollywood films before Blackmagic acquired it in 2009 and eventually released it as a free, standalone application.
That origin story matters. Unlike most editing software that started as a cut-and-trim tool and bolted colour correction on as an afterthought, Resolve was built from the colour suite outward. This lineage shows in the quality of its tools, even at the free tier.
The latest major release, DaVinci Resolve 19, introduced enhanced AI-powered audio tools, improvements to the Cut page, new colour science features, and performance upgrades across the board. It continues to be updated at a rate that would embarrass many subscription-based competitors.
For YouTube creators, the relevant picture is this: you are getting access to the same colour science used on major film productions, a professional non-linear editor, a full audio workstation, and a node-based compositing environment — all without spending a single dollar on software.
The Free Version vs. Studio Version: What Do You Actually Get?
One of the most common points of confusion among beginners is exactly where the line falls between the free version and DaVinci Resolve Studio. The short answer is that the free version handles the vast majority of what YouTube content creators need. The Studio version, which costs a one-time fee of $295 USD, adds capabilities that matter in specific professional or high-volume scenarios.
Here is a direct comparison of the most relevant differences:
| Feature | Free Version | Studio Version |
|---|---|---|
| 4K timeline and export | Yes (up to Ultra HD) | Yes (up to 32K) |
| Colour grading tools | Full access | Full access + extra noise reduction |
| Fusion VFX | Core tools included | Full ResolveFX and third-party plugins |
| Fairlight audio | Full access | Full access |
| Noise reduction (temporal/spatial) | Limited | Full Magic Mask and advanced tools |
| Collaborative multi-user editing | No | Yes |
| GPU processing | Single GPU | Multiple GPU support |
| AI-powered tools (DaVinci Neural Engine) | Partial | Full access |
| Watermark on export | None | None |
| Price | Free | One-time $295 USD |
For a solo YouTube creator producing weekly vlogs, tutorials, short films, or even podcast-style video content, the free version is entirely capable. You will only start running into meaningful limitations when you need advanced noise reduction on poorly lit footage, high-end motion graphics, or collaborative editing with a team.
The one-time pricing model for Studio is also worth emphasising. In an industry dominated by monthly subscriptions, paying once and owning it permanently is a meaningful financial advantage, especially for creators who are just starting to monetise.
Navigating the Interface: Pages, Panels, and the Learning Curve
Let us be straightforward: DaVinci Resolve has a steeper initial learning curve than iMovie or CapCut, and even steeper than Adobe Premiere Pro for someone coming in completely cold. But the reasons are worth understanding, because the difficulty is architectural rather than arbitrary.
Resolve is structured around dedicated pages, each designed for a specific part of the post-production workflow:
- Media Page — Import and organise your footage before you begin editing
- Cut Page — A streamlined, fast-editing environment designed for quick assembly. It features a dual-timeline system that makes rough cuts significantly faster than the traditional approach
- Edit Page — The traditional non-linear editor with a familiar timeline structure, multicam editing, and advanced trimming tools
- Fusion Page — A node-based compositing environment for motion graphics, titles, and visual effects
- Colour Page — The centrepiece. This is where DaVinci Resolve’s cinema heritage lives, offering nodes, scopes, power windows, curves, and more
- Fairlight Page — A complete digital audio workstation with mixing, effects, and dialogue tools
- Deliver Page — Render and export your finished project
For a beginner learning DaVinci Resolve, the honest recommendation is to start with the Cut page and Edit page exclusively. Master those before touching Fusion or Colour in depth. Many creators make the mistake of attempting to learn everything simultaneously, then feel overwhelmed and abandon the software. The pages are designed to be modular — you do not have to use all of them at once.
The Cut page in particular is genuinely underrated. It was designed with speed in mind, and for creators who publish frequently, it can dramatically reduce the time spent on basic assembly edits.
Colour Grading YouTube Videos: Where Resolve Truly Shines
If there is one capability that justifies learning Resolve above all else for YouTube, it is colour grading. The Colour page is not just a good colour grading tool — it is the industry standard for professional colourists working on film and television.
For YouTube specifically, this matters more than many creators realise. Colour affects how professional your content appears, how it competes in thumbnails and autoplay previews, and how it translates across different viewing devices. A well-graded video simply looks more intentional, more cinematic, and more trustworthy.
What sets Resolve’s Colour page apart for YouTube work:
- Node-Based Workflow — Rather than stacking adjustment layers linearly, Resolve uses nodes. Each node is a self-contained colour operation. This sounds complicated but becomes incredibly powerful once you understand it — you can build reusable looks, isolate specific colour ranges, and create complex grades without the performance overhead of stacked layers
- Scopes and Monitoring — The waveform, parade, histogram, and vectorscope tools help you grade to broadcast standards rather than guessing by eye. This matters especially when your audience watches on phones, tablets, TVs, and monitors — all of which display colour differently
- Colour Warper and Curves — These tools allow surgical adjustments that go well beyond the typical saturation and contrast sliders found in consumer editors
- LUT Support — You can apply Look Up Tables from third-party creators, which is a common workflow for creators shooting in log profiles on mirrorless cameras
Even if you shoot on a smartphone or basic mirrorless camera without shooting in log, the Colour page will elevate your footage. Understanding basic primary and secondary corrections alone will separate your videos from the majority of content on the platform.
Fairlight Audio: A Hidden Gem for Solo Creators
Audio quality is the single most underinvested area in most YouTube content, and it is also the one viewers notice most immediately. Poor audio causes viewers to click away faster than almost any other technical issue, according to audience research consistently cited by platform creators and podcasting experts.
Fairlight is DaVinci Resolve’s built-in digital audio workstation, and it is far more capable than most creators discover. For YouTube, the most practically valuable features include:
- Voice Isolation (Studio) — The AI-powered voice isolation tool can separate dialogue from background noise with impressive accuracy. It is one of the stronger arguments for upgrading to Studio if you record in imperfect acoustic environments
- Dialogue Processing Chain — You can build a signal chain including noise reduction, EQ, compression, and limiting directly within Fairlight without needing external plugins. This is the same fundamental chain used by professional audio engineers
- FairlightFX — Built-in audio plugins including reverb, chorus, delay, and the essential de-esser and noise reduction tools
- Multi-Track Mixing — If you incorporate music, sound effects, and voice-over into your content, Fairlight’s mixer gives you proper channel control with automation support
For creators who currently drop their footage into editing software, slap a music track on, and call it done — spending even two or three hours learning Fairlight basics will produce a noticeable and immediate improvement in content quality.
Fusion VFX: Motion Graphics Without the Monthly Bill
Fusion is DaVinci Resolve’s node-based visual effects and motion graphics compositor. If you have used After Effects, Fusion operates on similar principles but with a node graph rather than a layer stack.
For YouTube content creators, Fusion is primarily useful for:
- Creating animated lower thirds and title sequences
- Building custom intro animations
- Adding text animations that go beyond basic templates
- Compositing green screen footage
- Creating subtle visual enhancements like light leaks or particle effects
The learning curve on Fusion is steeper than the rest of Resolve. However, the DaVinci Resolve tutorial ecosystem on YouTube is substantial, and Blackmagic Design provides extensive official documentation and training materials through their Blackmagic Design training certification programme.
For creators who currently pay for a separate motion graphics tool or use template packs that do not quite match their brand, learning even basic Fusion skills opens significant creative doors without any additional software cost.
DaVinci Resolve vs. Premiere Pro for YouTube Creators
This comparison comes up constantly, and the answer is genuinely nuanced. Neither tool is objectively superior for every creator — the right choice depends on your workflow, ecosystem, and priorities.
| Factor | DaVinci Resolve | Adobe Premiere Pro |
|---|---|---|
| Cost | Free (Studio: one-time $295) | $55.99/month or Creative Cloud bundle |
| Colour grading | Industry-leading | Competent but less powerful |
| Audio tools | Fairlight (professional-grade) | Essential Sound panel (functional, basic) |
| Motion graphics | Fusion (node-based, steep curve) | After Effects integration (familiar, powerful) |
| Integration with other tools | Blackmagic ecosystem | Full Adobe Creative Cloud suite |
| Performance on lower-end hardware | Can be demanding | Similar demands, slightly more optimised |
| Community and tutorials | Growing rapidly | Larger established library |
| Collaboration features | Studio version only | Built into Creative Cloud |
| Export presets for YouTube | Excellent | Excellent |
| Update frequency | Frequent free updates | Frequent, tied to subscription |
If you are already embedded in the Adobe ecosystem — using Photoshop for thumbnails, After Effects for motion work, Audition for audio — staying with Premiere makes legitimate sense. The integration is genuinely useful and the workflow continuity matters.
If you are starting from scratch, or if you primarily use non-Adobe tools for the rest of your creative work, DaVinci Resolve is the stronger choice for most YouTube-focused workflows. The colour grading capabilities alone justify the investment in learning time, and the elimination of a monthly software subscription is a real financial benefit, particularly in the early stages of building a channel.
GPU Requirements and Performance Considerations
DaVinci Resolve is a GPU-accelerated application, and this is one of the areas where creators run into genuine frustration if they are underprepared.
The software relies heavily on the GPU for colour processing, Fusion effects, and playback. On underpowered machines, particularly older laptops with integrated graphics, performance can be genuinely challenging.
Minimum recommended for comfortable use:
| Component | Recommended for YouTube Editing |
|---|---|
| GPU | NVIDIA GTX 1060 / AMD RX 580 (8GB VRAM minimum for comfortable use) |
| RAM | 16GB minimum, 32GB recommended for longer timelines |
| Storage | NVMe SSD for project media and cache |
| CPU | Modern quad-core at minimum; eight-core or higher preferred |
| Operating System | macOS 12.5+, Windows 10 (64-bit), or Linux |
Apple Silicon Macs (M1, M2, M3, M4 series) run DaVinci Resolve exceptionally well due to the unified memory architecture. If you edit on a MacBook Pro or Mac Studio, performance is often outstanding even on the free version without proxy media.
For Windows users on mid-range hardware, the proxy workflow becomes an important tool — covered in the next section.
Proxy Media Workflow: How to Edit Smoothly on Any Machine
Proxy media is one of the most valuable concepts for any creator editing high-resolution footage on a machine that struggles with native playback. The concept is straightforward: you create lower-resolution copies of your original footage for use during editing, then switch back to the full-resolution originals for final export.
In DaVinci Resolve, proxies can be generated directly within the Media page using the optimised media or proxy media settings. The workflow looks like this:
- Import your footage into the Media Pool
- Right-click and generate optimised media (or proxy media) in a compressed format like DNxHR LB or H.264
- Edit using the proxy files — playback becomes smooth and responsive
- Before delivery, switch back to original media in the Project Settings
- Export at full quality using your original high-resolution footage
This workflow is particularly relevant for creators shooting in 4K on Sony, Canon, or Panasonic cameras that produce XAVC-S or H.265 footage, both of which are computationally demanding to decode in real time.
Exporting to YouTube: Settings That Actually Work
Exporting correctly matters more than most creators realise. YouTube re-compresses uploaded video, and uploading with the wrong settings can result in excessive quality loss or long processing times.
Blackmagic Design recommends the following export settings for YouTube on the Deliver page:
| Setting | Recommended Value |
|---|---|
| Format | MP4 or MKV |
| Codec | H.264 or H.265 |
| Resolution | Match timeline (1080p, 4K UHD) |
| Frame Rate | Match source footage |
| Bitrate | 30–50 Mbps for 1080p; 50–80 Mbps for 4K |
| Audio Codec | AAC |
| Audio Sample Rate | 48 kHz |
| Audio Bitrate | 320 kbps |
Resolve also includes a built-in “YouTube” preset in the Deliver page that handles most of these settings automatically. Using it as a starting point and adjusting bitrate upward is a sensible approach for most creators.
One important note: YouTube recommends uploading in its preferred formats as documented in their upload encoding guidelines, and Resolve’s H.264 output aligns well with those specifications.
Is DaVinci Resolve Worth Learning in 2026?
The question has a clear answer, but it comes with important context.
DaVinci Resolve is worth learning if you are committed to improving the production quality of your content, plan to create videos consistently for at least a year, and are willing to invest time upfront to build a workflow that will serve you for years. The software is not ideal for creators who need the fastest possible path to publishing simple, ungraded content.
For creators who are serious about their craft — who care about how their videos look and sound, who want professional tools without perpetual subscription costs, and who are willing to move past the initial learning curve — DaVinci Resolve is one of the most compelling options available at any price point.
The colour grading capabilities alone give your content a visual polish that is genuinely difficult to achieve in other editors without significant effort. The Fairlight audio tools address the most common technical weakness in creator content. And the fact that the software is deeply used in professional film and television means the skills you build are transferable well beyond YouTube.
The learning curve is real but finite. Most creators who commit to using Resolve for 30 days of consistent editing report that it begins to feel natural, and many find the Cut page faster than any editor they have previously used.
Key Takeaways
-
- DaVinci Resolve’s free version covers the full needs of the majority of YouTube content creators, including colour grading, audio mixing, and visual effects
- The Colour page is the software’s defining strength — no other free or similarly priced tool comes close for professional-grade colour work
- The Cut page is optimised for fast editing and is an underrated tool for high-volume creators
- Fairlight provides a professional audio workstation that addresses the most common technical weakness in YouTube content
- Fusion enables motion graphics and VFX without additional software costs, though it carries the steepest learning curve in the suite
- For creators on lower-end hardware, the proxy media workflow resolves most performance issues with high-resolution footage
- DaVinci Resolve 19 continues to expand its AI-powered tools, with the most powerful features available in the Studio version
- The one-time $295 Studio pricing compares extremely favourably with subscription-based alternatives over any period longer than six months
- Export settings matter — using high-bitrate H.264 or H.265 with a 48 kHz audio track aligns with YouTube’s preferred specifications and minimises quality loss during platform re-compression
FAQs
Q1: Can a complete beginner learn DaVinci Resolve for YouTube with no prior editing experience?
Yes, but approach it strategically. Start with the Cut page and Edit page, and spend your first month focused exclusively on assembly editing, basic colour corrections, and simple title additions. Blackmagic Design offers free official training courses through their certification programme that are well-structured for beginners. Many creators find that dedicating a few hours each week to intentional practice produces a comfortable working proficiency within four to eight weeks.
Q2: Does DaVinci Resolve free version add a watermark to exported videos?
No. This is one of the most common misconceptions about the software. The free version of DaVinci Resolve exports without any watermark whatsoever. Watermarks on export are associated with tools like DaVinci Resolve’s much simpler older product, and that is not the case here. You get clean, professional exports at no cost.
Q3: What are the biggest differences between DaVinci Resolve 19 and earlier versions?
DaVinci Resolve 19 introduced several meaningful upgrades including enhanced AI audio tools within Fairlight, new IntelliTrack motion tracking for the Colour page, improvements to the Cut page interface, updated Fusion tools, and performance refinements for Apple Silicon and modern NVIDIA GPU architectures. For most YouTube creators, the audio AI improvements and Cut page updates are the most immediately relevant changes in day-to-day use.
Q4: Is DaVinci Resolve better than Premiere Pro for YouTube specifically?
For creators focused primarily on video quality and who are not already invested in the Adobe ecosystem, Resolve is arguably the stronger choice for YouTube work. Its colour grading capabilities are objectively more powerful, Fairlight competes well with Premiere’s audio tools, and the absence of a subscription cost is a genuine advantage. Premiere Pro has the edge in integration with After Effects and the broader Creative Cloud suite, which matters significantly if you use those tools regularly.
Q5: How much VRAM does DaVinci Resolve need for comfortable 4K editing?
For 4K editing without proxy media, 8GB of VRAM is a practical minimum and 12–16GB provides noticeably smoother performance, particularly when working with multiple streams, colour-graded timelines, or Fusion effects. Apple Silicon Macs handle this differently due to unified memory, and an M2 MacBook Pro with 16GB unified memory typically outperforms Windows machines with dedicated 8GB VRAM cards in Resolve. For creators on tighter hardware budgets, the proxy workflow makes 4K editing manageable even on machines that would otherwise struggle.
Q6: Can I use DaVinci Resolve to edit YouTube Shorts and vertical video?
Yes. Resolve handles vertical timelines well — set your project to a 1080×1920 or 2160×3840 resolution in Project Settings and it operates just as smoothly as standard horizontal formats. The Cut page and Edit page both support vertical framing without issues. The Colour and Fairlight pages work identically regardless of aspect ratio, so your entire workflow transfers directly to short-form content.
Q7: Is the DaVinci Resolve tutorial ecosystem good enough to learn from for free?
The tutorial ecosystem for DaVinci Resolve has grown dramatically over the past few years and is now genuinely comprehensive. Channels dedicated to Resolve education on YouTube cover everything from beginner orientation to advanced colour science and Fusion workflows. Beyond YouTube, Blackmagic Design’s own official training materials are detailed and free. Forums like the Blackmagic Design forum and communities on Reddit provide active support for troubleshooting specific issues. For self-directed learners, the resources available today are more than sufficient to reach professional proficiency without spending money on third-party courses.
Conclusion
DaVinci Resolve occupies a genuinely unusual position in the creative software landscape — it is professional-grade software that costs nothing to use at a level that exceeds the needs of most working content creators. The learning curve is real, and the interface can feel overwhelming at first encounter, but the payoff for creators who work through that initial period is substantial.
The colour grading tools will visually differentiate your content in ways that matter to how viewers perceive and respond to it. The audio workstation in Fairlight addresses what is consistently the most damaging technical weakness in independent YouTube content. And the overall architecture of the software, with its dedicated pages for specific tasks, ultimately produces a more organised and intentional post-production workflow than the cluttered, everything-in-one-panel approach of many alternatives.
Whether you are publishing weekly travel videos, educational content, documentary work, or cinematic short films, the tools are there. The question is simply whether you are ready to invest the time to use them properly. For creators who are serious about the long game, that investment pays for itself many times over.