
Batch Filming: How to Film a Month of YouTube Content in One Day
Estimated reading time: 15 minutes
Why Batch Filming Is the Strategy Serious Creators Swear By
Most YouTube creators share a familiar breaking point. They upload consistently for a few months, grow a little audience, feel the momentum building — and then life happens. A busy week at work, a family obligation, a bad cold, and suddenly the upload schedule falls apart. Subscribers notice. The algorithm notices. And climbing back from that inconsistency is harder than starting fresh.
The creators who never seem to miss an upload? They are almost never filming day-by-day. They are batching.
Batch filming YouTube content — meaning you plan, shoot, and organize multiple videos in a single dedicated session — is how solo creators compete with media teams. It is how creators with full-time jobs still post twice a week. It is how burnout gets replaced with breathing room.
This guide walks through the complete process: preparation, scripting, studio setup, the filming day itself, B-roll strategy, and what happens after the camera turns off. Whether you are a newer creator wanting to build good habits or an established one who has been grinding through one-video-at-a-time chaos, this is the system worth adopting.
What Is Batch Filming and Why It Works
Batch filming — sometimes called content batching or bulk filming — means consolidating your video production into concentrated sessions rather than spreading it across individual days. Instead of filming one video on Tuesday, another next Monday, and scrambling for a third the following weekend, you carve out one full day (or two half-days) and record everything you need for the next three to five weeks.
The logic behind this is simple and borrowed directly from manufacturing: setup costs time. Every time you prep your camera, arrange your lighting, adjust your backdrop, test your audio, and mentally switch into “on camera” mode, you are spending time and cognitive energy that does not contribute directly to your content. When you batch, you pay that setup cost once and then extract maximum output from it.
According to research on deep work and cognitive switching costs published in Harvard Business Review, switching between tasks — even mentally — reduces productivity by as much as 40%. Creators who film one video at a time are constantly switching contexts: back to normal life, then into creator mode, then back out again. Batching eliminates that waste.
The other reason batch recording YouTube videos works so well is psychological safety. When you have four finished videos sitting in your editing queue, you stop publishing from a place of panic. You can take a week off, travel, get sick, or just rest without threatening your channel’s momentum. That calm translates into better content decisions, more creative risk-taking, and a more sustainable creative career.
The Week Before: How to Prepare Like a Production Studio
The filming day is not where batch filming succeeds or fails. Preparation is. A chaotic, underprepared filming day produces chaotic content — blurry concepts, stilted delivery, and hours of unusable footage.
Professional video production companies spend far more time in pre-production than they do on set. Apply the same principle on a solo scale.
Roughly one week before your filming day:
Finalize your topic list. Decide which videos you are shooting. Do not leave this for the morning of. Your topics should already align with your content calendar and be validated through keyword research or audience feedback. Aim to have at least four to six topics ready so you have options if one is not working on the day.
Write or outline every script. More on script batching below, but no script should be written the morning before filming. Ideally, all scripting is done two to three days before the shoot.
Prepare your shot list. This is your blueprint for what gets filmed and in what order. The shot list should include your talking head segments, planned B-roll, any product demonstrations, and any graphics or text overlays you plan to add in post.
Order or gather any props, products, or visual aids. Nothing derails a filming day faster than realizing the thing you planned to demonstrate is still in your Amazon cart.
Check your gear. Charge every battery you own. Format your memory cards. Test your microphone. If you use a teleprompter app, make sure your scripts are loaded and the app is updated. Discover your dead battery on Thursday, not on Saturday morning.
Clean and arrange your set. Whether you film in a home office, a spare bedroom, or a dedicated studio corner, prepare the space in advance. This means your backdrop, your desk arrangement, your plants or shelves used for visual depth — everything should be camera-ready before your filming day begins.
Script Batching: Writing Multiple Scripts Without Burning Out
Script batching deserves its own spotlight because writing four to six scripts in a short window can feel overwhelming if approached incorrectly.
The key is to use the same mental state across all your scripts. Creative momentum is real. Once your brain is in “writing mode,” transitioning between topics costs far less energy than stopping, doing something else, and coming back. So just as you are batching your filming, batch your writing.
Set aside a dedicated two to three-hour writing session. Write your intro for all six videos before going deeper on any of them. Then write your main content sections. Then your outros. This way, you maintain a consistent voice and energy across all scripts rather than noticing that your Monday-morning draft sounds completely different from your Friday-afternoon draft.
For creators who prefer speaking naturally rather than following a word-for-word script, detailed outlines work just as well. Each outline should include:
- A strong hook (the first 15 to 30 seconds that determines watch time)
- Three to five main content beats with supporting points
- A specific call to action
- Any transition lines or key phrases you want to land precisely
If you use a teleprompter, batch-load all your scripts before filming day so you are not stopping to retype during your shoot. Apps like Teleprompter Premium or PromptSmart Pro let you organize multiple scripts into folders for exactly this reason.
One practical writing trick: group your scripts by topic category. If three of your six videos are tangentially related — say, they all cover YouTube monetization from different angles — write those three in sequence. The research you do for the first script carries into the second and third, cutting your total prep time significantly.
Building Your Shot List and Content Calendar
A shot list is not optional for batch filming. Without one, you will finish a filming day, sit down to edit, and discover you missed an essential segment for two different videos.
Your shot list should be organized by video, not by shot type — unless you are grouping B-roll shoots at the end of the day, which is a legitimate strategy covered later.
Here is a simple structure that works:
| Video Title | Talking Head Segments | B-Roll Needed | Props/Screen Recordings | Special Notes |
|---|---|---|---|---|
| Video 1: Topic A | Intro, 3 main sections, outro | Laptop typing, scrolling phone | Analytics screenshot | Change backdrop color |
| Video 2: Topic B | Intro, 4 main sections, CTA | Notebook writing, reading | Product on desk | Outfit change |
| Video 3: Topic C | Full script, no major segments | None required | Whiteboard walkthrough | No teleprompter |
| Video 4: Topic D | Hook only, rest is voiceover | Stock footage supplemented | PDF shown on screen | Film intro last |
Your content calendar works in tandem with your shot list. It answers a different question: not “what am I filming today?” but “when does each video go live?” Mapping your filming day against your publishing schedule helps you prioritize. If Video 3 is due to publish in six days and Video 6 is due in four weeks, you should film and prioritize editing Video 3 first, even if it is the most demanding shoot.
Tools like Notion, Airtable, or even a well-structured Google Sheet work well for content calendars. The specifics matter less than the habit. Buffer’s content planning research consistently shows that creators with documented content calendars publish 60% more consistently than those planning ad hoc.
Your Studio Setup for a Full Filming Day
Your environment on filming day is not just a background — it is a production tool. An optimized setup allows you to move faster, feel more professional, and maintain visual consistency across all your videos.
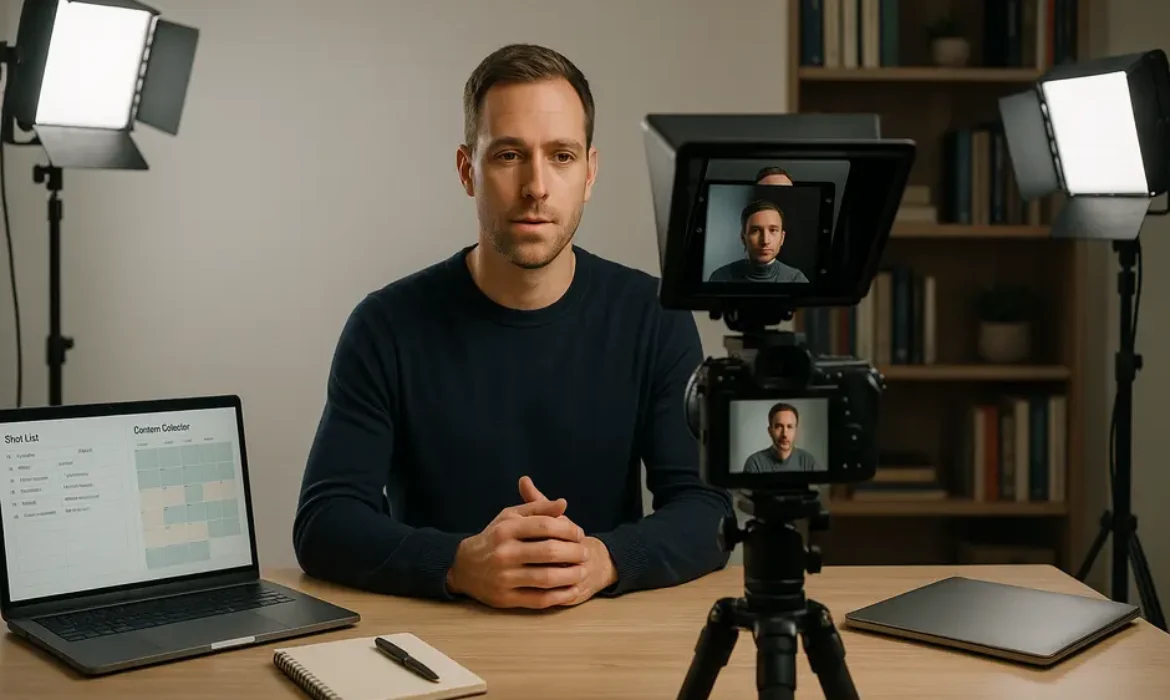
Lighting setup: Consistent lighting is critical when filming multiple videos in one session. Natural light is beautiful but unreliable — it changes over six to eight hours, so any footage filmed at 9 a.m. will look distinctly different from footage filmed at 3 p.m. For batch filming, controlled artificial lighting is your friend. A standard three-point lighting setup (key light, fill light, hair or rim light) gives you a polished, consistent look across every video. LED panel lights like those from Elgato or Godox are popular among YouTube creators because they allow easy color temperature and brightness adjustments between shots.
Camera settings: Lock in your camera settings before you start and do not touch them unless absolutely necessary. Fix your aperture, shutter speed, ISO, white balance, and frame rate at the beginning of the day. If your lighting setup is controlled, these should not need to change. Write your settings down or photograph your camera’s display so you can restore them quickly if something shifts.
Audio: Test your microphone at the start of the day and record a short test clip. Listen back through headphones. Do not trust your room acoustics have not changed — if you moved furniture to set up your backdrop, you may have inadvertently shifted your acoustic environment. A quick test saves you from discovering hours of bad audio during editing.
Teleprompter positioning: If you use a teleprompter, dial in the font size and scroll speed on a throwaway test clip first. A teleprompter that is slightly off-axis or scrolling too fast creates the glazed, unfocused eye look that instantly reads as scripted on camera.
Multiple backdrop options: If your videos have slightly different visual identities — a tutorial series versus a personal vlog-style video — consider having two backdrop arrangements ready. This might mean one half of the room has your standard bookshelf setup and the other side has a clean, minimalist look. Switching between them for different videos costs minutes, not hours.
The Day-Of Filming Workflow: Hour by Hour
Structure your filming day deliberately. Without a clear sequence, you will waste the middle hours deciding what to do next.
Here is a workflow template that scales well for a solo creator filming four to six videos:
| Time Block | Activity |
|---|---|
| 8:00 – 8:30 a.m. | Final gear check, test clip, audio test, teleprompter loaded |
| 8:30 – 9:00 a.m. | Quick script review for Videos 1 and 2 |
| 9:00 – 10:30 a.m. | Film Videos 1 and 2 talking head segments |
| 10:30 – 11:00 a.m. | Short break, review footage, outfit change if needed |
| 11:00 a.m. – 12:30 p.m. | Film Videos 3 and 4 talking head segments |
| 12:30 – 1:15 p.m. | Lunch break (genuine rest, step away from the space) |
| 1:15 – 2:00 p.m. | Film Videos 5 and 6 talking head segments |
| 2:00 – 3:30 p.m. | B-roll batching session (all videos) |
| 3:30 – 4:00 p.m. | Organize and label all footage, import to editing drive |
| 4:00 p.m. onward | Done. Do not edit today. |
The lunch break is not optional. Mental fatigue is real, and your on-camera energy in the afternoon should match your morning energy. Creators who push through lunch often notice their delivery in later videos becoming flat, rushed, or stiff — which means more retakes and less usable footage.
Film your talking head segments first while your energy is highest. B-roll is less mentally demanding and works well in the afternoon when your verbal delivery has started to tire.
Outfit Changes, B-Roll Batching, and Continuity Tricks
One of the most common anxieties about batch filming is visual continuity. If viewers watch four videos published across a month, will they notice you are wearing the same shirt in all of them?
Yes — and it matters more on some channels than others. Here is how to handle it cleanly.
Outfit changes: Plan two to three distinct outfits for your filming day and rotate them between videos. Keep each outfit consistent within a single video, obviously, but changing your top and maybe swapping your backdrop arrangement between videos creates enough visual variation that most viewers will never suspect they were filmed the same day. Document which outfit corresponds to which video in your shot list.
B-roll batching: Rather than interrupting each video shoot to capture B-roll, film all your talking head content first and then dedicate a separate block of time — usually late afternoon — to capturing all the B-roll for every video at once. Your shot list should clearly denote what B-roll each video requires. Common B-roll that applies across multiple videos — typing on a laptop, using your phone, writing in a notebook — can often be filmed once and reused across several edits with minor variations.
Continuity tricks:
- Keep your key light position and intensity consistent across all talking head segments so your face is lit identically across videos
- Use the same primary backdrop for at least half your videos to anchor your channel’s visual identity
- Avoid wearing a shirt with a prominent graphic or logo if you plan to use it across multiple videos — it becomes a continuity tell
Building Your Editing Queue After the Shoot
The work does not stop when the camera does. How you organize your footage immediately after filming determines how smoothly editing goes in the days that follow.
On filming day, before you dismantle anything:
Label every clip. Do not leave your camera’s default naming system in place. Rename files immediately: “Video1-Intro,” “Video1-Section2,” “Video3-Hook-Take3.” This takes fifteen minutes and saves hours of confused scrolling in your editing software.
Back up everything. Before you touch your memory card for anything else, copy all footage to your primary editing drive and a secondary backup. Memory cards fail. External drives fail. Cloud backup through a service like Backblaze adds another safety layer for large video files.
Build your editing queue. Create a simple list — it can live in Notion, a notes app, or a whiteboard — ranking your videos by publish date. The first video due goes to the top of the queue. You or your editor (if you have one) works through the list in order.
Separating filming and editing across different days is not laziness — it is strategy. Coming to your footage fresh, often 24 to 48 hours later, allows you to make sharper editorial decisions. You will more ruthlessly cut sections that do not work, spot audio issues more clearly, and generally produce a tighter final cut.
Common Mistakes That Derail Batch Filming Days
Even experienced creators run into problems. These are the most frequent ones worth avoiding:
Overloading the schedule. Six videos in one day is ambitious but manageable for most solo creators. Eight or ten is usually not. Overcommitting leads to rushing, which leads to lower quality footage across the board.
Skipping the script review. Reading through your scripts the morning of the shoot — even just a ten-minute skim — reactivates your familiarity with the material and reduces stumbles and retakes significantly.
Changing your lighting mid-day without documenting the change. If you adjust your key light for a specific video, write down the new settings. You will thank yourself when you try to match footage in editing.
Forgetting to capture thumbnail footage. Your thumbnail is often the most important visual asset for a video’s performance. Add a “thumbnail shot” line to your shot list for each video and capture it specifically — a clean, expressive still that works at small sizes.
Not reviewing any footage until editing day. Do a quick ten-second scrub of your first clip before filming your second video. Catching a focus issue or an audio problem early saves you from discovering it across six videos worth of footage.
Key Takeaways
-
- Batch filming YouTube content reduces the cognitive overhead of repeated setup, allowing you to produce more content with less total time investment
- The filming day is only as strong as the preparation that precedes it — scripts, shot lists, and gear checks all happen before the camera turns on
- Script batching works best when you write in a grouped, sequential flow rather than one complete script at a time
- A controlled artificial lighting setup is essential for visual consistency across a full day of filming
- Separating your talking head segments from your B-roll batching optimizes energy usage throughout the day
- An organized editing queue — footage labeled, backed up, and ranked by publish date — is what converts a productive filming day into a functional content pipeline
- Outfit changes and backdrop variation prevent viewers from noticing that multiple videos were filmed in the same session
FAQs
Q: How many videos can a solo creator realistically film in one day?
For most creators, four to six videos is the sweet spot. This assumes an average video length of seven to twelve minutes and a well-prepared script or outline for each. Shorter, more structured videos — tutorials, listicles, quick tips — can push that number toward eight. Longer-form, conversational content is harder to sustain across a full day. The guiding principle should be quality over volume: six great videos are far more valuable than ten rushed ones.
Q: Do I need a professional studio to batch film YouTube videos?
Not at all. A consistent, controlled home setup — even a spare corner of a room with a clean backdrop, a ring light or two LED panels, and a decent external microphone — is entirely sufficient. What matters more than equipment cost is setup consistency. The same camera position, the same lighting, the same focal length across all your talking head segments produces professional-looking results regardless of whether you are filming in a purpose-built studio or your bedroom.
Q: How do I stay energetic and natural on camera for six or more hours?
Pacing is everything. Build in genuine breaks — not scrolling your phone between takes, but actually stepping away from the filming space. Take a real lunch break. Hydrate consistently. Some creators find it helpful to do light physical movement before filming and between video blocks to maintain energy. Doing your most demanding or complex videos first, when your delivery is sharpest, and reserving simpler or more casual content for the afternoon also helps manage energy strategically throughout the day.
Q: Should I edit on the same day I film, or wait?
Wait. This is one of the most consistent recommendations across experienced creators and professional video editors. Coming to your footage fresh — ideally 24 to 48 hours later — dramatically improves the quality of your editorial decisions. You will spot problems you missed, cut more ruthlessly, and produce a tighter video. The only exception is if you have an extremely tight deadline on a specific video, in which case editing that one video that evening is acceptable, but it should be the exception, not the standard workflow.
Q: How do I plan my content calendar around batch filming days?
Work backward from your publishing schedule. If you publish twice a week, you need roughly eight videos per month. Plan one filming day every three to four weeks and target four to six videos per session. Schedule filming days during weeks when you have fewer competing commitments — not the week before a major deadline or during a travel period. Some creators prefer two lighter filming sessions per month (two to three videos each) over one intensive day, and both approaches are valid depending on your lifestyle and energy patterns.
Q: What is topic batching and how does it improve video quality?
Topic batching means grouping your videos by subject area for your scripting and research phase, not necessarily for filming order. For example, if three of your six planned videos are related to YouTube analytics and three are about equipment, write all three analytics scripts together before moving to the equipment scripts. This approach allows you to stay in a subject matter mindset longer, cross-reference ideas between related videos naturally, and often surface insights for one script while researching another. The result is more cohesive, better-researched content with less redundancy.
Q: What tools and apps are most useful for managing a batch filming workflow?
The following tools are widely used among creators who batch film regularly:
-
-
- Notion or Airtable — for content calendars, shot lists, and script organization
- Teleprompter Premium or PromptSmart Pro — for loading and scrolling multiple scripts during filming
- Google Drive or Dropbox — for script collaboration and pre-shoot organization
- Frame.io — for sharing footage with editors or collaborators after filming
- Backblaze — for automated cloud backup of large video files
- DaVinci Resolve or Adobe Premiere Pro — for editing, both of which support multi-project management useful for an editing queue
-
No single tool is mandatory. What matters is that your system is consistent, accessible, and does not create more friction than it removes.
Conclusion
Batch filming YouTube content is not a hack or a shortcut — it is a professional production methodology applied to the realities of solo content creation. The creators who build sustainable, growing channels are almost never the ones who scramble to film something whenever inspiration strikes. They are the ones with a content calendar mapped out, scripts written in advance, and a filming day that runs like a well-organized production.
The initial investment in building this system — writing the scripts, preparing the shot list, setting up a controlled environment — feels front-heavy. But that investment pays a return every single week when you are not stressed about what you are posting next, when you have creative space to actually improve your content, and when your audience receives the consistent, quality output that builds genuine trust over time.
Start small if the full system feels daunting. Plan a day to film just three videos. Build the habit before you scale the volume. The discipline of preparation is what separates creators who burn out in year one from those still growing in year five.
Have questions about your specific batch filming setup or content planning workflow? Drop them in the comments — practical questions often inspire the most useful content.