
Video Editing & Vlog Production Skills for YouTubers
Video Editing & Vlog Production Skills for YouTubers
Estimated reading time: 14 minutes
Introduction
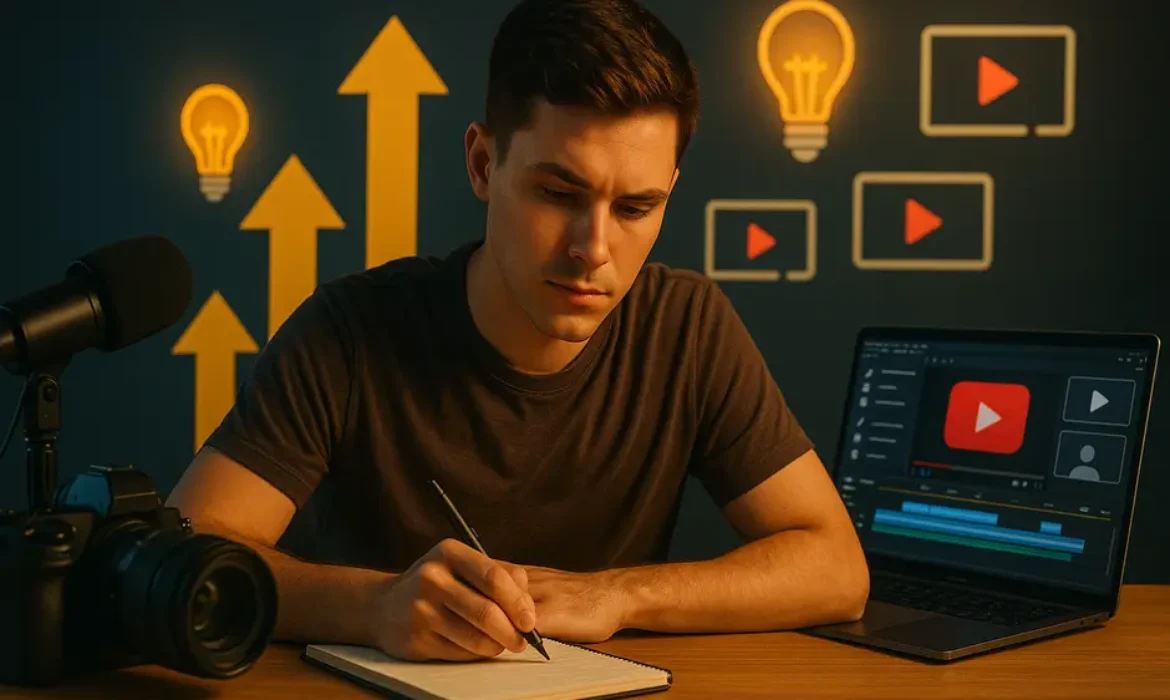
The difference between a vlog that gets 200 views and one that breaks 200,000 isn’t always about personality or equipment—it’s often about editing. Every successful YouTube creator understands this fundamental truth: capturing footage is only half the battle. The real magic happens in post-production, where raw clips transform into compelling narratives that hold attention spans measured in seconds.
According to YouTube’s Creator Research, viewers decide whether to continue watching within the first 15 seconds. That crucial window is shaped entirely by your vlog editing skills—the pacing, the visual interest, the audio clarity, and the storytelling rhythm you establish through your cuts.
Whether you’re launching your first channel or looking to elevate your existing content, mastering video editing skills for YouTube isn’t optional anymore. It’s the baseline requirement for competing in a platform where over 500 hours of video are uploaded every minute. This guide breaks down the essential vlog editing techniques that separate amateur content from professional-grade productions, along with practical workflows you can implement immediately.
Understanding the Foundation: Core Vlog Editing Skills
Before diving into specific techniques, you need to understand what makes vlog editing fundamentally different from other video formats. Unlike scripted productions or corporate videos, vlogs thrive on authenticity and pacing. Your editing needs to preserve personality while eliminating dead air, tangents, and technical imperfections.
The Three Pillars of Effective Vlog Editing
1. Pacing and Rhythm
Modern YouTube audiences have developed sophisticated content consumption habits. They can sense when a video drags, even by a second or two. Your primary responsibility as an editor is maintaining forward momentum. This doesn’t mean frantic cuts every half-second—it means being ruthless about removing anything that doesn’t serve the story or add value.
Professional vloggers typically cut 40-60% of their raw footage. Casey Neistat, one of YouTube’s most influential vloggers, has discussed in interviews how he shoots roughly 20 minutes of footage for every 1 minute in the final edit.
2. Story Structure
Even seemingly casual “day in the life” vlogs follow narrative principles. Your editing decisions should guide viewers through a beginning, middle, and end. This might mean rearranging chronological footage, building toward a payoff, or creating thematic connections between disparate clips.
3. Technical Polish
Audio levels need consistency. Colors should match across different lighting conditions. Transitions should feel invisible unless they’re intentionally stylistic. These technical fundamentals separate amateur from professional work, regardless of content quality.
Essential Video Editing Software for YouTube Creators
Your choice of video editing software significantly impacts both your workflow efficiency and creative possibilities. Here’s a breakdown of the most popular options among successful YouTubers:
| Software | Best For | Learning Curve | Price Range | Key Strengths |
|---|---|---|---|---|
| Adobe Premiere Pro | Professional creators, teams | Moderate-Steep | $20.99/month | Industry standard, extensive plugin ecosystem, seamless Adobe integration |
| Final Cut Pro X | Mac users, solo creators | Moderate | $299 one-time | Magnetic timeline, optimized for Mac, excellent performance |
| DaVinci Resolve | Color grading focus, budget-conscious | Steep | Free (Studio: $295) | Professional color tools, robust free version, Fairlight audio |
| CapCut | Beginners, mobile editing | Easy | Free | Template library, auto-captions, TikTok integration |
| HitFilm Express | VFX enthusiasts, beginners | Moderate | Free (Pro: $12.99/month) | Built-in effects, composite tools, free tier |
Making the Right Choice
For most beginners developing their vlog editing skills, I recommend starting with DaVinci Resolve’s free version or CapCut. Both offer professional capabilities without financial commitment. As your channel grows and monetizes, transitioning to Premiere Pro or Final Cut Pro gives you the industry-standard tools that scale with increasingly complex projects.
The software matters less than your understanding of editing principles. A skilled editor can create compelling content in any professional-grade platform. Focus first on mastering techniques, then choose software that supports your specific workflow needs.
Jump Cuts: The Vlogger’s Secret Weapon
If there’s one technique that defines modern vlog editing, it’s the jump cut. This simple edit—cutting out pauses, mistakes, or dead air within the same shot—has become synonymous with YouTube’s authentic, conversational style.
Why Jump Cuts Work
- Pace acceleration: They eliminate natural speech pauses that feel interminable on camera
- Retention optimization: They maintain visual interest through constant movement
- Authenticity signaling: Paradoxically, jump cuts feel more genuine than heavily produced smooth edits
- Error correction: They allow you to remove verbal mistakes while maintaining energy
Executing Clean Jump Cuts
- Cut on movement or emphasis: Time your cuts to coincide with hand gestures, head movements, or vocal emphasis. This natural motion masks the temporal jump
- Maintain consistent framing: If you move significantly between takes, the jump becomes jarring rather than dynamic. Stay relatively centered in frame
- Audio consideration: Cut just before or after breath sounds, not during them. Dead air between words is your friend when hunting for cut points
- Strategic pacing variation: Not every pause needs cutting. Occasionally letting a moment breathe creates rhythmic variety that makes fast sections feel faster by contrast
Popular creator Marques Brownlee (MKBHD) uses jump cuts selectively, typically for tech explanations where precision matters more than conversational flow. Meanwhile, lifestyle vloggers like Emma Chamberlain built entire aesthetics around rapid-fire jump cuts that became signature styles.
The “Too Many Jump Cuts” Debate
Some viewers find excessive jump cuts distracting. The sweet spot varies by niche—tech and educational content typically uses them more sparingly than lifestyle and comedy vlogs. Monitor your YouTube Analytics retention graphs to see if certain editing densities correlate with drop-off points.
B-Roll Techniques That Transform Amateur Vlogs
B-roll—supplemental footage that overlays your primary talking-head content—separates polished vlogs from webcam recordings. This vlog editing technique adds visual interest, illustrates points, and provides editing flexibility.
Strategic B-Roll Applications
1. Covering Edit Points
When you need to make major cuts or combine disparate footage segments, B-roll provides seamless transitions. Rather than jarring jump cuts, you momentarily cut away to relevant visuals while the audio continues underneath.
2. Illustrating Verbal Content
When you mention grabbing coffee, visiting a location, or using a product, corresponding B-roll transforms abstract description into concrete visualization. This multi-sensory approach dramatically improves information retention.
3. Establishing Context and Location
Wide shots of environments, close-ups of details, and transitional footage between scenes give viewers spatial awareness and create professional production value.
B-Roll Shooting Best Practices
- Shoot 3x more B-roll than you think necessary: You’ll be grateful for options during editing
- Vary shot types: Get wide establishing shots, medium frames, and macro details
- Hold shots for 10+ seconds: Shaky, brief clips are nearly useless in editing
- Capture sequences: Film actions from beginning to end for natural motion
- Match lighting: B-roll shot hours apart from A-roll creates jarring color discontinuity
B-Roll Organization
Professional editors catalog B-roll footage by category—locations, activities, objects, transitions. This organizational system transforms a 10-minute search through random clips into a 30-second retrieval. Most video editing software allows color coding and keyword tagging that makes this process manageable even with extensive footage libraries.
Color Grading for Visual Consistency
Color grading might seem like an advanced concern, but even basic color correction dramatically improves perceived production quality. This post-production skill ensures visual consistency across different lighting conditions, cameras, and shooting days.
Color Correction vs. Color Grading
These terms are often confused but represent distinct processes:
Color Correction normalizes footage to accurate, neutral standards—correcting white balance, exposure, and contrast to match how scenes appeared in reality.
Color Grading applies creative looks and moods—the cinematic teal-and-orange Hollywood blockbuster aesthetic, vintage film emulations, or brand-specific palettes.
For YouTube vlogs, you need color correction on every video. Color grading is optional but helps establish visual branding.
Basic Color Workflow for Vloggers
- Adjust exposure: Ensure your subject is properly lit without blown-out highlights or crushed blacks
- Correct white balance: Remove unwanted color casts from different lighting (the blue tone from windows, yellow from indoor lights)
- Balance contrast: Add depth without losing detail in shadows or highlights
- Enhance saturation: Subtle increases make footage pop, but excessive saturation looks amateurish
Most video editing software includes automatic color correction tools that provide decent starting points. Adobe Premiere Pro’s Auto Color, Final Cut’s Balance Color, and DaVinci Resolve’s Auto Color can handle 80% of typical vlog footage with one click.
Creating Signature Looks
Once you’ve mastered correction, developing a consistent grade across all videos strengthens your visual brand. Peter McKinnon uses slightly desaturated, contrast-heavy grading. Travel vloggers often favor warm, saturated looks that make destinations feel inviting.
Create custom LUTs (Look-Up Tables) of your preferred grades and apply them across footage for instant consistency. Most professional YouTubers use the same LUT template on every video, making their content instantly recognizable regardless of location or lighting.
Adobe’s guide to Lumetri Color provides excellent technical depth if you’re working in Premiere Pro.
Sound Design and Audio Post-Production
Poor audio is the fastest way to lose viewers. According to production research, audiences will tolerate mediocre video quality far longer than mediocre audio quality. Your sound design and audio post-production skills directly impact watch time and subscriber conversion.
Essential Audio Post-Production Steps
1. Dialogue Cleanup
Remove background noise, hum, and environmental sounds that distract from your voice:
- Use noise reduction plugins to eliminate consistent background sounds (air conditioning, computer fans)
- Apply high-pass filters to remove low-frequency rumble
- De-click to remove mouth sounds and lip smacks
- De-ess to soften harsh “s” and “sh” sounds
Most video editing software includes basic audio repair tools. For serious cleanup, consider dedicated audio software like Adobe Audition or the free Audacity.
2. Level Normalization
Your voice should maintain consistent volume throughout the video. Use compression to reduce the dynamic range between quiet and loud moments, then normalize overall levels to broadcast standards (typically -14 LUFS for YouTube, though -16 to -10 LUFS all work acceptably).
Inconsistent audio levels cause viewers to constantly adjust volume—a friction point that encourages clicking away.
3. Music and Sound Effects
Strategic music enhances mood and maintains energy during B-roll sequences or transitions. Key principles:
- Duck music under dialogue: Your voice should always be clearly audible. Music should drop 15-20dB when you’re speaking
- Match energy to content: Upbeat tracks for energetic vlogs, ambient sounds for contemplative moments
- Respect rhythm: Edit cuts to musical beats when possible—this creates subconscious satisfaction
- Use sound effects sparingly: Whooshes, pops, and effects can enhance transitions but easily become gimmicky
For royalty-free music, legitimate sources include Epidemic Sound, Artlist, and YouTube’s Audio Library. Using copyrighted music without licenses triggers Content ID claims that demonetize videos.
Creating Audio Depth
Advanced vlog editing techniques include subtle audio layering that adds richness:
- Ambient environmental sounds underneath primary audio (café chatter, street noise, nature sounds)
- Room tone to fill silent gaps
- Slight reverb to add natural space to voice recordings made in acoustically dead environments
These touches are nearly invisible but contribute to professional polish that keeps audiences engaged.
Advanced YouTube Editing Skills for Viewer Retention
Once you’ve mastered fundamentals, these advanced youtube editing skills will optimize for the metrics that matter most to the algorithm and your growth.
Pattern Interrupts and Attention Resets
YouTube’s algorithm heavily weights Average View Duration and Watch Time. Maintaining attention throughout longer videos requires intentional pattern interrupts—visual or audio changes that reset wandering attention.
Effective pattern interrupts include:
- Camera angle changes: Switching between multiple camera positions every 15-30 seconds
- Text overlays and graphics: Highlighting key points visually
- Speed ramps: Brief slow-motion or fast-forward sections
- Zoom cuts: The “Ali Abdaal zoom”—punching in slightly on the same footage to create dynamic movement
- Split screens: Showing multiple perspectives or before/after simultaneously
MrBeast’s videos exemplify retention-focused editing, with substantial changes every 3-5 seconds. While that frenetic pace doesn’t suit every niche, the principle applies universally: variety maintains attention.
Strategic Chapter Markers
YouTube allows creators to add timestamps that divide videos into chapters. This serves dual purposes:
- Viewer experience: Allows skipping to relevant sections, reducing frustration
- Algorithmic benefit: Provides structured data that helps YouTube understand your content
When implementing chapters:
- First chapter must start at 0:00
- Minimum three chapters required
- Each chapter needs minimum 10 seconds
- Use keyword-rich chapter titles that match search intent
Thumbnail-Intro Congruence
Your editing workflow should begin with your thumbnail design. The opening seconds must immediately deliver on the thumbnail’s visual promise, or viewers bounce. If your thumbnail shows you holding a strange product with an amazed expression, your first shot should replicate that exact scene.
This principle, called “pattern matching,” reduces the cognitive dissonance that causes immediate clicks away. Tom Scott’s educational videos exemplify this—his thumbnails capture a specific moment that appears within the first 15 seconds of every video.
Workflow Optimization and Post-Production Efficiency
Professional vlog editing skills include efficiency systems that reduce editing time without compromising quality. Full-time YouTubers often spend 8-20 hours editing a single video. Optimization makes the difference between sustainable production schedules and burnout.
Pre-Production Planning
- Script or outline key points: Reduces rambling footage that requires excessive cutting
- Shot list preparation: Know what B-roll you need before filming
- Consistent camera settings: Reduces color correction variations between clips
Proxy Workflows
If you’re shooting 4K or higher resolution, editing with full-quality files overwhelms most computers. Proxy workflows create lower-resolution copies for editing, then automatically relink to high-quality originals for export.
All professional video editing software supports proxy workflows. This single technique can transform stuttering, frustrating editing sessions into smooth, responsive experiences.
Template and Preset Systems
Create reusable assets:
- Intro/outro templates: Pre-built sequences you drop into every video
- Lower-third graphics: Your name, social handles, or location cards ready to customize
- Favorite effects: Color grades, audio processing chains, and transitions saved for instant application
- Keyboard shortcuts: Learning 10-15 essential shortcuts literally cuts editing time in half
I’ve worked with creators who reduced 12-hour editing sessions to 6 hours simply by systematizing recurring elements.
Organization Protocols
Establish consistent folder structures and naming conventions:
Project_Name/
├── 01_Raw_Footage/
│   ├── A_Roll/
│   ├── B_Roll/
│   └── Audio/
├── 02_Assets/
│   ├── Music/
│   ├── Graphics/
│   └── Sound_Effects/
├── 03_Project_Files/
└── 04_Exports/
This might seem excessive initially, but when you’re managing dozens of videos, organization prevents hours wasted searching for files.
Key Takeaways
-
- Master jump cuts to eliminate dead air and maintain YouTube’s rapid pacing expectations while preserving authentic conversational tone
- Invest time in B-roll during filming—it provides editing flexibility and visual interest that transforms amateur vlogs into polished productions
- Prioritize audio quality over visual effects; viewers tolerate visual imperfections far better than distracting or inconsistent sound
- Learn basic color correction to ensure consistency across different lighting conditions and establish recognizable visual branding
- Choose video editing software based on your workflow needs rather than popularity—free options like DaVinci Resolve rival expensive alternatives
- Implement pattern interrupts every 15-30 seconds to maintain viewer attention and optimize for YouTube’s retention-focused algorithm
- Develop systematic workflows with templates, presets, and organization protocols to reduce editing time without compromising quality
- Study retention analytics to understand which editing techniques correlate with audience engagement in your specific niche
Frequently Asked Questions
What vlog editing skills should beginners learn first?
Start with the fundamentals that deliver immediate impact: clean audio (dialogue clarity and consistent levels), basic jump cuts to remove pauses, and simple B-roll integration. These three skills will dramatically improve your vlogs’ watchability without requiring advanced technical knowledge. Only after mastering these basics should you invest time in color grading, complex transitions, or motion graphics. Too many beginners get distracted by flashy effects while neglecting the foundational editing principles that actually retain viewers.
How long should it take to edit a 10-minute vlog?
Expect 3-6 hours for beginners, 2-4 hours for intermediate editors, and 1-2 hours for advanced creators with optimized workflows. These estimates assume a typical talking-head vlog with B-roll and basic graphics. More complex productions with extensive motion graphics, advanced color grading, or intricate sound design can take 8-12 hours even for professionals. The ratio of shooting time to editing time typically ranges from 1:3 to 1:6—if you filmed 30 minutes of footage, plan for 90-180 minutes of editing. As your vlog editing techniques improve and you develop template systems, efficiency increases substantially.
Which video editing software do professional YouTubers use most?
Adobe Premiere Pro dominates among full-time creators due to its industry-standard status, extensive plugin ecosystem, and seamless integration with other Adobe tools like After Effects and Photoshop. Final Cut Pro X is the second choice, particularly among Mac users who appreciate its optimized performance and magnetic timeline. DaVinci Resolve is gaining ground rapidly, especially among creators focused on color grading or those preferring perpetual licenses over subscriptions. The honest truth: software choice matters less than technique mastery. Successful YouTubers exist on every platform, and you can create professional content with free tools if you understand editing principles.
How can I improve viewer retention through editing?
Focus on these proven retention techniques: eliminate all dead air and unnecessary pauses through aggressive jump cutting; add pattern interrupts (camera changes, graphics, B-roll) every 15-30 seconds; ensure your opening 15 seconds immediately deliver on your thumbnail’s promise; use strategic music to maintain energy during potentially dry segments; and implement chapter markers so viewers can navigate to relevant sections. Study your YouTube Analytics retention graph to identify exactly where viewers drop off, then analyze what editing choices coincided with those moments. Sometimes retention issues stem from content rather than editing, but pacing problems almost always manifest as gradual retention decline rather than sudden drop-offs.
Do I need expensive equipment to develop professional vlog editing skills?
Absolutely not. Your computer matters more than your camera—editing software demands substantial processing power, RAM, and storage. A decent computer with 16GB RAM, a modern processor, and an SSD can handle 1080p editing smoothly in any professional software. Many successful YouTubers started editing on basic laptops using free software like DaVinci Resolve or HitFilm Express. Your editing skills—understanding pacing, storytelling, and technical polish—deliver far more value than premium software or powerful hardware. Upgrade equipment only when it becomes a genuine bottleneck preventing you from executing techniques you’ve already mastered.
What’s the difference between vlog editing and other YouTube video styles?
Vlog editing prioritizes authenticity and personality over technical perfection. Unlike tutorial videos that require precise instructional clarity or cinematic productions demanding Hollywood-style color grading, vlogs succeed through relatability and pacing. This means more liberal use of jump cuts, conversational audio rather than broadcast-quality dialogue, and personal filming angles that create intimacy rather than polished distance. However, “authentic” doesn’t mean sloppy—professional vlog editing still requires clean audio, color consistency, and thoughtful B-roll. The distinction is philosophical rather than technical: vlogs feel like conversations with friends, while other formats feel like presentations to audiences.
How important is color grading for YouTube vlogs?
Color correction (normalizing exposure and white balance) is essential for every video—it’s the difference between professional and amateur. Color grading (applying creative looks) is valuable for branding but not strictly necessary for success. If you’re starting out, spend your limited time mastering pacing, audio, and storytelling through editing before diving deep into color grading. That said, even basic color grading dramatically improves perceived production quality. Start with simple adjustments: slight saturation increases, gentle contrast boosts, and consistent white balance. As your post-production skills advance, develop a signature look using custom LUTs that make your content instantly recognizable. Many successful YouTubers use minimal grading—their consistency and quality come from excellent lighting during shooting rather than corrective post-production.
Conclusion
Developing strong vlog editing skills transforms your YouTube presence from casual hobby to professional content creation. The techniques covered here—from fundamental jump cuts and B-roll integration to advanced color grading and retention optimization—represent the same post-production skills that separate viral creators from those struggling for views.
The path forward is straightforward: start with audio quality and basic pacing through jump cuts. Once those become second nature, layer in B-roll for visual interest and basic color correction for consistency. Only then should you explore advanced techniques like complex sound design, motion graphics, or stylized grading.
Remember that your video editing software choice matters far less than your understanding of editing principles. Free tools offer professional capabilities when wielded with skill. Focus on mastering techniques before upgrading equipment.
Most importantly, analyze your results. YouTube Analytics provides direct feedback on which editing choices resonate with your specific audience. What works for tech review channels differs from lifestyle vlogs or educational content. Use retention graphs, traffic sources, and engagement metrics to refine your approach based on evidence rather than assumptions.
Every professional YouTuber started exactly where you are now—overwhelmed by timeline interfaces, confused by audio waveforms, and frustrated by rendering times. The difference between those who succeeded and those who quit wasn’t talent. It was consistent practice, analytical refinement, and refusing to settle for “good enough.”
Your next video should be noticeably better than your last. That’s the only benchmark that matters.
Now stop reading and start editing.

Core Content Creation Skills for YouTube Growth
Core Content Creation Skills for YouTube Growth
Estimated reading time: 12 minutes
Introduction
The YouTube landscape has evolved dramatically from its early days of low-resolution webcam videos. Today’s successful creators aren’t just lucky individuals who went viral—they’re skilled professionals who’ve mastered specific competencies that drive sustainable channel growth.
While countless aspiring YouTubers invest thousands in cameras, lighting, and editing software, the most successful creators understand a fundamental truth: content creator skills outweigh production equipment every single time. A compelling story told with basic gear will outperform a beautifully shot video that fails to connect with its audience.
This guide examines the core content creation skills that separate growing channels from stagnant ones. Whether you’re launching your first channel or looking to break through a growth plateau, these competencies form the foundation of YouTube success in an increasingly competitive environment.
Understanding the Foundation: Why Skills Matter More Than Equipment
The barrier to entry for YouTube has never been lower from a technical standpoint. Modern smartphones shoot in 4K, and free editing software delivers professional-grade results. Yet YouTube’s own research indicates that fewer than 10% of channels that publish consistently ever reach 10,000 subscribers.
This paradox reveals something critical: technical capability doesn’t equal content mastery.
The creators who break through have developed a specific skill set that transcends production quality. They understand audience psychology, narrative structure, platform algorithms, and community dynamics. These youtube content creator skills create defensible competitive advantages that can’t be purchased or easily replicated.
Consider the success of channels like Primitive Technology, which built millions of subscribers with zero narration and basic camera work, or educational creators like 3Blue1Brown, whose hand-drawn animation style prioritizes clarity over polish. Both succeeded because they mastered the fundamental skills of content creation: identifying audience needs, delivering value efficiently, and maintaining consistency.
According to data from Think with Google, watch time and session duration matter more to YouTube’s recommendation algorithm than production quality. The algorithm rewards content that keeps people on the platform, which comes down to storytelling, pacing, and audience understanding—all learnable skills.
Strategic Niche Positioning: Finding Your Lane
Niche positioning represents perhaps the most misunderstood concept among new creators. Many interpret “finding a niche” as limiting themselves to narrow topics, when strategic positioning actually involves identifying where your unique perspective intersects with audience demand.
The Three-Circle Framework
Effective niche positioning occurs at the intersection of three elements:
| Element | Question to Ask | Purpose |
|---|---|---|
| Your Knowledge/Passion | What can you discuss deeply without burning out? | Ensures sustainability and authentic expertise |
| Audience Demand | What are people actively searching for and watching? | Validates market opportunity |
| Competitive Gap | Where are existing creators underserving the audience? | Identifies your differentiation angle |
Channels fail when they optimize for only one or two of these circles. A creator might be passionate about vintage typewriter repair, but if there’s insufficient audience demand, growth will stall. Conversely, jumping into oversaturated spaces like “Fortnite gameplay” without unique differentiation creates invisible content.
Evaluating Niche Viability
Before committing to a niche, evaluate these factors:
Search Volume vs. Competition: Use YouTube’s search suggestions and tools like Google Trends to identify topics with consistent search volume but manageable competition. Look for specific long-tail variations rather than broad categories.
Monetization Potential: Some niches attract high-value advertisers while others struggle with monetization. Finance, business, and technology typically command higher CPM rates than entertainment content, though this shouldn’t be the sole consideration.
Content Sustainability: Can you generate fresh ideas in this space for the next 100 videos? Creators often underestimate how quickly they’ll exhaust shallow topic areas.
Audience Lifetime Value: Consider whether your niche supports building a community with multiple touchpoints (courses, memberships, products) or if it’s purely transactional content consumption.
Micro-Positioning Strategies
Rather than competing in broad categories, successful creators often find success through micro-positioning—becoming the definitive voice for a specific sub-segment. Instead of “fitness,” it’s “strength training for desk workers over 40.” Instead of “cooking,” it’s “30-minute meals using an air fryer.”
This specificity accomplishes several goals: it helps the algorithm understand exactly what your content delivers, it attracts highly qualified subscribers genuinely interested in your perspective, and it creates natural authority that can later expand into adjacent topics.
Storytelling Framework for YouTube Success
Storytelling for YouTube differs fundamentally from traditional media. Viewers haven’t paid for tickets or committed to scheduled programming—they’re one swipe away from abandoning your content. This reality demands storytelling frameworks specifically designed for platform constraints and viewer behavior.
The Hook-Retain-Payoff Structure
Successful YouTube videos follow a three-phase structure adapted from classical storytelling but compressed and intensified:
Phase 1: The Hook (0:00-0:15)
The first fifteen seconds determine whether most viewers continue watching. Effective hooks accomplish three things simultaneously:
- Clearly communicate the video’s value proposition
- Create curiosity or tension that demands resolution
- Establish personality and production style
Weak hooks waste time with lengthy introductions, channel branding, or background context. Strong hooks immediately demonstrate value: “This technique increased my bench press by 40 pounds in six weeks” or “Most people organize their finances completely backward—here’s why.”
Phase 2: Retention Through Progressive Revelation (Middle Section)
The middle section battles against viewer drop-off through strategic information architecture. Rather than front-loading all the best content, skilled creators use progressive revelation—strategically teasing upcoming information to maintain forward momentum.
Pattern interrupts prevent monotony through:
- Visual changes (B-roll, graphics, location shifts)
- Tonal variations (energy shifts, humor injections)
- Format breaks (demonstrations, examples, testimonials)
- Callback references to the promised payoff
According to YouTube’s Creator Academy, maintaining audience retention above 50% through the midpoint significantly improves algorithmic performance. This threshold requires deliberate structural planning, not just engaging content.
Phase 3: Satisfying Payoff + Future Commitment
The conclusion must deliver on the hook’s promise while creating connection points for future engagement. Disappointment here damages channel credibility and reduces returning viewer rates.
Effective outros:
- Summarize key takeaways concisely
- Provide next-step resources or actions
- Create curiosity for upcoming content
- Include clear calls-to-action without desperation
The Open Loop Technique
Advanced storytellers use open loops—questions or tensions introduced early and resolved later—to maintain viewer investment. A video might open with “By the end of this video, I’ll explain why I abandoned this technique entirely,” creating a specific curiosity that keeps viewers watching for resolution.
Multiple smaller loops throughout the video maintain continuous forward pull. The key is strategic resolution timing—close loops before viewers lose patience, but space them to maintain consistent engagement throughout the runtime.
Emotional Architecture
Data-driven creators obsess over retention graphs, but those graphs ultimately reflect emotional engagement. The most retentive content takes viewers on emotional journeys: from confusion to clarity, frustration to relief, curiosity to satisfaction.
Map your content’s emotional arc deliberately. Where should viewers feel challenged? Validated? Surprised? Accomplished? These emotional beats, not just information delivery, create memorable content that builds loyal audiences.
Scripting Skills That Keep Viewers Watching
The script-versus-spontaneous debate misses the fundamental point: preparation level should match content type and creator strengths. What matters is developing scripting skills that enhance rather than constrain your natural communication style.
The Spectrum of Scripting Approaches
| Approach | Best For | Strengths | Weaknesses |
|---|---|---|---|
| Full Word-for-Word Scripts | Educational content, complex topics, creators who read naturally | Precision, efficiency, complete thought articulation | Can feel stiff, time-intensive preparation |
| Bullet Point Outlines | Discussion content, personality-driven channels | Maintains energy and authenticity | Risk of rambling, missing key points |
| Hybrid Framework | Most content types | Balances preparation with spontaneity | Requires practice to execute smoothly |
| Full Improvisation | Reaction content, vlogs, time-sensitive topics | Maximum authenticity, minimal prep time | Inconsistent quality, frequent retakes |
Most successful creators eventually adopt hybrid approaches—scripting critical segments (hooks, key explanations, outros) while allowing flexibility in transitional content and personality-driven sections.
Writing for the Ear, Not the Eye
Scripted content fails when creators write for reading rather than speaking. Written prose uses longer sentences, complex clause structures, and vocabulary choices that feel unnatural when spoken.
Effective YouTube scripts use:
Conversational Vocabulary: Choose words you’d naturally use in conversation. “Use” instead of “utilize,” “help” instead of “facilitate,” “show” instead of “demonstrate.”
Shorter Sentences: Written sentences average 15-20 words; spoken sentences should target 8-12 words for maximum clarity and energy.
Contractions and Colloquialisms: “You’re going to love this” sounds natural; “you are going to love this” sounds robotic.
Rhetorical Questions: “Why does this matter?” or “What’s the alternative?” create conversational rhythms that maintain engagement.
Strategic Repetition: Unlike written content where repetition seems redundant, spoken content benefits from restating key concepts in varied ways.
The Read-Aloud Test
Before filming, read scripts aloud and identify anywhere you stumble, lose energy, or sound unnatural. These friction points will only amplify on camera. Rewrite until the script flows as naturally as explaining the concept to a friend.
Record yourself reading the script on your phone, then listen during other activities. Does it maintain interest? Where does energy drop? Where does it feel too dense or too meandering?
Scripting for Different Content Segments
Different video sections require different scripting intensities:
Tightly Script: Hooks, complex explanations, key teaching moments, calls-to-action, sponsored segments (often contractually required)
Loosely Script: Transitions, personal anecdotes, examples and demonstrations, audience engagement moments
Don’t Script: Genuine reactions, spontaneous thoughts, responding to unexpected situations, natural personality moments
This variation creates dynamic pacing that prevents the monotonous feeling of fully-scripted content while maintaining structural integrity.
Audience Engagement Techniques That Build Communities
Audience engagement extends far beyond asking viewers to “smash that like button.” True engagement creates reciprocal relationships where viewers transition from passive consumers to active community participants.
Understanding Engagement Hierarchies
Viewer engagement exists on a spectrum, and effective creators strategically move people up the engagement ladder:
Level 1 – Passive Viewing: Watching videos without interaction
Level 2 – Algorithm Engagement: Liking, watching duration, click-through
Level 3 – Active Commenting: Leaving comments, responding to creator questions
Level 4 – Community Participation: Joining discussions, connecting with other viewers
Level 5 – Content Co-Creation: Submitting ideas, participating in challenges, user-generated content
Level 6 – Multi-Platform Loyalty: Following across platforms, joining memberships, purchasing products
Most creators focus exclusively on Level 2 (algorithm signals) while neglecting the higher levels that create sustainable communities and business opportunities.
Strategic Comment Section Management
Comments sections represent underutilized assets for most creators. Rather than simply thanking commenters or ignoring the section entirely, strategic creators use comments to:
Extend Content Value: Pin comments that add resources, corrections, or valuable perspectives
Identify Future Content: Monitor recurring questions or requests that reveal content gaps
Build Para-Social Relationships: Recognize returning commenters by name, creating familiarity
Facilitate Peer Connection: Highlight viewer-to-viewer helpful exchanges
Test Concepts: Float ideas for upcoming content and gauge reaction
Responding to comments within the first hour after publishing signals to YouTube that your content generates engagement, potentially triggering broader recommendation. This creates a strategic window for prioritizing comment interaction.
Creating Genuine Participation Opportunities
Generic requests (“let me know what you think in the comments”) generate minimal response. Specific, low-barrier participation opportunities perform significantly better:
- “Drop a ‘1’ if you’ve experienced this exact situation”
- “Which approach would you try first—A or B?”
- “What did I miss? I’ll add the best suggestions to the pinned comment”
- “Finish this sentence: The hardest part about [topic] is..”
These prompts require minimal effort but create investment. Once someone comments, they’re psychologically more likely to return to check responses, boosting returning viewer metrics.
Building Cross-Platform Community Ecosystems
YouTube’s algorithm prioritizes watch time, making it suboptimal for community discussion. Successful creators build complementary community spaces:
- Discord/Slack: Real-time discussion, deeper community connections, direct feedback loops
- Email Lists: Algorithm-independent communication, higher engagement rates than social platforms
- Instagram/Twitter: Behind-the-scenes content, personality-driven connection, more frequent touchpoints
- Membership Platforms: Exclusive content for highly engaged fans, revenue diversification
The key is creating clear value differentiation for each platform. Your email list might offer early access, Discord provides community discussion, and Instagram shows personality beyond the main content.
The Reciprocity Principle
Audiences engage more when they feel the creator genuinely values their input. This means:
- Actually implementing viewer suggestions and crediting contributors
- Featuring community content (art, testimonials, examples)
- Creating viewer-requested content regularly
- Sharing community wins and stories
- Maintaining consistent presence rather than appearing only when promoting content
Creator channels that feel like one-way broadcasts struggle with engagement. Channels that feel like communities—where the creator is an active participant rather than distant broadcaster—generate disproportionate loyalty and growth.
Content Planning Systems for Consistent Growth
Consistency ranks among the most important factors for YouTube growth, yet most creators approach content planning reactively, leading to inconsistent publishing and eventual burnout.
The Content Pipeline Framework
Sustainable content creation requires systems that separate ideation, production, and publication:
Stage 1: Continuous Ideation
Maintain an ongoing idea capture system rather than scrambling for topics before filming. Effective sources include:
- Audience questions and comments
- Keyword research tools showing search volume
- Competitor content gap analysis
- Personal experiences and challenges
- Industry news and developments
- Recurring annual/seasonal topics
Organize ideas by category, difficulty level, and estimated performance potential. This creates flexibility to choose appropriate content based on available time, resources, or strategic priorities.
Stage 2: Batched Production
Filming videos individually creates inefficiency and decision fatigue. Batching similar content reduces setup time, maintains creative momentum, and builds buffer inventory:
- Film multiple videos in single sessions when possible
- Group similar content requiring identical setup
- Maintain consistent filming schedules (even if publishing schedule varies)
- Separate filming days from editing days to prevent overwhelm
Most successful creators maintain 2-4 week content buffers, insulating against illness, creative blocks, or life disruptions while reducing publishing pressure.
Stage 3: Strategic Publishing Schedule
Publishing frequency should balance audience expectations, algorithm preferences, and sustainable capacity. YouTube’s algorithm favors consistency over frequency—one weekly video published reliably outperforms sporadic multiple-video weeks.
Analyze your audience’s viewing patterns through YouTube Analytics. When are your specific viewers most active? This might differ from general platform trends. Schedule publications to match these windows for maximum initial engagement.
Content Mix Strategy
Channels need content diversity that balances different objectives:
| Content Type | Purpose | Frequency |
|---|---|---|
| Pillar Content | Comprehensive, evergreen topics that build authority | Monthly |
| Topical/Trending | Timely content capturing current interest | As opportunities arise |
| Audience Service | Directly answering viewer requests | 20-30% of content |
| Experimental | Testing new formats, topics, or approaches | 10-15% of content |
| Collaboration | Cross-promotion and audience expansion | Quarterly |
This mix prevents channels from becoming either too reactive (chasing trends without building authority) or too rigid (ignoring timely opportunities).
The Editorial Calendar Advantage
Professional content creators use editorial calendars that plan months ahead while remaining flexible for opportunities:
- Quarterly Planning: Identify major themes, series launches, or campaigns
- Monthly Planning: Assign specific topics to publishing slots
- Weekly Planning: Finalize titles, thumbnails, and production schedules
- Daily Planning: Execute specific tasks within the production pipeline
This layered approach provides strategic direction without constraining tactical flexibility. When trending opportunities emerge, you can confidently adjust because the overall strategic plan remains intact.
Performance Review Integration
Content planning isn’t just forward-looking—it requires regular performance analysis to identify patterns:
- Which topics consistently outperform expectations?
- What video length delivers optimal retention for your audience?
- Do certain publishing times generate better early engagement?
- Which thumbnail styles achieve higher click-through rates?
- What content types drive the most subscriber conversions?
Schedule monthly analytics reviews where these questions inform upcoming content decisions. This creates an improvement loop rather than repeating unsuccessful patterns.
Building Niche Authority Through Depth and Consistency
Niche authority skills separate serious creators from hobbyists. Authority doesn’t come from claiming expertise—it develops through demonstrated knowledge depth, consistent value delivery, and community recognition over time.
The Depth-First Content Strategy
New creators often make the mistake of covering topics superficially, trying to appeal to everyone. This approach builds shallow audiences with low loyalty and poor engagement.
Authority develops through depth:
- Level 1 – Surface Coverage: “How to start a podcast” (broad, competitive)
- Level 2 – Specific Solutions: “Choosing podcast microphones under $200”
- Level 3 – Nuanced Expertise: “Why USB microphones hurt podcast sound quality in untreated rooms”
- Level 4 – Comprehensive Systems: “Complete acoustic treatment guide for podcast studios in shared spaces”
As you progress through these levels, competition decreases while audience qualification increases. Viewers finding your Level 3 and 4 content arrive with higher intent and greater likelihood of subscribing.
Creating Pillar Content Architecture
Authority channels organize content around pillar topics—comprehensive subject areas covered from multiple angles:
Each pillar becomes a content cluster:
- Comprehensive overview video (pillar content)
- Specific subtopic deep-dives (cluster content)
- Advanced techniques and case studies
- Common mistakes and troubleshooting
- Tool reviews and comparisons
This architecture serves both audiences (who can progress from beginner to advanced within your channel) and algorithms (which recognize comprehensive topic coverage).
Demonstrating Expertise Through Results
Audience skepticism is healthy—everyone claims expertise. Authority develops through demonstrated results:
- Show Your Work: Document processes, not just outcomes. Time-lapses, case studies, and progress documentation prove capability.
- Cite Research and Data: Reference credible sources, studies, and experts. This positions you within a larger knowledge ecosystem rather than claiming isolated expertise.
- Acknowledge Limitations: Ironically, admitting what you don’t know or where you’re still learning builds more credibility than pretending omniscience.
- Update and Correct: When you learn new information that contradicts previous content, acknowledge and update it. This demonstrates intellectual honesty.
- Feature External Experts: Interviewing other authorities or featuring diverse perspectives shows you’re part of a professional community, not an isolated voice.
Consistency as Authority Signal
Publishing consistency signals seriousness and reliability. Audiences develop viewing habits around predictable schedules, and the algorithm favors channels demonstrating ongoing commitment.
Consistency applies beyond publishing frequency:
- Quality standards (production values, research depth, editing rigor)
- Topic focus (staying within your established authority areas)
- Presentation style (recognizable personality and format)
- Value delivery (maintaining utility regardless of video length or format)
Channels that wildly fluctuate in quality, topic, or schedule struggle to build authority because audiences can’t form clear expectations.
From Authority to Thought Leadership
The highest level of niche authority is thought leadership—where you’re not just explaining existing knowledge but contributing new perspectives that advance the field.
Thought leadership develops through:
- Original research or data collection
- Novel frameworks or methodologies
- Challenging conventional wisdom with evidence
- Predicting industry trends before they materialize
- Synthesizing insights across disciplines
This level isn’t necessary for channel success, but it creates maximum defensibility against competition and opens opportunities beyond YouTube (speaking, consulting, partnerships).
Key Takeaways
-
- Strategic niche positioning creates competitive advantages that equipment and production value alone cannot match
- Storytelling frameworks like the three-act structure and pattern interruptions significantly improve retention metrics
- Scripting techniques balance preparation with authenticity, helping creators maintain energy while covering essential points
- Audience engagement extends beyond comments into building genuine community connections across platforms
- Content planning systems ensure consistency while allowing creative flexibility for trending opportunities
- Niche authority develops through progressive topic depth, not superficial coverage of trending subjects
Frequently Asked Questions
What content creator skills matter most when you’re just starting out?
For complete beginners, prioritize storytelling fundamentals and consistency over production quality. Learn to structure videos with clear hooks, valuable middle content, and satisfying conclusions. Establish a realistic publishing schedule you can maintain for at least six months—even if that’s just one video monthly. Too many new creators invest in expensive equipment while neglecting the communication skills that actually determine whether audiences watch. Focus on clearly articulating ideas, maintaining energy throughout videos, and delivering promised value. These foundational youtube content creator skills transfer across formats and niches, while technical production skills can develop gradually.
How do I develop storytelling skills specifically for YouTube versus other platforms?
YouTube storytelling requires understanding platform-specific viewer behavior and algorithm preferences. Unlike Netflix where viewers commit to 30-minute episodes, YouTube viewers make continuous micro-decisions about whether to keep watching. This demands tighter pacing, more frequent pattern interrupts, and progressive revelation techniques that maintain forward momentum. Practice analyzing retention graphs in YouTube Analytics for your own videos—identify exactly where viewers drop off, then experiment with structural changes to improve those moments. Study successful creators in your niche, but watch their content critically: where do they create curiosity? How do they transition between topics? When do they inject energy shifts? The best storytelling education comes from deliberate practice combined with data-driven iteration based on your specific audience’s behavior.
Should I script every video word-for-word or improvise more naturally?
Neither extreme works optimally for most creators. Full scripts risk sounding robotic unless you’re naturally gifted at reading conversationally, while complete improvisation often leads to rambling, missed key points, and excessive editing. Most successful creators develop hybrid approaches: tightly scripting critical segments like hooks (first 15 seconds), complex explanations, and calls-to-action, while using bullet points for transitions and personality-driven segments. This preserves spontaneous energy while ensuring you cover essential content efficiently. Your optimal approach depends on your natural communication style—some creators think clearly while speaking and benefit from minimal scripting, while others organize thoughts better through writing. Experiment with different preparation levels and compare the results both in filming efficiency and final retention metrics.
How can I improve audience engagement when my videos get views but few comments?
Low engagement despite decent views typically indicates your content lacks specific participation opportunities or community connection points. Start by analyzing what you’re asking viewers to do—generic prompts like “let me know what you think” generate minimal response because they require too much cognitive effort. Instead, create specific, low-barrier participation opportunities: yes/no questions, multiple choice options, completing sentence starters, or sharing single-word reactions. Pin questions to the top of comments sections and respond to early comments within the first hour after publishing to signal active discussion. Consider whether your content style creates emotional connection—educational content that stays purely informational often generates fewer comments than content that includes personal perspective, opinions, or vulnerability that viewers can respond to. Finally, engage authentically with every comment in your first few videos to establish community expectations that yours is a channel where the creator actively participates in discussions.
What’s the most effective content planning system for maintaining consistency?
The most effective system is one you’ll actually use, which means it must match your working style and available time. That said, successful creators typically separate ideation, production, and publishing into distinct processes. Maintain a continuous idea capture system—a simple document or note app where you record potential topics whenever inspiration strikes, pulling from audience questions, keyword research, and personal experiences. Schedule dedicated production days where you batch similar content rather than filming sporadically. Most importantly, build a content buffer of at least 2-4 weeks so you’re never scrambling to publish today’s video today. This buffer absorbs inevitable disruptions while reducing publishing pressure that kills creativity. Start with whatever publishing frequency you can sustain for six months minimum—one video monthly published reliably will outperform sporadic bursts of three videos one month and zero the next. Once you’ve maintained consistency for several months, you can experiment with increasing frequency if desired.
How long does it take to build real niche authority on YouTube?
Building recognized authority typically requires 12-24 months of consistent, quality content publication, though this varies significantly based on niche competition, publishing frequency, and content depth. Authority isn’t about subscriber count—it’s about whether your target audience recognizes you as a credible voice worth listening to on specific topics. You can accelerate authority building by focusing on depth over breadth (comprehensive coverage of specific topics rather than shallow coverage of many topics), citing credible research and sources, demonstrating real results from your approaches, and engaging authentically with your community. The creators who build fastest authority typically publish at least weekly, create thorough pillar content on core topics, and consistently deliver unique perspectives rather than regurgitating common knowledge. Remember that authority compounds—your 50th video benefits from the credibility established by your previous 49, creating exponential rather than linear growth in how audiences perceive your expertise.
Can I build YouTube success in a saturated niche, or should I find something completely unique?
Saturation indicates proven audience demand, which is actually advantageous—the challenge is differentiation, not viability. Rather than seeking completely unique niches (which often lack sufficient audience), find specific angles, perspectives, or sub-segments within established categories. A saturated niche like “fitness” contains countless underserved sub-audiences: fitness for new parents, desk workers, people with specific injuries, various age groups, or those with equipment limitations. Your differentiation might come from unique perspective (your specific background or experience), presentation style, content depth, or audience specificity. Analyze successful competitors to identify what they’re not covering or who they’re not serving. The creators who succeed in competitive niches typically combine several differentiating factors—perhaps they target a specific sub-audience with a unique format while going deeper than competitors on technical details. Competition validates market opportunity; your job is finding where existing creators leave gaps you can fill distinctively.
Conclusion
YouTube success in 2024 and beyond belongs to creators who treat content creation as a craft requiring specific, developable skills rather than hoping for viral luck or believing equipment alone determines quality.
The content creator skills outlined here—strategic niche positioning, storytelling frameworks, scripting techniques, audience engagement, content planning systems, and authority building—form an interconnected skill set that compounds over time. Improvement in one area enhances others, creating acceleration that separates growing channels from stagnant ones.
These competencies share an important characteristic: they’re all learnable through deliberate practice and data-informed iteration. You don’t need innate talent, prestigious credentials, or expensive equipment. You need commitment to developing these skills systematically while maintaining the consistency that allows them to compound.
The creators who master these fundamentals don’t just build YouTube channels—they develop sustainable media businesses with engaged communities, diversified revenue streams, and the flexibility to adapt as platforms evolve.
Start with whichever skill feels most accessible or addresses your current biggest constraint. Build systems that support consistency. Study your analytics to understand what’s working. Engage authentically with your community. Most importantly, maintain the long-term perspective that allows these skills to develop and compound.
Your future audience is searching for the exact value you can provide. Developing these core content creation skills ensures they find you, choose to watch, and decide to stay.
15 High-Impact Skills That Define a Successful YouTube Content Creator
15 High-Impact Skills That Define a Successful YouTube Content Creator
Estimated reading time: 12 minutes
Introduction
Building a sustainable career on YouTube requires far more than just hitting the record button and uploading videos. The platform has matured into a sophisticated ecosystem where success depends on mastering a diverse skill set that spans creative, technical, strategic, and business domains.
Whether you’re planning your first upload or looking to elevate your existing channel, understanding the skills needed to be a YouTuber helps you build a roadmap for meaningful growth. This comprehensive guide breaks down the 15 most important competencies that separate channels struggling to gain traction from those building engaged audiences and sustainable revenue streams.
The good news? These skills are learnable. While natural talent helps, deliberate practice and strategic development in these areas create far more reliable results than waiting for viral luck.
The Modern YouTube Landscape
YouTube has evolved dramatically since its inception. According to Statista, over 500 hours of video are uploaded to the platform every minute. This staggering volume means that technical competence alone won’t differentiate your content.
Today’s successful creators operate at the intersection of entertainment, education, and entrepreneurship. They understand that YouTube success requires balancing artistic expression with data-driven decision-making, audience psychology with algorithmic optimization, and authentic communication with strategic positioning.
The platform rewards creators who develop what I call “compound creator skills”—abilities that multiply each other’s effectiveness rather than simply adding incremental value.
Strategic & Creative Skills
1. Content Strategy and Planning
Content strategy sits at the foundation of every successful channel. This skill involves identifying your niche, understanding your target audience’s needs, and creating a sustainable content calendar that serves both viewer interests and your creative goals.
Effective content strategy answers these critical questions:
- What specific problems does my content solve?
- Who exactly am I creating for?
- What content gaps exist in my niche?
- How does each video support my channel’s larger mission?
Strategic creators develop content pillars—recurring themes or formats that create predictability for subscribers while allowing creative variation. A fitness channel might establish pillars around workout routines, nutrition guidance, and motivational content, ensuring comprehensive value delivery without repetitive monotony.
Research skills complement strategic planning. Successful YouTubers regularly analyze competitor content, study trending topics within their niche, and use tools like Google Trends to identify rising search interest before markets become saturated.
2. Storytelling and Narrative Structure
Storytelling transforms information into engaging experiences. Even educational or technical content benefits enormously from narrative structure—establishing context, building tension, and delivering satisfying resolution.
The hook-retain-payoff framework works particularly well on YouTube:
- Hook (0-15 seconds): Immediately establish why viewers should keep watching
- Retain (middle section): Maintain interest through pacing, visual variety, and progressive value delivery
- Payoff (conclusion): Deliver on your opening promise and create motivation for the next video
Great storytellers understand pacing, emotional arcs, and the psychological triggers that maintain attention. They structure content to create what filmmakers call “micro-tensions”—small unresolved questions that keep viewers engaged until the next segment.
3. Personal Branding
Your personal brand encompasses everything viewers associate with your channel—your values, presentation style, expertise areas, and even your thumbnail aesthetics. Developing youtuber skills in this area means consciously shaping these associations rather than letting them form accidentally.
Effective personal branding requires:
Clarity of positioning: What do you want to be known for?
Consistency across touchpoints: Your thumbnails, intro style, communication tone, and even comment responses should reinforce a coherent identity.
Authentic differentiation: Identify what makes your perspective unique without manufacturing artificial personas.
Channels with strong personal brands create immediate recognition. Viewers know what to expect, which builds trust and increases the likelihood they’ll click on new uploads. Your brand becomes a quality signal that cuts through the noise of endless content options.
Technical Production Skills
4. Video Editing
Video editing shapes raw footage into compelling narratives. Modern YouTube audiences expect professional pacing, smooth transitions, and intentional visual design—even from solo creators with modest budgets.
Key editing competencies include:
Pacing and rhythm: Understanding when to cut, when to let moments breathe, and how to match editing tempo to content mood
Visual hierarchy: Using graphics, text overlays, and B-roll to emphasize important points and maintain visual interest
Sound design: Incorporating music, sound effects, and audio balancing to enhance emotional impact
You don’t need expensive software to edit effectively. Tools like DaVinci Resolve offer professional-grade capabilities for free. The skill lies not in software mastery but in developing aesthetic judgment about what serves your content and audience.
5. Audio Quality Management
Poor audio quality destroys viewer retention faster than almost any other production flaw. Audiences will tolerate moderate visual imperfections, but harsh audio, background noise, or inconsistent volume levels trigger immediate abandonment.
Essential audio skills include:
- Microphone selection and placement for your recording environment
- Basic acoustic treatment to minimize echo and background noise
- Audio editing for consistent levels and clarity
- Understanding compression, EQ, and noise reduction without over-processing
Investing in a decent microphone (even a $100 USB option) and learning basic audio cleanup delivers disproportionate returns on production quality. The technical barrier here is relatively low, making audio quality a non-negotiable baseline competency.
6. Lighting and Cinematography
Visual presentation communicates professionalism and care before viewers process a single word. Understanding fundamental lighting principles—three-point lighting, color temperature, and exposure—elevates production value significantly.
Cinematography extends beyond lighting to composition, camera angles, and visual storytelling. Learning the rule of thirds, leading lines, and depth of field helps you create visually interesting frames that keep eyes on screen.
Many successful creators develop signature visual styles that become part of their brand identity. This might be a specific color grading approach, consistent framing choices, or recurring visual motifs that create subconscious familiarity.
Platform Mastery Skills
7. Understanding the YouTube Algorithm
The YouTube algorithm functions as a recommendation system designed to maximize viewer satisfaction and watch time across the platform. It’s not an adversary to outsmart but a system to understand and work with strategically.
Key algorithmic factors include:
| Factor | What It Measures | Why It Matters |
|---|---|---|
| Click-Through Rate (CTR) | Percentage of impressions that become views | Determines how widely your content gets distributed |
| Average View Duration | How long viewers watch before leaving | Primary signal of content quality and relevance |
| Audience Retention | Percentage of video watched | Identifies which content moments work and which lose viewers |
| Session Time | Total watch time your video generates | Rewards content that keeps viewers on YouTube longer |
| Engagement Metrics | Likes, comments, shares, subscriptions | Indicates viewer satisfaction and content value |
Understanding these factors helps you make informed creative decisions. According to Google’s Creator Academy, the algorithm primarily seeks to answer two questions: “What does this viewer want to watch?” and “Which videos satisfy viewers?”
Creating content that genuinely serves your audience’s needs naturally aligns with algorithmic priorities. The platform wants to recommend videos that people enjoy and watch completely.
8. Optimizing for Click-Through Rate
Your thumbnail and title form the first impression that determines whether potential viewers click. Optimizing for CTR means understanding visual psychology, curiosity gaps, and value communication.
Effective thumbnail strategies:
High contrast and bold colors that stand out in crowded feeds
Readable text (3-5 words maximum) that clarifies or enhances the title
Expressive faces showing genuine emotion relevant to content
Consistent branding elements that build recognition across videos
Titles should balance keyword optimization with curiosity and clarity. The best titles communicate clear value while creating an information gap that only watching can resolve. “How I Gained 10,000 Subscribers in 30 Days” works better than “Subscriber Growth Tips” because it’s both specific and intriguing.
Testing matters enormously. YouTube allows title and thumbnail changes after publishing, and successful creators regularly A/B test to identify what resonates with their specific audience.
9. Maximizing Watch Time and Audience Retention
Watch time and audience retention represent the most critical metrics for YouTube success. They directly influence how aggressively the algorithm promotes your content.
Retention optimization strategies include:
Pattern interrupts: Visual or audio changes every 5-7 seconds to maintain attention
Progress indicators: Showing viewers how much value remains (“Next, I’ll show you..” or “The most important tip comes in minute 5..”)
Strategic pacing: Matching content rhythm to audience expectations for your niche
Content delivery sequence: Leading with high-value information rather than extensive preambles
Analytics reveal exactly where viewers drop off. Studying these patterns helps you identify whether your intros are too long, certain segments lose interest, or your videos would perform better at different lengths.
According to industry research, the first 30 seconds determine whether most viewers continue watching. Successful creators craft openings that immediately deliver value, create curiosity, or establish emotional connection.
Business and Growth Skills
10. Analytics Interpretation
YouTube provides extensive data about your channel’s performance, but raw numbers only create value when translated into actionable insights. Analytics literacy separates creators who guess from those who optimize systematically.
Critical metrics to monitor:
Traffic sources: Where viewers discover your content (search, suggested videos, external sources)
Audience demographics: Age, geography, and viewing patterns of your subscriber base
Top-performing content: Which videos drive the most growth and why
Subscriber conversion rate: What percentage of viewers subscribe after watching
Effective analytics use involves asking specific questions: “Why did this video perform better than similar content?” “What traffic source drives the most engaged viewers?” “Which topics generate the most subscription growth?”
Over time, pattern recognition emerges. You’ll notice that certain topics, formats, or presentation styles consistently outperform others. These insights inform smarter content strategy.
11. Community Management
Building an engaged community transforms passive viewers into active participants who amplify your content through shares, comments, and word-of-mouth recommendations.
Community management skills include:
Responsive engagement: Regularly responding to comments, especially in the first hours after publishing
Creating dialogue: Asking questions and encouraging viewer participation
Moderating constructively: Establishing community guidelines and managing negative interactions professionally
Recognizing contributors: Highlighting thoughtful comments or viewer contributions
Engaged communities improve algorithmic performance (comments boost engagement metrics) while creating intrinsic motivation to continue creating. The relationships you build become one of the most rewarding aspects of YouTube success.
Some creators develop formal community structures—Discord servers, membership programs, or regular viewer spotlights—that deepen relationships beyond the comment section.
12. Monetization Strategies
Sustainable YouTube careers require diverse revenue streams beyond AdSense. Understanding monetization develops your skills for YouTube success into actual business viability.
Common revenue models:
| Revenue Stream | Requirements | Best For |
|---|---|---|
| AdSense | 1,000 subscribers, 4,000 watch hours | Baseline income for growing channels |
| Sponsorships | Engaged audience, professional presentation | Creators with clear niche demographics |
| Affiliate Marketing | Trust with audience, relevant product fit | Product review, tutorial, recommendation content |
| Digital Products | Expertise, ability to create educational content | Educational creators with specific skills |
| Channel Memberships | 30,000+ subscribers, consistent content | Creators with highly engaged communities |
| Merchandise | Strong brand identity, enthusiastic audience | Personality-driven channels with brand loyalty |
Effective monetization balances revenue generation with maintaining audience trust. Creators who prioritize viewer value over short-term extraction build more sustainable businesses.
Essential Soft Skills
13. Consistency and Discipline
Consistency compounds on YouTube. Regular upload schedules train audiences to expect new content, satisfy algorithmic preferences for active channels, and accelerate skill development through repetitive practice.
Discipline manifests in:
Sustainable production schedules: Creating realistic timelines you can maintain long-term
Batch production: Recording multiple videos in single sessions to build content buffers
Process systematization: Developing repeatable workflows that reduce decision fatigue
Pushing through creative resistance: Publishing even when inspiration feels absent
Many creators fail not from lack of talent but from inconsistent effort. Channels that upload weekly for a year almost always outperform those with sporadic bursts of activity, regardless of individual video quality.
14. Adaptability
YouTube evolves constantly—algorithm updates, format trends, audience preference shifts, and platform feature changes require ongoing adaptation. Rigid adherence to outdated strategies guarantees stagnation.
Adaptable creators:
- Monitor industry changes through creator communities and official YouTube communications
- Experiment with new formats and features (Shorts, community posts, live streaming)
- Evolve their content based on performance data and audience feedback
- Study emerging creators to identify successful innovations
Adaptability doesn’t mean chasing every trend or abandoning your core identity. It means remaining open to strategic evolution while maintaining the fundamental value proposition that attracted your audience initially.
15. Authentic Communication
Authenticity builds the trust necessary for long-term audience relationships. Viewers develop remarkably accurate instincts about genuine versus manufactured personas.
Authentic communication means:
Sharing genuine perspectives rather than performing what you think audiences want
Admitting limitations and mistakes instead of projecting false expertise
Letting personality emerge naturally without forcing artificial energy or personas
Aligning content with actual values to prevent burnout from maintaining incongruent identities
The most successful creators discover formats that feel natural to produce—where their authentic selves align with valuable audience service. This intersection creates sustainable content that doesn’t deplete your energy or require exhausting performance.
Key Takeaways
-
- YouTube success requires multidisciplinary skills spanning creative, technical, strategic, and business domains—no single talent guarantees results
- Strategic content planning and understanding your specific audience create more reliable growth than hoping for viral luck
- Technical production quality—especially audio—serves as a baseline credibility signal that viewers assess within seconds
- Algorithm understanding helps you make informed decisions, but creating genuinely valuable content for real people remains the core strategy
- Click-through rate and audience retention represent the most critical metrics determining how widely YouTube distributes your content
- Consistency and adaptability together create sustainable growth—regular effort combined with strategic evolution
- Authentic communication builds trust that transforms casual viewers into committed community members
- Monetization diversification beyond AdSense creates business sustainability and reduces platform dependency
- These skills are learnable—dedicated practice and systematic improvement matter more than natural talent
Frequently Asked Questions
What skills do you need to be a YouTuber if you’re just starting out?
Starting creators should prioritize three foundational skills: basic video editing, understanding your specific audience, and consistent content creation. You don’t need advanced cinematography or sophisticated analytics interpretation initially. Focus on clearly communicating value to a defined audience and maintaining a regular upload schedule. Technical skills improve naturally through repetition, but strategic clarity about who you’re serving and what value you’re delivering determines whether viewers have reason to return. Start with smartphone cameras and free editing software—upgrading equipment matters far less than developing your unique perspective and delivery style.
How long does it take to develop professional YouTube skills?
Most creators require 50-100 videos to develop competent production skills and find their authentic voice. This typically translates to 1-2 years of consistent effort with weekly uploads. However, skill development timelines vary dramatically based on prior experience, learning approach, and practice frequency. Creators with existing editing skills or on-camera experience obviously progress faster. The key insight is that skills compound—your 50th video will be exponentially better than your 5th, not because of equipment upgrades but because you’ve developed instincts about pacing, storytelling, and audience connection. Embrace this learning curve rather than expecting immediate polish.
Can you be successful on YouTube without understanding the algorithm?
While possible, it’s significantly harder and less efficient. Understanding algorithmic basics—particularly click-through rate and audience retention—helps you make informed creative decisions about thumbnails, titles, content pacing, and video length. That said, you don’t need deep technical knowledge of recommendation systems. The algorithm fundamentally rewards content that viewers enjoy and watch completely. Creators who genuinely serve their audience’s needs and pay attention to basic retention metrics will naturally align with algorithmic priorities. Think of algorithm knowledge as a multiplier on good content rather than a substitute for it.
What’s more important: production quality or content value?
Content value consistently outweighs production polish, but baseline technical competence matters. Viewers will forgive average lighting or basic editing if your content delivers unique insights, compelling storytelling, or genuine entertainment. However, poor audio quality or unwatchably shaky footage creates barriers that prevent audiences from accessing your value. Aim for “good enough” production that doesn’t distract from content, then focus primarily on delivering exceptional value through your unique perspective, expertise, or personality. As your channel grows, gradually improve production quality, but never at the expense of content substance.
How important are soft skills compared to technical abilities for YouTube success?
Soft skills often determine long-term success more than technical abilities. Consistency, adaptability, and authentic communication create sustainable careers, while technical skills can be hired, outsourced, or learned relatively quickly. Many technically brilliant creators burn out due to lack of discipline or inability to adapt to platform changes. Conversely, creators with moderate technical skills but strong consistency, clear audience understanding, and authentic communication build loyal communities and lasting channels. The ideal approach develops both—technical competence provides credibility while soft skills create sustainability.
Do I need to be good on camera to succeed as a YouTuber?
On-camera comfort helps but isn’t required. Many successful channels use voiceover formats, animation, screen recordings, or B-roll-focused content that minimizes or eliminates direct camera presence. Educational channels often succeed with screen captures and narration. Documentary-style creators build audiences through compelling storytelling and cinematography without personal appearances. That said, developing on-camera skills expands your creative options and can accelerate audience connection through the psychological trust that face-to-face communication creates. If camera anxiety holds you back, start with formats that minimize it while gradually building comfort through low-pressure practice.
What skills differentiate growing channels from stagnant ones?
Analytics interpretation and strategic adaptability most clearly separate growing channels from stagnant ones. Growing creators systematically study what works, identify patterns in their best-performing content, and double down on those successful elements while eliminating what doesn’t resonate. They adapt titles, thumbnails, content formats, and topics based on data rather than gut feelings. Stagnant channels often repeat the same approaches indefinitely without critical evaluation. The growth mindset—treating each video as an experiment that generates learning—combined with disciplined analysis creates continuous improvement that compounds into significant growth over time.
Conclusion
The skills needed to be a YouTuber extend far beyond hitting record and upload. Successful creators develop compound competencies across strategic planning, technical production, platform mastery, business development, and essential soft skills like consistency and authentic communication.
The encouraging reality is that these abilities develop through deliberate practice. Your first videos will likely feel awkward and look amateurish—everyone’s do. But systematic improvement across these 15 skill areas, combined with genuine commitment to serving your specific audience, creates reliable growth.
Start with foundational competencies: basic editing, clear audience understanding, and consistent creation. Build from there, adding sophistication to your production quality, analytics interpretation, and monetization strategies as your channel develops.
YouTube rewards creators who balance artistic expression with strategic thinking, who understand both human psychology and platform mechanics, and who commit to the long-term skill development that transforms hobbyists into professionals.
The question isn’t whether you currently possess all these skills—few creators do initially. The question is whether you’re committed to developing them systematically while creating value for real people with genuine needs. That combination, sustained over time, defines YouTube success far more reliably than viral moments or algorithmic luck.
Your journey begins with the next upload. Focus on improvement, serve your audience authentically, and trust that skills compound when you commit to the process.

The 10 Richest YouTubers in the World (Updated Rankings for 2026)
The 10 Richest YouTubers in the World (Updated Rankings for 2026)
Estimated reading time: 12 minutes
Introduction
A decade ago, calling yourself a “YouTuber” as a career choice would have raised eyebrows at family dinners. Today, the world’s wealthiest content creators command fortunes that rival traditional celebrities, tech entrepreneurs, and entertainment moguls.
The richest YouTubers in 2026 represent a fundamental shift in how digital influence translates to generational wealth. These aren’t just people who film videos in their bedrooms—they’re sophisticated business operators who’ve leveraged audience attention into diversified empires spanning consumer products, venture capital, entertainment production, and traditional media.
Understanding who the richest YouTuber is in 2026 reveals important insights about modern entrepreneurship, audience monetization, and the maturation of creator economics. The names on this list have mastered something far more valuable than viral content: they’ve built sustainable businesses that will outlast any single platform’s algorithm.
Let’s examine the top 10 richest YouTubers, how they built their wealth, and what separates them from millions of other creators.
How YouTubers Actually Make Their Money
Before diving into the rankings, it’s essential to understand that YouTube ad revenue represents a surprisingly small fraction of how the wealthiest creators actually earn their money.
The Revenue Streams That Build Real Wealth
YouTube AdSense pays creators approximately $3-5 per 1,000 views for most content categories. Even channels with billions of annual views might only generate $5-15 million directly from ads. That’s significant income, but it won’t land you in the top 10 richest YouTubers.
The real wealth comes from:
Brand Partnerships and Sponsorships: Premium creators command $100,000 to over $1 million per integrated sponsorship, with top-tier names negotiating equity positions in the companies they promote.
Product Lines and Merchandise: From cosmetics to energy drinks to burger chains, successful YouTubers launch consumer brands with built-in audiences numbering in the millions.
Equity and Investments: Smart creators invest their earnings into startups, real estate, and traditional assets that appreciate independently of their channel performance.
Media Companies and Production Studios: Many have built production companies that create content for other platforms, traditional television, and streaming services.
Licensing and Intellectual Property: Characters, formats, and content libraries generate ongoing royalties and licensing fees.
According to Forbes’ analysis of creator economics, the wealthiest content creators typically derive less than 20% of their total earnings from the platform that made them famous.
The 10 Richest YouTubers in 2026
1. MrBeast (Jimmy Donaldson) – $500-700 Million
MrBeast has ascended to the position of richest YouTuber in the world through an unprecedented combination of viral content and aggressive business expansion. With over 300 million subscribers across his channels, Jimmy Donaldson has built an empire that extends far beyond YouTube.
His MrBeast Burger virtual restaurant concept operates in over 3,000 locations globally, while Feastables—his chocolate and snack brand—has captured significant grocery shelf space competing directly with established brands. Industry analysts estimate Feastables alone could be valued between $200-300 million.
What distinguishes MrBeast is his reinvestment strategy: he famously invests most revenue back into increasingly expensive content production, creating a flywheel effect where bigger budgets drive more views, which fund even bigger projects.
His production company, Beast Studios, now creates content for multiple creators and has secured traditional media deals, positioning him as a media mogul rather than simply a content creator.
2. Logan Paul – $400-500 Million
Logan Paul’s transformation from controversial vlogger to business magnate represents one of the most remarkable pivots in creator history. His primary wealth drivers have shifted almost entirely away from YouTube revenue.
PRIME Hydration, co-founded with KSI, achieved unicorn status faster than almost any consumer beverage in history. The brand generated over $1.2 billion in retail sales in its first two years, with Paul holding a substantial equity position estimated to represent $200-300 million of his net worth.
His involvement with WWE brought a guaranteed multi-million dollar contract, while his earlier crypto investments (despite controversies) and NFT ventures added to his portfolio. Paul’s podcast, Impaulsive, commands premium advertising rates and has expanded into a broader media network.
3. Ryan Kaji (Ryan’s World) – $350-400 Million
Ryan Kaji, who started reviewing toys as a child, has built perhaps the most impressive licensing empire in the creator economy. Now a teenager, Ryan’s World has evolved into a multi-platform brand with over 100 million products sold globally.
His licensing partnerships span Walmart, Target, Amazon, and international retailers, with everything from toys to clothing to bedroom furniture. Industry estimates suggest the Ryan’s World brand generates over $200 million annually in retail sales, with the Kaji family receiving substantial royalties.
Unlike many creators whose relevance might fade, Ryan’s team has successfully transitioned his content as he’s aged while maintaining the brand’s appeal to new generations of young viewers. His parents have managed his career with unusual sophistication, ensuring long-term wealth preservation through trusts and diversified investments.
4. Jeffree Star – $300-350 Million
Jeffree Star represents the original blueprint for YouTuber-to-beauty-mogul transformation. While his YouTube presence has become less central to his business, Jeffree Star Cosmetics remains a powerhouse generating estimated annual revenues exceeding $100 million.
Star’s wealth comes primarily from his cosmetics company, which he owns outright—a rarity in an industry where most influencer brands are partially owned by larger corporations. This complete ownership means he retains all profits after expenses.
His real estate portfolio includes multiple multi-million dollar properties, and his investments in other beauty and fashion ventures have diversified his holdings. Despite periodic controversies, his business acumen and early entry into the beauty space secured his position among the wealthiest creators.
5. Dude Perfect – $250-350 Million
The five-member Dude Perfect team has built wealth through an unusual combination of family-friendly sports content and extensive brand partnerships. Their net worth is distributed among the five members but collectively places them among the richest YouTube personalities.
Dude Perfect’s touring shows sell out arenas internationally, generating millions in ticket sales. Their mobile games have been downloaded over 60 million times, and their merchandise line remains consistently strong.
What’s particularly notable is their longevity—over a decade of consistent content without significant controversy—and their expansion into traditional media with television specials and a planned permanent entertainment venue.
6. Nastya (Like Nastya) – $240-300 Million
Anastasia Radzinskaya, known as Nastya, oversees one of the most valuable children’s entertainment properties in the world. Her content, produced in multiple languages, reaches a global audience with combined channel views exceeding 100 billion.
The Like Nastya brand has secured licensing deals comparable to traditional children’s entertainment properties, with toys, books, and educational products available in over 100 countries. Her family has structured deals that ensure long-term royalties and maintain creative control.
Industry insiders note that Nastya’s multilingual approach and cultural adaptability have created a brand with unusual international appeal, making her licensing potential comparable to established entertainment franchises.
7. PewDiePie (Felix Kjellberg) – $200-250 Million
PewDiePie’s position on this list represents accumulated wealth from nearly 15 years of dominance in the creator economy. While he’s stepped back from intensive content creation, his earlier years of being YouTube’s most-subscribed individual creator built substantial financial reserves.
Kjellberg’s wealth comes from years of premium ad revenue, numerous book deals, mobile games, and merchandise sales. His investment in Japanese real estate and other ventures has continued growing his net worth even as his content output has decreased.
Unlike newer creators who’ve built businesses beyond YouTube, PewDiePie represents the classic model of converting platform success into lasting wealth through smart financial management and diversification.
8. Markiplier (Mark Fischbach) – $180-220 Million
Markiplier has leveraged his gaming content into a diversified entertainment career. His wealth stems from YouTube ad revenue, but increasingly from his production company and creative ventures outside the platform.
His podcast, Distractible, consistently ranks among the top podcasts globally. His investments in content production—including an upcoming original film and series projects—position him as a crossover entertainment figure rather than purely a YouTuber.
Fischbach’s approach emphasizes creative ownership and equity positions in projects rather than simply work-for-hire arrangements, a strategy that’s building long-term wealth beyond immediate earnings.
9. Rhett and Link – $150-200 Million
The duo behind Good Mythical Morning have built Mythical Entertainment into a full-scale production company valued at over $150 million. Their wealth is split between the two co-founders but places them among the highest net worth YouTubers.
Mythical Entertainment produces content for other creators, has launched successful consumer products (including Mythical Kitchen food products), and secured traditional media deals. Their business model focuses on owned intellectual property and scalable entertainment formats.
Their long-term partnership and business-focused approach have created sustainable wealth that doesn’t depend on their personal appearances in content.
10. Blippi (Stevin John) – $140-180 Million
Stevin John’s Blippi character generated such valuable intellectual property that he sold a significant stake to Moonbug Entertainment (later acquired by Candle Media for approximately $3 billion) while maintaining ongoing involvement and royalties.
The Blippi brand generates revenue through merchandise, live tours, streaming deals, and international licensing. John’s decision to sell equity while maintaining creative involvement and ongoing payments exemplifies sophisticated wealth-building strategy.
The character’s expansion to multiple languages and formats ensures continued revenue growth even as John steps back from performing the character personally.
Comparative Overview: The Top 10 Richest YouTubers
| Rank | Creator | Primary Channel | Estimated Net Worth | Primary Wealth Sources |
|---|---|---|---|---|
| 1 | MrBeast | MrBeast | $500-700M | Feastables, MrBeast Burger, Production Company |
| 2 | Logan Paul | Logan Paul | $400-500M | PRIME Hydration, WWE, Investments |
| 3 | Ryan Kaji | Ryan’s World | $350-400M | Licensing, Product Sales, Retail Partnerships |
| 4 | Jeffree Star | Jeffree Star | $300-350M | Jeffree Star Cosmetics, Real Estate |
| 5 | Dude Perfect | Dude Perfect | $250-350M | Tours, Mobile Games, Brand Deals |
| 6 | Nastya | Like Nastya | $240-300M | International Licensing, Product Lines |
| 7 | PewDiePie | PewDiePie | $200-250M | Accumulated Earnings, Investments |
| 8 | Markiplier | Markiplier | $180-220M | Production Company, Podcast, Creative Projects |
| 9 | Rhett and Link | Good Mythical Morning | $150-200M | Mythical Entertainment, Consumer Products |
| 10 | Blippi | Blippi | $140-180M | IP Sale to Moonbug, Licensing, Tours |
What Sets the Wealthiest Creators Apart
Examining the world’s richest YouTubers reveals consistent patterns that separate them from the millions of other content creators.
Ownership Over Earnings
The wealthiest creators own their businesses rather than simply earning from them. When MrBeast launched Feastables, he maintained significant equity. When Jeffree Star built his cosmetics line, he retained complete ownership. This difference between earning a paycheck and building equity represents the fundamental distinction.
Many successful YouTubers earn millions annually through sponsorships and ad revenue but won’t appear on lists of the richest because they haven’t converted those earnings into owned assets that appreciate.
Platform Diversification
Not a single creator in the top 10 relies primarily on YouTube ad revenue. They’ve all built businesses, products, or media properties that exist independently of any platform’s algorithm changes or policy updates.
This diversification protects against the inevitable evolution of platforms and audience preferences. When YouTube changes its algorithm or a new platform emerges, their wealth doesn’t evaporate because it’s housed in tangible businesses and assets.
Audience Conversion, Not Just Attention
The richest content creators have mastered converting attention into customer relationships. They don’t just have viewers; they have customers who purchase products, attend events, and engage across multiple platforms.
This conversion requires understanding business fundamentals beyond content creation—inventory management, retail relationships, customer acquisition costs, and lifetime value calculations.
Long-term Thinking
Many of these creators reinvest aggressively rather than maximizing short-term income. MrBeast famously spends millions on individual videos, sacrificing immediate profit for long-term audience growth. This patient capital approach builds compounding advantages over time.
Strategic Partnerships
The wealthiest YouTubers leverage partnerships rather than trying to build everything independently. Logan Paul partnered with KSI for PRIME. Ryan Kaji’s family partnered with established licensing experts. These collaborations bring expertise and capital while allowing creators to focus on their strengths.
The Business Models Behind YouTube Fortunes
The Product Launch Model
Creators like Jeffree Star and the MrBeast approach demonstrate how launching consumer products can generate wealth exceeding what content creation alone ever could. This model requires:
- Established audience trust and engagement
- Product-market fit aligned with audience demographics
- Distribution partnerships or direct-to-consumer infrastructure
- Capital for inventory and marketing
When executed well, product lines can generate revenues 10-100x larger than ad revenue from comparable audience sizes.
The Media Company Model
Rhett and Link’s Mythical Entertainment and MrBeast’s production company represent the media company approach. Rather than just creating content for their own channels, they build production capabilities that serve other creators and platforms.
This model creates multiple revenue streams—production fees, equity in shows they produce, licensing their formats, and traditional media deals—while building valuable company equity.
The Licensing Empire Model
Ryan’s World and Nastya demonstrate how character and brand licensing can generate sustained wealth. This approach, similar to traditional entertainment properties, creates passive income through royalty arrangements while other companies handle manufacturing, distribution, and retail relationships.
The Equity Investment Model
Several top creators have used their earnings to take equity positions in startups and established companies. Logan Paul’s stake in PRIME represents this approach—using his influence to add value to companies in exchange for ownership rather than just payment.
Key Takeaways
-
- The richest YouTubers have diversified far beyond ad revenue, building product lines, investment portfolios, and media empires
- MrBeast leads the pack in 2026 with an estimated net worth exceeding $500 million through strategic business ventures
- The top earners typically generate only 10-20% of their income from YouTube ads directly
- Several YouTubers have crossed into billionaire territory through smart equity positions in companies they’ve built
- Content creation has evolved into legitimate wealth-building, with the platform serving as a launchpad rather than the sole income source
Frequently Asked Questions
Who is the richest YouTuber in the world in 2026?
MrBeast (Jimmy Donaldson) holds the title of richest YouTuber in 2026, with an estimated net worth between $500-700 million. His wealth comes primarily from his Feastables snack brand and MrBeast Burger virtual restaurant concept, rather than YouTube ad revenue directly. His strategic approach of reinvesting earnings into increasingly elaborate content has created a growth flywheel, while his business ventures have matured into substantial companies. Unlike many creators who earn well but don’t build lasting wealth, MrBeast has converted his audience into customers across multiple product categories.
How do the richest YouTubers actually make most of their money?
The wealthiest YouTubers typically generate less than 20% of their income from YouTube ad revenue. Their primary wealth sources include consumer product lines (like cosmetics, food, and beverages), equity positions in companies they’ve founded or invested in, licensing deals, live events and tours, production companies that create content for multiple platforms, real estate investments, and traditional media contracts. YouTube serves as their audience-building platform and marketing channel, but the real money comes from converting that attention into owned businesses and assets that appreciate over time. This is why business acumen and strategic thinking matter as much as content creation skills for building substantial wealth.
Are there any billionaire YouTubers?
As of 2026, no YouTuber has definitively crossed into billionaire status purely from content creation and related ventures, though several are approaching that threshold. MrBeast’s various business ventures could collectively reach billion-dollar valuations within the next few years if current growth continues. Logan Paul’s equity position in PRIME Hydration, which achieved unicorn status, could potentially push his net worth toward billionaire territory if the company goes public or gets acquired at a premium valuation. The challenge is that most creator wealth is tied up in private companies and assets that are difficult to value precisely. Some creators may technically qualify as billionaires based on paper valuations of their companies, but confirmed liquid billionaire status remains just beyond current reach.
Why isn’t PewDiePie the richest YouTuber despite having been the most subscribed for years?
Subscriber count doesn’t directly correlate with net worth, especially when comparing creators from different eras of the platform. PewDiePie dominated during a period when YouTube monetization was less sophisticated and the creator economy was less mature. While he earned substantial income and invested wisely, he didn’t build the same kind of external business empire that newer creators have. He’s focused more on content and creative satisfaction in recent years rather than aggressive business expansion. Meanwhile, creators like MrBeast, Logan Paul, and the child-focused channels have launched major product lines and companies that generate revenues far exceeding what YouTube ad revenue alone could provide. PewDiePie’s approach has been more about sustainable comfortable income rather than maximum wealth accumulation, which is a perfectly valid choice but results in lower rankings on net worth lists.
How much do these rich YouTubers actually make from YouTube ads?
Even the most successful YouTubers with billions of annual views might earn $10-20 million directly from YouTube’s AdSense program. YouTube’s payment model typically ranges from $3-5 per thousand views for most content, with variations based on audience geography, content category, and advertiser demand. A channel earning 5 billion views annually (which only a handful achieve) might generate $15-25 million in ad revenue. While this is substantial, it pales compared to earnings from product lines that can generate hundreds of millions in annual revenue. For context, MrBeast’s Feastables brand reportedly generates over $200 million in retail sales annually, while his direct YouTube ad revenue, despite having some of the platform’s highest view counts, likely represents less than 10% of his total income. This is why savvy creators view YouTube primarily as a customer acquisition channel rather than the business itself.
What happens to child YouTubers’ wealth, and is it protected?
Child YouTubers’ earnings are subject to various legal protections depending on their location, though regulations vary significantly by jurisdiction. In the United States, some states have extended “Coogan Law” protections (originally created for child actors) to cover social media earnings, requiring that a portion of earnings be placed in blocked trust accounts the child can access upon reaching adulthood. Ryan Kaji’s parents, for instance, have reportedly established trusts and financial structures to protect his earnings from the Ryan’s World empire. However, enforcement is inconsistent, and some child creators may not have adequate protections in place. The most sophisticated families work with entertainment attorneys to structure proper financial protections, ensure compliance with child labor laws, and create paths for the child to access their wealth when they come of age. This remains an evolving area of law as regulators catch up with the creator economy.
Can new YouTubers in 2026 still become this wealthy, or has that window closed?
The specific path that created wealth for current top creators may have narrowed, but new opportunities continue emerging. The creator economy has matured, meaning simply starting a channel and hoping for viral success is less reliable than it was a decade ago. However, several factors favor new creators: the creator economy is larger than ever, with more monetization options available; niche audiences can be highly valuable even without massive subscriber counts; new platforms and content formats continue emerging, creating fresh opportunities; and the infrastructure for launching products and businesses as a creator is more accessible than ever. The key difference is that successful new creators typically need stronger business thinking from the start rather than stumbling into business opportunities after gaining fame. Those who approach content creation as audience building for an eventual business, rather than hoping to earn from ads alone, still have significant wealth-building potential.
Conclusion
The landscape of the richest YouTubers in 2026 reveals a mature creator economy where the platform serves as a launchpad rather than the destination. These individuals have transcended their origins as content creators to become entrepreneurs, brand builders, and media moguls.
What distinguishes the world’s richest YouTubers isn’t simply their subscriber counts or view numbers—it’s their ability to convert attention into owned assets, their willingness to think beyond the platform that made them famous, and their capacity to build real businesses that create lasting value.
For aspiring creators, the lesson is clear: YouTube success might make you internet famous and provide comfortable income, but building real wealth requires thinking like an entrepreneur from day one. The platform is the megaphone; what you choose to build with that amplified voice determines whether you’ll simply earn well or build generational wealth.
The gap between the highest-earning YouTubers and the wealthiest YouTubers illuminates this distinction perfectly. Many creators earn millions annually but won’t appear on wealth rankings because they haven’t converted those earnings into appreciating assets and businesses.
As we move further into 2026, expect these wealth gaps to widen as the most business-savvy creators continue building empires that extend far beyond video content, while others remain dependent on algorithm changes and platform policies that could shift overnight.
The creator economy has matured from a novelty into a legitimate path to extraordinary wealth—but only for those who understand that content is the marketing, not the business itself.
Who Is the Highest-Paid YouTuber in 2026? Monthly and Annual Earnings Explained
Who Is the Highest-Paid YouTuber in 2026? Monthly and Annual Earnings Explained
Estimated reading time: 12 minutes
Key Takeaways
-
- MrBeast (Jimmy Donaldson) leads as the highest-paid YouTuber in 2026, earning an estimated $82–95 million annually through diverse revenue streams
- Top YouTube creators earn 60–80% of their income outside traditional YouTube ads, primarily through brand deals and business ventures
- Monthly earnings for top-tier creators range from $5–8 million, with significant fluctuation based on content releases and sponsorship cycles
- The creator economy has matured into a sophisticated business ecosystem where YouTube serves as a distribution platform rather than the sole revenue source
- Geographic location, content niche, and audience demographics significantly impact CPM rates and overall earning potential
The State of YouTube Creator Earnings in 2026
The landscape of YouTube monetization has transformed dramatically over the past decade. What began as a platform where creators relied almost entirely on ad revenue has evolved into a comprehensive media empire where the most successful personalities operate like full-scale production companies.
In 2026, the highest-earning YouTubers represent something entirely different from what we saw even five years ago. They’re entrepreneurs first, content creators second. The platform itself has become one component of a diversified revenue strategy that includes merchandise lines, production companies, investment portfolios, and traditional media deals.
The numbers tell a compelling story. According to recent industry analysis, the top 10 YouTube earners collectively generate over $450 million annually, with the gap between the highest earner and those in second or third place widening each year. This concentration of wealth at the top reflects broader trends in the creator economy—winner-take-most dynamics where brand recognition and scale create exponential returns.
Understanding who earns the most on YouTube requires looking beyond simple subscriber counts. A channel with 20 million subscribers might earn substantially less than one with 15 million if their audience demographics, engagement rates, and diversification strategies differ significantly.
Who Makes the Most Money on YouTube Right Now?
The Undisputed Leader: MrBeast
Jimmy Donaldson, better known as MrBeast, has solidified his position as the highest-earning YouTuber in 2026 with estimated annual earnings between $82 million and $95 million. His monthly income fluctuates between $6.5 million and $8 million, though individual months with major brand campaigns can push those figures substantially higher.
What sets MrBeast apart isn’t just his view count—though his videos routinely exceed 100 million views—it’s his business model. He operates multiple YouTube channels, runs a successful food brand (MrBeast Burger and Feastables), and has created a production ecosystem that rivals traditional media companies in scale and sophistication.
His content strategy reflects an understanding of platform economics that few creators possess. Videos often cost $2–3 million to produce, but generate returns through multiple monetization layers: YouTube ads, integrated sponsorships, brand equity building for his consumer products, and international licensing deals.
The Close Contenders
Jake Paul occupies the second position with estimated earnings of $65–75 million annually. His income stems primarily from boxing matches (which he promotes heavily through YouTube), sponsorships, and merchandise. His YouTube channel serves as a marketing funnel for higher-margin revenue streams rather than the primary income source.
Ryan Kaji of Ryan’s World continues to demonstrate the enduring power of family-friendly content, generating approximately $55–60 million annually. His empire extends far beyond YouTube into retail partnerships with major chains, a television show, and an extensive toy line. His monthly YouTube ad revenue alone exceeds $2 million.
Dude Perfect maintains their position among top earners with $50–55 million in annual revenue. The sports entertainment group has successfully transitioned from pure content creation to brand building, with television shows, a streaming platform, and extensive merchandising operations.
The Broader Top 10
| Rank | Creator | Estimated Annual Earnings | Primary Revenue Sources |
|---|---|---|---|
| 1 | MrBeast (Jimmy Donaldson) | $82–95M | Brand deals, YouTube ads, Feastables, licensing |
| 2 | Jake Paul | $65–75M | Boxing, sponsorships, YouTube ads, merchandise |
| 3 | Ryan Kaji (Ryan’s World) | $55–60M | Toy licensing, TV shows, YouTube ads, retail deals |
| 4 | Dude Perfect | $50–55M | Sponsorships, TV deals, merchandise, YouTube ads |
| 5 | Preston Arsement | $35–40M | YouTube ads, merchandise, real estate investments |
| 6 | Markiplier | $35–38M | YouTube ads, touring, merchandise, production company |
| 7 | Rhett & Link | $32–36M | YouTube ads (multiple channels), Mythical brand, consumer products |
| 8 | Unspeakable | $28–32M | YouTube ads (multiple channels), merchandise, gaming |
| 9 | Like Nastya | $28–30M | YouTube ads, licensing, brand deals |
| 10 | Jeffree Star | $25–28M | Cosmetics business, YouTube ads, investments |
These figures come from a combination of publicly available financial disclosures, industry reporting from sources like Forbes and Statista, and analysis of channel performance metrics combined with known CPM rates and sponsorship benchmarks.
Breaking Down Monthly vs. Annual Income Streams
Understanding YouTube income requires distinguishing between consistent monthly revenue and the lumpy nature of major deals that characterize annual earnings.
Monthly Revenue Patterns
For top creators, monthly income from YouTube’s Partner Program provides a baseline that’s surprisingly consistent relative to their total earnings. MrBeast’s YouTube ad revenue alone likely generates $3–4 million monthly when averaged across the year, though individual months vary by 40–60% based on upload frequency and seasonality.
CPM rates—the amount advertisers pay per thousand ad impressions—fluctuate significantly throughout the year. The final quarter typically sees rates 25–35% higher than summer months due to increased advertising budgets. A creator who earns $1.5 million in August might generate $2.1 million in December from similar viewership.
Monthly Income Breakdown for a Top-Tier Creator:
| Revenue Source | Monthly Range | Annual Total |
|---|---|---|
| YouTube Ad Revenue | $2.5–4M | $35–48M |
| Sponsorship Deals | $1.5–3M | $18–36M |
| Merchandise Sales | $500K–1M | $6–12M |
| Licensing & Other | $300K–800K | $4–10M |
| Total | $4.8–8.8M | $63–106M |
This structure explains why most paid YouTubers don’t rely on monthly consistency but rather manage cash flow across quarters and years. A single major brand campaign might pay $5 million but require three months of content production and integration.
The Reality of “Highest Paid YouTuber Per Month”
The question of who earns the most per month doesn’t have a straightforward answer because income isn’t distributed evenly. Jake Paul might earn $15 million in a single month when a boxing match occurs, then earn $2–3 million monthly during training periods.
Preston Arsement, focused primarily on gaming content, maintains more consistent monthly earnings because his revenue mix depends heavily on YouTube ads from frequent uploads rather than large, sporadic deals. His monthly range likely falls between $2.5–3.5 million with less volatility than creators pursuing mega-deals.
For creators seeking to understand their own potential, monthly earnings provide more actionable benchmarks than annual figures. A channel generating 50 million monthly views with a $4 CPM in a favorable niche can expect roughly $200,000 monthly from ads alone—before accounting for sponsorships, memberships, or other revenue streams.
How YouTube’s Top Earners Actually Make Their Money
The mythology around YouTube income focuses heavily on ad revenue, but this represents just a fraction of total earnings for the platform’s highest earners. Understanding the complete revenue ecosystem reveals why certain creators dominate financially while others with similar view counts struggle.
YouTube Ads and CPM Economics
The foundation of YouTube monetization remains the Partner Program, where creators receive 55% of ad revenue generated from their content. CPM rates vary enormously based on several factors:
-
-
- Geographic Audience Composition: Views from the United States, Canada, Australia, and Northern Europe generate $8–25 CPMs, while views from developing markets might only produce $0.50–3 CPMs. A creator with 80% U.S.-based viewership earns dramatically more than one with geographically diverse audiences.
- Content Category: Finance, technology, and business content commands premium CPM rates ($15–35) because advertisers in these sectors have higher customer lifetime values. Entertainment and gaming content typically sees $2–8 CPMs despite often generating higher view counts.
- Viewer Demographics: Audiences aged 25–45 with purchasing power attract premium advertising. Content appealing primarily to children sees reduced ad rates due to COPPA restrictions and advertiser preferences.
- Seasonality: Q4 (October–December) typically delivers 30–50% higher CPMs due to holiday advertising budgets, while summer months see suppressed rates.
-
For MrBeast, whose content appeals to broad demographics in premium markets and whose engagement rates signal high-quality audiences to advertisers, CPM rates likely average $10–14 across his portfolio of channels. With monthly views exceeding 400–500 million across all properties, this generates $4–7 million monthly from ads alone.
Sponsorship Revenue: The Real Money Maker
Brand deals represent where YouTube’s highest earners truly separate themselves. While YouTube ads provide predictable baseline income, sponsorships deliver the majority of revenue for top creators.
A single integrated sponsorship in a MrBeast video can command $2.5–4 million depending on integration depth, exclusivity terms, and deliverables across other platforms. These deals have evolved far beyond simple 30-second mid-roll spots.
Modern top-tier sponsorships include:
-
-
- Integrated content where the brand becomes central to the video concept
- Multi-video campaigns spanning several weeks or months
- Cross-platform promotion including Instagram, Twitter, and TikTok
- Usage rights for the content in the brand’s own marketing
- Appearance at brand events or in traditional advertising
-
Jake Paul’s sponsorship with DraftKings and other betting platforms reportedly exceeds $10 million annually, demonstrating how aligned partnerships with controversial but high-margin industries can generate extraordinary returns.
Dude Perfect’s corporate partnerships with brands like Pringles, Nerf, and Bass Pro Shops are structured as long-term relationships rather than one-off deals, providing reliable annual income while allowing for premium pricing based on proven performance.
Merchandise and Consumer Products
The third major revenue pillar for YouTube top earners is owned product lines. This strategy offers the highest margins but requires significant upfront investment and operational complexity.
MrBeast’s Feastables chocolate brand launched with distribution in major retailers and has reportedly generated over $50 million in revenue in its first 18 months. While profit margins are lower than pure digital products, the scale potential far exceeds what’s possible through YouTube alone.
Ryan’s World demonstrates the ultimate expression of this strategy, with toys, clothing, and accessories generating hundreds of millions in retail sales. While Ryan’s family receives a royalty rather than full retail revenue, these licensing deals constitute the majority of their $55–60 million annual income.
Even creators without major retail distribution generate substantial merchandise revenue. Channels with engaged audiences convert 2–5% of monthly viewers into merchandise customers when products are promoted effectively. For a creator with 30 million monthly views, this might translate to 600,000–1.5 million merchandise purchasers annually, generating $5–15 million in revenue depending on average order value and margins.
Ancillary Revenue Streams
Top earners have diversified into numerous additional income sources:
-
-
- Production Companies: Markiplier, Rhett & Link, and others have established production companies that create content for other platforms and clients, generating revenue independent of their personal channels.
- Investments: Many top creators invest their earnings into startups, real estate, and traditional markets. Jeffree Star’s cosmetics business dwarfs his YouTube income, while Preston has built a substantial real estate portfolio.
- Platform Diversification: Income from TikTok creator funds, Instagram partnerships, and emerging platforms supplements YouTube revenue.
- Touring and Live Events: Creators like Markiplier have generated millions through live tours, though this remains a smaller component of total earnings.
- NFTs and Digital Products: While the NFT market cooled significantly, several creators generated substantial one-time windfalls from digital collectibles in 2021–2022.
-
The Economics Behind YouTube Success
Understanding who earns the most on YouTube requires examining the economic principles that govern creator success at scale.
The Power Law Distribution
YouTube earnings follow a power law distribution where a tiny percentage of creators capture the majority of revenue. The top 1% of channels generate approximately 75–80% of all creator income on the platform, while the top 0.1% capture perhaps 40–50%.
This isn’t unique to YouTube—it reflects broader patterns in attention economies and network effects. Channels that achieve initial success gain algorithmic advantages, attract better sponsorship opportunities, and can invest more in production quality, creating a reinforcement loop.
Scale Economics in Content Production
Top earners benefit from economies of scale that smaller creators can’t access. MrBeast’s production team of 60+ people allows for simultaneous work on multiple projects, systematic optimization of thumbnails and titles, and professional-grade production values that drive higher performance.
While a solo creator might spend 20 hours producing a video that generates 500,000 views, MrBeast’s team can produce a video for $2 million that generates 150 million views—a dramatically better return on invested time and capital.
Brand Value Compounding
Each successful video enhances a creator’s brand value, increasing what they can charge for future sponsorships and making product launches more viable. MrBeast’s ability to launch Feastables with immediate retail distribution stems from years of brand building that demonstrated his influence to potential retail partners.
This brand equity becomes increasingly valuable over time, explaining why long-tenured creators with slightly declining viewership often maintain or increase earnings through better monetization of their existing audience.
Audience Quality vs. Quantity
The creator economy increasingly rewards audience quality over pure scale. A channel with 5 million highly engaged subscribers in premium demographics will out-earn one with 15 million less-engaged subscribers in lower-value markets.
Metrics like average view duration, comment rates, and audience demographics directly impact both CPM rates and sponsorship appeal. The highest-earning YouTubers have cultivated audiences that score exceptionally well on these quality indicators.
What Separates Top Earners from Everyone Else
Examining the highest-paid YouTubers reveals common patterns that explain their exceptional performance.
Diversification Strategy
Every creator in the top 10 has systematically diversified beyond YouTube ads. They’ve built multiple revenue streams that reduce platform dependency and increase total earning potential. This isn’t accidental—it represents a sophisticated understanding that YouTube’s primary value is attention aggregation, not the advertising system itself.
Content Consistency and Volume
Top earners maintain remarkable consistency in upload schedules and content quality. While small creators often fluctuate between periods of intensive uploading and dormancy, channels like Preston and Unspeakable publish daily content across multiple channels, ensuring consistent audience engagement and algorithmic favor.
Reinvestment in Production
MrBeast reportedly reinvests 80–90% of earnings back into content production and business ventures. This aggressive reinvestment strategy accelerates growth in ways that creators who extract earnings for personal consumption cannot match.
Videos that cost $100,000 to produce generate proportionally more views, engagement, and sponsorship interest than $5,000 videos, creating returns that justify the investment.
Platform Understanding
The highest earners possess deep understanding of YouTube’s recommendation algorithm, audience psychology, and content formats that drive performance. They systematically test thumbnails, titles, and content structures, optimizing based on data rather than intuition.
This analytical approach to content creation separates professionals from hobbyists. Rhett & Link’s Mythical Entertainment employs data analysts who examine performance metrics to inform content decisions—an investment that pays dividends through improved performance.
Team Building and Delegation
No top earner operates alone. They’ve built teams that handle production, business development, merchandise operations, and other functions, allowing the creator to focus on content and strategic decisions.
Jake Paul’s team manages his boxing career, sponsorship negotiations, content production, and social media presence, enabling him to pursue multiple revenue streams simultaneously without personal burnout.
The Future of YouTube Earnings
The trajectory of creator earnings suggests several important trends that will shape the landscape through 2026 and beyond.
Platform Diversification Acceleration
Top creators increasingly treat YouTube as one component of a multi-platform presence. Short-form content on TikTok, Instagram Reels, and YouTube Shorts drives discovery, while long-form YouTube content serves as the primary monetization vehicle.
Future top earners will likely generate 40–60% of income from non-YouTube sources, with the platform serving primarily as a audience aggregation tool rather than the primary revenue source.
Professionalization of Creator Businesses
The days of bedroom creators reaching the top earnings tiers are largely over. Future highest-paid YouTubers will operate as media companies with professional teams, sophisticated business strategies, and diversified revenue streams.
This professionalization raises barriers to entry for the top tier but creates opportunities for creators who build sustainable businesses rather than chasing viral moments.
Increased Competition from Traditional Media
Traditional media companies and celebrities increasingly recognize YouTube’s value for audience building and monetization. As they deploy professional resources toward the platform, competition for attention and sponsorship dollars will intensify.
However, native YouTube creators maintain advantages in platform understanding and audience relationships that prove difficult for traditional media to replicate.
Evolution of Monetization Models
YouTube continues expanding monetization options including memberships, Super Chat, merchandise shelves, and other features that allow creators to capture more value from engaged audiences.
The highest earners will increasingly derive income from direct audience relationships rather than advertising intermediation, reducing platform dependency and increasing margins.
Frequently Asked Questions
Who is the highest-paid YouTuber in 2026?
MrBeast (Jimmy Donaldson) is the highest-paid YouTuber in 2026, with estimated annual earnings between $82 million and $95 million. His income comes from multiple sources including YouTube ads (approximately $35–48 million annually), major brand sponsorships ($25–35 million), his Feastables chocolate brand, licensing deals, and various business ventures. His success stems from extraordinary production values, consistent viral content, and a diversified business model that extends far beyond traditional YouTube monetization. Unlike creators who rely primarily on ad revenue, MrBeast has built an ecosystem where YouTube serves as the distribution platform for a broader media and consumer products empire.
How much do top YouTubers make per month?
Monthly earnings for YouTube’s top creators typically range from $2.5 million to $8 million, though this varies significantly based on upload schedules, sponsorship timing, and seasonal factors. MrBeast averages $6.5–8 million monthly when large sponsorships and product launches are factored in, while creators like Preston Arsement maintain more consistent monthly earnings of $2.5–3.5 million from steady content production. These figures reflect total income across all revenue streams—YouTube ads generally contribute 30–50% of monthly income, with sponsorships, merchandise, and other ventures making up the remainder. It’s important to note that monthly income for top creators can fluctuate by 200–300% depending on when major deals close and campaigns launch.
What is the highest YouTube income from ads alone?
The highest YouTube ad revenue for individual creators reaches approximately $40–50 million annually for channels with massive global viewership and favorable audience demographics. However, this represents only a portion of total earnings for top creators. Channels focused on high-CPM content categories like finance, business, or technology can generate $15–25 CPMs, meaning a channel with 2 billion annual views in these niches might earn $30–50 million from ads alone. In contrast, entertainment and gaming channels with similar view counts might only generate $8–20 million due to lower CPM rates. The key variables affecting YouTube ad income include audience geography, content category, viewer demographics, seasonality, and engagement metrics that signal audience quality to advertisers.
How do sponsorship deals compare to YouTube ads for top creators?
For YouTube’s top earners, sponsorship revenue typically exceeds YouTube ad income by 50–200%. While MrBeast might generate $35–48 million annually from YouTube ads, his sponsorship income likely reaches $30–40 million. Top-tier integrated sponsorships in videos with guaranteed view counts of 50–100 million can command $2–4 million per video, compared to perhaps $800,000–1.2 million in ad revenue for the same video. Sponsorships offer better economics because brands pay premium rates for guaranteed placement and integration rather than competing in ad auctions. Additionally, sponsorships allow for negotiation based on the creator’s full value including audience quality, brand alignment, and cross-platform promotion—factors that YouTube’s automated ad system doesn’t fully capture.
Can smaller YouTubers become top earners?
While theoretically possible, the path for newer creators to reach top-earner status has become significantly more challenging in 2026 compared to five years ago. The current top earners benefit from years of audience building, algorithmic advantages from established channels, and brand recognition that enables premium sponsorships and product launches. Emerging creators face intense competition for attention and typically need 3–7 years of consistent, high-quality content production to build audiences capable of generating seven-figure annual incomes. However, opportunities exist in emerging content categories, underserved niches, and through exceptional innovation in content formats. Creators who build sustainable businesses with diversified revenue streams have better odds than those pursuing viral fame alone. The realistic path involves reaching $100,000–500,000 in annual earnings within 2–3 years, then scaling systematically through reinvestment and diversification.
What role does CPM play in YouTube earnings?
CPM (cost per mille, or cost per thousand impressions) fundamentally determines YouTube ad revenue and varies dramatically based on content category, audience demographics, and geographic location. Financial content creators can achieve $20–35 CPMs, while gaming channels might see $3–8 CPMs despite higher view counts. For a creator generating 100 million monthly views, the difference between a $5 CPM and $15 CPM means the difference between $500,000 and $1.5 million in monthly ad revenue. However, CPM represents the advertiser’s cost—creators receive approximately 55% of this amount, so a $10 CPM translates to roughly $5.50 per thousand views for the creator. Geographic composition heavily impacts CPM, with U.S. views worth 5–10 times more than views from lower-income regions. Top earners optimize content to appeal to high-CPM demographics while maintaining broad appeal, maximizing both view counts and per-view value.
How important is subscriber count for YouTube earnings?
Subscriber count matters less for earnings than most people assume. While subscribers provide a foundation for consistent viewership, engagement metrics, view counts, and audience quality determine actual income. A channel with 5 million subscribers averaging 10% view rates (500,000 views per video) and high audience quality will out-earn a channel with 20 million subscribers averaging 2% view rates (400,000 views per video) with less valuable demographics. The highest-paid YouTubers typically have exceptionally high view-to-subscriber ratios, indicating strong engagement that translates to better algorithmic distribution and sponsor appeal. MrBeast’s videos often exceed his subscriber count in views due to algorithmic promotion to non-subscribers, demonstrating that view generation capacity matters more than accumulated subscribers. For monetization purposes, a smaller, highly engaged audience in premium demographics beats a larger, less engaged audience every time.
Conclusion
The question of who makes the most money on YouTube in 2026 reveals a creator economy that has matured far beyond simple ad revenue sharing. MrBeast’s position as the highest-earning YouTuber reflects not just exceptional content creation but sophisticated business building that leverages YouTube as a platform for broader commercial activities.
Understanding the highest YouTube income requires examining the complete revenue ecosystem—ads, sponsorships, consumer products, investments, and ancillary ventures that transform successful channels into media companies. The gap between top earners and even successful mid-tier creators has widened as scale advantages, brand value, and diversification create compounding returns.
For aspiring creators, the lessons are clear: sustainable success requires treating YouTube as a business rather than a hobby, diversifying revenue streams as quickly as possible, investing aggressively in content quality and team building, and maintaining relentless consistency in publishing and optimization.
The future of YouTube earnings will likely see continued concentration at the top, with the highest-paid creators expanding their lead through sophisticated business operations that smaller creators cannot match. However, opportunities remain for exceptional talent, innovation, and strategic thinking to break into higher earnings tiers.
Whether you’re a creator building your channel, a marketer seeking to understand influencer economics, or simply curious about the business of online content, understanding how YouTube’s top earners operate provides valuable insights into the attention economy that increasingly shapes media and commerce.
The creator economy continues evolving rapidly, but the fundamental principles separating the highest-earning YouTubers from everyone else—quality over quantity, diversification over dependence, business thinking over content obsession—remain consistent guideposts for success.
MrBeast Net Worth in 2026: Is He Still the Richest YouTuber?
MrBeast Net Worth in 2026: Is He Still the Richest YouTuber?
Estimated reading time: 12 minutes
Key Takeaways
-
- MrBeast’s estimated net worth in 2026 ranges between $700 million to $1 billion, depending on valuation methods and private equity assessments
- His revenue streams extend far beyond YouTube ad revenue, encompassing Feastables, MrBeast Burger, merchandise, and content licensing deals
- Jimmy Donaldson generates approximately $600-700 million in annual revenue across all business ventures as of 2026
- While not officially a billionaire in liquid assets, his brand equity and business valuations suggest he’s approaching that milestone
- MrBeast’s wealth growth represents a paradigm shift in how digital creators build sustainable business empires
The Evolution of MrBeast’s Empire
When Jimmy Donaldson uploaded his first YouTube video at age 13, few could have predicted he’d become one of the most influential entrepreneurs of his generation. Today, MrBeast represents something fundamentally different from traditional YouTube creators—he’s built a diversified business conglomerate that happens to use YouTube as its primary distribution channel.
The MrBeast phenomenon extends beyond viral stunts and philanthropic giveaways. By 2026, his operation employs over 250 people, operates multiple production studios, and maintains partnerships with some of the world’s largest corporations. Understanding his net worth requires looking beyond simple subscriber counts or video views.
What distinguishes MrBeast from previous YouTube millionaires is his aggressive reinvestment strategy. While many creators extract profits for personal luxury, Donaldson has consistently poured revenue back into increasingly ambitious content and business ventures. This approach has compounded his wealth exponentially while simultaneously expanding his cultural influence.
MrBeast Net Worth 2026: Breaking Down the Numbers
Calculating MrBeast’s net worth in 2026 presents unique challenges because much of his wealth exists in private company valuations, real estate holdings, and brand equity rather than publicly traded assets.
Verified Assets and Holdings
| Asset Category | Estimated Value | Notes |
|---|---|---|
| YouTube Channel Portfolio | $150-200 million | Primary channel plus international versions |
| Feastables | $300-400 million | Based on latest funding round valuation |
| MrBeast Burger | $100-150 million | Virtual restaurant brand with 1,600+ locations |
| Real Estate Holdings | $30-50 million | Production facilities and personal properties |
| Merchandise & Licensing | $80-120 million | Apparel, gaming, and IP licensing deals |
| Cash & Liquid Investments | $40-80 million | Operating capital and personal reserves |
| Total Estimated Net Worth | $700 million – $1 billion | Conservative to optimistic range |
These figures represent conservative estimates based on comparable company valuations and industry benchmarks. According to Forbes methodology for influencer wealth calculations, brand equity often multiplies liquid asset values by 2-3x for creators with MrBeast’s market position.
The Complication of Private Valuations
Unlike publicly traded companies, MrBeast’s businesses don’t have transparent market valuations. Feastables raised significant venture capital funding in 2024-2025, but the exact terms remain confidential. Industry sources suggest the chocolate company achieved “unicorn” status (over $1 billion valuation) during its Series B round, though MrBeast’s ownership percentage affects how much of that value belongs to him personally.
MrBeast Burger operates under a unique virtual restaurant model through ghost kitchens. While the brand generates substantial revenue, its profitability remains debated within the industry. Some analysts value it based on revenue multiples common in the QSR (quick-service restaurant) sector, while others apply technology company valuations due to its app-based ordering system.
How Much Money Does MrBeast Have? Revenue Streams Analyzed
The question “how much money does MrBeast have” requires distinguishing between net worth (total assets minus liabilities) and liquid cash available for spending. MrBeast’s income streams have diversified dramatically since 2020, creating a financial ecosystem that generates revenue even when he’s not uploading videos.
YouTube Revenue: The Foundation
MrBeast’s main YouTube channel consistently ranks among the platform’s highest earners. With over 300 million subscribers across all channels by 2026, his YouTube revenue alone generates an estimated $50-80 million annually through:
-
-
- Ad Revenue: Despite giving away most of his prize money, the sheer view counts generate substantial AdSense income
- YouTube Premium Revenue: Subscriber watch time provides additional income streams
- Sponsored Integrations: Brand deals within videos command premium rates, often $2-3 million per integration
- Content Licensing: Networks and streaming platforms pay for rights to feature or distribute his content
-
Unlike traditional creators who might earn $3-8 CPM (cost per thousand views), MrBeast’s advertiser-friendly content and premium brand partnerships push his effective CPM significantly higher. His videos attract Fortune 500 advertisers willing to pay premium rates for association with his positive brand image.
Feastables: The Billion-Dollar Chocolate Play
Launched in 2022, Feastables has evolved from a YouTuber chocolate brand into a legitimate competitor in the confectionery market. By 2026, the brand has achieved nationwide distribution across major retailers including Walmart, Target, and convenience store chains.
Industry estimates suggest Feastables generates between $300-500 million in annual revenue. The company’s success stems from several strategic advantages:
-
-
- Built-in Marketing Engine: Every MrBeast video serves as a Feastables commercial to hundreds of millions of viewers
- Product Quality: Unlike many influencer brands, Feastables invested heavily in product development, creating genuinely competitive chocolate
- Strategic Positioning: Pricing between premium brands and mass-market options captures middle-market consumers
- Retail Relationships: Leveraging his cultural influence to secure premium shelf space normally reserved for established brands
-
The brand’s rapid growth attracted venture capital investment, with funding rounds valuing the company at increasingly impressive multiples. Even if Jimmy owns 60-70% of the company (common for founder-led startups after Series B funding), that stake alone could represent $300-400 million of his net worth.
MrBeast Burger: Navigating Virtual Restaurants
The MrBeast Burger venture represents both innovation and complication. Launched in December 2020, the virtual restaurant brand exploded to over 1,600 locations by partnering with existing restaurants to prepare menu items under the MrBeast Burger name.
The business model generates revenue through:
-
-
- Delivery order commissions: Percentage of each order placed through the app
- Licensing fees: Restaurants pay for the right to prepare and sell MrBeast Burger items
- Franchise expansion: International partnerships extend the brand globally
-
However, the venture has faced challenges, including quality control issues and legal disputes with some partners. These complications make exact revenue figures difficult to verify, though estimates suggest the brand generates $100-200 million in annual gross sales, with MrBeast’s company capturing roughly 15-25% of that revenue after expenses.
Additional Income Streams
Beyond his major ventures, MrBeast generates income through:
-
-
- Merchandise Sales: Premium apparel and accessories sold through his online store
- Gaming and Esports: Investments and partnerships in the gaming industry
- Real Estate: Strategic property investments, particularly around his North Carolina headquarters
- Speaking Engagements: Though rare, commanding six-figure fees when he does appear
- Consulting and Advisory: Helping brands understand creator economics and Gen-Z marketing
-
Is MrBeast a Billionaire? The Valuation Question
The billion-dollar question—literally—dominates discussions about MrBeast’s wealth. The answer depends entirely on how you calculate net worth.
Liquid Net Worth vs. Paper Valuation
If we consider only liquid assets (cash, stocks, bonds, and easily sold property), MrBeast almost certainly hasn’t reached billionaire status as of 2026. Conservative estimates place his liquid net worth between $200-400 million.
However, modern wealth calculation increasingly considers brand equity and private company valuations. When Kim Kardashian’s SKIMS brand received a $4 billion valuation, her net worth calculations included her ownership stake despite not having “sold” that value. The same principle applies to MrBeast.
If Feastables alone commands a $1-1.5 billion valuation (not unreasonable given comparable CPG brand multiples), and Jimmy owns 65% of the company, that stake represents $650-975 million. Add his other holdings, and the billionaire designation becomes defensible from a paper valuation perspective.
The Forbes Billionaire Methodology
Forbes uses specific criteria for including individuals on their billionaire list, primarily focusing on assets that could reasonably be liquidated. Private company shares count, but with appropriate discounting for illiquidity and market volatility.
As of early 2026, Forbes has not officially listed MrBeast as a billionaire, though several financial publications have speculated he’s approaching that threshold. The difference often comes down to discount rates applied to his private holdings and whether brand equity gets counted as an asset.
Comparing to Historical YouTube Wealth
To contextualize MrBeast’s position, consider the wealth trajectories of previous YouTube success stories:
PewDiePie (Felix Kjellberg) accumulated an estimated net worth of $40-50 million during his peak, primarily through ad revenue and merchandise. He never built substantial businesses beyond content creation.
Jeffree Star leveraged YouTube fame into a cosmetics empire, achieving an estimated net worth of $200+ million. His model more closely resembles MrBeast’s approach of using YouTube as a marketing vehicle for broader business ventures.
Ryan Kaji (Ryan’s World) transformed children’s content into a licensing empire worth an estimated $100-150 million by 2026, including toy lines, apparel, and media deals.
MrBeast’s trajectory suggests he’ll surpass all previous YouTube-native entrepreneurs in total wealth accumulation, potentially by significant margins. His combination of massive reach, business acumen, and aggressive expansion puts him in a category typically reserved for tech founders rather than content creators.
How Did MrBeast Get Rich? The Strategic Foundation
Understanding MrBeast’s wealth requires examining the strategic decisions that separated him from thousands of other talented creators competing for attention.
The Reinvestment Philosophy
The most consequential decision Jimmy Donaldson made early in his career was treating YouTube as a business requiring capital investment rather than a passive income source. When other creators were buying luxury cars and designer clothing, MrBeast reinvested every dollar into more ambitious content.
This philosophy created a virtuous cycle:
-
-
- Reinvestment → Bigger, more expensive videos
- Bigger videos → More views and subscribers
- More views → Higher ad revenue and brand deal opportunities
- Higher revenue → Even larger reinvestment capacity
-
By 2026, this cycle has compounded for nearly a decade, each iteration expanding his resources and reach. The strategy required remarkable discipline—living modestly while possessing millions in revenue—but created exponential rather than linear growth.
Understanding the Algorithm
MrBeast famously spent years obsessively studying YouTube’s recommendation algorithm, analyzing why certain videos went viral while others languished. He shared insights from this research openly, often discussing his findings on podcasts and in interviews.
His algorithmic understanding manifests in:
-
-
- High retention editing: Every second optimized to prevent viewers from clicking away
- Thumbnail psychology: Images and titles engineered for maximum click-through rates
- Watch time optimization: Video lengths calibrated to maximize total watch time rather than just views
- Topic selection: Choosing concepts with broad appeal across demographics and geographies
-
This technical expertise allowed him to consistently achieve viral reach while competitors struggled with algorithmic changes. According to YouTube’s Creator Academy resources, retention rate is among the most important factors in recommendation algorithms—an insight MrBeast leveraged before many competitors understood its significance.
Building a Production Company, Not Just a Channel
By 2019, MrBeast had already transitioned from solo creator to production company operator. He hired researchers, writers, editors, producers, and eventually entire departments focused on specific aspects of content creation.
This infrastructure provided several advantages:
-
-
- Consistent Output: Producing high-quality content on schedule regardless of Jimmy’s personal availability
- Scalability: Ability to launch multiple channels and projects simultaneously
- Quality Control: Professional standards in filming, editing, and post-production
- Risk Management: Spreading creative and operational responsibilities across a team
-
The production company model also created asset value beyond Jimmy’s personal brand. If he chose to step back from on-camera work, the company could theoretically continue operating—though his personal appeal remains central to the brand’s value.
Strategic Philanthropy as Marketing
MrBeast’s philanthropic content represents perhaps his most innovative business strategy. By giving away millions of dollars on camera, he created content that:
-
-
- Appeals universally: Generosity transcends cultural and linguistic barriers
- Generates goodwill: Viewers feel positive associations with the brand
- Attracts media coverage: Traditional press covers his stunts, expanding reach beyond YouTube
- Justifies premium sponsorships: Brands want association with charitable activities
-
The strategy’s brilliance lies in its sustainability. The content generates enough revenue to fund both the giveaways and substantial profit margins. According to industry analysis, MrBeast’s videos typically cost 40-60% of their generated revenue to produce (including prizes), leaving healthy profit margins while creating goodwill competitors can’t easily replicate.
MrBeast Wealth Growth: From Bedroom to Boardroom
Tracking MrBeast’s wealth growth over time illustrates the exponential nature of his success and the inflection points that accelerated his trajectory.
The Growth Timeline
| Year | Estimated Net Worth | Key Milestone |
|---|---|---|
| 2016 | $100,000 – $500,000 | Early monetization, living with mother |
| 2018 | $1 – $3 million | “Counting to 100,000” video goes viral |
| 2019 | $8 – $15 million | Team Trees campaign, first employees |
| 2020 | $16 – $25 million | MrBeast Burger launch |
| 2021 | $25 – $40 million | Squid Game recreation breaks records |
| 2022 | $50 – $100 million | Feastables launch, massive expansion |
| 2023 | $150 – $300 million | Feastables retail distribution secured |
| 2024 | $400 – $600 million | Major funding rounds for businesses |
| 2025 | $550 – $800 million | International expansion accelerates |
| 2026 | $700 million – $1 billion | Approaching billionaire status |
These estimates vary widely because much of his wealth exists in private valuations, but the growth trajectory remains consistent—approximately doubling every 12-18 months since 2020.
Inflection Points That Changed Everything
Several specific moments accelerated his wealth accumulation beyond normal creator trajectories:
December 2018: The “Worst Intros” Era Ends
MrBeast spent years creating content that generated minimal views while studying what worked. When he pivoted to large-scale stunts and giveaways, his channel growth exploded from thousands to millions of subscribers within months.
November 2019: Team Trees
Partnering with Mark Rober to raise $20 million for tree planting demonstrated his ability to mobilize massive audiences for collective action. The campaign established him as more than entertainment—he became a cultural force.
December 2020: MrBeast Burger
Launching a restaurant brand overnight through ghost kitchens showed sophisticated business thinking. Despite subsequent challenges, it proved he could leverage his audience into traditional business sectors.
January 2022: Feastables Launch
Entering the competitive confectionery market with a genuinely quality product, not just a branded cash-grab, changed how investors viewed his business acumen. The success of Feastables transformed him from “YouTuber with side businesses” to “entrepreneur who uses YouTube for marketing.”
November 2021: Squid Game Recreation
The most expensive YouTube video ever produced at that time, this project demonstrated both his ambition and his ability to capture cultural moments. The video’s success validated his aggressive spending strategy.
Comparing MrBeast to Other YouTube Titans
How does MrBeast’s net worth stack up against other YouTube elite in 2026?
The Top YouTube Earners
| Creator | Estimated Net Worth (2026) | Primary Revenue Source | Business Model |
|---|---|---|---|
| MrBeast | $700M – $1B | Businesses + YouTube | Diversified entrepreneur |
| Jeffree Star | $200M – $300M | Cosmetics + YouTube | Product empire |
| Ryan Kaji | $100M – $150M | Licensing + YouTube | Children’s brand |
| Dude Perfect | $80M – $120M | YouTube + Sponsorships | Content production |
| Logan Paul | $75M – $150M | PRIME + Wrestling + YouTube | Diversified celebrity |
| Markiplier | $45M – $75M | YouTube + Merchandise | Traditional creator |
| PewDiePie | $40M – $60M | YouTube + Investments | Semi-retired creator |
The comparison reveals MrBeast’s unique position. While other successful creators either focus primarily on content (Markiplier, PewDiePie) or have successfully built businesses (Jeffree Star, Logan Paul), none have matched MrBeast’s combination of massive YouTube presence and multiple large-scale business ventures.
Beyond YouTube: Tech Founder Comparisons
Perhaps more relevant comparisons come from tech entrepreneurs who built companies around similar timeframes:
Palmer Luckey (Oculus VR founder) sold his company to Facebook for $2 billion in 2014, though his personal take was a fraction of that total.
Evan Spiegel (Snapchat co-founder) achieved billionaire status through his social media platform, similar to how MrBeast built audience on an existing platform before expanding into businesses.
Whitney Wolfe Herd (Bumble founder) became the youngest self-made female billionaire when Bumble went public, illustrating how consumer-facing brands can achieve rapid valuations.
These comparisons suggest MrBeast’s trajectory more closely resembles successful tech entrepreneurs than traditional media personalities or entertainers.
The Future Trajectory: What’s Next for Jimmy Donaldson?
Projecting MrBeast’s future wealth requires examining his stated goals, industry trends, and likely expansion paths.
Stated Ambitions
Jimmy Donaldson has publicly stated his goal to become “the biggest YouTuber” and to “die with zero dollars” by giving away all his wealth. These seemingly contradictory goals actually align—continuing to pursue maximum growth while using the platform for philanthropic impact.
In various interviews, he’s mentioned interest in:
-
-
- Expanding Feastables into a multi-billion-dollar food and beverage company competing with established CPG giants
- Creating original entertainment beyond YouTube, potentially including streaming content or television
- Building philanthropic infrastructure for sustainable, long-term charitable impact
- International expansion of all his businesses, particularly in underserved markets
-
The Path to Billionaire Status
If MrBeast hasn’t technically achieved billionaire status by early 2026, several clear paths could take him there:
-
-
- Feastables Exit or Major Funding Round: If Feastables achieves a $2-3 billion valuation (reasonable for a fast-growing CPG brand with his marketing advantages) and he maintains majority ownership, that alone could establish billionaire status.
- YouTube Revenue Growth: His channel continues growing internationally. Adding another 100-200 million subscribers while maintaining engagement could substantially increase annual revenue.
- Strategic Acquisitions: Using accumulated wealth to acquire complementary businesses could accelerate growth across multiple sectors.
- Public Market Activity: Taking any of his businesses public through traditional IPO or SPAC merger would create publicly verifiable valuations and potentially unlock substantially higher net worth calculations.
-
Potential Challenges
Several factors could slow or complicate MrBeast’s wealth growth:
-
-
- Market Saturation: YouTube growth must eventually slow as he approaches theoretical maximum audiences.
- Business Competition: Feastables faces established competitors with vastly more resources. MrBeast Burger has struggled with quality control and legal challenges.
- Platform Risk: His empire remains heavily dependent on YouTube’s continued dominance and favorable algorithm treatment.
- Economic Headwinds: Consumer spending on discretionary items like premium chocolate could suffer during economic downturns.
- Personal Burnout: The relentless content creation schedule and business expansion could prove unsustainable long-term.
-
Despite these challenges, MrBeast’s track record of adaptation and innovation suggests he’ll navigate obstacles effectively.
Frequently Asked Questions
What is MrBeast’s net worth in 2026?
MrBeast’s estimated net worth in 2026 ranges between $700 million and $1 billion, depending on how private company valuations are calculated. This figure includes his YouTube channel portfolio (worth approximately $150-200 million), Feastables ownership stake (valued at $300-400 million), MrBeast Burger (worth $100-150 million), real estate holdings, merchandise revenue, and liquid assets. The wide range exists because much of his wealth consists of private company equity without publicly traded valuations. Conservative estimates focusing primarily on liquid assets place his net worth around $700 million, while more optimistic calculations including full private company valuations approach or exceed $1 billion. Unlike publicly traded companies, these private valuations involve significant estimation and depend on factors like revenue multiples, growth rates, and comparable company analysis.
How much money does MrBeast make per year?
MrBeast’s annual income across all revenue streams is estimated at $600-700 million in total revenue as of 2026, though his personal take-home after business expenses, reinvestment, and giveaways is substantially lower—likely $150-250 million annually. His income sources include YouTube ad revenue ($50-80 million annually), Feastables sales (company generates $300-500 million in revenue), MrBeast Burger (approximately $100-200 million in gross sales, with his company capturing 15-25%), merchandise sales, brand sponsorships within videos ($2-3 million per major integration), and various licensing deals. It’s important to distinguish between gross revenue (total money flowing through his businesses) and net income (what he personally keeps). MrBeast famously reinvests most income back into content production and business expansion, often spending 40-60% of video revenue on the videos themselves, including extravagant prizes and production costs.
Is MrBeast actually a billionaire?
As of early 2026, MrBeast is not officially recognized as a billionaire by Forbes or other wealth-tracking organizations, though he’s approaching that milestone depending on valuation methodologies. His liquid net worth (easily accessible cash and assets) almost certainly falls short of $1 billion, likely in the $200-400 million range. However, when including private company valuations—particularly his ownership stake in Feastables, which may have achieved “unicorn” status (over $1 billion company valuation) during recent funding rounds—his total net worth could approach or exceed the billion-dollar threshold. The distinction matters because billionaire status typically requires assets that could theoretically be converted to cash, not just paper valuations. Private company shares involve significant illiquidity discounts. Many financial analysts predict MrBeast will definitively achieve billionaire status within 2-4 years if Feastables continues its growth trajectory or if any of his companies go public through IPO or acquisition.
How did MrBeast get so rich?
MrBeast accumulated wealth through a unique combination of YouTube mastery and aggressive business diversification. He started by obsessively studying YouTube’s algorithm and viewer psychology, creating highly engaging content that consistently went viral. His breakthrough strategy involved reinvesting all revenue back into increasingly expensive and ambitious videos, creating a compounding growth cycle—bigger videos generated more views, which produced more revenue, enabling even larger productions. Unlike typical YouTubers who extract profits, MrBeast reinvested everything, allowing his channel to grow exponentially. He then leveraged his massive audience to launch businesses with built-in customer bases: Feastables (chocolate brand), MrBeast Burger (virtual restaurant chain), and merchandise. Each video serves as a marketing vehicle for these businesses, reaching hundreds of millions of potential customers without traditional advertising costs. His philanthropic content strategy also differentiated him, creating universal appeal and justifying premium sponsorship rates. The combination of technical YouTube expertise, disciplined reinvestment, business diversification, and innovative content strategy created wealth accumulation far exceeding traditional creator models.
What businesses does MrBeast own?
MrBeast owns or has significant stakes in several major businesses as of 2026. Feastables is his most valuable venture—a chocolate and snack company launched in 2022 that achieved nationwide retail distribution and generates an estimated $300-500 million in annual revenue. MrBeast Burger is a virtual restaurant brand operating through 1,600+ ghost kitchen locations, generating approximately $100-200 million in annual gross sales through app-based ordering. He owns Beast Philanthropy, a separate charitable channel and organization focused entirely on giving away money and resources. His production company employs over 250 people and operates multiple channels in different languages, essentially functioning as a media company rather than a simple YouTube channel. He has investments in various gaming and esports ventures, though these remain smaller compared to his primary businesses. Real estate holdings include production facilities, warehouses, and properties around his North Carolina headquarters. He also operates a substantial merchandise business selling apparel and accessories. Additionally, he earns revenue through content licensing deals with streaming platforms and traditional media. This diversified portfolio distinguishes him from typical content creators, positioning him more as an entrepreneur who uses YouTube as a marketing platform.
How much does MrBeast give away?
MrBeast gives away an estimated $30-60 million annually through his videos, challenges, and philanthropic efforts as of 2026, though the exact figure fluctuates dramatically based on specific projects. His giveaways range from thousands of dollars in smaller videos to millions in large-scale productions. Notable examples include: giving away a private island, multiple houses, cars worth hundreds of thousands of dollars, funding cataract surgeries for 1,000 people, building wells in Africa, and the Team Trees campaign that raised over $20 million. His separate channel, Beast Philanthropy, is entirely dedicated to charitable giving and operates as a food bank and hunger relief organization. The critical strategic element is that these giveaways aren’t purely altruistic from a business perspective—they generate compelling content that earns more revenue than the giveaway costs. A $3 million prize giveaway video might generate $5-8 million in revenue through ads, sponsorships, and indirect business promotion, making the philanthropy financially sustainable while creating genuine positive impact. This model has proven remarkably effective, allowing him to scale charitable giving while simultaneously growing his businesses.
Is MrBeast richer than PewDiePie?
Yes, MrBeast is substantially richer than PewDiePie as of 2026. While PewDiePie (Felix Kjellberg) accumulated an estimated net worth of $40-60 million during his career—impressive by any standard—MrBeast’s net worth of $700 million to $1 billion represents roughly 10-20 times PewDiePie’s wealth. The difference stems from their fundamentally different approaches to content creation and monetization. PewDiePie primarily earned through YouTube ad revenue, sponsorships, and merchandise, representing a traditional creator model focused on content rather than business building. He also semi-retired from intensive content creation, moving to Japan and reducing upload frequency. MrBeast, conversely, built multiple businesses using YouTube as a marketing vehicle rather than treating YouTube as the business itself. His ownership stakes in Feastables and MrBeast Burger, combined with aggressive expansion and reinvestment strategies, created wealth accumulation more similar to tech entrepreneurs than traditional entertainers. PewDiePie himself has acknowledged MrBeast’s different approach, noting that Jimmy operates on a completely different scale. Both creators achieved remarkable success, but MrBeast’s business diversification created exponentially more wealth.
Conclusion
MrBeast’s net worth in 2026—conservatively estimated between $700 million and $1 billion—represents more than personal financial success. It signals a fundamental shift in how digital creators can build sustainable business empires that transcend their original platforms.
Jimmy Donaldson’s journey from teenager uploading videos in his bedroom to potential billionaire entrepreneur offers a blueprint for the creator economy’s future. His success stems from treating YouTube not as an end goal but as a marketing platform for broader business ambitions, reinvesting profits with unusual discipline, and maintaining audience trust through genuine generosity and quality content.
Whether MrBeast has technically achieved billionaire status depends on valuation methodologies and how much weight we assign to private company equity. What’s undeniable is his trajectory toward that milestone and his position as likely the wealthiest creator to emerge primarily from YouTube.
The question “Is he still the richest YouTuber?” seems almost quaint given that MrBeast has transcended the category of “YouTuber” entirely. He’s built a diversified business conglomerate that happens to use YouTube as its primary distribution channel—a fundamentally different model than previous platform celebrities.
His wealth growth shows no signs of slowing. Feastables continues expanding retail presence, international audiences drive YouTube growth, and new ventures emerge regularly. Barring unexpected challenges, MrBeast will likely achieve undisputed billionaire status within the next few years, cementing his position not just as YouTube’s richest creator but as one of the most successful entrepreneurs of his generation.
For aspiring creators and entrepreneurs, MrBeast’s story offers clear lessons: understand your platform deeply, reinvest in growth rather than extracting profits prematurely, build businesses beyond single revenue streams, maintain quality and authenticity, and think bigger than conventional wisdom suggests possible.
The MrBeast empire continues expanding, and 2026 may be remembered not as the peak but as an inflection point in an even more remarkable trajectory ahead.
The Richest Kid YouTubers and Family Channels in 2026
The Richest Kid YouTubers and Family Channels in 2026
Estimated reading time: 12 minutes
Key Takeaways
-
- Ryan Kaji of Ryan’s World maintains his position as the wealthiest kid YouTuber with an estimated net worth exceeding $100 million in 2026
- Vlad and Niki have grown their empire to become the second-richest kid YouTube duo, with a combined net worth approaching $85 million
- The top kid YouTubers earn money through multiple revenue streams including ad revenue, merchandise, licensing deals, and brand partnerships
- Family YouTube channels collectively generate billions in annual revenue, creating unprecedented wealth for young content creators
- COPPA regulations and platform policy changes continue to reshape how children’s content monetizes on YouTube
- The business model has evolved beyond simple video uploads to encompass full-scale media empires with retail presence in major chains like Walmart and Target
The Multi-Million Dollar World of Kid YouTube Channels
The landscape of children’s entertainment has fundamentally transformed over the past decade. Gone are the days when Saturday morning cartoons and Disney Channel dominated youth viewership. Today’s generation consumes content primarily through YouTube, and the financial implications are staggering.
Kid-focused YouTube channels have become some of the platform’s most lucrative properties. These digital-native entertainment brands generate revenue that rivals—and often exceeds—traditional children’s television programming. The richest kid YouTubers aren’t just making pocket money; they’re building generational wealth before reaching high school.
What makes this phenomenon particularly fascinating is how these young creators have leveraged YouTube’s global reach to build diversified business empires. A video of a child unboxing toys or playing games can translate into merchandise deals with major retailers, television shows, mobile apps, and licensing agreements worth tens of millions of dollars.
The year 2026 marks a significant milestone in the maturation of this industry. The first generation of kid YouTubers who started during the platform’s early boom years are now teenagers, with several having accumulated net worths that place them among the wealthiest young people in the world. Meanwhile, new faces continue to emerge, capturing the attention of millions of young viewers and their parents.
Understanding the financial success of these channels requires examining not just their YouTube ad revenue but the sophisticated business strategies their families and management teams employ. These aren’t accidental successes—they’re carefully orchestrated media ventures that have capitalized on YouTube’s democratization of content distribution.
The Top 10 Richest Kid YouTubers in 2026
The wealth accumulated by the top kid YouTubers reflects both their massive audience reach and their successful expansion beyond the platform. Here’s a comprehensive breakdown of the richest kids on YouTube as of 2026:
| Rank | Channel Name | Primary Creator(s) | Estimated Net Worth | Subscribers | Primary Content Type |
|---|---|---|---|---|---|
| 1 | Ryan’s World | Ryan Kaji | $100-120 million | 38.5 million | Toy reviews, experiments, education |
| 2 | Vlad and Niki | Vlad & Nikita Vashketov | $80-85 million | 114 million | Adventure stories, pretend play |
| 3 | Like Nastya | Anastasia Radzinskaya | $75-80 million | 118 million | Educational, family adventures |
| 4 | Kids Diana Show | Diana | $65-70 million | 123 million | Pretend play, dress-up, adventures |
| 5 | Cocomelon (JJ) | Animated character | $60-65 million* | 177 million | Nursery rhymes, educational songs |
| 6 | Blippi | Stevin John | $55-60 million | 18.2 million | Educational entertainment |
| 7 | FGTeeV Family | Skylander Boy, others | $45-50 million | 24.3 million | Gaming, comedy sketches |
| 8 | EvanTubeHD | Evan | $35-40 million | 7.1 million | Toy reviews, gaming |
| 9 | JoJo Siwa | JoJo Siwa | $30-35 million | 12.4 million | Dance, lifestyle, music |
| 10 | Piper Rockelle | Piper Rockelle | $25-30 million | 11.8 million | Challenges, lifestyle |
*Note: Cocomelon represents brand value rather than individual net worth, as it’s an animated production rather than a personal brand.
These figures represent estimated net worth based on publicly available information, business registrations, real estate records, and industry analysis. The actual numbers may vary as these families typically maintain considerable privacy around their finances.
What’s striking about this list is the international diversity. While Ryan’s World launched from Texas, Vlad and Niki operate from Dubai with Russian heritage, and Like Nastya’s family splits time between the United States and Russia. This global reach demonstrates YouTube’s power as a borderless entertainment platform.
Ryan’s World Net Worth 2026: Still the King?
Ryan Kaji remains the undisputed champion of kid YouTube channels, with a net worth estimated between $100 and $120 million as of 2026. Now a teenager, Ryan started his YouTube journey in 2015 at age three with a simple toy unboxing video. That single video sparked a media empire that has redefined what’s possible for child entertainers.
The Ryan’s World Business Model
Ryan’s World generates revenue through multiple sophisticated channels:
YouTube Ad Revenue: With billions of views annually across his main channel and several spin-off channels, YouTube ad revenue forms the foundation of Ryan’s earnings. Industry estimates suggest his channels generate $25-30 million annually from ads alone.
Merchandise Empire: Walk into any Walmart, Target, or Amazon marketplace and you’ll find Ryan’s World products. From action figures to bedding sets, clothing, school supplies, and toys, the merchandise line generates an estimated $250 million in retail sales annually, with the Kaji family earning substantial royalties.
Television Deals: Ryan’s World has expanded to traditional media with shows on Nickelodeon and other networks, bringing in additional licensing revenue.
Mobile Apps and Games: Several Ryan’s World mobile applications generate revenue through downloads and in-app purchases.
Brand Partnerships: Strategic partnerships with major brands create additional revenue streams through sponsored content and co-branded products.
The Team Behind the Success
Ryan’s continued dominance isn’t accidental. His parents, Shion and Loann Kaji, partnered with pocket.watch, a children’s media startup that helped scale Ryan’s World beyond YouTube. This partnership brought professional management, strategic planning, and industry connections that transformed a YouTube channel into a comprehensive media brand.
The family has also been strategic about Ryan’s public presence as he’s aged. Content has evolved from simple toy reviews to more educational content, science experiments, and age-appropriate entertainment that grows with his audience.
Challenges and Adaptations
Ryan’s World has faced scrutiny. In 2019, consumer advocacy groups filed complaints about the channel’s blurred lines between content and advertising. The family and their management team responded by implementing clearer disclosures and adjusting their content strategy.
As Ryan enters his teenage years, the channel faces the inevitable challenge of maintaining relevance as its star outgrows the typical audience age range. The family has addressed this by featuring Ryan’s younger sisters more prominently and diversifying content formats.
Vlad and Niki Net Worth 2026: The Russian-American Success Story
Brothers Vlad and Nikita Vashketov have built an empire that rivals Ryan’s World in scale, with a combined net worth approaching $85 million in 2026. Their channel has become the fastest-growing kid-focused brand on YouTube, with content translated into 18 languages and distributed across multiple regional channels.
The Vlad and Niki Formula
What sets Vlad and Niki apart is their content approach. Rather than focusing on toy reviews, their videos center on imaginative pretend play scenarios. The brothers transform everyday situations into adventures—whether it’s playing with toy cars that become life-size vehicles or turning their home into an imaginary kingdom.
This narrative-driven approach has proven exceptionally popular with young viewers, particularly in international markets. The content requires minimal language comprehension, making it easily adaptable across cultures.
Global Distribution Strategy
Vlad and Niki’s team has implemented an aggressive multi-channel strategy. They operate 21 different YouTube channels targeting specific regions and languages, from Vlad and Niki Arabic to channels focused on European, Latin American, and Asian markets.
This localization strategy has resulted in a combined subscriber count exceeding 250 million across all channels—more than any other kid-focused YouTube brand. The main English channel alone boasts 114 million subscribers as of 2026.
Merchandising and Licensing
Following Ryan’s World playbook, Vlad and Niki have expanded into physical products. Their merchandise line includes toys, clothing, books, and even a mobile game. Partnerships with major retailers across North America, Europe, and Asia have made their products accessible to their global fanbase.
The family has also licensed their brand for a mobile application and is developing animated series to extend their reach beyond live-action content.
The Business Philosophy
Based in Dubai, the Vashketov family takes a calculated approach to their business. Father Sergey Vashketov manages the business side while mother Victoria appears frequently in videos. They’ve partnered with Haven Global, a management company specializing in digital talent, to handle complex negotiations and strategic planning.
Interviews with the family reveal a focus on sustainable growth rather than maximizing short-term revenue. They’re selective about sponsorships and maintain creative control over their content—decisions that have helped preserve authentic audience connections.
How Kid YouTubers Actually Make Their Money
Understanding kid YouTuber net worth requires breaking down their diverse revenue streams. The business model has evolved significantly beyond simple YouTube ad revenue.
YouTube Ad Revenue
This remains the foundation for most channels. YouTube’s Partner Program shares 55% of ad revenue with creators. For channels with billions of views, this translates to substantial income.
However, the equation is complex. Children’s content faces specific limitations under COPPA (Children’s Online Privacy Protection Act) regulations. YouTube doesn’t serve personalized ads on content marked as “made for kids,” resulting in significantly lower CPM (cost per thousand views) rates compared to general audience content.
Typical CPM rates for children’s content range from $2-5, compared to $10-20 for general audience content. Despite this limitation, the massive view counts on successful kid channels still generate millions in annual ad revenue.
Merchandise and Licensing
This is where the real money materializes. Successful kid YouTubers license their name and image to product manufacturers who handle production and distribution. The YouTuber receives royalties—typically 5-15% of wholesale prices.
When a brand like Ryan’s World generates $250 million in retail sales, even a conservative 8% royalty rate results in $20 million in revenue for the creator’s family.
Sponsored Content and Brand Deals
Companies pay significant sums for integration into popular kid channels. A single sponsored video on a top-tier channel can command $200,000-500,000, depending on the channel’s reach and engagement rates.
These deals must now include clear disclosures per FTC guidelines, with sponsors prominently identified in both the video content and description.
Media Rights and Streaming Deals
Major streaming platforms and traditional networks pay for rights to create shows featuring popular YouTube personalities. These deals can range from hundreds of thousands to several million dollars, plus residuals based on viewership.
Mobile Apps and Digital Products
Many successful channels develop mobile applications and games. These generate revenue through paid downloads, in-app purchases, and advertising within the apps themselves.
Real Estate and Investment Income
The wealthiest kid YouTubers’ families invest their earnings in appreciating assets. Many have purchased substantial real estate portfolios that generate passive income and long-term wealth preservation.
The Business Empire Behind Children’s YouTube Channels
The most successful kid YouTube channels aren’t mom-and-pop operations—they’re sophisticated business ventures with professional management teams, strategic partnerships, and diversified revenue streams.
Management Companies and Agencies
Companies like pocket.watch, Moonbug Entertainment, and Haven Global specialize in developing YouTube talent into comprehensive media brands. These companies provide:
-
-
- Strategic planning and brand development
- Licensing and merchandising negotiations
- Content production support
- Legal and compliance management
- Financial planning and investment guidance
-
pocket.watch, which manages Ryan’s World, raised over $100 million in venture capital funding to expand its roster of YouTube talent. Moonbug Entertainment acquired Cocomelon and other popular children’s brands before being purchased by Candle Media for $3 billion in 2021, demonstrating the industry’s massive valuations.
Production Quality Evolution
Early kid YouTube content consisted of simple home videos shot on smartphones. Today’s top channels employ professional production teams including:
-
-
- Videographers and editors
- Set designers and prop managers
- Writers and creative directors
- Social media managers
- Thumbnail designers and SEO specialists
-
This professionalization has raised the barrier to entry for new creators while dramatically improving content quality across the industry.
The Role of Parents and Family
Behind every successful kid YouTuber is a family managing the business and protecting the child’s interests—at least in theory. The best-managed channels treat the endeavor as a family business with clear roles:
-
-
- The child performer provides the on-camera talent and creative spark
- Parent-managers handle business decisions and protect their child’s welfare
- Professional advisors provide specialized expertise in areas like contract negotiation and tax planning
-
However, this arrangement can create complicated dynamics around child labor, earnings management, and the pressure placed on young performers.
Legal Structures and Financial Protection
Savvy families establish business entities—typically LLCs—to manage their YouTube empires. This provides liability protection and tax advantages. Many also establish Coogan accounts or similar trust arrangements to protect a portion of the child’s earnings for their future use.
Controversies and Regulations Shaping the Industry
The explosive growth of kid YouTube channels has attracted regulatory scrutiny and sparked important debates about child welfare, privacy, and advertising ethics.
COPPA and Platform Changes
The FTC’s enforcement of COPPA against YouTube in 2019 fundamentally changed children’s content monetization. YouTube paid a $170 million settlement and implemented significant policy changes:
-
-
- Content designation requirements: Creators must mark videos as “made for kids” if they target children under 13
- Limited data collection: Personalized advertising is prohibited on children’s content
- Disabled features: Comments, notifications, and other community features are turned off on kids’ content
- Reduced revenue: CPM rates dropped significantly when personalized ads were removed
-
These changes reduced ad revenue for children’s content by 60-70% for many creators, forcing business model adaptations and accelerating the shift toward merchandise and licensing deals.
Child Labor Concerns
Critics question whether child YouTubers should be subject to the same protections as child actors. Traditional entertainment has regulations limiting work hours and requiring financial safeguards. YouTube’s creator economy largely operates outside these frameworks.
Several states have begun addressing this gap. In 2023, Illinois passed legislation requiring parents to set aside earnings for child influencers. Other states are considering similar measures.
Advertising Ethics and Exploitation
Consumer advocacy groups have raised concerns about:
-
-
- Blurred lines between content and advertising in sponsored videos
- Inappropriate product promotion to young audiences
- Psychological manipulation through persuasive viewing and purchase encouragement
- Privacy violations when filming children without proper consent frameworks
-
These concerns led to FTC actions against several channels and increased disclosure requirements for sponsored content.
Long-Term Psychological Impact
Mental health professionals have raised questions about the long-term impact on children who grow up as content creators. Issues include:
-
-
- Pressure to perform and maintain relevance
- Loss of privacy and normal childhood experiences
- Identity formation challenges when one’s childhood is commodified
- Difficulty transitioning to non-public life if desired
-
The first generation of kid YouTubers is now reaching adolescence and young adulthood, and their experiences will provide valuable insights into these concerns.
The Future of Family YouTube Channels
As we progress through 2026, several trends are reshaping the kid YouTube landscape.
Increased Professionalization
The barrier to entry continues rising as production values and content quality improve. New creators face an established ecosystem where breaking through requires significant resources or exceptional creativity.
Platform Diversification
Smart creators no longer depend solely on YouTube. TikTok, Instagram, and emerging platforms offer additional audience reach. The most successful channels maintain presence across multiple platforms while adapting content to each platform’s unique characteristics.
Educational Content Focus
The pandemic accelerated demand for educational children’s content. Channels blending entertainment with learning consistently outperform pure entertainment. This trend appears sustainable as parents increasingly view screen time through the lens of educational value.
Aging Audiences and Creator Evolution
As the first generation of kid YouTubers ages into adolescence, their channels face a choice: evolve content to maintain relevance with the growing original audience or continually target the same young age group with fresh faces. Different channels are testing different approaches.
Increased Regulation
Expect more legislative action around child influencers. Potential regulations might address:
-
-
- Mandatory trust fund requirements
- Work hour limitations
- Enhanced privacy protections
- Stricter advertising disclosures
- Parental obligation frameworks
-
Consolidation and Acquisition
Media companies recognize the value of successful YouTube brands. Expect continued acquisitions as traditional media companies seek to capture digital-native audiences. The Moonbug acquisition represents just one example of this trend.
Technology Integration
Emerging technologies will shape content creation:
-
-
- AI-assisted production will improve editing efficiency and content personalization
- Virtual and augmented reality may create new content formats
- Improved analytics will enable more sophisticated audience understanding
- Blockchain and NFTs might create new revenue opportunities through digital collectibles
-
Frequently Asked Questions
Who is the richest kid YouTuber in 2026?
Ryan Kaji of Ryan’s World remains the richest kid YouTuber in 2026, with an estimated net worth between $100-120 million. Ryan started his channel in 2015 at age three and has since built a comprehensive media empire including merchandise at major retailers, television shows, mobile apps, and extensive licensing deals. While Vlad and Niki have gained significant ground with a combined net worth around $85 million, Ryan’s earlier start and successful diversification maintain his position at the top. His wealth stems not just from YouTube ad revenue but from substantial royalties on merchandise sales that generate hundreds of millions in retail revenue annually.
How much are Vlad and Niki worth in 2026?
Vlad and Niki have a combined estimated net worth of $80-85 million as of 2026. The Russian-American brothers operate one of YouTube’s fastest-growing children’s entertainment brands, with their content translated into 18 languages across 21 different YouTube channels. Their combined subscriber count across all channels exceeds 250 million. The brothers generate income through YouTube ad revenue, extensive merchandise licensing with major retailers worldwide, mobile applications, and branded content deals. Their Dubai-based family has partnered with Haven Global management to strategically expand their brand internationally while maintaining creative control over content that emphasizes imaginative play and adventure stories.
How do kid YouTubers make money besides YouTube ads?
Kid YouTubers generate revenue through multiple sophisticated channels. Merchandise licensing typically represents the largest income source, with successful creators earning 5-15% royalties on products sold at retailers like Walmart, Target, and Amazon—which can translate to millions when retail sales reach hundreds of millions annually. Other revenue streams include sponsored content from brands seeking youth audience exposure (individual deals can reach $200,000-500,000), television and streaming deals with traditional networks, mobile applications that generate download and in-app purchase revenue, live events and appearances, and licensed content deals. COPPA regulations have actually accelerated this diversification, as restrictions on personalized advertising reduced YouTube ad revenue by 60-70% for children’s content, forcing creators to develop alternative income sources.
What regulations affect kid YouTubers?
Kid YouTubers operate under several important regulatory frameworks. COPPA (Children’s Online Privacy Protection Act) requires platforms to obtain parental consent before collecting personal information from children under 13, leading YouTube to disable personalized advertising on content marked “made for kids,” which significantly reduces ad revenue. The FTC requires clear disclosures for sponsored content, with specific requirements that sponsorships be “clearly and conspicuously” disclosed. Some states, including Illinois, have passed laws requiring parents to set aside portions of earnings for child influencers in trust accounts similar to Coogan accounts for child actors. Traditional child labor laws generally don’t apply to YouTube creators as they’re not considered employees, though this legal gray area is receiving increasing attention. Additional regulations are emerging around privacy protections, with restrictions on filming other children without proper consent and requirements for handling viewer data appropriately.
Is Like Nastya richer than Ryan’s World?
No, Like Nastya is not richer than Ryan’s World, though she represents one of the closest competitors. Anastasia Radzinskaya, the creator behind Like Nastya, has an estimated net worth of $75-80 million in 2026, compared to Ryan Kaji’s $100-120 million. However, Like Nastya actually has more YouTube subscribers (118 million) than Ryan’s main channel (38.5 million), and her content reaches massive international audiences with translations into multiple languages. The net worth difference primarily reflects Ryan’s earlier start—he launched in 2015 while Like Nastya began in 2016—and his more developed merchandise empire. Ryan’s licensing deals with major retailers are more extensive, and his brand diversification into television, apps, and other media happened earlier, creating a wider revenue base. That said, Like Nastya’s trajectory suggests she could potentially surpass Ryan if her merchandise expansion continues at its current pace.
How much does Cocomelon make?
Cocomelon operates differently from personality-driven kid channels, as it’s an animated production rather than a personal brand. The channel, now owned by Moonbug Entertainment (purchased by Candle Media for $3 billion in 2021), generates an estimated $60-65 million annually through multiple revenue streams. With 177 million YouTube subscribers—making it one of the most-subscribed channels globally—Cocomelon earns substantial ad revenue despite COPPA limitations on children’s content. The brand’s value extends far beyond YouTube, with Netflix streaming deals, extensive merchandise licensing including toys, clothing, books, and home goods available at major retailers worldwide. Cocomelon also generates revenue from live touring shows and international licensing agreements. The channel’s nursery rhyme format and educational focus have proven remarkably resilient, with consistent viewership growth even as individual kid creator channels face audience attention fragmentation.
What happens to kid YouTubers’ earnings?
The management of kid YouTubers’ earnings varies significantly by family and jurisdiction. Responsible parents establish legal business entities (typically LLCs) to manage the channel, provide liability protection, and optimize tax treatment. Many families work with financial advisors to invest earnings in diversified portfolios including real estate, stocks, and bonds. Some states now require that a portion of earnings (typically 15-30%) be placed in trust accounts that children can access when they reach adulthood, similar to Coogan laws that protect child actors. However, no federal law requires this, and enforcement varies. The most sophisticated operations treat YouTube as a family business, with earnings supporting the entire family while ensuring the child’s financial future is secured through trusts and education funds. Unfortunately, some situations involve parents spending freely without adequate protections for the children generating the income—a concern that has prompted increasing regulatory attention and advocacy for stronger legal safeguards for child content creators.
Conclusion
The world of kid YouTubers represents a fascinating intersection of technology, entertainment, business, and family dynamics. The wealthiest children’s channels have evolved far beyond simple video uploads to become sophisticated media empires generating nine-figure valuations.
Ryan’s World maintains its position atop the rankings in 2026, though competition from Vlad and Niki, Like Nastya, and others continues intensifying. These success stories demonstrate YouTube’s power to democratize content distribution and create unprecedented opportunities for young creators to build generational wealth.
However, this industry’s growth has rightfully prompted important conversations about child welfare, labor protections, privacy, and ethical advertising. The regulatory landscape continues evolving to address these concerns, with COPPA enforcement fundamentally reshaping monetization models and state legislatures considering enhanced protections for child influencers.
The business model itself has matured significantly. Where early kid YouTubers relied almost exclusively on ad revenue, today’s successful channels operate as comprehensive brands with diverse revenue streams spanning merchandise, licensing, traditional media, and digital products. Professional management teams and sophisticated business strategies have replaced casual home video operations.
Looking ahead, the kid YouTube ecosystem will likely see continued professionalization, increased regulation, platform diversification, and ongoing evolution as creators age and audiences’ preferences shift. New technologies will create fresh opportunities while presenting novel challenges.
For families considering entering this space, the success stories offer inspiration but shouldn’t obscure the reality that breakthrough success is increasingly rare in a mature, competitive market. The channels that thrive combine exceptional content, strategic business development, and careful attention to both financial management and child welfare.
The richest kid YouTubers have proven that age is no barrier to building substantial business ventures in the digital age. Their stories will continue shaping children’s entertainment and influencing how the next generation consumes media, learns, and engages with brands. Whether this represents progress or presents concerning questions about childhood commodification depends largely on how effectively families, platforms, and regulators balance opportunity with protection.
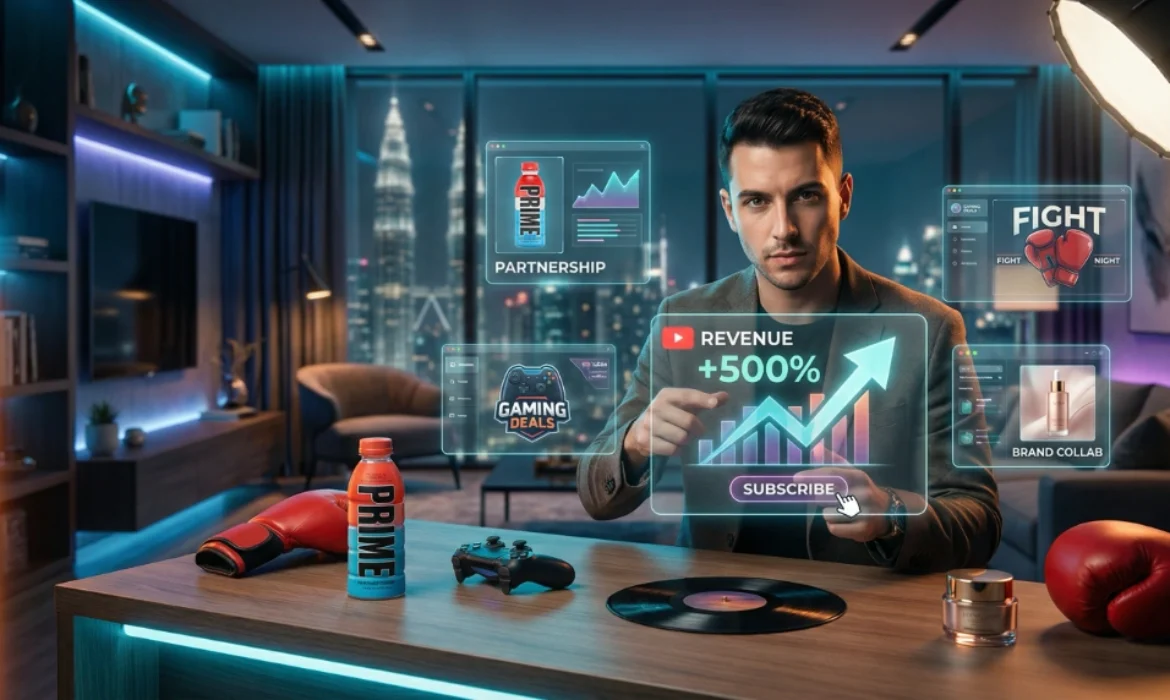
YouTuber Net Worths in 2026: Earnings of the Biggest Creators
YouTuber Net Worths in 2026: Earnings of the Biggest Creators
Estimated reading time: 12 minutes
The Evolution of YouTube Wealth
When YouTube launched in 2005, nobody predicted it would mint millionaires—and eventually billionaires—from people filming themselves in their bedrooms. Fast forward to 2026, and the platform has fundamentally reshaped wealth creation for an entire generation.
The net worth of YouTubers has evolved dramatically over the past decade. What started as modest ad revenue checks has transformed into complex business empires spanning merchandise lines, production companies, investment portfolios, and traditional media deals. Today’s top creators aren’t just content producers; they’re CEOs of multimillion-dollar enterprises.
Understanding YouTuber net worth requires looking beyond subscriber counts. The YouTube celebrity wealth landscape is built on diversification, business acumen, and the ability to convert attention into sustainable revenue streams. While platform ad revenue remains important, it typically represents just 10-30% of a top creator’s total income.
The shift has been remarkable. In 2015, making $1 million annually from YouTube was extraordinary. By 2026, the highest-earning creators generate that amount in weeks—sometimes days. This exponential growth reflects both the platform’s expansion and creators’ increasingly sophisticated monetization strategies.
How YouTubers Actually Make Money
Before examining specific creator net worth figures, it’s essential to understand the revenue mechanisms that build these fortunes.
Ad Revenue (AdSense)
YouTube’s Partner Program allows creators to earn money from advertisements displayed on their videos. Payment varies widely based on CPM (cost per thousand views), which fluctuates according to content niche, audience demographics, and advertiser demand. Finance and business content typically commands $15-30 CPM, while gaming might earn $2-8 CPM.
However, AdSense alone rarely builds substantial wealth. A channel generating 10 million monthly views might earn $20,000-$80,000—meaningful income, but far from the millions attributed to famous YouTubers’ earnings.
Sponsored Content and Brand Deals
Brand partnerships represent significantly higher earning potential. Top creators command $100,000-$500,000+ for single sponsored videos, with rates determined by audience size, engagement, and demographic alignment with advertiser goals.
These collaborations have become increasingly sophisticated, often involving long-term ambassador relationships rather than one-off promotions. Creators with authentic audience connections can negotiate profit-sharing arrangements that extend well beyond flat fees.
Merchandise and Product Lines
Merchandise has evolved from basic logo t-shirts to comprehensive product ecosystems. Successful YouTube personalities launch clothing brands, beauty lines, energy drinks, and even food products. These ventures can generate tens of millions annually when executed effectively.
The margin potential here significantly exceeds ad revenue. While YouTube takes a 45% cut of ad earnings, creators retain substantially more from direct product sales.
Business Ventures and Investments
The wealthiest creators invest their YouTube earnings into businesses, real estate, startups, and financial markets. This wealth multiplication strategy separates those with high incomes from those building generational wealth.
Some have launched media companies, talent agencies, or technology platforms. Others invest in cryptocurrency, NFTs, or traditional stocks. These diversified portfolios often represent the largest component of top YouTuber income over time.
Top YouTuber Net Worths in 2026
The following figures represent estimated net worth based on publicly available information, industry reporting, and financial disclosures. Exact figures remain difficult to verify as most creators maintain private finances.
| Creator | Estimated Net Worth (2026) | Primary Content Niche | Key Revenue Sources |
|---|---|---|---|
| Jeffree Star | $200-220 million | Beauty/Lifestyle | Jeffree Star Cosmetics, YouTube ads, merchandise |
| PewDiePie | $120-140 million | Gaming/Commentary | YouTube ads, merchandise, book deals, investments |
| Logan Paul | $100-125 million | Entertainment/Boxing | PRIME drink, boxing, YouTube, NFTs, podcasting |
| Jake Paul | $90-110 million | Entertainment/Boxing | Boxing purses, PRIME drink, YouTube, sponsorships |
| KSI | $80-100 million | Music/Entertainment/Boxing | PRIME drink, music sales, boxing, YouTube, Sidemen |
| DanTDM | $75-90 million | Gaming | YouTube ads, merchandise, book sales, tours |
| Unspeakable | $65-80 million | Gaming | YouTube ads, merchandise, gaming investments |
Jeffree Star: The Beauty Empire Builder
Jeffree Star tops many creator net worth lists not because of YouTube ad revenue, but due to Jeffree Star Cosmetics. His beauty company generates an estimated $100+ million in annual revenue, dwarfing his YouTube earnings. Star represents the archetype of creator-as-entrepreneur, using YouTube primarily as marketing infrastructure for his broader business empire.
His controversial persona and luxury lifestyle content maintain engagement, but the substantive wealth comes from product sales, real estate investments, and business holdings. This model demonstrates how YouTube serves as a foundation rather than the complete structure.
PewDiePie: The OG Digital Creator
Felix Kjellberg, better known as PewDiePie, held the most-subscribed individual creator title for years. His net worth reflects over a decade of consistent content creation, smart business decisions, and early platform adoption advantages.
Beyond YouTube ad revenue, PewDiePie has monetized through book deals, mobile games, merchandise collaborations, and strategic investments. His relatively scandal-free later career (after early controversies) has maintained brand partnership viability while his loyal fanbase ensures consistent revenue across multiple channels.
The Paul Brothers: Boxing Meets Content Creation
Logan Paul and Jake Paul represent a newer wealth-building model: leveraging YouTube fame into celebrity boxing careers and business ventures. Their PRIME hydration drink, co-founded with KSI, has become a global phenomenon worth hundreds of millions.
Both brothers have successfully transitioned from purely digital content to mainstream entertainment, commanding multi-million dollar boxing purses while maintaining YouTube presence. Their net worth of YouTubers like the Pauls shows how platform fame can springboard into traditional celebrity wealth.
KSI: The Multi-Hyphenate Creator
Olajide “JJ” Olatunji (KSI) has diversified more than almost any creator. His income streams span YouTube content, chart-topping music, boxing matches, the PRIME beverage company, and the Sidemen collective—a creator group with its own merchandise, restaurants, and media productions.
This portfolio approach hedges against any single revenue stream declining. When YouTube algorithm changes affect views, music or PRIME sales compensate. This strategic diversification exemplifies sophisticated wealth management in the influencer economy.
DanTDM: Family-Friendly Gaming Dominance
Daniel Middleton built one of YouTube’s most successful gaming channels focused on family-friendly content. His net worth stems from extraordinarily high view counts (billions annually), extensive merchandise lines, bestselling books, and live touring.
DanTDM’s appeal to younger audiences creates substantial merchandise opportunities, as parents spend on products for children. His brand remains remarkably consistent, avoiding the controversies that have damaged other creators’ earning potential.
Unspeakable: The Gaming Entrepreneur
James Rallison operates multiple gaming channels while investing in gaming-related businesses and technology. His approach focuses on content volume across channels, maximizing ad revenue through quantity while maintaining quality sufficient to retain audiences.
Unspeakable’s merchandise operation and gaming investments complement YouTube earnings, creating a comprehensive gaming media business that extends beyond single-platform dependence.
Breaking Down the Earnings: Revenue Streams Explained
Understanding digital creator income requires examining how different revenue sources interact and scale.
The 70/30 Rule
Many top creators follow an unofficial 70/30 rule: approximately 70% of income comes from businesses, investments, and ventures outside direct YouTube monetization, while 30% comes from platform-native revenue (ads, memberships, Super Chat).
This ratio varies by creator. Beauty and lifestyle influencers often see even higher percentages from product lines, while pure entertainment channels might rely more heavily on ad revenue and sponsorships.
Revenue Scaling and Diminishing Returns
Ad revenue doesn’t scale linearly with views. A creator doubling their viewership rarely doubles their ad income due to CPM variations, advertiser budgets, and audience engagement patterns.
However, business ventures can scale dramatically. A successful product launch might generate 10x the revenue of previous efforts if it captures market demand effectively. This explains why creators increasingly focus on businesses rather than maximizing upload frequency.
Geographic Income Variations
YouTube celebrity wealth concentrates among English-speaking creators, particularly Americans, due to higher CPM rates and larger addressable markets for merchandise and sponsorships. A creator with 5 million US-based subscribers typically earns substantially more than one with 5 million subscribers in lower-CPM regions.
This geographic advantage extends to business ventures, as US and UK creators access larger investment markets, more sophisticated business infrastructure, and higher consumer spending power.
The Business Empire Approach: Beyond Ad Revenue
The most successful creators don’t view YouTube as their business—it’s their marketing platform for the actual business.
Vertical Integration
Smart creators vertically integrate their operations, controlling production, distribution, and merchandising. The Sidemen collective exemplifies this, operating:
- Multiple YouTube channels
- Sidemen Clothing merchandise line
- Sides restaurant chain
- XIX Vodka brand
- Original streaming content
This integration captures value at every stage rather than depending on a single revenue point.
Licensing and Media Deals
Traditional media has increasingly recognized YouTube talent. Creators license content to streaming platforms, publish books through major publishers, and develop television shows. These deals provide substantial upfront payments plus ongoing royalties.
PewDiePie’s book deal, DanTDM’s graphic novels, and numerous creator-led Netflix and Hulu shows demonstrate this revenue stream’s potential.
Real Estate and Investment Portfolios
The wealthiest creators invest heavily in real estate and diversified portfolios. Jeffree Star owns multiple multimillion-dollar properties. Jake Paul has purchased several homes as investments. These assets appreciate while generating rental income or serving as business expense write-offs.
Investment portfolios typically include stocks, bonds, cryptocurrency, and startup equity. These financial instruments compound wealth far beyond what content creation alone provides.
Comparing YouTube Star Earnings Across Niches
Different content categories generate vastly different income potential.
| Content Niche | Average CPM | Sponsorship Rates | Merchandise Potential | Business Scalability |
|---|---|---|---|---|
| Finance/Business | $15-30 | Very High | Low | Very High |
| Beauty/Fashion | $8-15 | Very High | Very High | Very High |
| Gaming | $2-8 | High | High | High |
| Comedy/Entertainment | $4-10 | Medium-High | Medium | Medium |
| Vlogging/Lifestyle | $5-12 | High | Medium-High | Medium-High |
| Education | $10-20 | Medium | Low-Medium | Medium |
Why Beauty Dominates Net Worth Lists
Beauty creators consistently rank among the wealthiest because of exceptional product launch potential. An engaged audience of beauty enthusiasts actively seeks product recommendations, creating ideal conditions for launching cosmetics, skincare, or fashion lines.
The margins on beauty products are substantial—often 70-80% after manufacturing costs. A moderately successful product launch can generate millions in profit, far exceeding years of ad revenue.
Gaming’s Volume Approach
Gaming creators typically earn lower CPMs but compensate through massive view counts. Channels posting daily content can accumulate billions of annual views, generating substantial ad revenue despite lower per-view rates.
Gaming merchandise also performs well with dedicated fanbases, though physical product margins are lower than beauty items.
The Business Content Premium
Finance and business channels earn the highest CPMs because advertisers targeting these audiences (financial services, business software, investment platforms) pay premium rates. However, these audiences are often smaller and merchandise potential is limited.
The creator personality net worth in business content comes from consulting, courses, speaking engagements, and business investments rather than traditional merchandise.
The Influencer Economy: What Powers Digital Creator Income
The broader influencer economy context helps explain individual creator wealth.
Market Size and Growth
According to Statista, the global influencer marketing industry reached approximately $24 billion in 2024 and continues growing 15-20% annually. This expanding market creates more opportunities and higher rates for established creators.
Brand marketing budgets increasingly shift from traditional advertising to influencer partnerships, recognizing superior engagement rates and audience targeting capabilities.
Platform Evolution and Creator Support
YouTube has enhanced creator monetization options through:
- YouTube Premium revenue sharing
- Super Chat and Super Stickers
- Channel memberships
- YouTube Shorts Fund
- Shopping integrations
These features diversify platform-native income beyond traditional ads, though they still represent smaller percentages of top creator earnings compared to external ventures.
The Attention Economy
Fundamentally, famous YouTubers’ earnings derive from capturing and monetizing attention. The average person spends 40+ minutes daily on YouTube. Creators who consistently capture portions of this attention gain valuable assets: audiences that can be directed toward products, services, and content.
This attention has quantifiable value. Brands pay for access. Products sell because trusted creators recommend them. The influencer net worths we see today represent successful attention capture and strategic monetization over years.
Sustainability Concerns
The influencer economy faces questions about long-term sustainability. Algorithm changes can decimate viewership overnight. Audience tastes shift. Controversies can end careers.
Successful creators recognize these risks and diversify accordingly. The highest net worth YouTubers treat their channels as marketing platforms for diversified business portfolios rather than relying on platform income alone.
Key Takeaways
-
- The wealthiest YouTubers earn the majority of their income outside traditional ad revenue through businesses, merchandise, investments, and brand deals
- Gaming, lifestyle, and business content creators dominate the highest net worth brackets
- Creator net worth can fluctuate dramatically based on business ventures, controversies, and platform algorithm changes
- Most top-earning YouTube personalities have diversified into multiple revenue streams to build sustainable wealth
- The influencer economy has matured into a sophisticated business ecosystem worth billions annually
Wealth Building Takes Time: Most top earners have been creating content for 8-15+ years, building audiences and learning business skills progressively.
Diversification Is Essential: No top creator relies solely on YouTube ad revenue. Multiple income streams protect against platform changes and provide scaling opportunities.
Business Acumen Matters More Than Creativity: The wealthiest creators are often better entrepreneurs than entertainers, leveraging their audience into sustainable businesses.
Timing and Luck Play Roles: Early platform adoption, viral moments, and being in the right niche at the right time significantly impact earning potential.
Audience Quality Exceeds Quantity: A highly engaged million-subscriber audience often generates more revenue than a passive ten-million-subscriber base.
The Platform Is Marketing Infrastructure: Successful creators view YouTube as a customer acquisition channel for their actual businesses rather than the business itself.
Frequently Asked Questions
Who is the richest YouTuber in 2026?
Jeffree Star holds the title of wealthiest YouTuber in 2026 with an estimated net worth between $200-220 million. However, his wealth primarily comes from Jeffree Star Cosmetics rather than YouTube ad revenue. His cosmetics company generates over $100 million annually, demonstrating how top creators build wealth through businesses rather than platform monetization alone. Other contenders include PewDiePie, Logan Paul, and Jake Paul, all with net worths exceeding $100 million through diversified business ventures.
How much do YouTubers actually make per view?
YouTubers typically earn $0.001 to $0.003 per view from ad revenue, translating to roughly $1-3 per thousand views (CPM). However, this varies dramatically based on content niche, audience location, and advertiser demand. Finance content might earn $15-30 CPM while gaming earns $2-8 CPM. More importantly, ad revenue represents only a small fraction of how successful creators make money. Sponsorships, merchandise, and business ventures generate far more income than direct ad payments. A creator with 10 million monthly views might earn $20,000-$80,000 from ads but potentially $200,000+ from sponsorships and products.
Can you become a millionaire from YouTube?
Yes, thousands of creators have become millionaires through YouTube, though the path requires more than simply uploading videos. Success demands consistent content creation over several years, audience building, and most critically, business development beyond ad revenue. The creators who reach millionaire status typically diversify into merchandise, brand deals, product lines, or business ventures. Relying solely on ad revenue makes millionaire status difficult unless you maintain extraordinarily high view counts over extended periods. Strategic business thinking matters more than pure content creation talent.
What YouTuber makes the most money annually?
Annual earnings fluctuate more than net worth, but Logan Paul and Jake Paul likely lead annual income due to boxing purses (often $10-20+ million per fight), PRIME drink profits (potentially $50+ million annually), and combined YouTube/sponsorship income. Jeffree Star’s cosmetics company likely generates the highest consistent business revenue. KSI also ranks extremely high due to PRIME, music, boxing, and the Sidemen collective. Annual income can vary dramatically based on product launches, boxing matches, or business deals, making year-to-year comparisons less meaningful than examining long-term wealth accumulation patterns.
How do YouTubers get paid?
YouTubers receive payment through multiple channels. Google AdSense pays ad revenue monthly once creators reach $100 minimum threshold, with payments arriving 30-60 days after the month ends. Sponsorships typically pay via direct invoice on negotiated terms (often net-30 or net-60). Merchandise and product sales generate revenue through e-commerce platforms, with creators receiving wholesale profit or retail margins minus platform fees. Business ventures, investments, and media deals follow standard business payment structures. Most successful creators establish business entities (LLCs or corporations) to manage multiple revenue streams professionally and optimize tax situations.
Why do gaming YouTubers make less per view than other creators?
Gaming content earns lower CPMs ($2-8 versus $15-30 for business content) because advertisers pay less to reach gaming audiences. Gaming viewers skew younger with less disposable income, making them less valuable to many advertisers compared to older audiences watching finance or business content. Additionally, gaming content abundance creates ad inventory surplus, driving down prices. However, gaming creators compensate through massive view counts (posting daily content that generates billions of views annually) and strong merchandise sales to engaged fanbases. While CPM is lower, total earnings can exceed higher-CPM niches through volume and alternative revenue streams.
Do YouTubers pay taxes on their earnings?
Yes, YouTubers must pay taxes on all income including ad revenue, sponsorships, merchandise sales, and business profits. In the United States, creators typically file as self-employed individuals or through business entities, paying both income tax and self-employment tax (covering Social Security and Medicare). Tax rates depend on total income, with top earners paying 37% federal income tax plus state taxes. Most successful creators work with accountants to properly categorize expenses (equipment, home office, travel), establish appropriate business structures, and manage tax obligations across multiple income streams and potentially multiple countries if they have international business operations.
Conclusion
The net worth of YouTubers in 2026 reflects a mature digital economy where content creation serves as the foundation for broader business empires. The days of relying solely on ad revenue have passed. Today’s wealthiest creators are entrepreneurs who happen to use YouTube as their primary marketing channel.
Understanding YouTube star net worth requires looking beyond subscriber counts and view metrics to examine the complete business ecosystem each creator has built. Jeffree Star’s cosmetics empire, the Paul brothers’ boxing and PRIME ventures, KSI’s multi-platform presence, and PewDiePie’s consistent monetization all demonstrate different paths to substantial wealth.
The common thread connecting all top earners is strategic thinking beyond the platform. They recognize YouTube’s power as an audience-building tool but don’t mistake it for the business itself. The business is whatever converts that audience’s attention into sustainable revenue—products, services, experiences, or content.
For aspiring creators, these examples provide valuable lessons. Success requires patience, business acumen, diversification, and the willingness to take calculated risks on ventures beyond comfortable content creation. The influencer economy continues maturing, creating opportunities for those who approach it strategically.
The creator net worth landscape will continue evolving as platforms change, new monetization methods emerge, and audience preferences shift. Those who adapt, diversify, and think entrepreneurially will build lasting wealth regardless of platform-specific changes.
The YouTube millionaires and multi-millionaires of 2026 aren’t just talented creators—they’re business leaders who recognized opportunity early, built loyal audiences, and leveraged attention into sustainable enterprises. Their success stories offer both inspiration and practical blueprints for the next generation of digital entrepreneurs.
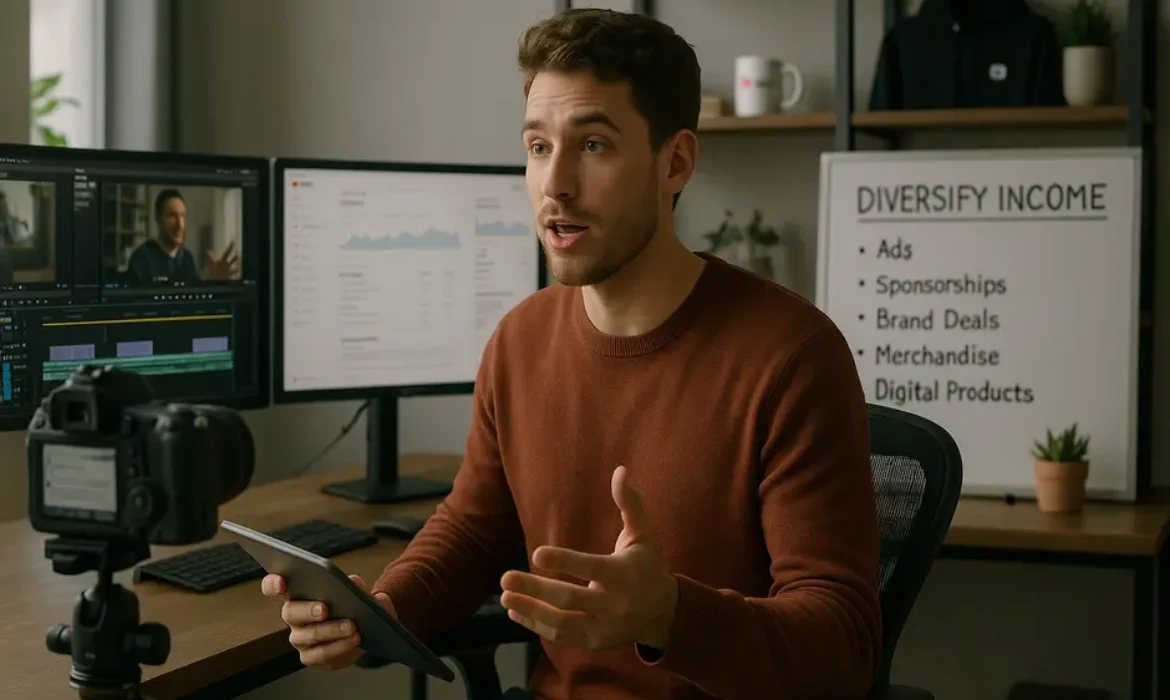
How YouTubers Make Money in 2026: Ads, Sponsorships, Brands, and More
How YouTubers Make Money in 2026: Ads, Sponsorships, Brands, and More
Estimated reading time: 12 minutes
Key Takeaways
-
- YouTube creators typically earn between $2-$12 per 1,000 views through AdSense, but ad revenue represents only 20-40% of total income for successful channels
- Sponsorships generate 3-10 times more revenue than ads for creators with over 100,000 subscribers
- The creator economy has matured into a sophisticated business ecosystem worth over $250 billion globally
- Diversification across multiple revenue streams is essential for sustainable creator income
- YouTube’s payment system operates on a revenue-sharing model, with creators receiving 55% of ad revenue generated on their content
When Grace Mitchell uploaded her first cooking tutorial in 2019, she had no idea that five years later, her channel would generate over $480,000 annually. More surprising? Only $68,000 of that comes from YouTube ads.
This represents the modern reality of how YouTubers make money. The platform has evolved far beyond simple ad revenue, creating a sophisticated ecosystem where creators function as multimedia entrepreneurs, building diversified income portfolios that would impress any business consultant.
Understanding how YouTube pays creators—and how successful YouTubers actually structure their income—requires looking beyond the romantic notion of “getting paid to make videos.” The creator economy operates on multiple revenue layers, each with distinct earning potential, requirements, and strategic considerations.
Let’s break down exactly how this business model works in 2026.
The Evolution of YouTube Creator Revenue
The creator revenue model has undergone dramatic transformation since YouTube introduced the Partner Program in 2007. What started as a simple ad-revenue sharing arrangement has evolved into a complex financial ecosystem that mirrors traditional media companies.
Between 2020 and 2026, three major shifts reshaped how creators earn money:
Direct platform monetization expanded significantly. YouTube introduced Super Thanks, channel memberships, Super Chat, and YouTube Shopping features that allow creators to capture revenue directly from their audiences without relying solely on advertisers.
Brand partnerships became more sophisticated. Companies now work with creators through long-term ambassadorships rather than one-off sponsored videos, creating stable recurring income that rivals or exceeds traditional advertising revenue.
Audience ownership became paramount. Smart creators recognized that building email lists, community platforms, and owned digital properties provides income security that platform-dependent revenue cannot match.
According to Statista’s latest creator economy research, the global creator economy reached $254 billion in 2025, with YouTube representing approximately 35% of that market. This growth reflects not just more creators joining the platform, but existing creators becoming more sophisticated in monetizing their audiences.
Google AdSense: The Foundation of YouTube Income
Despite being just one component of creator income, understanding how YouTube’s advertising system works remains essential. Google AdSense for YouTube operates on a CPM (cost per mille, or cost per thousand impressions) and CPC (cost per click) model, where creators earn money when viewers watch or interact with ads displayed on their content.
How YouTube Ad Revenue Actually Works
When you join the YouTube Partner Program, you gain access to several ad formats:
Display ads appear beside your video on desktop. Overlay ads are semi-transparent banners that appear on the lower portion of videos. Skippable and non-skippable video ads play before, during, or after content. Bumper ads are six-second non-skippable messages. Sponsored cards show relevant products featured in videos.
YouTube takes 45% of advertising revenue, leaving creators with 55%. This might seem steep, but it covers massive infrastructure costs including video hosting, bandwidth, content delivery networks, and the platform’s recommendation algorithm that drives views.
What Determines Your AdSense Earnings
The amount creators actually earn varies enormously based on several factors:
| Factor | Impact on Earnings | Example Range |
|---|---|---|
| Content Niche | High | Finance videos: $12-25 CPM; Gaming: $2-6 CPM |
| Viewer Geography | High | US viewers: 3-5x more valuable than developing markets |
| Viewer Age | Moderate | 25-45 demographic commands premium rates |
| Video Length | Moderate | 8+ minute videos allow mid-roll ads, doubling revenue potential |
| Watch Time | High | Higher retention = more ad opportunities |
| Seasonality | Moderate | Q4 CPMs increase 30-60% during holiday shopping |
A channel focusing on personal finance with a primarily US-based audience aged 30-50 might earn $15 per 1,000 views, while a gaming channel with a younger international audience might earn $3 per 1,000 views on the same view count.
YouTube Partner Program Requirements
Accessing AdSense revenue requires meeting specific thresholds:
-
-
- 1,000 subscribers
- 4,000 valid watch hours in the previous 12 months (or 10 million valid public Shorts views)
- Compliance with all YouTube monetization policies
- Active AdSense account linked to your channel
- Two-step verification enabled
-
These requirements, updated periodically, ensure creators have established audiences before accessing monetization features. For detailed current requirements, YouTube’s official Partner Program documentation provides comprehensive guidelines.
Realistic AdSense Income Expectations
Here’s what typical channels actually earn through ads alone:
A channel generating 100,000 monthly views in a moderate-CPM niche (lifestyle, education, general entertainment) with $4-6 CPM earns approximately $400-600 monthly from ads. That same channel in a high-CPM niche (finance, technology, business) with $10-15 CPM earns $1,000-1,500 monthly.
A channel hitting 1 million monthly views earns $4,000-15,000 monthly depending on niche, geography, and viewer demographics.
These numbers explain why relying solely on AdSense creates financial vulnerability. A single algorithm change, shifting viewer demographics, or platform policy update can significantly impact income overnight.
Sponsorship Income: Where Real Money Lives
Ask any creator earning over $100,000 annually where their money comes from, and most will point to sponsorships and brand deals. This revenue stream typically generates 3-10 times more income than AdSense for established channels.
How YouTube Sponsorships Work
Brands pay creators to feature their products or services within video content. Unlike traditional advertising that YouTube controls, sponsorships represent direct business relationships between creators and companies.
Three primary sponsorship models dominate:
Dedicated videos feature a single sponsor for an entire video, typically commanding $20-100 per 1,000 subscribers depending on engagement and niche. A channel with 200,000 subscribers might charge $4,000-20,000 for a dedicated sponsorship.
Integrated segments place a 60-90 second sponsor message within regular content. These typically generate 60-70% of dedicated video rates but allow creators to maintain content variety.
Ongoing partnerships establish long-term relationships where creators regularly feature sponsors across multiple videos, often generating monthly retainer income ranging from $3,000 to $50,000+ for larger channels.
What Determines Sponsorship Value
Sponsors care less about subscriber counts and more about actual business results. Several factors determine what brands will pay:
Audience alignment matters most. A skincare brand pays premium rates to a beauty channel with 75,000 engaged subscribers rather than a general entertainment channel with 300,000 loosely connected viewers.
Engagement rates prove audience connection. Channels with 4-8% engagement rates (likes, comments, shares relative to views) command 2-3x higher sponsorship rates than channels with 1-2% engagement despite similar subscriber counts.
Conversion history increasingly determines rates. Creators who track affiliate codes and demonstrate that their audience actually purchases sponsored products can demand significantly higher fees.
Content quality and production value signal professionalism that brands trust with their marketing budgets.
Finding and Securing Sponsorships
Creators access sponsorships through several channels:
Direct outreach works when you identify brands that align with your content and audience. A professional media kit outlining audience demographics, engagement metrics, previous partnerships, and rate card streamlines this process.
Sponsorship platforms like Grapevine, IZEA, AspireIQ, and FameBit connect creators with brands seeking partnerships. These platforms simplify discovery but typically take 10-30% commission.
Talent agencies and management companies represent larger creators, handling negotiation, contracts, and relationship management in exchange for 15-25% of sponsorship revenue.
Organic brand interest occurs when channels grow large enough that brands proactively reach out. This usually happens around 50,000-100,000 subscribers in most niches.
Sponsorship Disclosure and Authenticity
Federal Trade Commission guidelines and YouTube policies require clear sponsorship disclosure. More importantly, audience trust—your most valuable asset—depends on authentic partnerships.
Successful creators maintain strict standards about which sponsorships they accept, only partnering with products they genuinely use or believe provide value to their audience. This selectivity preserves credibility while often allowing higher rates, since sponsors recognize the value of authentic endorsements.
Brand Deals and Partnerships
While sponsorships focus on direct product promotion within videos, brand deals encompass broader collaborative relationships between creators and companies.
Types of Brand Partnerships
Ambassador programs establish creators as ongoing faces of brands, generating monthly retainer income plus usage fees for content that appears in brand marketing. These relationships often span 6-24 months and provide income stability that episodic sponsorships cannot match.
Content collaborations involve brands funding content creation aligned with their marketing goals. A travel brand might fund a creator’s trip to a specific destination, covering all expenses plus a creation fee of $10,000-100,000 depending on the creator’s reach and production quality.
Licensing agreements allow brands to repurpose creator content across their marketing channels—social media, websites, email campaigns, even television commercials. Usage rights can generate $5,000-250,000+ depending on scope, duration, and distribution channels.
Product development partnerships bring creators into the design process for new products, often including royalty agreements on sales. Beauty creators frequently launch product lines with established cosmetics companies, earning both upfront fees and ongoing royalties.
The Shift Toward Long-Term Relationships
Smart brands recognized that one-off sponsorships generate limited impact compared to sustained partnerships. In 2026, major advertisers increasingly structure creator relationships as ongoing collaborations rather than transactional arrangements.
This shift benefits creators through predictable recurring income and deeper creative integration, while brands benefit from authentic association that builds over time rather than appearing as obvious paid promotion.
Merchandising and Product Lines
Physical and digital products represent increasingly significant revenue streams for creators with engaged audiences. Unlike advertising-dependent income, merchandise revenue scales with audience size and loyalty while building tangible assets with long-term value.
Creator Merchandise Revenue
Print-on-demand platforms like Teespring (now Spring), Printful, and Printify allow creators to sell branded merchandise without inventory investment. While convenient, margins typically range from just $4-8 per item sold.
Custom merchandise production through manufacturers provides better margins ($12-25 per item) but requires upfront investment, inventory management, and fulfillment logistics.
Successful merchandise operations share common characteristics:
Strong brand identity translates visual style and catchphrases into desirable products. Creators with distinctive aesthetics and memorable sayings naturally generate more merchandise interest.
Quality over quantity matters more than product variety. Three excellent products that your audience actually wants outperform twenty mediocre options.
Authentic integration means featuring merchandise naturally in content rather than constant selling. Audiences notice the difference between creators who love their products and those simply pushing inventory.
Realistic revenue expectations: A channel with 100,000 engaged subscribers might generate $2,000-8,000 monthly merchandise revenue. Channels with exceptionally strong brand identity and audience connection can exceed $50,000 monthly at similar subscriber counts.
Digital Products and Course Creation
Many creators transition expertise into educational products:
Online courses teaching skills related to channel content generate significant revenue. Creators with 50,000 subscribers successfully sell courses priced at $197-997, generating $10,000-100,000+ in launches.
Ebooks and guides provide lower-priced entry points ($19-47) that convert larger audience percentages while establishing authority.
Templates and tools serve specific audience needs. A productivity creator might sell Notion templates, a photography creator might sell Lightroom presets, and a business creator might sell financial spreadsheets.
Membership communities combine educational content, community access, and ongoing support through platforms like Patreon, Circle, or Kajabi. Successful membership programs generate $10-100+ monthly per member, creating predictable recurring revenue.
Additional Revenue Streams Modern Creators Use
Sophisticated creators stack multiple income sources to build resilient businesses less vulnerable to platform changes or algorithm updates.
YouTube-Specific Features
Channel memberships ($4.99-$24.99 monthly) provide perks like exclusive content, badges, and emojis to paying subscribers. Channels with highly engaged audiences convert 1-5% of viewers into members.
Super Chat and Super Thanks allow viewers to pay for highlighted messages during live streams or show appreciation on regular videos. Live-streaming creators generate $500-10,000+ monthly through these features depending on audience size and engagement.
YouTube Shorts Fund and revenue sharing now allows creators to monetize short-form content through ad revenue sharing similar to regular videos, though CPM rates typically run lower than long-form content.
Affiliate marketing involves promoting products with trackable links, earning commissions on resulting sales. Amazon Associates, ShareASale, and CJ Affiliate represent popular networks. Tech reviewers, lifestyle creators, and educators particularly benefit from affiliate revenue, which can exceed AdSense income for channels with purchase-intent audiences.
Platform Diversification
Successful creators rarely depend exclusively on YouTube:
Podcasting allows content repurposing while accessing distinct sponsorship markets. Many YouTube creators convert their video content into podcast formats, effectively doubling reach and revenue opportunities.
Newsletter and email marketing builds owned audience assets that platforms cannot affect. Creators with 100,000 email subscribers often generate more revenue per subscriber than their YouTube audience.
Consulting and services leverage expertise demonstrated through content. Business and educational creators frequently earn $150-500+ hourly consulting, generating substantial income from relatively few clients.
Speaking engagements at conferences and corporate events pay $2,000-50,000+ per appearance for established creators, providing high-margin revenue opportunities.
How Much YouTubers Actually Make: Real Numbers
The question “how much do YouTubers make” lacks a simple answer because income varies dramatically based on niche, monetization sophistication, audience size, and engagement quality.
Income by Subscriber Count
These ranges reflect creators who actively pursue multiple revenue streams:
| Subscriber Range | Monthly Income Range | Primary Revenue Sources |
|---|---|---|
| 10,000-50,000 | $500-$3,000 | AdSense, occasional sponsorships, affiliate |
| 50,000-100,000 | $2,000-$10,000 | Sponsorships, AdSense, affiliate, merchandise |
| 100,000-500,000 | $8,000-$50,000 | Sponsorships, brand deals, AdSense, products |
| 500,000-1M | $30,000-$150,000 | Major sponsorships, brand partnerships, multiple revenue streams |
| 1M-5M | $100,000-$500,000+ | Diversified business including products, services, investments |
| 5M+ | $400,000-$10M+ | Media company operations with teams and multiple business lines |
These figures represent monthly income for creators actively monetizing. Channels that rely exclusively on AdSense typically earn 60-80% less than these ranges.
Income by Niche
Content category dramatically affects earning potential:
High-earning niches (finance, business, technology, real estate, legal) benefit from premium CPM rates ($12-25+) and high-value sponsorship opportunities. A 100,000-subscriber finance channel often outerns a 500,000-subscriber entertainment channel.
Moderate-earning niches (lifestyle, education, health, parenting, cooking) see standard CPM rates ($4-8) with solid sponsorship markets from consumer brands.
Lower-earning niches (gaming, general entertainment, vlogs, comedy) face lower CPM rates ($2-5) and more competitive sponsorship landscapes, though merchandise and membership revenue can compensate.
Case Study: Diversified Creator Income
Consider a creator with 250,000 subscribers in the personal development niche generating 600,000 monthly views:
-
-
- AdSense Revenue: $4,200 (assuming $7 CPM)
- Sponsorships: $12,000 (two monthly sponsorships at $6,000 each)
- Affiliate Marketing: $3,800 (promoting books, courses, tools)
- Course Sales: $8,500 (ongoing sales of signature online course)
- Channel Memberships: $2,400 (400 members at $5.99 monthly)
- Merchandise: $1,600 (supplementary revenue)
-
Total Monthly Income: $32,500 ($390,000 annually)
This breakdown illustrates that AdSense represents just 13% of total revenue, while direct audience monetization and business partnerships drive the majority of income.
The YouTube Payment System Explained
Understanding how YouTube actually pays creators clarifies timing, requirements, and processes for accessing your earnings.
YouTube Partner Program Payment Structure
YouTube pays creators monthly for earnings exceeding $100. Payments arrive between the 21st and 26th of each month for the previous month’s earnings. For example, January earnings are paid in late February.
The payment process follows this timeline:
-
-
- Day 1-30 of the month: Revenue accrues from ads, Super Chat, memberships, and other YouTube monetization features
- Day 7-12 of the following month: YouTube calculates finalized earnings, accounting for invalid traffic, advertiser adjustments, and revenue sharing calculations
- Day 21-26 of the following month: Payment is issued to your linked AdSense account
- Payment arrival: Depends on your payment method—wire transfer (typically 2-5 business days), check (2-4 weeks), or other regional payment options
-
Payment Thresholds and Methods
Different monetization features have varying payment thresholds:
-
-
- AdSense revenue: $100 minimum
- YouTube Premium revenue: Included with AdSense, same $100 threshold
- Channel memberships: $100 minimum
- Super Chat and Super Thanks: $100 minimum
- Merchandise shelf: Paid directly by your merchandise partner
-
Geographic location determines available payment methods. Most countries support wire transfer and checks, while some regions offer additional options like Western Union Quick Cash or Rapida.
Tax Considerations
YouTube requires tax information from all creators in the Partner Program. US creators submit W-9 forms, while international creators submit W-8BEN forms.
For US creators, YouTube reports earnings over $600 annually via 1099 forms. These earnings constitute self-employment income subject to income tax and self-employment tax.
International creators may face US tax withholding on US-based viewers unless tax treaties between their country and the US reduce or eliminate withholding. Google’s AdSense tax requirements page provides detailed guidance for various situations.
Consulting a tax professional familiar with creator economy taxation ensures compliance while optimizing deductions for equipment, software, home office space, and other business expenses.
Building a Sustainable Creator Business
Successful creators approach YouTube as a business requiring strategy, systems, and diversification rather than hoping for viral success.
Diversification Strategy
Financial resilience requires multiple revenue streams. Dependence on any single income source—whether AdSense, sponsorships, or merchandise—creates vulnerability to market changes, platform policy shifts, or algorithm updates.
The ideal revenue mix spreads income across:
-
-
- Platform revenue (AdSense, YouTube features): 20-35%
- Sponsorships and brand deals: 30-45%
- Products and services: 20-30%
- Affiliate and other: 10-20%
-
This distribution ensures that problems with any single revenue source won’t devastate overall income.
Building Beyond the Platform
Smart creators recognize that YouTube serves as a distribution channel rather than the entirety of their business. Platform-independent assets provide long-term security:
Email lists allow direct audience communication unaffected by algorithm changes. Converting 5-10% of viewers into email subscribers creates a valuable owned asset.
Independent websites host content, products, and community features while improving search visibility and establishing professional presence.
Multiple platform presence distributes audience across YouTube, Instagram, podcasts, newsletters, and other channels, reducing dependence on any single platform’s continued favor.
Intellectual property development creates lasting value through courses, books, frameworks, and methodologies that continue generating revenue independent of new content creation.
Business Infrastructure
Professional creators implement systems supporting sustainable operations:
Separate business entities (LLC or S-Corp) provide liability protection and tax advantages once income exceeds $50,000-75,000 annually.
Business bank accounts and credit cards separate personal and business finances, simplifying accounting and establishing business credit.
Accounting systems track income and expenses across multiple sources, essential for tax compliance and financial planning.
Team building allows scaling beyond individual capacity. Successful creators hire editors, thumbnail designers, researchers, and community managers to increase output while maintaining quality.
Contract and legal support protects your interests in sponsorship agreements, brand deals, partnership arrangements, and intellectual property licensing.
Long-Term Value Creation
The creator economy increasingly rewards expertise and unique perspective over entertainment alone. Channels that educate, solve problems, or provide genuine value build audiences that monetize more effectively than pure entertainment channels.
Consider your channel as building a media company around your expertise or passion, systematically developing assets—audience, content library, products, brand partnerships, intellectual property—that compound in value over time.
Frequently Asked Questions
How much money do YouTubers make per 1,000 views?
YouTubers typically earn between $2 and $12 per 1,000 views through AdSense, with significant variation based on content niche, viewer geography, and audience demographics. Finance and business channels often exceed $15 per 1,000 views, while gaming and entertainment channels frequently fall between $2 and $5 per 1,000 views.
This represents only ad revenue. When including sponsorships, affiliate income, and other monetization methods, total revenue per 1,000 views for established creators often reaches $20-50 per 1,000 views. A creator with strong monetization generating 500,000 monthly views might earn $10,000-25,000 total monthly income despite AdSense revenue of just $2,000-4,000.
Remember that watch time and engagement matter more than raw view counts for long-term earnings, since these metrics determine both ad revenue and attractiveness to sponsors.
How many subscribers do you need to make money on YouTube?
You need 1,000 subscribers and either 4,000 watch hours in the past 12 months or 10 million Shorts views to qualify for the YouTube Partner Program and access AdSense revenue. However, making meaningful money requires significantly higher thresholds.
Most creators begin earning $500-1,500 monthly around 30,000-50,000 subscribers when combining AdSense with occasional sponsorships and affiliate income. Sustainable full-time income ($3,000-5,000+ monthly) typically requires 75,000-150,000 subscribers, though highly engaged audiences in valuable niches can support full-time creation at lower subscriber counts.
Subscriber count alone matters less than view consistency and audience engagement. A channel with 50,000 highly engaged subscribers often generates more income than a channel with 200,000 inactive subscribers.
Can you make money on YouTube without showing your face?
Absolutely. Numerous successful channels generate substantial income without showing creators’ faces. Faceless channel formats include screen recordings with voiceovers, animated explainers, compilation videos, meditation and music channels, educational presentations, and gameplay commentary.
These channels monetize through all standard methods—AdSense, sponsorships, affiliate marketing, and digital products. Some faceless formats like financial education, technology tutorials, and meditation channels command premium sponsorship rates despite creators remaining anonymous.
The key to faceless channel success lies in providing clear value through information, entertainment, or services rather than relying on personality-driven content. Production quality and consistency matter more when you can’t leverage personal connection.
How do YouTubers get paid by YouTube?
YouTube pays creators through Google AdSense accounts linked to their channels. The payment process operates on a monthly cycle, with earnings from each month paid around the 21st-26th of the following month, provided you’ve exceeded the $100 minimum threshold.
YouTube retains 45% of ad revenue while creators receive 55%. For a video generating $1,000 in ad revenue, YouTube keeps $450 and pays the creator $550. This split covers hosting, bandwidth, platform development, and the recommendation system that drives views.
Additional YouTube monetization features like channel memberships, Super Chat, Super Thanks, and merchandise shelf revenue follow similar monthly payment schedules, each with their own $100 minimum thresholds before payment is issued.
Payment arrives via your chosen method—wire transfer, check, or regional payment options—to the bank account or address associated with your AdSense account. Processing times vary by payment method and location.
What type of YouTube content makes the most money?
Finance, business, technology, and real estate content consistently generates the highest AdSense revenue due to premium CPM rates, often $12-25+ per 1,000 views compared to $2-6 for entertainment content. These niches attract high-value advertisers willing to pay premium rates to reach financially qualified audiences.
However, total revenue potential depends on multiple factors beyond CPM. Educational content, lifestyle channels, and parenting channels successfully monetize through courses, coaching, and products despite lower AdSense rates. Gaming channels leverage merchandise and sponsorships. Beauty and fashion creators excel at affiliate marketing and product collaborations.
The most financially successful content combines reasonable CPM rates with engaged audiences that purchase recommended products, value educational offerings, and support creators through memberships. A passionate niche audience of 100,000 subscribers often generates more income than a disengaged audience of 500,000 subscribers in a higher-CPM category.
Choose content aligned with your expertise and interests rather than chasing CPM rates alone. Sustainable success requires consistent quality over years, which demands genuine interest in your subject matter.
How long does it take to start making money on YouTube?
Most creators reach Partner Program eligibility (1,000 subscribers and 4,000 watch hours) within 6-18 months of consistent posting, though timelines vary dramatically based on content quality, posting frequency, niche selection, and promotional efforts.
Reaching meaningful income levels ($1,000+ monthly) typically requires 12-36 months of consistent work for creators who actively pursue multiple monetization strategies. Exceptional creators in valuable niches occasionally reach this milestone in 6-12 months, while others require 3-5 years.
The timeline shortens significantly when creators bring existing audiences from other platforms, possess expertise in high-demand topics, or invest in strategic promotion beyond organic growth.
Rather than focusing on timeline, successful creators emphasize consistent improvement in content quality, audience understanding, and monetization sophistication. The compound effects of quality content, growing audience, and improving skills eventually generate income that justifies the investment.
Are YouTube earnings consistent and reliable?
YouTube earnings fluctuate based on multiple factors including seasonal advertising budgets, algorithm changes, viewer behavior, and individual content performance. AdSense revenue typically increases 30-60% during Q4 holiday shopping season and decreases in January-February. News cycles, platform updates, and content trends create additional variability.
Creators depending solely on AdSense face the most income volatility. Those with diversified revenue—sponsorships, products, memberships, affiliate income—experience more stability since different revenue streams peak at different times and respond to different market forces.
Building income reliability requires multiple strategies: diversifying revenue streams, creating content libraries that generate ongoing views, developing recurring revenue like memberships and product subscriptions, maintaining emergency reserves, and treating profitable months as opportunities to prepare for slower periods.
Professional creators budget based on conservative income estimates rather than best-case scenarios, setting aside 25-35% for taxes and maintaining 3-6 months of operating expenses in reserves.
Final Thoughts
Understanding how YouTubers make money reveals a sophisticated business ecosystem far more complex than “getting paid for views.” While AdSense provides foundational revenue, successful creators function as multimedia entrepreneurs, strategically combining advertising, sponsorships, products, services, and platform-specific features into diversified income portfolios.
The creator economy rewards those who provide genuine value—whether through entertainment, education, or community—while implementing professional business practices. Subscriber counts and view numbers matter less than audience engagement, monetization sophistication, and long-term strategic thinking.
For aspiring creators, the path to sustainable income requires patience, consistency, and willingness to develop business skills alongside creative abilities. Focus on serving a specific audience exceptionally well, experiment with multiple revenue streams as your channel grows, and build platform-independent assets that provide long-term security.
The opportunities in 2026 exceed any previous period in the creator economy. Platforms provide unprecedented monetization tools, audiences eagerly support creators they value, and brands increasingly recognize creator partnerships as essential marketing strategies. Success belongs to those who combine creative excellence with business acumen, building sustainable enterprises rather than chasing viral moments.
Whether you’re just starting or looking to optimize existing channel revenue, remember that every successful creator started exactly where you are now. The difference between those who succeed and those who quit lies not in talent alone, but in persistence, strategic thinking, and commitment to providing value that audiences appreciate enough to support.

Tren Twins Strength Comparison: Who Is Stronger, Mike or Chris?
Tren Twins Strength Comparison: Who Is Stronger, Mike or Chris?
Estimated reading time: 12 minutes
Introduction
The fitness community has been captivated by the Tren Twins—Mike and Chris—since they burst onto the social media scene with their relentless training intensity and impressive physiques. As identical twins who share nearly identical genetics, their strength comparison offers a fascinating case study in how training variables, recovery protocols, and minor physiological differences can influence athletic performance.
The question “which tren twin is stronger” has sparked countless debates across YouTube comments, Reddit threads, and bodybuilding forums. This comprehensive analysis goes beyond surface-level observations to examine their actual lifting stats, body composition metrics, and gym performance data to determine who truly holds the strength advantage.
While both brothers have built impressive physiques through years of dedicated training, subtle differences in their approach to fitness, muscle development patterns, and strength profiles reveal important insights about athletic performance—even among individuals with identical genetic blueprints.
Who Are the Tren Twins?
Mike and Chris, collectively known as the Tren Twins or Tren Bros, rose to prominence through their brutally honest gym content, high-intensity training footage, and refreshingly authentic approach to fitness content creation. Unlike many fitness influencers who carefully curate their image, the twins have built a loyal following by showcasing raw training sessions, discussing both successes and setbacks, and maintaining transparency about their fitness journey.
Both brothers began their serious bodybuilding endeavors in their late teens, transforming from relatively average builds into the muscular physiques they display today. Their content focuses on heavy compound movements, progressive overload principles, and maintaining consistency over years rather than chasing quick fixes.
The twins’ popularity stems partly from their identical appearance but distinctly different personalities during training. This dynamic creates natural curiosity about whether one brother has developed physical advantages despite their shared genetics.
Physical Stats Breakdown: Mike vs Chris
Understanding the tren twins strength analysis requires examining their baseline physical measurements. While exact stats fluctuate based on their current training phase and body composition goals, here’s what we know from their disclosed information and observable evidence:
Basic Measurements
| Measurement | Mike | Chris | Difference |
|---|---|---|---|
| Height | ~5’6″ (168 cm) | ~5’6″ (168 cm) | None |
| Weight (Contest) | 170-175 lbs | 172-176 lbs | Minimal |
| Weight (Bulking) | 185-190 lbs | 183-188 lbs | 2-3 lbs |
| Body Fat % (Lean) | 8-10% | 8-9% | ~1% |
| Body Fat % (Bulk) | 12-15% | 12-14% | Negligible |
These measurements reveal what you’d expect from identical twins—remarkably similar baseline statistics. The minor weight fluctuations likely reflect daily variance, hydration status, and measurement timing rather than significant compositional differences.
Body Composition Insights
According to research published in the American Journal of Clinical Nutrition, identical twins typically maintain body composition patterns within 2-3% of each other when exposed to similar environmental factors. The Tren Twins exemplify this phenomenon, displaying nearly identical muscle mass distribution and body fat percentages throughout various training phases.
Their compact frames (both standing around 5’6″) provide biomechanical advantages for certain lifts, particularly those requiring shorter ranges of motion. This anthropometric reality partially explains their impressive strength relative to body weight.
Tren Twins Muscle Comparison: Body Composition Analysis
While overall measurements tell part of the story, examining specific muscle groups reveals more nuanced differences in the tren twins physique breakdown.
Upper Body Development
Mike’s Upper Body:
- Slightly thicker chest development, particularly in the upper pectorals
- More pronounced front delt development
- Dense tricep insertions with visible separation even at higher body fat percentages
- Back width comparable to Chris with marginally better mid-back thickness
Chris’s Upper Body:
- Superior lat width creating a more pronounced V-taper
- Better bicep peak and overall arm aesthetics
- Comparable shoulder development with slightly fuller rear delts
- Similar trap development with occasional edge during peak condition
Lower Body Analysis
The tren bros physique differences become more apparent when examining leg development:
Mike’s Lower Body:
- Solid quad development with good sweep and teardrop
- Adequate hamstring development
- Standard glute development for his training style
Chris’s Lower Body:
- Noticeably superior quad development in both mass and definition
- Better hamstring-to-quad ratio
- More developed calves with better genetic insertion points
- Overall more balanced lower body proportions
This lower body advantage for Chris translates directly into functional strength metrics, particularly in squatting variations and leg-focused compound movements.
Muscle Density and Quality
When comparing tren twins muscle density, both brothers display the hard, full muscle bellies associated with years of progressive resistance training. The quality of their muscular development suggests consistent protein intake, adequate recovery, and intelligent programming rather than sporadic intensity.
Neither twin exhibits the overly smooth appearance that sometimes accompanies rapid size gains, nor do they show the flat, depleted look of chronic under-eating. This indicates solid nutritional practices supporting their training demands.
Strength Analysis: Powerlifting Numbers and Gym Performance
Now we arrive at the core question: who demonstrates superior tren twins gym strength across measurable metrics?
Bench Press (Upper Body Pressing Strength)
Based on documented training footage and disclosed numbers:
| Lift Variation | Mike | Chris |
|---|---|---|
| Flat Barbell Bench (1RM) | 315-325 lbs | 305-315 lbs |
| Incline Barbell Bench (Working Sets) | 245 lbs x 6-8 | 235 lbs x 6-8 |
| Dumbbell Bench (Working Weight) | 110-120 lbs | 105-115 lbs |
Advantage: Mike demonstrates a consistent 5-10 pound edge across pressing variations. While this might seem minor, it represents a measurable performance difference that appears consistently across multiple training sessions.
Squat (Lower Body Strength)
| Squat Variation | Mike | Chris |
|---|---|---|
| Back Squat (1RM) | 365-375 lbs | 385-405 lbs |
| Front Squat (Working Sets) | 275 lbs x 5 | 295 lbs x 5 |
| Leg Press (Working Weight) | 700+ lbs x 10-12 | 750+ lbs x 10-12 |
Advantage: Chris shows a more substantial lead in squatting strength, with approximately 20-30 pounds separating their maximum efforts. This aligns with the observable lower body development differences noted earlier.
Deadlift (Posterior Chain Power)
| Deadlift Style | Mike | Chris |
|---|---|---|
| Conventional Deadlift (1RM) | 455-475 lbs | 465-485 lbs |
| Romanian Deadlift (Working Sets) | 315 lbs x 8 | 325 lbs x 8 |
| Trap Bar Deadlift | 495 lbs x 3 | 505 lbs x 3 |
Advantage: Chris (Slight) maintains a marginal edge, though the difference falls within the variation you’d expect from daily performance fluctuations, sleep quality, and recovery status.
Overhead Press and Olympic Lifts
Neither twin focuses heavily on Olympic lifting or maximal overhead pressing, but their training content reveals:
- Overhead Press: Mike edges out Chris by approximately 5-10 lbs (185 lbs vs 175-180 lbs)
- Clean variations: Chris demonstrates better technical proficiency and slightly higher working weights
- Snatch variations: Neither performs these regularly enough for meaningful comparison
Strength-to-Bodyweight Ratios
Looking at the tren bros lifting stats through a relative strength lens:
Mike’s Ratios (at ~180 lbs bodyweight):
- Bench: 1.75-1.80x bodyweight
- Squat: 2.0-2.1x bodyweight
- Deadlift: 2.5-2.6x bodyweight
- Total relative strength: 6.25-6.5x bodyweight
Chris’s Ratios (at ~180 lbs bodyweight):
- Bench: 1.70-1.75x bodyweight
- Squat: 2.1-2.25x bodyweight
- Deadlift: 2.6-2.7x bodyweight
- Total relative strength: 6.4-6.7x bodyweight
When examining overall powerlifting total equivalents, Chris holds a slight advantage, primarily driven by his superior squat numbers.
Chris vs Mike Tren: Training Styles and Workout Output
The tren twins lifting power doesn’t exist in isolation—it’s shaped by their distinct approaches to training despite following similar overall programs.
Mike’s Training Philosophy
- Higher frequency upper body work: Often hitting chest and shoulders twice weekly with significant volume
- Moderate rep ranges: Typically working in the 6-10 rep zone for compound movements
- Controlled tempos: Emphasizes time under tension over explosive movements
- Lower body as complementary: Trains legs thoroughly but without the same enthusiasm shown for upper body sessions
This approach has clearly optimized his upper body pressing strength while maintaining respectable lower body numbers.
Chris’s Training Philosophy
- Balanced training split: Equal enthusiasm and intensity for both upper and lower body sessions
- Wider rep range variation: Comfortable working from heavy triples up to sets of 15-20
- More explosive movements: Incorporates jump variations, plyometrics, and speed work
- Higher lower body volume: Frequently performs additional leg work beyond programmed sessions
These differences explain the diverging strength profiles despite identical genetics and similar overall programming frameworks.
Recovery and Work Capacity
The tren bros workout output also depends on recovery capacity. Both twins emphasize:
- Consistent sleep schedules (7-9 hours nightly)
- High protein intake (180-220g daily depending on phase)
- Strategic deload weeks every 4-6 weeks
- Active recovery techniques including stretching and mobility work
Chris has mentioned sleeping slightly longer on average and placing greater emphasis on post-workout nutrition timing, which may contribute to his ability to handle higher training volumes, particularly for lower body work.
Tren Twins Physique Differences: What Sets Them Apart
Beyond raw strength numbers, comparing tren twins physiques reveals aesthetic and functional differences:
Proportions and Symmetry
Mike’s Aesthetic:
- More upper-body dominant appearance
- Thicker, denser upper body creates impression of greater mass
- Classic bodybuilding proportions with emphasis on chest and delts
- Slightly less balanced overall but more impressive upper body presentation
Chris’s Aesthetic:
- More balanced overall development
- Better flow between muscle groups
- Superior leg-to-torso proportions
- More athletic appearance overall
Vascularity and Conditioning
When comparing the tren bros body comparison in terms of conditioning:
- Both achieve impressive vascularity when lean
- Mike tends to hold slightly less water, creating more visible striations when dieted down
- Chris maintains fuller muscle bellies even at lower body fat percentages
- Neither shows signs of poor muscle insertion points or major asymmetries
Posing and Presentation
Stage presence matters even for non-competitors. Mike demonstrates slightly better control in upper body poses (most muscular, front double biceps), while Chris excels in poses requiring lower body development (front relaxed, side chest).
Athletic Performance Beyond the Gym
The tren twins athletic build analysis extends beyond powerlifting metrics to functional athleticism:
Speed and Agility
Chris displays better:
- Vertical jump height (estimated 28-30 inches vs Mike’s 26-28 inches)
- Lateral movement quickness
- Sprint acceleration from a standstill
- Overall coordination in dynamic movements
This advantage likely stems from his superior lower body development and emphasis on explosive training modalities.
Endurance and Work Capacity
In conditioning-focused challenges and circuit training sessions shown on their channel:
- Mike demonstrates better upper body muscular endurance (higher rep push-up sets, longer plank holds)
- Chris shows superior cardiovascular conditioning and recovery between high-intensity intervals
- Both display above-average work capacity compared to general population bodybuilders
Sport-Specific Skills
Neither twin currently competes in formal sports, but their content reveals:
- Chris has better basketball shooting form and jumping ability
- Mike shows superior arm wrestling positioning and hand strength
- Both have average to above-average flexibility for their muscle mass
The Verdict: Which Tren Twin Is Stronger?
After examining the tren twins strength profile across multiple dimensions, the answer depends on how you define “stronger.”
If Strength Means Total Powerlifting Numbers:
Chris holds a slight advantage with an estimated powerlifting total approximately 20-30 pounds higher than Mike’s, driven primarily by his superior squat performance. His combined total across the big three lifts would place him marginally ahead in any head-to-head competition.
If Strength Means Upper Body Power:
Mike demonstrates clear superiority across all pressing variations. His consistent 5-15 pound advantage in bench press variations and slightly better overhead pressing gives him the edge for upper body-specific strength.
If Strength Means Pound-for-Pound Performance:
Chris narrowly wins when comparing strength-to-bodyweight ratios across all lifts, though the margin is minimal—within 2-3% of total relative strength output.
If Strength Means Functional Athleticism:
Chris takes this category convincingly with better explosive power, jumping ability, and overall athletic coordination beyond pure weight room performance.
The Honest Assessment
The reality is that the tren twins gym performance is remarkably similar, with each brother showing slight advantages in specific areas:
Mike’s Strengths:
- Upper body pressing movements
- Chest and shoulder development
- Static strength displays
- Upper body muscular endurance
Chris’s Strengths:
- Lower body power and development
- Overall powerlifting total
- Explosive athletic movements
- Balanced full-body strength
For most practical purposes, they’re equivalently strong with complementary specializations rather than one being definitively stronger across all metrics.
Key Takeaways
- Genetics provide the baseline, but training determines specialization: Despite identical DNA, different training emphases have created measurable performance differences
- Strength is multidimensional: Raw numbers, relative strength, explosive power, and endurance all contribute to overall strength capacity
- Sustainable progress beats temporary peaks: Both twins have built their strength over years of consistent training rather than program-hopping or chasing quick gains
- Recovery matters as much as training: Their similar commitment to sleep, nutrition, and deloading supports their ability to train intensely while avoiding injury
- Comparison drives improvement: Their friendly competition likely pushes both twins to achieve more than they would training independently
- Body composition impacts performance: Their ability to maintain relatively lean physiques year-round prevents the performance decrements associated with excessive body fat
- Authenticity resonates: Their honest approach to documenting both successful and difficult training sessions provides realistic expectations for their audience
Frequently Asked Questions
Who has better genetics, Mike or Chris Tren Twin?
This question contains a misconception—as identical twins, Mike and Chris share virtually identical genetics. Their DNA is 99.9% the same, meaning any physical differences stem from environmental factors like training variables, nutrition timing, recovery quality, sleep patterns, and minor epigenetic influences rather than genetic superiority. The subtle differences in their physiques and strength profiles demonstrate how significantly training approaches can influence outcomes even when genetics are held constant. Both have excellent genetics for building muscle and strength relative to the general population, but neither has better genetics than the other.
What are the Tren Twins’ actual lifting numbers?
Based on documented training footage and disclosed information, Mike’s approximate one-rep maxes include: bench press 315-325 lbs, squat 365-375 lbs, and deadlift 455-475 lbs. Chris’s numbers are: bench press 305-315 lbs, squat 385-405 lbs, and deadlift 465-485 lbs. These numbers fluctuate based on their training phase, body weight, recovery status, and whether they’re prioritizing strength or hypertrophy at any given time. Both twins typically train in moderate rep ranges (6-12 reps) rather than focusing exclusively on one-rep max attempts, so their true maximal strength may be slightly higher than demonstrated numbers. For their bodyweight class (typically 170-190 lbs depending on phase), these are impressive strength levels indicating years of consistent progressive overload.
How do the Tren Twins build muscle so effectively?
The Tren Twins’ muscle-building success stems from several key factors working synergistically. First, they maintain exceptional training consistency, hitting the gym 5-6 days weekly year-round without extended breaks. Second, they employ progressive overload principles, gradually increasing weights, reps, or volume over time rather than using the same loads indefinitely. Third, they consume adequate protein (approximately 1g per pound of bodyweight) alongside sufficient overall calories to support muscle growth. Fourth, they prioritize recovery through consistent sleep schedules and strategic deload weeks. Fifth, they focus primarily on compound movements (squats, deadlifts, presses, rows) that stimulate multiple muscle groups simultaneously. Finally, they’ve maintained this approach for years rather than months, allowing compound interest effects on muscle development. Their genetic advantages as individuals with favorable muscle-building genetics certainly help, but their consistency and intelligent programming deserve primary credit.
Do the Tren Twins use performance-enhancing substances?
The twins have addressed this topic directly in their content, acknowledging they don’t claim to be natural athletes. Like many competitive bodybuilders and strength athletes, they’ve been transparent about using performance-enhancing substances to achieve their physiques. This honesty differentiates them from influencers who make misleading natural claims while using such substances. However, it’s important to understand that even with pharmaceutical assistance, their results still require years of disciplined training, precise nutrition, and exceptional consistency. Performance enhancers don’t replace hard work—they enhance the results of hard work that’s already happening. For natural athletes looking to learn from the twins, their training principles, progressive overload approach, exercise selection, and recovery emphasis remain valuable regardless of enhancement status.
Which Tren Twin has the better physique for bodybuilding?
From a competitive bodybuilding perspective, this depends on the division being considered. For classic physique or bodybuilding divisions that emphasize balance and proportions, Chris likely holds an advantage due to his more balanced upper-to-lower body development and superior leg development. His better V-taper (wider lats, tighter waist) and fuller muscle bellies would score favorably with bodybuilding judges. For divisions emphasizing upper body development or where the judging criteria favor density and conditioning over proportions, Mike’s thicker chest, denser muscle insertions, and superior upper body development might perform better. Neither twin currently competes in bodybuilding, so this remains theoretical. Both have physiques that would be competitive at regional natural bodybuilding shows if they chose to pursue that path. Their current focus appears to be building social media presence and creating fitness content rather than stepping on stage.
How can I train like the Tren Twins?
Training like the Tren Twins requires adopting their principles while adjusting for your individual circumstances. Start with a foundation of compound movements: squats, deadlifts, bench press, overhead press, and rowing variations should form 60-70% of your training volume. Train each muscle group 2x per week with sufficient volume (15-20 sets per muscle group weekly). Use progressive overload by adding weight, reps, or sets gradually over time—aim to improve some performance metric every 2-4 weeks. Maintain high training intensity while using proper form—the twins push close to failure but rarely sacrifice technique for additional reps. Consume adequate protein (0.8-1g per pound bodyweight) and sufficient overall calories to support your goals. Prioritize recovery through 7-9 hours of sleep nightly and implementing deload weeks every 4-6 weeks. Most importantly, maintain consistency over months and years rather than expecting rapid transformations. Natural lifters should adjust expectations accordingly, as pharmaceutical assistance significantly impacts achievable results and recovery capacity.
What’s the Tren Twins’ diet and nutrition approach?
The Tren Twins follow a flexible but structured nutrition approach that prioritizes protein intake while adjusting carbohydrates and fats based on their current training phase. During muscle-building phases, they consume a caloric surplus of approximately 200-500 calories above maintenance, with protein around 180-220g daily, carbohydrates 300-400g, and fats 60-80g. During cutting phases, they reduce overall calories by lowering carbohydrates and fats while maintaining high protein to preserve muscle mass. They don’t follow extreme restrictive diets or eliminate entire food groups. Instead, they emphasize whole food sources like chicken, beef, rice, potatoes, oats, eggs, and vegetables while occasionally incorporating more indulgent foods when they fit their macros. Meal timing isn’t obsessively strict, but they ensure protein is distributed across 4-5 meals throughout the day. They use supplements minimally—primarily whey protein for convenience, creatine monohydrate for performance, and basic micronutrients. Their approach demonstrates that sustainable nutrition doesn’t require perfection, just consistency and hitting fundamental targets repeatedly.
Conclusion
The question of which Tren Twin is stronger doesn’t have a simple answer because strength itself is multifaceted. Mike demonstrates superior upper body pressing strength and chest development, while Chris shows better lower body power, overall powerlifting total, and explosive athleticism. Their remarkably similar genetics have produced similar results overall, with training specificity creating measurable but modest differences in particular areas.
What makes their strength comparison particularly valuable isn’t determining a definitive winner—it’s understanding how identical genetic starting points can produce different physical outcomes based on training emphasis, recovery protocols, and individual preferences. Their journey illustrates that even with perfect genetics, consistent intelligent training over years remains the foundation of impressive strength and physique development.
For those looking to build their own strength, the Tren Twins offer a compelling case study in the power of:
- Unwavering consistency over years, not months
- Progressive overload applied systematically
- Training intensity balanced with adequate recovery
- Honest assessment of both strengths and weaknesses
- Focusing on compound movements that provide the most return on effort
Whether Mike’s upper body dominance or Chris’s balanced athleticism appeals more to you personally, both twins have achieved impressive results that place them well above average gym-goers. Their continued documentation of their training provides valuable insights for anyone serious about building strength and muscle mass.
The real winner in the Tren Twins strength comparison is anyone who learns from their disciplined approach and applies those principles to their own training journey.