Podcast Video Editing: How to Turn Your Audio Podcast into Engaging YouTube Content
Estimated reading time: 14 minutes
Why Your Audio Podcast Deserves a Visual Life
Most podcasters spend months perfecting their audio — the mic placement, the EQ curve, the edit points between sentences. Then they upload to Spotify and Apple Podcasts, and wait. What many never consider is that the same content they labored over could be working twice as hard on a completely different platform, reaching an entirely different audience.
YouTube is no longer just a video platform. It has quietly become one of the most popular podcast listening destinations in the world. According to Edison Research’s Infinite Dial 2024, YouTube has surpassed Spotify and Apple Podcasts as the most used platform for podcast consumption in the United States. That shift is not a coincidence — it reflects a deeper change in how audiences engage with long-form content.
But here is the thing: uploading a black screen with audio playing over it is not a YouTube podcast strategy. That is just an audio file wearing a costume. Real podcast video editing means transforming your recorded conversations into something visually compelling enough to keep viewers watching, subscribing, and sharing.
This guide breaks down the full process — from capturing usable footage to mastering the final export — so you can build a genuine YouTube presence without starting from scratch or abandoning your existing audio-first workflow.
Understanding What YouTube Actually Wants from Podcasters
Before touching a single editing tool, it helps to understand what YouTube rewards. The platform’s algorithm prioritizes two things above nearly everything else: watch time and click-through rate. A beautifully edited podcast video that nobody clicks on will never surface. A video people click but immediately abandon will fare just as poorly.
YouTube has been actively courting podcasters. In 2023, the platform introduced native podcast features, including a dedicated podcast playlist structure and RSS feed integration. Google has also made it possible for podcast episodes to appear in search results directly, which means that your YouTube podcast video can capture both video search traffic and traditional podcast discovery simultaneously.
What that means for your editing approach is this: your video needs a hook in the first 30 seconds that gives viewers a reason to stay, a clear visual identity that signals professionalism, and a structure that keeps attention moving. It is not about cinematic production — most successful podcast video channels are shot in home studios with modest gear. What separates them is intentional editing.
Recording Setup: Getting Video-Ready Before You Edit
Great podcast video editing starts before you open any software. If your footage is unusable, no amount of color grading or b-roll will save it.
Camera and Lighting Basics
You do not need a cinema camera. A Sony ZV-E10, a recent iPhone in Cinematic mode, or even a solid webcam like the Logitech Brio can produce footage that looks genuinely polished on YouTube. What matters more than camera quality is lighting consistency. A single key light positioned at roughly 45 degrees to your face eliminates harsh shadows and creates the kind of even, flattering look that viewers unconsciously associate with credibility.
For remote interviews, tools like Riverside.fm and Squadcast record each participant’s video and audio locally rather than compressing it through the internet. This is a significant advantage over Zoom, where video quality degrades in real time based on connection speed. When you are dealing with remote guests, local recording means you get studio-quality footage from both sides of the conversation.
Audio Still Comes First
One counterintuitive rule of podcast video production: viewers will tolerate mediocre video far longer than they will tolerate bad audio. Your mic setup — whether that is an XLR dynamic mic like the Shure SM7B or a USB condenser like the Audio-Technica AT2020 — should be your primary investment. Fix the sound first. Then worry about the picture.
Consistency Across Sessions
If you record episodes weekly, your editing life becomes significantly easier when every session looks and sounds roughly the same. A consistent backdrop, consistent lighting setup, and consistent mic positioning mean you are not making new decisions in post every time. Create a simple setup checklist and follow it before every record.
The Podcast Video Editing Workflow, Step by Step
This is where the process gets practical. The workflow below applies whether you are working in Adobe Premiere Pro, Final Cut Pro, DaVinci Resolve, or a purpose-built tool like Descript.
Step 1: Sync and Organize Your Files
If you recorded locally on both ends (using Riverside.fm or Squadcast), your first task is syncing the audio and video tracks. Most recording platforms export pre-synced files, but if you recorded with a separate audio interface and camera, use a clap or countdown at the start of each session to give yourself a sync point.
Organize your project folder before you touch the timeline. Separate folders for raw footage, audio stems, music, graphics, and exports will save you enormous frustration when you need to locate a specific clip three months later.
Step 2: Rough Cut the Conversation
Start by cutting the dead air — long pauses, false starts, filler phrases, and off-topic tangents that do not serve the listener. This is the most time-consuming part of audio to video editing, but it is also where the episode earns its pacing. A tight rough cut feels energetic even at a slow conversational tempo.
Keep sentences that contain “ums” and “uhs” that happen mid-thought, as removing every single one creates an artificial, clipped rhythm. Focus on removing the gaps and the genuinely wasted space.
Step 3: Color Correct and Grade
Color correction brings your footage to a neutral baseline — accurate skin tones, balanced exposure, no color casts. Color grading is the creative step on top of that, adding a consistent visual tone across the episode. For most talking-head podcast videos, a subtle, clean grade works better than anything dramatic. The goal is to look polished, not cinematic.
If your footage was recorded in a log profile (for maximum dynamic range), this step is non-negotiable. If you shot on an iPhone in standard mode, basic color correction in DaVinci Resolve or Premiere Pro takes five minutes.
Step 4: Add B-Roll and Visual Support
B-roll is one of the most underused tools in podcast video editing. When your host or guest references a product, a place, a concept, or a statistic, cutting to relevant footage — even stock video from Pexels or Artgrid — gives viewers’ eyes something to engage with while the conversation continues on the audio track.
Beyond stock footage, you can use:
- Screen recordings when discussing software or websites
- Text overlays and animated quotes to highlight key moments
- Waveform animations as a visual anchor when you want to stay on a speaker but add visual interest
- Audiogram-style inserts for particularly memorable lines
B-roll also solves one of the most common problems in podcast video editing: what to do when you cut a section and the jump cut is jarring. Cover it with b-roll and the edit becomes invisible.
Step 5: Add Lower Thirds, Titles, and Chapter Markers
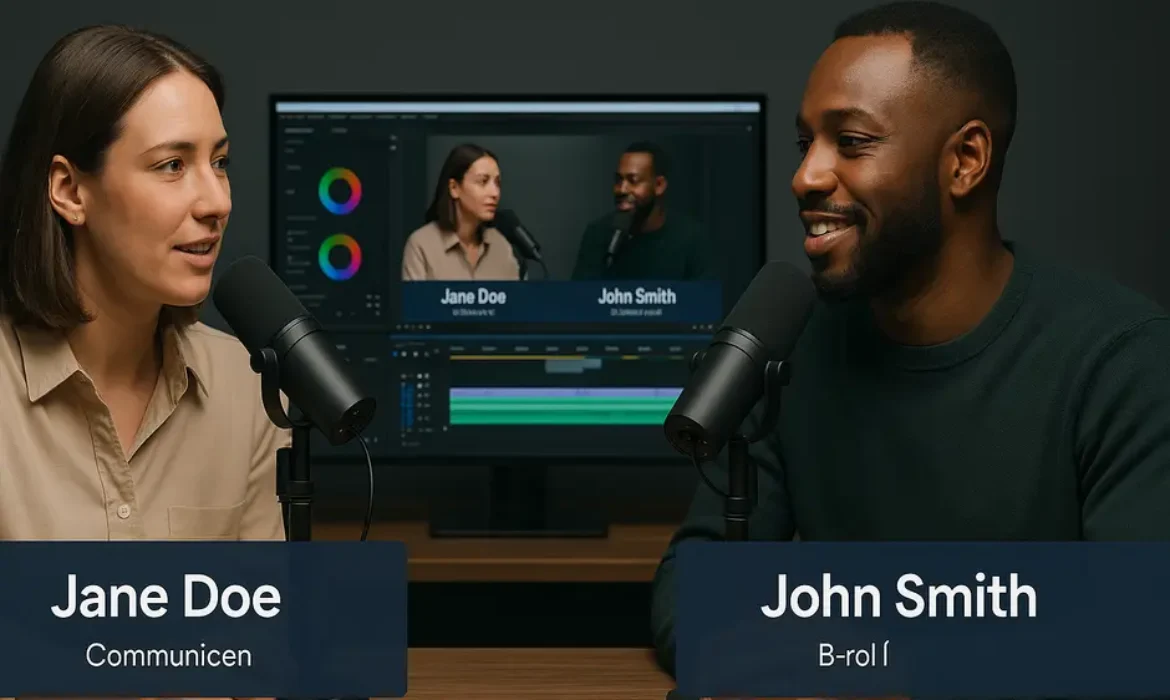
Lower thirds — the text graphics that introduce speakers at the start of a segment — immediately elevate the production value of any talking-head video. They only need to appear once or twice per guest, but their presence signals a level of craft that viewers notice subconsciously.
Chapter markers (also called timestamps) are critical for YouTube specifically. Adding them to your video description — formatted as 00:00 Introduction, 05:32 Topic Two, and so on — activates the chapter feature in the YouTube player, which allows viewers to navigate directly to the sections they care about. This behavior data also feeds back positively into YouTube’s algorithm, as it reflects intentional engagement.
Step 6: Mix and Master the Audio
Even if your raw audio is clean, the final mix matters. A balanced mix means both voices sit at roughly the same perceived loudness level, the background music (if any) sits well beneath the conversation without disappearing entirely, and the overall loudness targets the platform standard. YouTube recommends content normalized to around -14 LUFS, which aligns closely with the standard for streaming audio platforms.
Use a tool like Auphonic for automated loudness normalization, or handle it manually in your DAW if you prefer precise control.
Step 7: Export and Optimize for YouTube
For YouTube, export at 1080p minimum, ideally at 4K if your footage supports it. A common export setting in Premiere Pro: H.264 codec, High profile, bitrate around 16 Mbps for 1080p. Match your frame rate to your recording frame rate — do not let the export settings introduce a conversion.
For aspect ratio: 16:9 is the standard for full-length YouTube uploads. But export a 9:16 vertical version simultaneously for Shorts and Reels. The extra export takes minutes and gives you an entirely separate distribution asset.
Tools That Make Podcast Video Production Faster and Better
| Tool | Best For | Pricing Model |
|---|---|---|
| Descript | Text-based editing, transcription, filler word removal | Subscription (free tier available) |
| Riverside.fm | Remote recording, local video/audio quality | Subscription |
| Adobe Premiere Pro | Full professional timeline editing | Subscription |
| DaVinci Resolve | Color grading, professional editing (free version) | Free / Paid Studio version |
| Opus Clip | AI-powered clip extraction for Shorts/Reels | Subscription |
| Canva | Thumbnail design, lower thirds, audiogram graphics | Free / Pro |
| Auphonic | Automated audio mastering and loudness normalization | Per-hour credits |
| Headliner | Audiogram creation, video clip captioning | Free / Pro |
Descript deserves special attention. Its text-based editing model means you edit the transcript like a document and the video edits follow automatically. For podcasters moving into video, it removes the intimidation factor of traditional timeline editing entirely. The overdub and filler word removal features alone are worth the subscription cost for many creators.
Creating Clips for Reels, Shorts, and Social Media
Full-length episodes are the anchor content. But the clips are what drive discovery.
A 45-to-90-second excerpt — a sharp opinion, a surprising fact, a moment of genuine emotion — can introduce your podcast to someone who has never heard of you. When that clip is properly captioned, visually dynamic, and ends on a subtle call to action, it becomes a pipeline straight into your full-length content.
Identifying Clip-Worthy Moments
Not every strong moment makes a great clip. The best podcast clips share a few characteristics:
- They make sense without context (or establish context within the first five seconds)
- They contain a clear point of tension, surprise, or value
- They do not require knowledge of the guest to be engaging
Review your rough cut and mark moments with a bright color label or a note in Descript’s comment system. Aim for three to five potential clips per episode, then select the two or three strongest.
Editing for Vertical Format
Podcast shorts editing for 9:16 vertical requires a different visual logic than widescreen. If you are shooting with two people, you may need to use a split-screen layout — guest on top, host on bottom — or cut dynamically between speakers using your B camera footage. Captions become non-negotiable in vertical format, where a significant portion of viewers watch without sound. Tools like Descript, Captions.app, and CapCut all offer auto-captioning with decent accuracy.
Keep vertical clips tight. The drop-off rate on Reels and Shorts climbs steeply after 60 seconds for podcast content unless the clip is genuinely riveting.
YouTube-Specific Optimization After Editing
Finishing the edit is only half the job. What you do on the upload side shapes how the algorithm treats your video.
Thumbnails
Your thumbnail competes against hundreds of other thumbnails in a sidebar or search result. A clean, high-contrast design with a legible headline (six words or fewer), a strong facial expression, and a consistent visual style across your channel performs consistently better than generic designs. Study what the strongest podcast channels in your niche are doing, then develop your own take on those conventions.
Title and Description
Your title should front-load the most specific, searchable phrase. “Podcast Video Editing” performs better at the front of a title than buried at the end. The description should read naturally — not like a keyword list — but should include your core terms within the first two sentences, followed by a detailed summary and your chapter timestamps.
Tags, Categories, and Playlists
Use YouTube’s category setting (typically “Education” or “Entertainment” for podcast content), add 5-10 relevant tags, and add every episode to a dedicated podcast playlist. The playlist structure helps YouTube understand your content’s thematic consistency, which influences recommendation behavior over time.
Common Mistakes That Kill Engagement
Even technically well-edited videos can underperform if they make these structural errors.
Starting too slowly. The first 30 seconds of a YouTube video determine whether most viewers stay or leave. Cutting straight to the most interesting part of the conversation, then circling back to context, is a proven structure that retains attention.
Ignoring captions. A significant share of YouTube viewing happens in environments where viewers cannot or will not use sound. Burned-in captions or accurate auto-captions are not optional anymore.
Inconsistent publishing cadence. YouTube’s algorithm rewards consistency. An irregular upload schedule trains the algorithm to treat your channel as unpredictable, which suppresses recommendation frequency.
Neglecting the thumbnail-title relationship. Both elements need to work together to create curiosity or communicate value. A title that says everything and a thumbnail that adds nothing is a missed opportunity.
Exporting at low quality. Blurry, compressed video looks amateurish regardless of how good the conversation is. Export at the highest quality your source footage supports.
FAQs
Q: Do I need to have video footage to create a YouTube podcast, or can I use just audio?
You can technically upload audio-only content to YouTube using a static image or a waveform animation as the visual element. This is called an audiogram, and it works reasonably well for building a Spotify-style listening experience on YouTube. However, talking-head video consistently outperforms static visuals on YouTube in terms of watch time, click-through rate, and subscriber conversion. If you have any way to capture even basic webcam footage, use it.
Q: What is the best software for podcast video editing as a beginner?
Descript is the most accessible entry point for podcasters new to video editing. Its text-based editing model eliminates the learning curve of traditional timeline tools, and it handles transcription, filler word removal, and basic video assembly in one interface. As your needs grow, transitioning to DaVinci Resolve (free) or Adobe Premiere Pro gives you professional-grade control over color, audio, and effects.
Q: How long should a YouTube podcast video be?
There is no universal correct answer, but data from YouTube creators in the podcast space suggests that full episodes between 45 and 90 minutes perform well when the content is genuinely engaging. Episodes under 20 minutes often leave subscribers feeling short-changed if your format is interview-based. For standalone clip content, 7-to-15-minute “highlight” videos perform strongly in YouTube search because they satisfy the query without requiring a full episode commitment.
Q: How do I convert an existing audio-only podcast to video for YouTube?
The most common approach is to pair your existing audio with a simple visual — a branded static image, a waveform animation, or a slideshow of relevant images. A more effective approach for ongoing production is to start recording video going forward while repurposing older audio content with audiogram-style visuals. Tools like Headliner and Wavve make creating audiograms from audio files straightforward, giving older episodes a visual presence without requiring you to re-record anything.
Q: Should I use the same video for YouTube and Instagram Reels?
You should create separate vertical edits for Reels and Shorts rather than simply cropping your 16:9 YouTube video. The cropped version almost always cuts off important visual information. Shooting with vertical in mind during recording — or using a platform like Riverside.fm that offers separate portrait-mode recording — gives you native vertical footage to work with. The audience behaviors on Reels and YouTube are also different, so a clip that works on one may need a slightly different hook or pacing to perform on the other.
Q: How many clips should I create from each podcast episode?
A practical content multiplication strategy is to create two to three short clips (under 90 seconds) for Reels and Shorts, one medium-length highlight clip (5-to-10 minutes) for YouTube, and one full-length episode upload. That turns a single recording session into five to six pieces of distributed content. As your editing workflow gets faster, you can scale this further, but starting with this ratio keeps the workload manageable without leaving distribution potential on the table.
Q: What is the difference between Riverside.fm and Squadcast for podcast video production?
Both platforms record locally, which preserves audio and video quality regardless of internet conditions during the call. Riverside.fm has positioned itself more aggressively toward video podcast production, offering features like separate camera track recording, green screen removal, and built-in clip creation tools. Squadcast was acquired by Descript in 2023 and integrates tightly with Descript’s editing environment, making it a strong choice if Descript is your primary editing tool. For pure video quality and built-in production features, Riverside.fm currently has a slight edge for video-focused podcast creators.
Key Takeaways
-
- YouTube has overtaken Spotify and Apple Podcasts as the most popular podcast platform in the US, making a YouTube video strategy essential for serious podcast growth
- Great podcast video editing begins with a smart recording setup — local recording tools like Riverside.fm and Squadcast eliminate quality degradation that Zoom recordings suffer from
- The core editing workflow — rough cut, color correction, b-roll, lower thirds, audio mastering, chapter markers — can be applied in any professional editing tool and dramatically improves watch time and perceived credibility
- Descript is the fastest on-ramp for audio-focused podcasters who are new to video editing; DaVinci Resolve and Premiere Pro offer professional control as needs scale
- Clips for Shorts and Reels are discovery engines, not afterthoughts. Creating two to three short clips per episode significantly amplifies the reach of every recording session
- YouTube-specific optimization — thumbnails, timestamps, playlists, descriptions — is as important as the edit itself when it comes to algorithmic performance
- Common technical mistakes like slow intros, missing captions, and low-quality exports cost you viewers before your content has a chance to earn them
Turning your audio podcast into compelling YouTube content is not about reinventing your creative process. It is about extending it — capturing the same conversations you are already having, applying a focused editing approach that serves the visual medium, and distributing the result across platforms where entirely new audiences are actively looking for content exactly like yours. The gap between a podcast that stays small and one that builds genuine cross-platform momentum is often nothing more than the decision to start treating video seriously. That decision starts in the edit.